Lexmark MS812 Series Printing Manual

Category
Laser/LED printers
Type
Printing Manual

This manual is also suitable for

Lexmark MS812 Series: High-performance printing for demanding workgroups

The Lexmark MS812 Series is a powerful printing solution designed for busy workgroups. With print speeds of up to 65 pages per minute and a maximum monthly duty cycle of 300,000 pages, this series can handle even the most demanding print jobs. The MS812 Series also features a variety of advanced features, including:

  • Two-sided printing: Save paper and reduce costs by printing on both sides of the page.
  • Wireless connectivity: Print from your laptop, tablet, or smartphone without the need for a physical connection.
  • Mobile printing: Use the Lexmark Mobile Print app to print from your mobile device.
Printing Guide
Get the most from your printer by properly loading the trays and properly setting the types and sizes of media.
Loading the 250 or 550sheet tray
CAUTION—POTENTIAL INJURY: To reduce the risk of equipment instability, load each tray separately. Keep all other trays
closed until needed.
1 Pull out the tray.
Notes:
When loading folio, legal, or oficiosize paper, lift the tray slightly and pull it out.
Avoid removing trays while a job prints or while Busy appears on the display. Doing so may cause a jam.
Printing Guide
Page 1 of 16
2 Squeeze and slide the width guide to the correct position for the size of the paper being loaded until it clicks into place.
Note: Use the paper size indicators on the bottom of the tray to help position the guides.
Printing Guide
Page 2 of 16
3 Unlock the length guide, and then squeeze and slide the guide to the correct position for the size of the paper being loaded.
Notes:
Lock the length guide for all paper sizes.
Use the paper size indicators on the bottom of the tray to help position the guides.
Printing Guide
Page 3 of 16
4 Flex the sheets back and forth to loosen them. Do not fold or crease the paper. Straighten the edges on a level surface.
5 Load the paper stack with the printable side facedown.
Note: Make sure the paper or envelope is loaded properly.
There are different ways for loading letterhead depending on whether an optional staple finisher is installed or not.
Without an optional staple finisher With an optional staple finisher
Onesided printing Onesided printing
Twosided printing Twosided printing
Do not slide the paper into the tray. Load paper as shown in the illustration.
Printing Guide
Page 4 of 16
If you are loading envelopes, then make sure that the flap side is facing up and the envelopes are on the left side of the
tray.
Make sure the paper is below the maximum paper fill indicator.
Warning—Potential Damage: Overfilling the tray can cause paper jams.
6 For custom or universalsize paper, adjust the paper guides to lightly touch the sides of the stack, and then lock the length
guide.
Printing Guide
Page 5 of 16
7 Insert the tray.
8 From the printer control panel, set the paper size and type in the Paper menu to match the paper loaded in the tray.
Note: Set the correct paper size and type to avoid paper jams and print quality problems.
Loading the 2100sheet tray
CAUTION—POTENTIAL INJURY: To reduce the risk of equipment instability, load each tray separately. Keep all other trays
closed until needed.
1 Pull out the tray.
2 Adjust the width and length guides.
Loading A5size paper
a
Pull up and slide the width guide to the position for A5.
Printing Guide
Page 6 of 16
b Squeeze and slide the length guide to the position for A5 until it clicks into place.
c Remove the A5 length guide from its holder.
d Insert the A5 length guide into its designated slot.
Note: Press the A5 length guide until it clicks into place.
Printing Guide
Page 7 of 16
Loading A4, letter, legal, oficio, and foliosize paper
a
Pull up and slide the width guide to the correct position for the size of the paper being loaded.
b If the A5 length guide is still attached to the length guide, then remove it from its place. If the A5 length guide is not
attached, then proceed to step d.
Printing Guide
Page 8 of 16
c Put the A5 length guide in its holder.
d Squeeze the length guide and slide it to the correct position for the size of the paper being loaded until it clicks into place.
3 Flex the sheets back and forth to loosen them. Do not fold or crease the paper. Straighten the edges on a level surface.
Printing Guide
Page 9 of 16
4 Load the paper stack with the printable side facedown.
Note: Make sure the paper is loaded properly.
There are different ways for loading letterhead depending on whether an optional staple finisher is installed or not.
Without an optional staple finisher With an optional staple finisher
Onesided printing Onesided printing
Twosided printing Twosided printing
Printing Guide
Page 10 of 16
Make sure the paper is below the maximum paper fill indicator.
Warning—Potential Damage: Overfilling the tray can cause paper jams.
5 Insert the tray.
Note: Press the paper stack down while inserting the tray.
Printing Guide
Page 11 of 16
6 From the printer control panel, set the size and type in the Paper menu to match the paper loaded in the tray.
Note: Set the correct paper size and type to avoid paper jams and print quality problems.
Loading the multipurpose feeder
1 Pull down the multipurpose feeder door.
Note: Do not load or close the multipurpose feeder while a job is printing.
Printing Guide
Page 12 of 16
2 Pull the multipurpose feeder extender.
Note: Guide the extender gently so that the multipurpose feeder is fully extended and open.
3 Slide the width guide to the correct position for the size of the paper being loaded.
Note: Use the paper size indicators on the bottom of the tray to help position the guides.
Printing Guide
Page 13 of 16
4 Prepare the paper or specialty media for loading.
Flex sheets of paper back and forth to loosen them. Do not fold or crease the paper. Straighten the edges on a level
surface.
Hold transparencies by the edges. Straighten the edges on a level surface.
Note: Avoid touching the printable side of the transparencies. Be careful not to scratch them.
Flex the stack of envelopes back and forth to loosen them. Straighten the edges on a level surface.
5 Load the paper or specialty media.
Note: Slide the stack gently into the multipurpose feeder until it comes to a stop.
Load only one size and type of paper or specialty media at a time.
Make sure the paper fits loosely in the multipurpose feeder, lies flat, and is not bent or wrinkled.
There are different ways of loading letterhead depending on whether an optional staple finisher is installed or not.
Printing Guide
Page 14 of 16
Without an optional staple finisher With an optional staple finisher
Onesided printing Onesided printing
Twosided (duplex) printing
Load envelopes with the flap side down and on the left of the multipurpose feeder.
Warning—Potential Damage: Never use envelopes with stamps, clasps, snaps, windows, coated linings, or selfstick
adhesives. These envelopes may severely damage the printer.
Printing Guide
Page 15 of 16
Make sure the paper or specialty media is below the maximum paper fill indicator.
Warning—Potential Damage: Overfilling the feeder can cause paper jams.
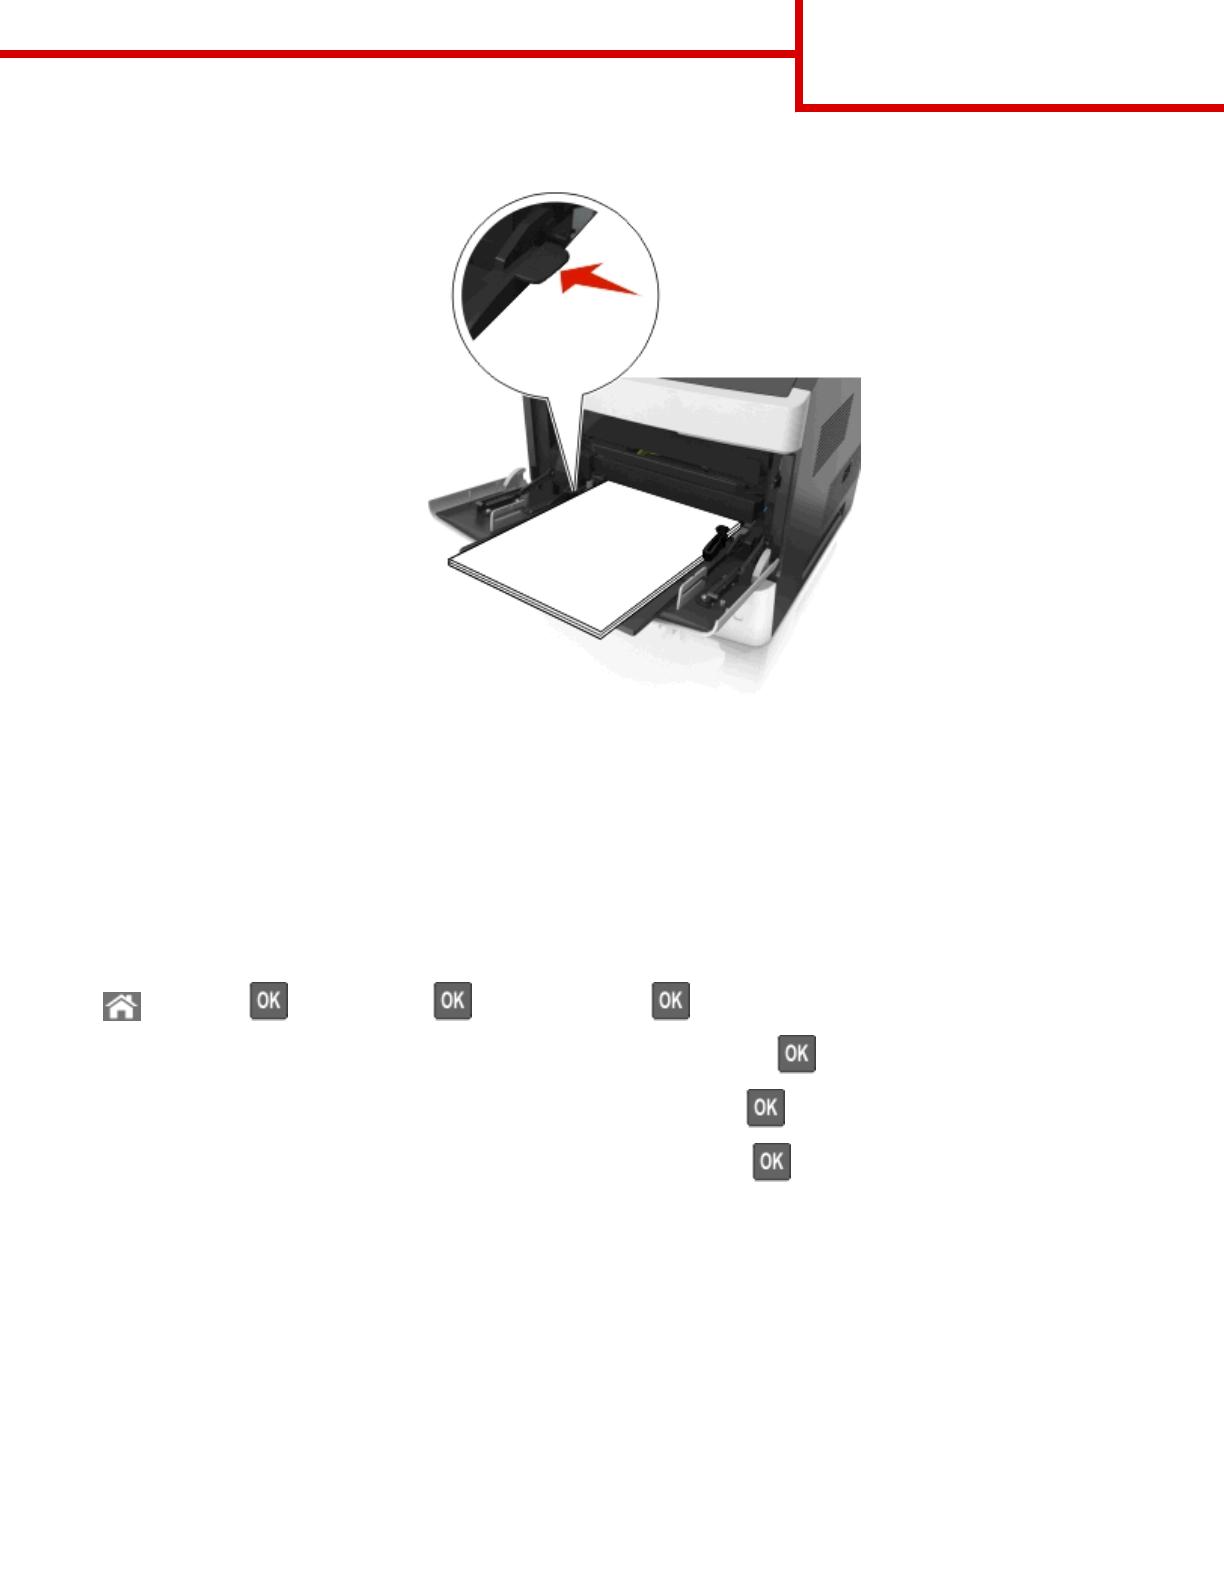
6 For custom- or universal-size paper, adjust the width guides to lightly touch the sides of the stack.
7 From the printer control panel, set the paper size and type in the Paper menu to match the paper loaded in the tray.
Note: Set the correct paper size and type to avoid paper jams and print quality problems.
Setting the paper size and type
1 From the printer control panel, navigate to:
> Settings > > Paper Menu > > Paper Size/Type >
2 Press the up or down arrow button to select the tray or feeder, and then press .
3 Press the up or down arrow button to select the paper size, and then press .
4 Press the up or down arrow button to select the paper type, and then press to change the settings.
Printing Guide
Page 16 of 16
  • Page 1 1
  • Page 2 2
  • Page 3 3
  • Page 4 4
  • Page 5 5
  • Page 6 6
  • Page 7 7
  • Page 8 8
  • Page 9 9
  • Page 10 10
  • Page 11 11
  • Page 12 12
  • Page 13 13
  • Page 14 14
  • Page 15 15
  • Page 16 16

Lexmark MS812 Series Printing Manual

Category
Laser/LED printers
Type
Printing Manual
This manual is also suitable for

Lexmark MS812 Series: High-performance printing for demanding workgroups

The Lexmark MS812 Series is a powerful printing solution designed for busy workgroups. With print speeds of up to 65 pages per minute and a maximum monthly duty cycle of 300,000 pages, this series can handle even the most demanding print jobs. The MS812 Series also features a variety of advanced features, including:

  • Two-sided printing: Save paper and reduce costs by printing on both sides of the page.
  • Wireless connectivity: Print from your laptop, tablet, or smartphone without the need for a physical connection.
  • Mobile printing: Use the Lexmark Mobile Print app to print from your mobile device.

Ask a question and I''ll find the answer in the document

Finding information in a document is now easier with AI