Design Innovations 51007 Installation guide
- Type
- Installation guide

FINISHING:
and touch up – for touch up at cut ends or exposed wood use a water based paint or stain that is thinned down to blend with the color tone of
the board. Topcoat finishing or sealing is not required if installing in a moderate climate condition. If you desire to seal the surfaces or add a
satin or glossy finish then you can use a polyurethane type finish. For best results brush or spray on the finish.
HORIZONTAL APPLICATION
Make sure the bottom row of boards is level. As you install
up the wall be sure to keep the board ends staggered.
When installing the top board, leave 1/4” between the
ceiling and the boards.
VERTICAL APPLICATION
Leave 1/4” space at the corner, top and
bottom and begin at an inside corner and
work left to right if you are right handed
work right to left if you are left handed. Nail
through the visible face of the board only when necessary
to hold the board until the glue sets. Measure and fit the
next boards carefully checking for plumb as you work
across the wall. The last board may have to be trimmed
to fit into a corner.
DIAGONAL AND CHEVRON APPLICATION
Start the boards at an inside floor corner
location. Cut and fit a triangular shaped piece at a 45°
angle to the corner. Nail and glue the triangular piece into
the corner. Proceed by marking, cutting and installing the
remainder of the boards using the same as the above
procedures.
CEILING APPLICATION
Install the same as vertical or horizontal application.
IMPORTANT: BE SURE, THE BOARDS ARE NAILED
AND GLUED SECURELY TO A SOLID SURFACE.
METHODS OF INSTALLATION
ACCLIMATION REQUIREMENTS:
In order to minimize the expansion and contraction of your boards
you must take the following steps prior to installation: Open all
packages and place the boards flat with spacers in between the
boards to allow air to circulate around each board. Allow 36 hours
for the boards to adjust to the humidity and temperature of the room
in which they are being installed. Do not attempt to acclimate your
boards in a damp unheated area which would not be representative
of the true year round temperature of the room.
Important: In rooms that are below grade, apply a vapor barrier
between the studs and the boards. In rooms that have unusually
high moisture conditions such as saunas, bathrooms or laundry
rooms, acclimation and finish sealing must be applied. Expansion
and contraction are inherent characteristics of all wood products
due to changes in humidity within the room. The manufacturer
cannot be held liable for any movement in the boards.
SELECTING BOARDS:
First select the boards you want to mix on the wall. It is recommended
to install mixing the colors so you don’t result with installing all
lighter colors and then all darker colors together. Better to mix the
light and dark together as much as possible so your finished wall
looks evenly random colors.
WALL PREPARATION:
If your walls are in good condition you may glue and nail the boards
directly onto drywall, plywood or existing paneling. On uneven,
cracked or very rough walls, repair and smooth out the wall so
boards will lay flat against a sturdy wall.
GENERAL:
Reclaimed board designs is solid wood which may cup or have a
bend in the length, it is recommended to use nails when necessary
to hold down areas that will not naturally lay flush when installed.
Angle all nails for greater holding power. Hammer nails to within
1/8” of face, then finish with a nail set. Glue each board to the
wall with a quality panel adhesive or double sided carpet tape and
following the manufacturer’s instructions. From time to time, check
for plumb/level and if necessary, slightly angle the board to make it
level. Do not butt up boards too tightly to allow for normal expansion
and contraction. If a board has a severe bend that cannot be pulled
straight – use it by cutting it into shorter sections and install it at the
beginning or end of runs.
CHECK FOR PLUMB:
The first board is the key to a successful and easy installation.
Using a level, make sure the first row of boards is absolutely
straight. Where necessary, scribe and then plane or cut the long
edge to assure a level fit.
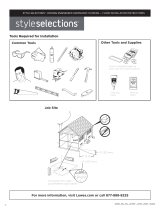
TOOLS REQUIRED: Fine tooth saw, miter box, hammer,
ruler, level, carpenter’s combination square.
APPLY BOARDS with 1” finish nails, 18ga brad or 23ga pin
nails, panel adhesive or double sided carpet tape.
BarnWood Planking
INSTALLATION
INSTRUCTIONS
DESIGN INNOVATIONS PRODUCT #51007
-
 1
1

Design Innovations 51007 Installation guide
- Type
- Installation guide
Ask a question and I''ll find the answer in the document
Finding information in a document is now easier with AI
Related papers


Other documents
-
 Style Selections LWCSS352 Installation guide
-
 HOMELEGEND HL1220-48 Installation guide
-
 Style Selections 1364518 Installation guide
-
 Home Legend HL9312NH Installation guide
-
 HOMELEGEND HL283S Installation guide
-
Home Decorators Collection HL662S Installation guide
-
Pergo LEW47-69 Installation guide
-
 Home Legend HL1057 Installation guide
-
 Vintage Timber 2102 Operating instructions
-
 Cali Bamboo 7014006500 Installation guide


