Page is loading ...

WWW.gronomics.com East Bethel, MN USA
763-753-7374
Solar Assist Composter (24” x 45” x 32”H)
Assembly Instruction
Continued
Parts List
Product Care and Maintenance
ITEM QTY. PART # DESCRIPTION
Western Red Cedar will turn a
weathered grey if left unfinished.
Although no finish is required for
cedar when used outdoors, a
natural oil finish applied regularly
will help maintain the beauty and
minimize cracking and
drying. It is recommended to use
Gronomics Garden Bed Oil
(Item# GBO-1Q), a non-toxic, food
safe finish that is very easy to
apply.
Apply oil when air and wind
temperatures are between 50-90
degrees. Avoid applying in direct
sunlight.
1 1 TL 2746 Top Lid, 27” x 46”
2 8 R2100 Side Rail, 5/8” x 5-1/2” x 21”
3 4 3200H Corner Post, 4” x 4” x 32” w/21-3/4” dovetail
depth
4 2 SPC4021 Screen Panel w/cleat 40” x 21-1/2”
5 1 BSP4018 Bottom Screen Panel w/4 notched corners
20-3/8” x 40-1/8”
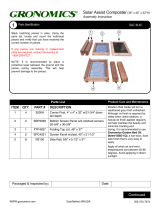
Stack matching pieces in piles. Using the parts list,
locate and count the individual pieces and verify that
you have received the correct number of pieces.
If any pieces are missing or replacement parts are
required, contact Gronomics at 1-855-299-6727.
NOTE: It is recommended to place a protective layer
between the ground and the pieces during assembly.
This will help prevent damage to the pieces.
Parts Identification
SAC 24-45
1
1
2 3
4
5
Packaged & Inspected by: Date:

WWW.gronomics.com East Bethel, MN USA 763-753-7374
Continued
NOTE: Assemble the solar assist composter on a level
surface and keep posts and parts square when
assembling.
Stand two 4” x 4” x 32” corner posts (Item 3) upright
with slots facing you and with slots facing each other.
Install a 40” x 21-1/2” screen panel w/cleat (Item 4)
(cleat facing you) into the slots and slide down.
Corner Post / Screen Side Assembly
2
Cleat
3
4
3
Repeat step 2 with the remaining 4” x 4” x 32”corner
posts (Item 3) and 40” x 21-1/2” screen panel w/cleat
(Item 4).
Install a 5/8” x 5-1/2” x 21” side rail (Item 2) on each
side into the slots and slide down.
Side Rail Assembly
3
3
4
2
2
Install remaining 5/8” x 5-1/2” x 21” side rails (Item 2).
Side Rail Assembly Continued
4
2
2
Install the 20-3/8” x 40-1/8” bottom screen panel (Item
5), with the screw heads facing down by resting it on
the cleats of the 40” x 21-1/2” screen panels w/cleats
(Item 4).
Bottom Screen Panel Assembly
5
5
4
4

WWW.gronomics.com East Bethel, MN USA 763-753-7374
1
Install the 27” x 46” top lid, (Item 1) on top of the
composter. The lid will rest on top of the composter
when raised.
Top Lid Assembly
6
1
/


