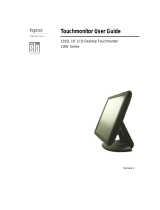
Computer Monitor 1200L

Elo TouchSystems Computer Monitor 1200L User manual

  • Hello! I am an AI chatbot trained to assist you with the Elo TouchSystems Computer Monitor 1200L User manual. I’ve already reviewed the document and can help you find the information you need or explain it in simple terms. Just ask your questions, and providing more details will help me assist you more effectively!
Copyright © 2001 Elo TouchSystems Inc. All Rights Reserved.
No part of this publication may be reproduced, transmitted, transcribed, stored in a
retrieval system, or translated into any language or computer language, in any form or by
any means, including, but not limited to, electronic, magnetic, optical, chemical, manual, or
otherwise without prior written permission of Elo TouchSystems.
Disclaimer
The information in this document is subject to change without notice. Elo TouchSystems
makes no representations or warranties with respect to the contents hereof, and spe-
cifically disclaims any implied warranties of merchantability or fitness for a particular
purpose. Elo TouchSystems reserves the right to revise this publication and to make
changes from time to time in the content hereof without obligation of Elo TouchSystems to
notify any person of such revisions or changes.
Trademark Acknowledgments
IntelliTouch, SecureTouch, AccuTouch, Entuitive, and MonitorMouse are trademarks of
Elo TouchSystems, Inc.
Other product names mentioned herein may be trademarks or registered trademarks of
their respective companies. Elo TouchSystems claims no interest in trademarks other
than its own.
2
Usage Notice
Precautions ................................................................................. 3
Introduction
About the Product ....................................................................... 4
Package Overview...................................................................... 5
Installation
Product Overview........................................................................ 6
Start Your Installation .................................................................. 7
User Controls
Front Panel Controls ................................................................... 9
How to Use the OSD Menus....................................................... 10
On-Screen Display Menus ......................................................... 11
Appendices
Troubleshooting........................................................................... 14
Warning Signal............................................................................ 15
Product Dimensions ................................................................... 16
Touchmonitor Specifications......................................................... 17
Compatibility Modes ................................................................... 19
Installing the Driver Software....................................................... 20
Regulatory Information ................................................................. 23
Warranty ....................................................................................... 25
Table of Contents
3
Usage Notice
Warning- To prevent the risk of fire or shock hazards, do not
expose this product to rain or moisture.
Warning- Do not open or disassemble the product as this
may cause electric shock.
Precautions
Follow all warnings, precautions and maintenance as recom-
mended in this users manual to maximize the life of your unit.
Do:
q Turn off the product before cleaning.
q Use only a dry soft cloth or clean wipe when cleaning the
LCD panel surface.
q Use a soft cloth moistened with mild detergent to clean the
display housing.
q Use only high quality and safety approved AC/DC power
adapter.
q Disconnect the power plug from AC outlet if the product is not
used for a long period of time.
Don’t:
q Do not touch the LCD panel surface with sharp or hard objects.
q Do not use abrasive cleaners, waxes or solvents for your
cleaning.
q Do not operate the product under the following conditions:
- Extremely hot, cold or humid environment.
- Areas susceptible to excessive dust and dirt.
- Near any appliance generating a strong magnetic field.
- Place in direct sunlight.
4
Introduction
About the Product
This product is a 12.1” SVGA TFT color LCD touchmonitor with the
following features:
q Direct analog RGB input
q Active matrix TFT LCD technology
q 12.1” diagonal screen size
q 16.7 million displayable colors
q SVGA 800 x 600 addressable pixels
q Auto-adjustment
q Full screen re-scaling capability
q 31 ~ 54kHz horizontal scan
q 56 ~ 85Hz high refresh rate
q Multilingual OSD user controls
q VESA DPMS power saving
q Serial touch interface (RS232 cable)
q Built-in speakers
q Patented touch technology of Elo TouchSystems.
For full product specifications refer to
Touchmonitor Specifications
, page
16.
5
RS-232 Touchscreen
Interface Cable
Audio-In Cable
US/Canada
Power Cord
Package Overview
Check that the following 10 items are present and in good condition:
Mac Video Adapter
User’s Guide and
software CD
Manual
CD
Software
VGA Signal Cable
European power cable
Power Adapter
LCD Touchmonitor
6
Installation
Product Overview
u
Main Unit
u
Rear View
MENU SELECT
LCD Touchmonitor
Stand
User Controls
Power
Switch
Ear
Phone
Audio
In
Power
DC-In
Display
Input
RS-232
Touch
Interface
7
Start Your Installation
u
Tilt
Grasp both sides of the monitor screen with your hands and adjust the
tilt as desired.
u
Connecting the Touchmonitor (Figure 7.1)
To setup this touchmonitor, please refer to the following figure and proce-
dures.
1. Be sure all equipment is off.
2. Connect the VGA signal cable from display input connector to the
15-pin connector of your host computer and tighten the screws.
3. Connect the female end of the touchscreen cable to the serial port on
the back of your PC, and the male end of the cable to your
touchmonitor.
4. Connect the DC power cord to the power connector; plug one end of
the AC power cord into the power adapter, and then the other end into
an electrical outlet.
5. Connect the Audio-In cable from audio input port of your touchmonitor to
the Audio-out port of your computer. If you need to use earphone,
connect your earphone cable to the earphone port of your display.
6. Turn on both your computer and touchmonitor.
u Install Driver Software
Please refer to page 20 for driver software instructions.
8
Notice:To ensure the LCD display works well with your computer, please configure the
display mode of your graphic card to less than or equal to 800 x 600 resolution. Make sure the
timing of the display mode is compatible with the LCD display. We have listed the Compatibility
Modes of this LCD display in the appendices for your reference.
Power Adapter
Audio-In Cable
VGA Signal Cable
Mac Adapter
Power Cord
RS-232 Touch
Cable
(Figure 7.1)
9
User Controls
Front Panel Controls
No. / Icon Control Function
MENU Menu button Displays the OSD menus
SELECT Select Selects the adjustment items
from OSD menus.
3 Decrease / Select Decreases value of the
adjustment items or selects
the functions.
4 Increase / Select Increases value of the
adjustment items or selects
the functions.
Power LED 1. Green indicates the display
is turned on.
2. Amber indicates the display
in power-saving mode.
MENU SELECT
10
How to Use the OSD Menus
1. Press the “MENU” button to pop up the on-screen menu and to toggle
between Main Menu Page 1 to Page 3.
2. Choose the adjustment items by pressing the “ SELECT” button.
3. Adjust the value of adjustment items by pressing the “ 3 ” & “ 4
buttons.
4. Press the “ MENU” button again to turn off the OSD menu. If you don’t
operate the OSD menu in a pre-set time, the OSD will automatically
disappear.
11
On-Screen Display Menus
4 Brightness
Adjusts the brightness of the image.
4 Contrast
Adjusts the contrast of the display image.
4 Horizontal Position
Adjusts the horizontal position of the image.
4 Vertical Position
Adjusts the vertical position of the image.
4 Tracking
Synchronizes the signal timing of the display to that of the graphic card.
When you are experiencing an unstable or flickering image, use this
function to make an adjustment.
4Frequency
Changes the display data frequency to match the frequency of your graphic
card. When you are experiencing a vertical flickering bar, use this function
to make an adjustment.
First OSD Menu:
Brightness
Contrast
Horizontal Position
Vertical Position
Frequency
Tracking
Main Menu
Page 1
43
+
-
12
4Auto-Adjustment
Choose this function to obtain an optimum image.
4Re-Scaling
If the input resolution is less than 800 x 600, you can select this function to
obtain the full screen image.
4Display Mode
Select this function to demonstrate the display resolution, vertical refresh,
and horizontal scan of the current mode.
4OSD Off-Time
Adjusts the time period in which the OSD menu will disappear.
4Language
Choose the language you need; English, French, German,
Spanish and Japanese.
4Text-Graphic
Toggles between VGA text mode (mode M03H) and graphic mode (mode
M13H).
Second OSD Menu:
Auto-Adjustment
Re-Scaling
Display Mode
OSD Off-Time
Language
Text-Graphic
Main Menu
Page 2
YesNO
13
4 Volume
Allows you to control the volume of sound,
4Mute
Allows you to disable the sound immediately.
4Reset
Returns the display parameters of the current mode to the factory defaults.
Third OSD Menu:
Volume
Mute
Reset
Main Menu
Page 3
43
+
-
14
Troubleshooting
If you are experiencing trouble with the LCD display, refer to the
following. If the problem persists, please contact your local dealer
or our service center. Please refer to the back cover of this manual
for the phone number of the Elo TouchSystems office nearest you.
Problem: No image appears on screen.
4
Check that all the I/O and power connectors are correctly and
well connected as described in the “ Installation ” section.
4
Make sure the pins of the connectors are not crooked or broken.
Problem: Partial image or incorrectly displayed image.
4
Check to see if the resolution of your computer is higher than that
of the LCD display.
4
Reconfigure the resolution of your computer to less than or equal to 800
x 600.
Problem: Image has vertical flickering line bars.
4
Use “ Frequency ” to make an adjustment.
4
Check and reconfigure the display mode of the vertical refresh
rate of your graphic card to make it compatible with the LCD
display.
Problem: Image is unstable and flickering
4
Use “ Tracking ” to make an adjustment.
Problem: Image is scrolling
4
Make sure the VGA signal cable (or adapter) is well connected.
4
Check and reconfigure the display mode of the vertical refresh
rate of your graphic card to make it compatible with the LCD
display.
Problem: Touch doesn’t work
4
Make sure the touchscreen cable is securely attached at both ends.
Appendices
15
Warning Signal
Sometimes you will see warning messages from the LCD screen. This
means that the LCD display cannot receive the signal from the computer
graphic card.
There are three situations where this may happen. Please check the
connected cables or contact your local dealer for more information.
4No Signal
This message means that the LCD display has been powered on but it
cannot receive any signal from the computer graphic card. Check all the
power switches, power cables, and VGA signal cable.
4Going to Sleep
This message means that the LCD display is in power saving mode. In ad-
dition, the LCD display will go to the sleep mode when experiencing a
sudden signal disconnecting problem.
4Unsupport Mode
This message means that the signal of the computer graphic card is not
compatible with the LCD display. When the signal is not included in the
compatibility mode we have listed in the Appendices of this manual, the
LCD display will show this message.
16
Product Dimensions
340mm/13.4”
286.7mm/11.3”
170mm/6.7”
Front View
Side View
Top View
17
Touchmonitor Specifications
12” LCD Touchmonitor (ET12-XXWC-1) Specifications
epyTyalpsiD
rotsisnartmlifniht,xirtamevitcA
yalpsidlatsyrcdiuqil,)TFT(
eziSlanogaidhcni-21
aeraneercslufesumm581x642
noituloseRevitaN006x008
neercshcuoTeralg-itna,hcuoTuccA
sroloCgnirehtidhtiwnoillim61
ssenthgirByalpsiDlacipytm/dc881:hcuoTuccA
efiLpmaLthgil-kcaBlacipytssenthgirblluftasruoh000,03
elgnAgniweiVlatnoziroH
lacitreV
latotseerged06ro03-/+
latotseerged03ro02-/01/+
oitaRtsartnoClacipyt1:001
emiTesnopseRyalpsiDlacipytyaledsm05,esirsm05
latnemnorivnE
pmeTgnitarepO
pmeTegarotS
ytidimuH
C04otC01
C06+otC02-
gnisnednoc-non%08
lacinahceM
thgieW
eziS
)gk5(.sbl01lautca
)gk5.8(.sbl71gnippihs
.thgiew.xorppa
.51egapnosgniwardeeS
lacirtcelE
oediVtupnI
tupnI
tupnIrewoP
golanaAGX/AGVS/AGV
oediv
.zH06/05,CAV042-001
lasrevinU
srekaepSrekaepsrepttaw1,smho8
seicnegA
CME&ytefaS
VUTdnaLUc,LU
ICCV,kciT-C,EC,CCF
18
AccuTouch Touchmonitor Specifications
lacinahceM
noitcurtsnoCgnitaocecafrus-drahedistuohtiwretseyloP:poT
.hsiniferalgitnaroraelchtiw
.gnitaocevitcudnoctnerapsnarT:edisnI
evitsisermrofinuhtiwetartsbusssalG:mottoB
ybdetarapessreyalmottobdnapoT.gnitaoc
.stodrotarapesdetnetap-olE
ycaruccAlanoitisoP
.ni080.0nahtsselsirorrefonoitaiveddradnatS
.%1nahtsselotsetauqesihT.)mm30.2(
ytisneDtniophcuoT
005,51(ni/stniophcuot000,001nahteroM
.)mc/stniophcuot
ecroFnoitavitcAhcuoT.)smarg311(secnuo4nahtsselyllacipyT
ytilibaruDecafruS,)4401DMTSA(tseTnoisarbArebaTsteeM
.g005,leehwF01-SC
.H3ssendrahlicnepsteeM
ecnamrofrePefiLdetcepxEyllanoitareponeebsahygolonhcethcuoTuccA
enonisehcuotnoillim53nahtretaergotdetset
aotralimissulytsagnisu,eruliaftuohtiwnoitacol
.regnif
lacitpO
rep(noissimsnarTthgiL
3001DMTSA
thgilelbisiv(htgnelevawmn-055ta%57yllacipyT
.)murtceps
noituloseRlausiV1591FASUgnisuedamstnemerusaemllA
htiw,noitacifingamX03rednu,trahCnoituloseR
)mm83(.ni5.1yletamixorppadetacoltinutset
.trahcnoituloserfoecafrusmorf
A/N:ecafrusraelC
.muminim1:6:ecafruseralgitnA
3001DMTSArep(ezaH
.%5.1nahtsseL:ecafrusraelC
.%51nahtsseL:ecafruseralgitnA
)7542DMTSArep(ssolG
A/N:ecafrusraelC
anodetsetstinussolg0209:ecafruseralgitnA
.ecafrustnorfdetaoc-drah
19
Compatibility Modes
AGVMBI053x046075.13
AGVMBI004x046075.13
AGVMBI084x046065.13
AGVMBI004x027075.13
AGVASEV084x046279.73
AGVASEV084x046575.73
AGVASEV084x046583.34
AGVSASEV006x008652.53
AGVSASEV006x008069.73
AGVSASEV006x008271.84
AGVSASEV006x008579.64
AGVSASEV006x008587.35
CLcaMelppA084x046769.43
IIcaMelppA084x046760.53
Mode
Resolution
V. Frequency
(Hz)
H. Frequency
(kHz)
/