Inseego 11487 Installation guide

Category
Network antennas
Type
Installation guide

Inseego 11487 is a high-performance 5G gateway designed to deliver blazing-fast internet speeds and reliable connectivity for your home or office. With support for the latest Wi-Fi 6 technology, it can handle multiple devices simultaneously without compromising speed or performance. The Inseego 11487 also features advanced security features to protect your network and data from unauthorized access. With its sleek and compact design, it fits seamlessly into any living or working space.

Inseego 11487 is a high-performance 5G gateway designed to deliver blazing-fast internet speeds and reliable connectivity for your home or office. With support for the latest Wi-Fi 6 technology, it can handle multiple devices simultaneously without compromising speed or performance. The Inseego 11487 also features advanced security features to protect your network and data from unauthorized access. With its sleek and compact design, it fits seamlessly into any living or working space.

all in one external antenna
INSTALLATION GUIDE
The all in one external antenna is a high-performance, 5G, Cat 18 (600MHz
- 6GHz) antenna designed for Inseego 5G gateways. Available with MIMO
5G/LTE and supporting 0.6-6 GHz and L1/L5 GPS, the all in one external
antenna is perfect for mobile and fixed wireless applications.
Masking tape (roof mount)
Center punch (roof mount)
Drill and 0.1 inch drill bit (roof mount)
Adjustable wrench
1.5 inch hole saw (roof mount)
Neutral cure silicone sealant (roof mount)
Level (pole mount)
Torque wrench
Electrical tape/heat shrink tubing
About your antenna
Preparing to install your antenna
Step one: gather tools and materials
Step two: select a location
Select a mounting location that is easily accessible and where there are
no obstructions within a radius of 24 inches and no other antennas within
five feet. Avoid proximity to outlets, AC/heating units, or electrical motors,
which may cause radio interference and reduce antenna performance.
You can perform a location survey using the Inseego Mobile app:
1. Scan the QR code to download the Inseego Mobile app from
Apple Store or Google Play Store.
2. Follow instructions within the app and perform initial rough signal
testing, then repeat after installation to confirm signal quality.
Step three: select a mounting option
Select the mounting option that best fits your needs. NOTE: You can
purchase mounts through the channel.
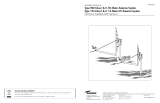
Roof mount
For mounting the antenna on a vehicle,
cabinet roof, or any flat surface.
Magnetic mount
For temporarily mounting the antenna on any ferrous
metal surface using a magnetic mount bracket.
Pole mount
For mounting the antenna on pole or wall
using a heavy duty, steel-fixed bracket.
Installing your antenna
Roof mount
Step one: prepare the hole
1. Mask the mounting location surface with masking tape to avoid paint
damage and mark the hole center with ink or scribed cross hairs.
2. Use a center punch to make a dimple on the marked location to avoid
drill bits from walking across the sheet metal. Use a 0.1” twist drill bit
to drill a pilot hole. Use a 1.5” diameter sheet metal hole saw to drill a
hole. NOTE: The hole saw cuts the required diameter hole with less risk
of stretching and distorting the vehicle/cabinet surface.
3. Clean up any metal shavings from the hole cutting process.
You can install the antenna on a vehicle, cabinet roof, or any flat surface,
with a roof mount.
Step two: mount the antenna
1. Feed the coaxial cables from the antenna through the hole from the
outside surface to the inside surface and thread the entire length of
the cable through the hole.
2. Clean any debris off the mounting surface and mark the desired
antenna orientation by placing the antenna flat on the surface.
3. Lift the antenna and remove the protective backing from the
underside of the antenna. Place the antenna back in the desired
position and apply downward pressure to stick it in place.
4. To avoid a gap between the antenna and mounting surface, use
neutral cure silicone sealant around the base of the mount to fully
compress the antenna to the mounting surface.
5. On the inside of the vehicle/cabinet, thread the provided flat washer
and hex nut over the cable. NOTE: If applicable, you can add a star
washer between the split washer and hex nut.
Slide the washer(s) and nut to the threaded flange of the antenna
and tighten the hex nut until the antenna compresses flat with the
mounting surface.
Magnetic mount
1. Feed the coaxial cables from the antenna through the top of the
mount hole and thread the entire length of the cable through the
hole.
2. Screw the threaded flange of the antenna into the magnetic mount.
3. Place the mount in the desired position.
Mount the antenna
You can use the magnetic mount for temporary installation of the
antenna with no drilling required. The magnets provide a strong physical
connection with 40 lbs of pull strength.
1. Select a pole with a diameter between 1.5 - 2.5 inches, or a rectangular
post up to 3 inches wide. Cut the pole to the required length. Mount
the pole vertically and confirm it with a level. Make sure the pole is
firm before mounting the antenna.
2. Mount the bracket on the top of the pole and tighten the nuts,
making sure equal lengths of thread extend past each nut.
NOTE: Additional vertical and horizontal slots for gear/worm drive clamps
offer additional mounting options.
Pole mount
Use a pole mount to provide optimal isolation for uninterrupted service.
The pole mount bracket is weatherproof and wind rated up to 130 mph.
Step one: mount the bracket on the pole
Step two: mount the antenna
1. Feed the coaxial cables from the antenna through the antenna
mounting hole on the bracket and thread the entire length of the
cable through the hole.
2. Remove the protective backing from the underside of the antenna
and place the antenna on the bracket, applying downward pressure to
stick it in place.
3. Thread the flat washer, then split washer and hex nut through the
cable. Slide the washers and nut to the threaded flange of the antenna
and tighten the hex nut until the split washer compresses flat with the
flat washer.
Connecting cables to your gateway
Step one: route the cables
1. Route the cables from the antenna to the gateway, maintaining a
minimum bend radius of 1 inch. Avoid sharp bends and run the cables
adjacent to existing wiring.
NOTE: For pole mounts, clamp the cables to the pole at about 3 inches
below the bracket. If long cables are used, secure the cable to the pole
using zip ties, velcro, or tape.
2. Tighten the mounting hardware and, if required, waterproof the RF
connectors using electrical tape or a heat shrink tubing.
Step two: connect the cables
1. Clean the connectors on the gateway to ensure there is no dust in the
terminals.
2. Finger tighten the cables from the antenna to the designated
connector on the gateway, checking the label on each cable to ensure
correct placement. Then tighten the connectors to a recommended
torque of 5 in-lbs (56 N-cm) with an SMA torque wrench.
WI-90029810 Rev 1
© 2023 Inseego Corp. All Rights Reserved.
  • Page 1 1
  • Page 2 2
  • Page 3 3
  • Page 4 4
  • Page 5 5
  • Page 6 6
  • Page 7 7
  • Page 8 8
  • Page 9 9

Inseego 11487 Installation guide

Category
Network antennas
Type
Installation guide

Inseego 11487 is a high-performance 5G gateway designed to deliver blazing-fast internet speeds and reliable connectivity for your home or office. With support for the latest Wi-Fi 6 technology, it can handle multiple devices simultaneously without compromising speed or performance. The Inseego 11487 also features advanced security features to protect your network and data from unauthorized access. With its sleek and compact design, it fits seamlessly into any living or working space.

Ask a question and I''ll find the answer in the document

Finding information in a document is now easier with AI