Page is loading ...

234
© 1998 Graco 225-12-98 IS3850
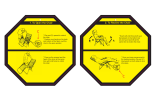
Failure to follow these warnings and the assembly
instructions could result in serious injury or death.
Congratulations on your purchase of a
Graco
®
highchair!
Graco is the recognized leader in the
design and manufacture of quality baby
products. We believe your new Graco
®
highchair is a wise choice, promising many
hours of enjoyment for your baby.
Before using your highchair, please take a
few minutes to read this Owners Manual.
The short time you spend reading these
instructions will help you use your
highchair properly.
Please save your Owners Manual
for future use.
Customer Satisfaction
Our goal is to make every product the best it can
be! We are also committed to supporting our
products after purchase. If you would like to speak
to Graco about your product, please contact our
Customer Service Department at 1-800-345-4109.
Our knowledgeable staff will be ready to answer
any questions you may have concerning parts, use,
or maintenance. When you call, please have the
model and serial numbers ready so your call may
be processed quickly and efficiently.
OWNERS
MANUAL
Model No. _______
Serial No. ________
Dear Customer,
Please fill in the
model and serial
numbers above
from the label on
the back of the
footrest of your
new highchair.
Models 3835, 3845, 3848, 3855,
and 3865
Seat with seat belt
or harness
Large tray
Chair frame
Screw (2)
Never leave child unattended.
Always keep your child in view.
Prevent serious injury or death from
falls or sliding out. Always secure
child in the restraint.
THIS PRODUCT REQUIRES ADULT ASSEMBLY.
FOLLOW ASSEMBLY INSTRUCTIONS CAREFULLY.
If you experience any difficulties, please contact the
Customer Service Department.
THIS HIGHCHAIR IS DESIGNED TO BE USED by a child
up to 3 years old. Maximum weight 37 pounds (17 kg).
DO NOT FORCE TRAY against child. Use only the five
adjustment positions. Be sure all adjustment fingers are in
armrest slots.
DISCONTINUE USING YOUR HIGHCHAIR should it
become damaged or broken.
CARE AND MAINTENANCE
FROM TIME TO TIME CHECK YOUR HIGHCHAIR for
loose screws, worn parts or torn material. Replace or repair
the parts as needed. Use only Graco
®
replacement parts.
REMOVABLE CLOTH SEAT PAD (on certain models) may
be machine washed in lukewarm water on delicate cycle
and drip-dried. NO BLEACH.
TO CLEAN HIGHCHAIR FRAME, use only household soap
or detergent and warm water. NO BLEACH.
Seat pad (style
depends on model)
Crossbrace tube
Right
plastic
leg tube
Left
plastic
leg tube
Small tray
Bolt (2)
T-nut (2)
Hex wrench
Foot top (2)
Foot bottom (2)
Secure your child at all times
with the restraint system provided,
in either the reclining or upright
position. The tray is not designed
to hold your child in the highchair.
It is recommended that the
highchair be used in the upright
position only by children capable
of sitting upright unassisted.
Highchair
STRANGULATION HAZARD:
DO NOT place highchair in any location
where there are cords, such as window
blind cords, drapes, phone cords, etc.
Leg tube end cap (2)
PARTS LIST
CHECK that you have all the parts listed
below BEFORE assembling your highchair.
If any parts are missing, call
Customer Service at 1-800-345-4109.
Tool required: Screwdriver

234
© 1998 Graco 225-12-98 IS3850
Failure to follow these warnings and the assembly
instructions could result in serious injury or death.
Congratulations on your purchase of a
Graco
®
highchair!
Graco is the recognized leader in the
design and manufacture of quality baby
products. We believe your new Graco
®
highchair is a wise choice, promising many
hours of enjoyment for your baby.
Before using your highchair, please take a
few minutes to read this Owners Manual.
The short time you spend reading these
instructions will help you use your
highchair properly.
Please save your Owners Manual
for future use.
Customer Satisfaction
Our goal is to make every product the best it can
be! We are also committed to supporting our
products after purchase. If you would like to speak
to Graco about your product, please contact our
Customer Service Department at 1-800-345-4109.
Our knowledgeable staff will be ready to answer
any questions you may have concerning parts, use,
or maintenance. When you call, please have the
model and serial numbers ready so your call may
be processed quickly and efficiently.
OWNERS
MANUAL
Model No. _______
Serial No. ________
Dear Customer,
Please fill in the
model and serial
numbers above
from the label on
the back of the
footrest of your
new highchair.
Models 3835, 3845, 3848, 3855,
and 3865
Seat with seat belt
or harness
Large tray
Chair frame
Screw (2)
Never leave child unattended.
Always keep your child in view.
Prevent serious injury or death from
falls or sliding out. Always secure
child in the restraint.
THIS PRODUCT REQUIRES ADULT ASSEMBLY.
FOLLOW ASSEMBLY INSTRUCTIONS CAREFULLY.
If you experience any difficulties, please contact the
Customer Service Department.
THIS HIGHCHAIR IS DESIGNED TO BE USED by a child
up to 3 years old. Maximum weight 37 pounds (17 kg).
DO NOT FORCE TRAY against child. Use only the five
adjustment positions. Be sure all adjustment fingers are in
armrest slots.
DISCONTINUE USING YOUR HIGHCHAIR should it
become damaged or broken.
CARE AND MAINTENANCE
FROM TIME TO TIME CHECK YOUR HIGHCHAIR for
loose screws, worn parts or torn material. Replace or repair
the parts as needed. Use only Graco
®
replacement parts.
REMOVABLE CLOTH SEAT PAD (on certain models) may
be machine washed in lukewarm water on delicate cycle
and drip-dried. NO BLEACH.
TO CLEAN HIGHCHAIR FRAME, use only household soap
or detergent and warm water. NO BLEACH.
Seat pad (style
depends on model)
Crossbrace tube
Right
plastic
leg tube
Left
plastic
leg tube
Small tray
Bolt (2)
T-nut (2)
Hex wrench
Foot top (2)
Foot bottom (2)
Secure your child at all times
with the restraint system provided,
in either the reclining or upright
position. The tray is not designed
to hold your child in the highchair.
It is recommended that the
highchair be used in the upright
position only by children capable
of sitting upright unassisted.
Highchair
STRANGULATION HAZARD:
DO NOT place highchair in any location
where there are cords, such as window
blind cords, drapes, phone cords, etc.
Leg tube end cap (2)
PARTS LIST
CHECK that you have all the parts listed
below BEFORE assembling your highchair.
If any parts are missing, call
Customer Service at 1-800-345-4109.
Tool required: Screwdriver

HARNESS MODELS:
Place the crotch strap between your childs legs and
insert the harness buckles into the center buckle
housing. Adjust shoulder straps as needed (pull adjust-
ment buckles down to loosen harness, push them up
to tighten harness) to get a snug fit around your child.
Check that belt is tightly threaded through retainers
behind seat.
To release, squeeze buckle at right
and left sides of center housing.
The position of the shoulder straps can be adjusted
for the size of your child. Locate the small retainers
behind the seat back, push them through to the
front and move them to the higher or lower position
as needed.
If it becomes necessary to remove the seat belt, follow
these instructions:
SEAT BELT MODELS:
Step 1.
Unthread both ends of seat belt
through the buckles as shown.
Step 2.
Pull one end of the seat belt
through the belt retainer as
shown.
Step 3.
To rethread buckle, reverse the above steps. CHECK
that the belt is threaded correctly by pulling on the seat
belt. The belt should not slip through the buckle.
HARNESS MODELS:
Remove seat pad. Follow directions given under To
Attach Seat Pad to remove harness straps from seat.
SEAT PAD WITH POCKET:
Your highchair will have either a seat belt or a 5-point
harness. Follow the proper instructions below.
Step 1.
SEAT BELT MODELS:
Position seat pad over highchair.
Pull the seat belt through the
hole in the middle of the seat pad.
5-POINT HARNESS MODELS:
Straps must first be removed
from seat before pad can be
attached. Behind the seat back,
locate four small plastic retainers
on the shoulder straps. Push
them through the slots in seat
to the front. Set straps aside.
Position seat pad over highchair.
Push each plastic retainer through
proper hole in seat pad and back
into slot it was removed from, as
shown. (The strap length adjust-
ment buckles will be near the
shoulders.) Avoid twisting straps.
Two levels of shoulder holes are provided. Choose the
level that is at or slightly above your childs shoulders.
Pull crotch strap and buckle through center opening in
seat pad.
Step 2.
Attach seat pad by sliding pocket
over the back of the seat as
shown.
NOTE: On certain models with a
cloth pad, pad is reversible. Turn
pocket inside out to reverse.
To Use Restraint
SEAT BELT MODELS:
Place crotch strap between
childs legs and snap both side
buckles to the center buckle.
Adjust belt as needed to get a
snug fit around your child.
Push in on front of buckle to
release.
5
225-12-98 IS3850
Step 1.
IMPORTANT: BEFORE attaching feet to highchair,
frame MUST be folded exactly as in the drawing below.
Lay highchair frame on floor so it looks like the
drawing before attaching feet.
Place a foot top and foot bottom at each corner of the
chair frame tube. Insert a screw into the foot bottom,
through the hole in the chair frame, and into the foot
top. Tighten screws securely, but do not overtighten.
Step 2.
Unfold the chair frame
as shown. Insert one
bolt and one T-nut into
each leg brace and
through the holes in
the legs. Tighten them
securely with a screw-
driver and the enclosed
hex wrench.
Step 3.
Snap end caps into ends of
right and left plastic leg tubes.
Step 4.
Turn the seat upside down
as shown. Match up the
L or R on the plastic
leg tubes with the letters
molded on the seat back.
Slide the leg tubes into the
collars on the seat back.
Slide the crossbrace tube
through the slots under
the seat. Then insert the
ends of the crossbrace
tube into the holes in the
leg tubes. (This may be
more easily done if the
crossbrace tube is held at
an angle as shown.)
Step 5.
Set chair frame into upright
position. Slide the seat assem-
bly onto the frame. Press the
red latches, located on the
plastic leg tubes, to allow seat
to slide onto frame.
NOTE: Lowest seat position
should NOT rest on top of legs.
Pull seat up to lowest latching
position.
To Attach Seat Pad
SEAT PAD WITH FOUR TABS:
Step 1.
Place seat pad in seat. Large
part of pad goes on seat back
as shown. Pull the seat belt
through the hole in the middle
of the seat pad.
Step 2.
Push the four tabs on the seat
cover into the slots at the top
and bottom of the seat.
Step 3.
From the rear of the seat, pull
the four tabs over the plastic
anchors near them.
6 87
To Assemble Highchair
Hex wrench
Left
plastic
leg tube
Collars
Crossbrace
tube
Right
plastic
leg
tube
Lowest
latching
position
NOT
resting
on legs
Anchor
Seat
back
Seat
bottom
Your highchair seat pad will either have 4 attachment tabs
or a pocket on the back. Follow the appropriate instructions
below:
T-nuts
Slack
length
adjustment
buckle
Loosen
Tighten
Prevent serious
injury or death from falls or sliding
out. Always secure your child in
the restraint. Do not depend on the
tray alone to hold your child.

HARNESS MODELS:
Place the crotch strap between your childs legs and
insert the harness buckles into the center buckle
housing. Adjust shoulder straps as needed (pull adjust-
ment buckles down to loosen harness, push them up
to tighten harness) to get a snug fit around your child.
Check that belt is tightly threaded through retainers
behind seat.
To release, squeeze buckle at right
and left sides of center housing.
The position of the shoulder straps can be adjusted
for the size of your child. Locate the small retainers
behind the seat back, push them through to the
front and move them to the higher or lower position
as needed.
If it becomes necessary to remove the seat belt, follow
these instructions:
SEAT BELT MODELS:
Step 1.
Unthread both ends of seat belt
through the buckles as shown.
Step 2.
Pull one end of the seat belt
through the belt retainer as
shown.
Step 3.
To rethread buckle, reverse the above steps. CHECK
that the belt is threaded correctly by pulling on the seat
belt. The belt should not slip through the buckle.
HARNESS MODELS:
Remove seat pad. Follow directions given under To
Attach Seat Pad to remove harness straps from seat.
SEAT PAD WITH POCKET:
Your highchair will have either a seat belt or a 5-point
harness. Follow the proper instructions below.
Step 1.
SEAT BELT MODELS:
Position seat pad over highchair.
Pull the seat belt through the
hole in the middle of the seat pad.
5-POINT HARNESS MODELS:
Straps must first be removed
from seat before pad can be
attached. Behind the seat back,
locate four small plastic retainers
on the shoulder straps. Push
them through the slots in seat
to the front. Set straps aside.
Position seat pad over highchair.
Push each plastic retainer through
proper hole in seat pad and back
into slot it was removed from, as
shown. (The strap length adjust-
ment buckles will be near the
shoulders.) Avoid twisting straps.
Two levels of shoulder holes are provided. Choose the
level that is at or slightly above your childs shoulders.
Pull crotch strap and buckle through center opening in
seat pad.
Step 2.
Attach seat pad by sliding pocket
over the back of the seat as
shown.
NOTE: On certain models with a
cloth pad, pad is reversible. Turn
pocket inside out to reverse.
To Use Restraint
SEAT BELT MODELS:
Place crotch strap between
childs legs and snap both side
buckles to the center buckle.
Adjust belt as needed to get a
snug fit around your child.
Push in on front of buckle to
release.
5
225-12-98 IS3850
Step 1.
IMPORTANT: BEFORE attaching feet to highchair,
frame MUST be folded exactly as in the drawing below.
Lay highchair frame on floor so it looks like the
drawing before attaching feet.
Place a foot top and foot bottom at each corner of the
chair frame tube. Insert a screw into the foot bottom,
through the hole in the chair frame, and into the foot
top. Tighten screws securely, but do not overtighten.
Step 2.
Unfold the chair frame
as shown. Insert one
bolt and one T-nut into
each leg brace and
through the holes in
the legs. Tighten them
securely with a screw-
driver and the enclosed
hex wrench.
Step 3.
Snap end caps into ends of
right and left plastic leg tubes.
Step 4.
Turn the seat upside down
as shown. Match up the
L or R on the plastic
leg tubes with the letters
molded on the seat back.
Slide the leg tubes into the
collars on the seat back.
Slide the crossbrace tube
through the slots under
the seat. Then insert the
ends of the crossbrace
tube into the holes in the
leg tubes. (This may be
more easily done if the
crossbrace tube is held at
an angle as shown.)
Step 5.
Set chair frame into upright
position. Slide the seat assem-
bly onto the frame. Press the
red latches, located on the
plastic leg tubes, to allow seat
to slide onto frame.
NOTE: Lowest seat position
should NOT rest on top of legs.
Pull seat up to lowest latching
position.
To Attach Seat Pad
SEAT PAD WITH FOUR TABS:
Step 1.
Place seat pad in seat. Large
part of pad goes on seat back
as shown. Pull the seat belt
through the hole in the middle
of the seat pad.
Step 2.
Push the four tabs on the seat
cover into the slots at the top
and bottom of the seat.
Step 3.
From the rear of the seat, pull
the four tabs over the plastic
anchors near them.
6 87
To Assemble Highchair
Hex wrench
Left
plastic
leg tube
Collars
Crossbrace
tube
Right
plastic
leg
tube
Lowest
latching
position
NOT
resting
on legs
Anchor
Seat
back
Seat
bottom
Your highchair seat pad will either have 4 attachment tabs
or a pocket on the back. Follow the appropriate instructions
below:
T-nuts
Slack
length
adjustment
buckle
Loosen
Tighten
Prevent serious
injury or death from falls or sliding
out. Always secure your child in
the restraint. Do not depend on the
tray alone to hold your child.

9
225-12-98 IS3851
To Adjust Recline
(on certain models)
DO NOT adjust
recline with your child in the
highchair.
Flip up the red lock under the
seat. Lift the seat slightly, and
recline it to one of the three
settings.
Be sure that lock is flipped
back down after changing
recline. It is recommended
that the highchair be used in
the upright position only by
children capable of sitting
upright unassisted.
Do not use large tray when
seat is in a recline position.
To Fold Highchair
Lay the highchair on the
floor as shown. Press in
the tabs on both leg
crossbraces as shown.
Then push the rear legs
down to fold the highchair.
10
Replacement Parts
Instructions for ordering highchair parts:
Complete form below. Your highchair model number
MUST be included on the form to ensure proper
replacement parts. Your model number can be found
on a sticker on the back of the footrest. Payment
must accompany your order.
Return the form below with payment to:
GRACO CHILDRENS PRODUCTS INC.
CUSTOMER SERVICE DEPARTMENT
P.O. BOX 100, MAIN STREET
ELVERSON, PA 19520
IF YOU NEED HELP
If you have any questions, please call toll-free:
1-800-345-4109
Model Number
(Must be filled in)
SHIP TO:
Name
Address
City, State, Zip
( )
Telephone
Parts List:
Large tray .....................................
Small tray .....................................
Seat ..............................................
Vinyl seat pad with tabs* ..............
Vinyl seat pad with pocket* ..........
Cloth seat pad (not reversible)* ...
Cloth seat pad (reversible)* .........
Plastic tube (L or R) .....................
Crossbrace tube ...........................
Foot top ........................................
Foot bottom ..................................
Seat belt .......................................
Hardware ......................................
* Only on certain models.
Price:**
$18.00
$14.00
$22.00
$12.00
$15.00
$18.00
$22.00
$ 8.00 (each)
$7.00
$ 5.00 (each)
$ 5.00 (each)
$5.00
$5.00
** Prices subject to change without
notice.
Check enclosed
(payable to Graco Childrens
Products Inc.)
Charge to credit card:
Visa
MasterCard
Discover
Account #:
Expiration date:
Signature:
Large tray
Small tray
Seat
Vinyl pad with tabs
Vinyl pad with pocket
Cloth pad (not reversible)
Cloth pad (reversible)
Plastic tube (L or R)
Crossbrace tube
Foot top
Foot bottom
Seat belt
Hardware
Push
tabs in
Push
rear
legs
down
To Adjust Height
DO NOT adjust
the highchair with your child
in it.
Place foot on base of rear legs.
Lift seat slightly by the handles
at rear of chair and press both
red latches. Slide the seat up or
down until it latches.
There are six possible height
settings. The highchair can be
used as a toddler chair by
adjusting to the lowest height
setting (which does NOT rest
on top of legs).
CHECK that both sides of
chair are latched at the same
height setting.
To Use Large Tray
Small tray
must be attached securely
to highchair before using
the large tray.
Place the large tray on the
armrests of the small tray. Pull
out the side handles under the
large tray. Put the tray in one
of the five adjustment posi-
tions, and release the side
handles.
CHECK that tray is securely
attached by pulling forward
on the tray.
Use either the side handles
or the front button to adjust
the position of the large tray.
DO NOT
force the tray against
your child. Keep your
childs hands and fingers
away from the tray when
adjusting the tray.
Tray may be removed from
highchair by using the side
handles.
Push on
front button
To Use Small Tray
Highchair can be used with
small tray alone, or with large
tray attached on top of small
tray.
Insert the tabs on the small
tray into the slots at the front
of the armrests. Push down on
the rear of the tray until both
latches at the sides snap onto
seat.
CHECK that small tray is
securely attached by pulling
up on the tray.
Tray may be removed from
highchair by pulling out the
side latches and lifting off tray.
Ta b
Ta b
Latches
11
Total:
Shipping
& handling: $5.00
6% sales tax
(PA only):
Total amount
due:
/