Milwaukee 2260-21 User manual

Category
Power tools
Type
User manual

This manual is also suitable for

OPERATOR’S MANUAL
Cat. No.
2260-21
M12™ 160x120 Thermal Imager



Safety Information ................................................................................................................................ 1
Introduction ............................................................................................................................................ 3
How to Use the Manuals ....................................................................................................................... 4
Obtaining Technical Support or Service ............................................................................................... 5
Unpacking the System........................................................................................................................... 6
Charging and Installing the Battery ....................................................................................................... 8
Installing the SD Memory Card.............................................................................................................. 8
Controls and Features ........................................................................................................................... 9
Battery Life and Power-Saving Features ............................................................................................. 13
Taking a Basic Thermal Picture ........................................................................................................... 14
Using the Built-In Visual Image Camera .............................................................................................. 16
Reviewing Saved Images .................................................................................................................... 16
Optimizing Thermal Images ................................................................................................................. 17
Manual Range and Auto Range .......................................................................................................... 19
Changing the Color Palette ................................................................................................................. 21
Changing the Settings ......................................................................................................................... 22
Specications ...................................................................................................................................... 23
Glossary .............................................................................................................................................. 25
M12 160x120 Thermal Imager Operator’s Manual
M12 160x120 Thermal Imager Operator's Manual 1



Failure to follow the warnings and instructions may result in electric shock, re and/or serious injury. This
OPERATOR’S MANUAL contains important safety and operating instructions for this Thermal Imager. Before using the Thermal Imager, read
this OPERATOR’S MANUAL, the M12 Battery Charger and Battery OPERATOR’S MANUAL, and all labels on the battery pack, charger and
Thermal Imager.
Avoid dangerous environments. Do not use in rain, snow, damp or wet locations. Do not use in the presence of explosive atmospheres (gaseous
fumes, dust or ammable materials) because sparks may be generated when inserting or removing battery pack, possibly causing re or explosion.

Recharge only with the charger specied by the manufacturer. A charger that is suitable for one type of battery pack may create a risk of re
when used with another battery pack.
Use power tools only with specically designated battery packs. Use of any other battery packs may create a risk of injury and re.
When battery pack is not in use, keep it away from other metal objects like paper clips, coins, keys, nails, screws, or other small metal
objects that can make a connection from one terminal to another. Shorting the battery terminals together may cause burns or a re.

Have your Thermal Imager serviced by a qualied repair person using only identical replacement parts. This will ensure that the safety of
the tool is maintained. MILWAUKEE Tool Company recommends service and calibration at a MILWAUKEE Service Center annually.
Do not disassemble. Incorrect reassembly may result in the risk of electric shock or re. If it is damaged, take it to a MILWAUKEE service facility.
Store in a cool, dry place. Do not store where temperatures may exceed 120 °F (50 °C) such as in direct sunlight, a vehicle or metal building
during the summer.
Do not remove or deface labels. Maintain labels and nameplates. These carry important information. If unreadable or missing, contact a
MILWAUKEE service facility for a free replacement.
2 M12 160x120 Thermal Imager Operator’s Manual
Federal Communications Commission WARNING: Changes or modications to this unit not expressly approved by the party responsible for compliance
could void the user’s authority to operate the equipment. This equipment has been tested and found to comply with the limits for a Class B digital
device, pursuant to Part 15 of the FCC Rules. These limits are designed to provide reasonable protection against harmful interference in a residential
installation. This equipment generates, uses and can radiate radio frequency energy and, if not installed and used in accordance with the instructions,
may cause harmful interference to radio communications. However, there is no guarantee that interference will not occur in a particular installation. If this
equipment does cause harmful interference to radio or television reception, which can be determined by turning the equipment off and on, the user is
encouraged to try to correct the interference by one or more of the following measures:
Reorient or relocate the receiving antenna.
Increase the separation between the equipment and receiver.
Connect the equipment into an outlet on a circuit different from that to which the receiver is connected.
Consult the dealer or an experienced radio/TV technician for help.
M12 160x120 Thermal Imager Operator's Manual 3
226
174.3˚F
98
Figure 1. Thermal Imager and a Thermal Image

Model 2260-21 M12™ 160x120 Thermal Imager is an
ultra-rugged, hand-held battery-powered tool that takes
thermal pictures, called “thermal images.” Thermal images
reveal different temperatures as different colors. A bright
color display shows an image of hot and cold spots and
temperature gradients in-between. The temperature of the
object in the center target is shown at the top of the thermal
image. Information about the temperature range and color
palette settings for the image are on the bottom of the
image. See Figure 1.
You can optionally load the thermal images onto a
computer to prepare a report later. The Thermal Imager
and its supplied PC software satisfy the requirements
of industrial electricians and technicians new to thermal
imaging, as well as expert professional thermographers.
MILWAUKEE Thermal Imager Report Software is included
on the CD (Compact Disk). Instructions for using the
software are in the MILWAUKEE Thermal Imager Report
Software Manualwhich is on the supplied CD.
With the software, you can organize, choose, annotate
and adjust images and present results in a report. In your
report, you can write recommendations and add your
company logo.
4 M12 160x120 Thermal Imager Operator’s Manual

All of the manuals needed to safely and properly operate
the Thermal Imager are available in Adobe
®
PDF (Portable
Document Format) on the CD. You can easily load these
PDF documents from the CD or from the MILWAUKEE
website onto your computer. There, you read them on the
computer screen, search for topics or keywords, or print
pages from them.












The following manuals are supplied with the Thermal
Imager:
 M12 160x120 Thermal Imager Operator’s Manual:
this explains how to use the Thermal Imager. Thermal
Imager Specications and a Glossary of Terms are
located at the back of this manual.
 Thermal Imager Report Software Manual: this
explains how to use MILWAUKEE Thermal Imager
Report Software to produce a report. You load this
manual onto your computer from the product CD when
you install the software. It opens for viewing whenever
you press F1 or “Help” while using the software.
 M12 Battery Charger and Battery Operator’s
Manual: this is a printed booklet that you should read
and understand before using the product. It contains
important warnings and information for proper battery
handling and charging. Improper usage, handling or
charging of the batteries can cause risk of re or injury.
You must rst charge the battery before you use the
Thermal Imager.
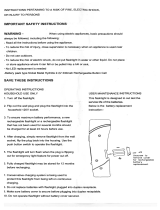
 Warranty and Safety Information: this is a printed
booklet with the Warranty, safety information from
the Operator’s Manuals for the battery, charger and
Thermal Imager and an explanation of symbols on the
product and in the documentation.
 Reference Card: this is a printed, folded, pocket-sized,
picture-based guide. It gives you visual step-by-step
instructions for basic workow using with the Thermal
Imager system.
M12 160x120 Thermal Imager Operator's Manual 5

Visit www.milwaukeetool.com online and click on Service.
There you can search for the nearest factory authorized
Service Center. You can also nd how to contact someone
at MILWAUKEE by email, telephone, or postal mail.





The mailing address for the main MILWAUKEE Service
Center is:
MILWAUKEE Service Center
13145 West Lisbon Rd.
Brookeld, WI 53003
USA
6 M12 160x120 Thermal Imager Operator’s Manual

The complete system comes packed in a rugged portable hard case. Figure 2 and Table 1 identify each item. If anything is
missing, contact the point of purchase.
Figure 2. Identifying Items in the Hard Case
2
1
4
5
3
6
SD
SD CARD READER
USB 2.0
7
8
10
9
11
PRODUCT
CD
Reference
Card
WARRANTY
AND SAFETY
INFORMATION
Cat. No.
2260-21
M12™ 160x120 Thermal Imager
TO REDUCE THE RISK OF INJURY, USER MUST READ AND
UNDERSTAND THIS OPERATOR’S MANUAL.
OPERATOR'S MANUAL
MANUEL de L'UTILISATEUR
MANUAL del OPERADOR
12V Li-ION BATTERY CHARGERS
12V Li-ION BATTERY
CHARGEURS AU LITHIUM-ION 12V
BATTERIE AU LITHIUM-ION 12V
CARGADORS PARA BATERÍAS DE IONES DE LITIO DE 12V
BATERÍA DE IONES DE LITIO DE 12V
New batteries must be charged before
rst use.
Les batteries neuves doivent être
chargées avant leur utilisation initiale.
Las baterías nuevas se deben cargar
antes de usarlas por primera vez.
Cat. No.
No de Cat.
48-59-2401
2510-20
Cat. No.
No de Cat.
48-11-2401
See bottom of charger for CAUTION markings
Voir le MISE EN GARDE le fond du chargeur
Vea el fondo del cargador para los mensajes de PRECAUCION
TO REDUCE THE RISK OF INJURY, USER MUST READ AND UNDERSTAND OPERATOR'S
MANUAL.
AFIN DE RÉDUIRE LE RISQUE DE BLESSURES, L'UTILISATEUR DOIT LIRE ET BIEN
COMPRENDRE LE MANUEL DE L'UTILISATEUR.
PARA REDUCIR EL RIESGO DE LESIONES, EL USUARIO DEBE LEER Y ENTENDER EL
MANUAL DEL OPERADOR.
M12 160x120 Thermal Imager Operator's Manual 7
No. Item Model or Part Number
1 Hard Carry Case 42-55-2265
2 Reference Card 58-22-0240
3 Product CD with software and manuals in PDF format 58-99-0015
4 Warranty and Safety Information booklet 22-74-3005
5 M12 160 x120 Thermal Imager 2260-20
6 M12 Battery Charger and Battery Operator’s Manual 58-14-2402
7 SD Memory Card Reader with USB (Universal Serial Bus) plug for attaching to a PC
to transfer images
22-80-0110
8 M12 Rechargeable Li-Ion Battery 48-11-2401
9 Mini USB to Type A USB cable to connect the Thermal Imager to a PC to transfer
images
42-44-0205
10 M12 Li-Ion Battery Charger 48-59-2401
11 Statement of Calibration 58-22-0190
Table 1. Identifying Items in the Hard Case
8 M12 160x120 Thermal Imager Operator’s Manual
3. To remove it, press it in gently and it releases so you
can pull it out.
4. If an SD card is not installed, insert the SD card with
the label facing the front of the Thermal Imager (the
side with the lens). It ts only one way. Do not use
excessive force.
5. Gently press it until the SD card clicks and locks in
place. Press it again to release it. Leave it locked into
place and close the rubber dust and water cover.
Figure 3. Installing the SD Card

Read and understand the warnings and instructions in the
Battery Charger Operator’s Manual. Charge the battery
until the green indicator on the Battery Charger appears. It
takes approximately 30 minutes to reach a full charge with
the supplied M12 battery. Any MILWAUKEE M12 Series
battery will work with the Thermal Imager.
To avoid damage or injury, use only a genuine
MILWAUKEE M12 battery and charger, and follow the
charging and handling instructions supplied with the Battery
Charger. Snap the battery into place until it locks into the
Thermal Imager’s hand grip as shown in Figure 4.

The SD card is installed in the Thermal Imager at the
factory. The Thermal Imager does not store any images
without one installed.
To remove and re-install the SD card, refer to Figure 3 and
proceed as follows:
1. Flip open the rubber dust and water cover toward the
front of the Thermal Imager.
2. If an SD card is already installed, you will see it in the
upper half of the area under the rubber cover.
M12 160x120 Thermal Imager Operator's Manual 9

Figure 4 and Table 2 identify the location and explain the function of the buttons, controls and features. See Table 3 for a
list of all the symbols printed on the Thermal Imager and the meaning of each. Figure 5 and Table 3 explain the meaning
of symbols and information on the display when it is showing a thermal image.
Figure 4. Locating the Controls and Features
15
12
16 17
5
6 7
3
4
2
1
9
8
10
14
13 18
11
10 M12 160x120 Thermal Imager Operator’s Manual
Table 2. Controls and Features
No. Name Function
1 Hand grip Grip this when you use the Thermal Imager. The hand grip also holds the removable M12 rechargeable
battery.
2 Mini USB socket Plug the USB cable into this socket when you want to connect the Thermal Imager to a computer. This
is one way to transfer images to a computer.
3 Media door A rubber-ap protective cover that keeps dust and moisture out of the USB socket and SD memory card
socket when you are not using these sockets.
4 SD card socket Push the SD memory card in to install it. Push it again to release it. It ts only one way. Do not use
excessive force.
5 Thermal imager
focus ring
Turn in small increments and wait for the thermal image to refresh on the display. This focus ring does
not affect the visual image.
6 Thermal imager
lens cap
To open for use, squeeze the side release tabs, lift the lens cap up and snap it in place on top of the
Thermal Imager. To protect the lens, replace the lens cap when you are not using the Thermal Imager.
7 Thermal imager
lens
Focuses incoming infrared (IR) radiation on to the IR sensor to make a thermal image. You manually
focus this lens for the sharpest thermal image on the display.
8 Visual digital
camera lens
There is no need for any focus adjustment. All visual images are xed-focus.
9 LED ashlight
Press the
button to turn on and off the LED ashlight. The LED ashlight illuminates the area you
are photographing. It is used only to improve images from the built-in visual digital camera and to help
you see in a dark area. The LED ashlight does not affect thermal images in any way.
10 Trigger Squeeze the trigger to take a picture. This takes both a thermal and visual image. Squeeze it again to
save the image. Alternatively, choose [CANCEL] from the keypad to discard the image.
11 Battery Insert and push until it locks in place. To remove, squeeze the sides to release the battery. Any
MILWAUKEE M12 series battery is compatible.
12 Display This is the color screen for viewing live or stored images and for making choices in the Setup Menu.
M12 160x120 Thermal Imager Operator's Manual 11
No. Name Function
13
(Toggle button)
Press to toggle between thermal image display and visual image display. The toggle button works
in both live view and image review.
14
(Back button) Press
to revert to the most recent operating condition.
15, 16
This part of the keypad has up, down, left and right cursor movement buttons for selecting items in
menus and selecting images in image review mode. The center button turns the power on or off, opens
the Setup Menu, or conrms an action such as CANCEL or SAVE or a menu selection.
17
(LED
ashlight button)
This button turns the LED ashlight on and off. The LED ashlight illuminates the subject area for the
visual digital camera and for the user. The default setting is off.
18
(Review
button)
Calls up stored images for reviewing on the display. Press
to return to live operation.
Table 3. Symbology
Symbol Meaning
Read the Operator’s Manual.
Danger, Warning, or Caution - Consult the
operators manual for additional safety information.
Battery symbol
Symbol Meaning
European Conformity Mark
Do not dispose of this product as unsorted
municipal waste.
Table 2. Controls and Features (continued)
12 M12 160x120 Thermal Imager Operator’s Manual
Figure 5. Elements of the Thermal Image Display
226
174.3˚F
98
7
6
5
8
41
2
3
Table 4. Explanation of Display Elements
1 LED ashlight is on
2 SD card is not installed (you cannot save images)
3 Target temperature
4 Target
5
Battery charge indicator (more white = more
charge remaining)
6 Upper limit of range
7 Picture of color palette in use ("Iron" is shown)
8 Lower limit of range
M12 160x120 Thermal Imager Operator's Manual 13
LOW BATTERY
100%
75%
50%
25%
<10%
Figure 6. Battery Fuel Gauge Levels and Imminent
Shutdown Warning

To preserve battery life, the Thermal Imager goes into
Sleep Mode after 5 minutes of no activity. Sleep Mode
maintains a ready-to-go, warmed-up condition, but uses a
fraction of normal operating battery current. After another
15 minutes of no activity, the Thermal Imager turns itself
completely off. Although you can turn off the Thermal
Imager with the button, you never have to because of its
auto power-off feature.
Using the supplied M12 battery, continuous operating
time is at least 3 hours with the LED ashlight off. If you
are using the Thermal Imager intermittently, Sleep Mode
extends operating time to an entire work day or longer.
A Fuel Gauge on the Thermal Imager display shows the
capacity remaining in the battery. See Figure 6. When 10%
of charge remains, the Fuel Gauge reads empty and blinks
on and off. This is the time to replace the battery with a
charged one, or charge the battery as soon as you can.
When no charge remains, a Low-Battery Message appears
on the display for 3 seconds. Then the Thermal Imager
shuts itself off.
14 M12 160x120 Thermal Imager Operator’s Manual

Proceed as follows to capture and save a basic image set:





1. Press and hold (center button on the directional
keypad) for 2 to 3 seconds until you see activity on the
display.
2. The Thermal Imager displays progress messages
about Sensor Calibration during warm-up. From Sleep
Mode, warm-up is almost instantaneous. Until warm-up
is complete, button presses are ignored.
3. If the time and date are not already set, the Settings
Menu appears so you can set these.
Figure 7 shows TIME selected for setting. To set the
time, press the
button to open the time setting
menu. Use the arrow keys to set the current time, then
press the button to return to SETTINGS. Press
twice to select DATE, then set the date the same way
you set the time. Once any settings are changed, the
new settings stay in memory when the power is turned
off.
SETTINGS
TIME FORMAT
EMISSIVITY
SCALE
DATE FORMAT
DATE
12 HR
0.95
˚F
MM/DD/YYYY
09/29/2011
TIME
10:45PM
BRIGHTNESS
LANGUAGE
ENGLISH
ERASE SD MEMORY CARD
Figure 7. Setting Time
4. Open the lens cap by pinching the buttons on the sides
of the lens cap. Flip it open until it snaps in place on top
of the Thermal Imager.
5. Observe the live thermal image on the display as
shown in Figure 8. Rotate the focus ring on the thermal
sensor lens for maximum sharpness. Make small focus
adjustments and wait for the image to settle before
making another adjustment. Focusing has a different
feel than it does with visual image cameras.
M12 160x120 Thermal Imager Operator's Manual 15
230
138.9˚F
95
CANCEL
SAVE
Figure 9. SAVE or CANCEL a New Image
7. To write the image to SD card, press the
button
on the arrow keypad or pull the trigger again. Or, to
discard the image, press the arrow button to highlight
CANCEL, then press the
button.






LOW BATTERY
LOW BATTERY
In the live thermal image in Figure 8, the 411.3 °F
reading at the top of the display is the temperature
inside the center target. The bottom of the display
shows the color palette over the temperature span
(in this case, 370 °F to 446 °F). Span is adjusted
automatically in auto-range mode (default setting). This
manual explains how to use manual range settings
under “Optimizing Thermal Images.”
122
120.6˚F
86
MANUALAUTO
Figure 8. Live Thermal Image
6. When the display shows the object or scene framed
the way you want it, pull the trigger to take a thermal
picture. The display then presents you with choices to
SAVE or CANCEL the new image. See Figure 9.
16 M12 160x120 Thermal Imager Operator’s Manual
Figure 10. Live Visual Camera View
Press
again to return to the thermal image view.

Every time you take a thermal picture, the Thermal Imager
captures a visual image at the same time. When you save
a thermal image, the Thermal Imager saves the visual
image that goes with it as well. Just like with thermal
images, you can see live visual images on the display.
Press the
button to switch between thermal and visual
images.
Figure 10 shows a visual image as it would appear on
the display. This is the companion to the thermal image in
Figure 8. There is no temperature data associated with a
visual image. Visual images are to help you identify objects
in thermal images.
The visual image camera has its own lens. It is xed-focus.
(No focus adjustment is necessary.) The visual image
camera lens is a small rectangular window below the lens,
forward of and above the trigger.





M12 160x120 Thermal Imager Operator's Manual 17
• Auto or Manual Range (default is Auto) – Gives you
control over the lowest and highest temperature.
• Span (default is the Imager’s Range, or widest
temperature range from lowest to highest temperature
that the Imager can detect). A custom span setting lets
you narrow the range of temperatures. This reveals
small temperature variations as different colors. The
Span setting is like reducing the scale in a graph,
magnifying small variations for easier viewing.
• Level (no default) – Level is always the center point of
the Span or Range.
• Palette (default is “IRON”) – The Palette is the color
scheme for the display and saved thermal images.

Proceed as follows to review or “play back” saved thermal
and visual images:
1. Press the button. This displays the most recent
thermal image. At any time during review, you can
press
to see its companion visual image.
2. Press (directional arrow on the keypad) to continue
reviewing the next older image. Press to move to the
next more recent images.
3. To return to live view, press .

Once you become familiar with basic operation, you’re
ready to discover the image enhancement and renement
you can achieve using custom settings. The custom setting
that has the most impact on temperature reading accuracy
is Emissivity. If you select only one custom setting, this is
the one to change. All the custom settings that affect the
accuracy of your data are:
• Emissivity (default is 0.95 - rubber, asphalt, concrete,
black electrical tape) – Adjusts the Imager to
compensate for different target surface materials.
18 M12 160x120 Thermal Imager Operator’s Manual
Emissivity is the ratio of a target surface’s infrared output
(radiance) to that of a blackbody at the same temperature.
A “blackbody” is a theoretical perfect radiator of infrared
radiation (IR).
What this means is you can set the sensitivity of the
Thermal Imager to determine the true temperature of an
object, no matter what its IR radiation characteristics are.
The poorest radiators (surfaces with the lowest emissivity
ratios) need the most correction. These materials are things
like shiny metal and glass.
When you have a low-emissivity surface that you need
a very accurate temperature reading from, placing black
electrical tape or even painting it with at-black paint is
very effective. Black electrical tape and at-black painted
surfaces have an emissivity ratio of 0.95.






Emissivity
Press , select SETUP, then press to get the Setup
Menu as shown in Figure 7. Press and as necessary
to select “EMISSIVITY.” This brings up the Emissivity Menu
as shown in Figure 11.
0.95 DEFAULT
0.30 ALUMINUM
0.30 CUSTOM
EMISSIVITY
MATERIAL
Figure 11. Emissivity Menu
This setting tells the Thermal Imager what surface
material it is measuring. This is important, because
setting the right emissivity has a signicant effect on the
accuracy of temperature readings. See Table 5 for a list
of the materials in the Thermal Imager Emissivity menu,
and their corresponding emissivity ratios. You can also
select “CUSTOM” in the emissivity menu, and select any
emissivity value. In Figure 11, “CUSTOM” shows “0.30,” but
when you select CUSTOM, you can choose any value.
  • Page 1 1
  • Page 2 2
  • Page 3 3
  • Page 4 4
  • Page 5 5
  • Page 6 6
  • Page 7 7
  • Page 8 8
  • Page 9 9
  • Page 10 10
  • Page 11 11
  • Page 12 12
  • Page 13 13
  • Page 14 14
  • Page 15 15
  • Page 16 16
  • Page 17 17
  • Page 18 18
  • Page 19 19
  • Page 20 20
  • Page 21 21
  • Page 22 22
  • Page 23 23
  • Page 24 24
  • Page 25 25
  • Page 26 26
  • Page 27 27
  • Page 28 28
  • Page 29 29
  • Page 30 30
  • Page 31 31
  • Page 32 32
  • Page 33 33
  • Page 34 34
  • Page 35 35
  • Page 36 36

Milwaukee 2260-21 User manual

Category
Power tools
Type
User manual
This manual is also suitable for

Ask a question and I''ll find the answer in the document

Finding information in a document is now easier with AI