ProForm PFIVEX17016 Owner's manual
- Type
- Owner's manual
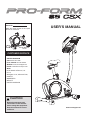
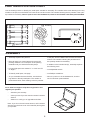
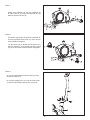
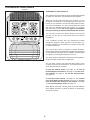
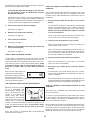
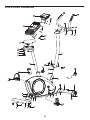
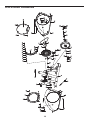
The ProForm PFIVEX17016 exercise bike is designed to provide a challenging and effective workout for users of all fitness levels. With its sturdy steel frame and adjustable seat, the PFIVEX17016 can accommodate users of various heights and weights. The bike's console features a large, easy-to-read display that tracks your progress, including speed, distance, time, and calories burned. Additionally, the PFIVEX17016 is equipped with a heart rate monitor to help you stay in your target heart rate zone.
The ProForm PFIVEX17016 exercise bike is designed to provide a challenging and effective workout for users of all fitness levels. With its sturdy steel frame and adjustable seat, the PFIVEX17016 can accommodate users of various heights and weights. The bike's console features a large, easy-to-read display that tracks your progress, including speed, distance, time, and calories burned. Additionally, the PFIVEX17016 is equipped with a heart rate monitor to help you stay in your target heart rate zone.


-
 1
1
-
 2
2
-
 3
3
-
 4
4
-
 5
5
-
 6
6
-
 7
7
-
 8
8
-
 9
9
-
 10
10
-
 11
11
-
 12
12
-
 13
13
-
 14
14
-
 15
15
-
 16
16
-
 17
17
-
 18
18
-
 19
19
-
 20
20


ProForm PFIVEX17016 Owner's manual
- Type
- Owner's manual
The ProForm PFIVEX17016 exercise bike is designed to provide a challenging and effective workout for users of all fitness levels. With its sturdy steel frame and adjustable seat, the PFIVEX17016 can accommodate users of various heights and weights. The bike's console features a large, easy-to-read display that tracks your progress, including speed, distance, time, and calories burned. Additionally, the PFIVEX17016 is equipped with a heart rate monitor to help you stay in your target heart rate zone.
Ask a question and I''ll find the answer in the document
Finding information in a document is now easier with AI
Related papers
-
ProForm PFEVEX72916 Owner's manual
-
-
-
-
-
-
-
-
-
Other documents
-
Weslo WLIVEX 30017.0 User manual
-
NordicTrack Commercial VR21 User manual
-
-
Pro-Form 320 CSX+ User manual
-
FreeMotion VMEL81918.0 User manual
-
-
-
-
-