Page is loading ...

Instructions for Installation & Use - Series No. 8100/A/2010
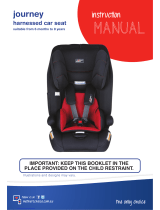
IMPORTANT: KEEP THIS BOOKLET IN THE PLACE PROVIDED ON THE CHILD RESTRAINT

Instructions for Installation & Use - Series No. 8100/A/2010Instructions for Installation & Use - Series No. 8100/A/2010
INTRODUCTION
INDEX
23
The Maxi Rider AHR™Easy Adjust™is suitable for toddlers and older children as a convertible booster
seat. This child restraint is tted with our exclusive VERSATETHER™ Catch that allows it to use the
Safe-n-Sound™Protecta PLUS™ child harness in booster seat mode for older children.
To be used in forward-facing position with in-built harness by children whose shoulders are above the
lower shoulder height marker (approximately 6 months of age) until their shoulders reach the middle
shoulder height marker (approximately 4 years of age). Then to be used with either a lap-sash seatbelt
or an add-on accessory child harness until their shoulders reach the upper shoulder height marker
(approximately 6 to 8 years of age).
Continue to use this child restraint until the child reaches this limit. Children are safest in a booster seat
until their shoulders reach the upper shoulder height marker of the booster seat.
Do not use this restraint until child’s shoulders are above the lower shoulder height marker.
Just using a seatbelt is not recommended for children that have outgrown this seat. Use a larger
booster.
WHEN USED WITH IN-BUILT HARNESS - TO BE USED WITH A LAP-SASH OR LAP ONLY SEAT BELT IN
THE BACK OF MOST CARS WITH FORWARD FACING SEATS.
WHEN USED AS A BOOSTER SEAT - THIS RESTRAINT MUST BE USED IN CARS WITH FORWARD
FACING SEATS WITH A LAP-SASH SEAT BELT OR WITH A SEAT BELT AND CHILD HARNESS. When
using a child harness with the seat it may be used in seating positions with either a lap or lap-sash
seat belt.
Only the Safe-n-Sound™Protecta PLUS™Harness Series 220/2010 or Babylove EzyGo Harness™
Series BL220/2010 Child Harnesses are suitable for use with this product.
No child restraint can guarantee absolute protection from injury in every crash. However, to ensure
that your child gets all the protection designed into the restraint PLEASE READ AND FOLLOW THESE
INSTRUCTIONS EXACTLY and use only Safe-n-Sound recommended parts and accessories.
Carefully read all the instructions for installation in this book. If in doubt about the method of instal-
lation, consult Britax childcare or agent or a child restraint tting station authorized by a relevant
transport authority or, in New Zealand, the agent for the vehicle or authorized child restraint tter.
THIS RESTRAINT MUST BE ATTACHED TO A CHILD RESTRAINT ANCHORAGE POINT IN THE CAR.
REFER TO CAR OWNER'S HANDBOOK FOR LOCATION OF ANCHORAGE POINTS. REFER TO A CHILD
RESTRAINT FITTING STATION IF NO ANCHORAGE POINTS ARE IN THE MOTOR CAR. Refer to pages
64 to 67.
INTRODUCTION
WARNINGS
SHOULDER HEIGHT MARKERS AND A GROWING CHILD
SHOULDER HEIGHT MARKERS
SHOULDER HEIGHT MARKERS AND THE NEXT SEAT
SPECIAL FEATURES - TODDLER USE (WITH IN-BUILT HARNESS)
SUITABLE FOR USE
HOW TO SET-UP
HOW TO INSTALL
HOW TO USE
SPECIAL FEATURES - CHILD USE (BOOSTER SEAT MODE)
SUITABLE FOR USE
HOW TO SET-UP
HOW TO USE
HOW TO INSTALL WITH A CHILD HARNESS
RESTORING THE RESTRAINT
CARE AND MAINTENANCE
ACCESSORIES & FEATURES
INSTALLATION OF CAR ANCHOR FITTING
IN CASE OF ACCIDENT
3
Page
9
8
4
10
6
12
13
18
23
25
39
27
28
33
60
54
53
69
64
Always store the instruction book in the pocket provided on the side or the back of the cover.

Instructions for Installation & Use - Series No. 8100/A/2010Instructions for Installation & Use - Series No. 8100/A/2010
WHEN USED WITH THE 'IN-BUILT' HARNESS
• Fit the restraint rmly to the car seat.
• Fit the harness rmly to the child.
• A loose restraint or harness is dangerous.
• When used in this mode the restraint must be used in conjunction with a lap or lap-sash seat belt.
WHEN USED AS A BOOSTER SEAT (with or without a separately supplied Child Harness)
• DO NOT USE WITH JUST A LAP BELT. You must use with a lap-sash belt or with a seat belt and
child harness.
• The lap part of the seat belt must be rmly across the thighs and the sash straps tted diagonally
across the chest and on the shoulder.
• If used with a child harness, the lap strap of the seat belt must be adjusted rmly rst and then the
harness, so that the lap strap is not lifted off the child’s lap when the harness is adjusted.
• Do not use with the integral harness when in booster mode. This built in harness must be stored.
• Use only with a lap-sash seat belt or with an add-on accessory child harness and either a lap or
lap-sash seat belt.
GENERAL WARNINGS - also see warnings on pages 12 and 27.
• Supervision of children is needed because they may be able to undo buckles and adjusters.
• Use the restraint exactly as shown in the instructions.
• DO NOT LEAVE CHILDREN UNATTENDED IN THE CAR.
• Do not alter or modify this restraint.
• Repairs must only be done by the manufacturer or agent. Use only recommended parts and
accessories.
• Do not allow the restraint to come into contact with polishes, oils, bleach and other chemicals.
• Destroy the restraint if it has been in a severe crash, even if no damage is visible. See page 69.
• DO NOT USE THIS RESTRAINT WITHOUT THE COVER.
• Regularly check the restraint components, straps and other tments for correct function and
condition. Seek prompt repair.
• IF AN AIRBAG IS FITTED IN THE SEATING POSITION WHERE THE CHILD RESTRAINT IS TO BE
FITTED, FOLLOW THE VEHICLE MANUFACTURERS WARNINGS AND INSTRUCTIONS.
• Straps may be damaged by unsecured cargo in a collision. Secure or remove hazardous cargo
before using this restraint. Hatch-back or Wagon: Do not use the child restraint where this strap
may fall into a split in the seat back. Always attach hook and remove slack.
• Protect all webbing from abrasion and cutting by sharp corners and edges.
• The restraint should not be purchased or sold as a second hand item. It is recommended not to use
child restraints older than 10 years as the protection in an accident may be reduced.
• This restraint must be used in conjunction with a lap or lap-sash seat belt.
• THIS RESTRAINT IS NOT SUITABLE FOR USE WHERE THE ANCHORAGE STRAP MAY FALL INTO A
SPLIT IN THE SEAT BACK (E.G. HATCHBACK OR WAGON).
FOR BOOSTER SEAT MODE:
• Seat belt extenders should not be used if the seat belt is not long enough to t around the child. If a
seat belt extender is used then the seat belt buckle must not be in contact with the child.
• THE BOOSTER SEAT MODE MAY NOT FIT IN RECLINE POSITION, IN SOME VEHICLES WITH
SHORT SEATBELTS.
FOR 'IN-BUILT' HARNESS:
• Seat belt extenders should not be used if the seat belt is not long enough to secure the child
restraint. If they are used then the buckle tongue must not enter the seating zone.
4 5
DO NOT LEAVE CHILDREN UNATTENDED IN THE CAR.
:

Instructions for Installation & Use - Series No. 8100/A/2010Instructions for Installation & Use - Series No. 8100/A/2010
67
Young Toddler
SHOULDER HEIGHT MARKERS
AND A GROWING CHILD
SHOULDER HEIGHT MARKERS
AND A GROWING CHILD
Older Toddler
Marker B
Front of Vehicle
Older Child
Shoulders must not be below the lowest marker.
Use the in-built harness.
From approximately 6 months of age.
However, Britax recommends that you keep your
child in a rearward facing restraint for as long as
possible (up to approx 12 months).
Shoulder height markers B and C are visible with the headrest in the upper positions.
AS A BOOSTER SEAT with
Lap sash seat belt
To approximately 6 - 8 years of age.
AS A BOOSTER SEAT with
Child Harness and Seat belt
To approximately 6 - 8 years of age.
Shoulders above middle marker but below upper shoulder height marker.
When shoulders are in-line with middle marker,
Change to Booster Seat mode.
To approximately 4 years of age.
Change to the next type of booster seat or child restraint when shoulders reach
the upper shoulder height marker when the headrest is in the highest position.
A child harness must be used if the car’s seating position is tted with a lap
only seat belt. If a child no longer physically ts in the seat then move to the
next form of child restraint.
Marker A
Marker C
Marker B
Marker A
Marker B
Marker C
Marker B
Marker C

Instructions for Installation & Use - Series No. 8100/A/2010Instructions for Installation & Use - Series No. 8100/A/2010
IMPORTANT: Follow this advice.
9
8
Marker A Smaller Toddler - LOWER SHOULDER HEIGHT MARKER
Marker B Larger Toddler - MIDDLE SHOULDER HEIGHT MARKER
SHOULDER HEIGHT MARKERS
AND THE NEXT SEAT
Using the in-built harness, the
child’s shoulders must be in-line
with this marker or above this
marker. If the child’s shoulders
are below then the child should
remain in their previous child
restraint. Approximately 6
months.
When the child’s shoulders
reach this marker, convert the
child restraint to booster seat
mode and use either a lap-sash
seat belt or a child harness and
lap-sash seat belt or lap only
seat belt. Approximately 4 years.
When the child’s shoulders
reach this upper marker, or the
child no longer ts in the child
restraint, approximately 6 to 8
years of age, then the child must
be moved to the next form of
child restraint, see next page.
Marker C Larger Child - UPPER SHOULDER HEIGHT MARKER
Or you can use a Child
Harness and lap seat belt. Lap
seat belts can be dangerous
without a Child Harness.
Next type of restraint that can be used in the car for your child.
When your child has outgrown the seat, you can then either use:
Just the car's lap-sash
seatbelt.
Or you can use a booster
seat suitable for children
up to 8-10 years of age. An
accessory Child Harness may
be used.
SHOULDER HEIGHT MARKERS

Instructions for Installation & Use - Series No. 8100/A/2010Instructions for Installation & Use - Series No. 8100/A/201010 11
SPECIAL FEATURES - TODDLER USE SPECIAL FEATURES - TODDLER USE
16. Car’s lap-sash seat belt or lap belt
17. Car's Anchor Fitting
18. Upper Anchorage Strap Adjuster
19. Upper Anchorage Storage Band
20. Adjustable Upper Anchorage Strap
21. Attachment Clip
1. AHR Easy Adjust Headrest Lever
2. Headrest slots
3. Fully adjustable 6 point harness
4. Armrests (if tted)
5. Red seatbelt path labels (Booster
Seat)(1 each side)
6. Recline Foot in upright position
7. Cup Holder 1 each side (if tted)
8. Harness Adjustment Strap
9. Harness Adjustment Button
10. Padded cover for comfort
11. Quick release harness
Buckle (Red button)
12. Padded insert (if tted)
13. Shoulder Pads (if tted)
14. Shoulder Height Markers
15. Adjustable Headrest
To be used only in a forward-facing position for a child approximately 6 months of age up to
approximately 4 years of age using the in-built harness.
Harness Tongues
Harness
Buckle
2
1
3
3
5
6
6
7
4
8
9
12
10
15
14
13
18
20
21
17
16
11
NOTE: Not all features are supplied on some models. "If tted" is used to indicate some of the
features that may not be on the seat supplied.
TODDLER USE
(WITH IN-BUILT HARNESS)
TODDLER USE
(WITH IN-BUILT HARNESS)
19

Instructions for Installation & Use - Series No. 8100/A/2010Instructions for Installation & Use - Series No. 8100/A/2010
12 13
INSTALLATION AND USE OF RESTRAINT
For Toddlers who have reached the shoulder height limit on their infant restraint refer to pages 10-24.
For Children who have reached the shoulder height marker and need to use a booster seat refer to
Pages 25-52.
HOW TO SET-UP
TO BE USED WITH A LAP SASH OR LAP ONLY SEAT BELT IN THE BACK OF MOST CARS WITH
FORWARD-FACING SEATS.
To be used in forward-facing position by children whose shoulders are above the lower shoulder
height marker (approximately 6 months of age) until their shoulders reach the upper shoulder height
marker (approximately 4 years of age).
Continue to use this infant restraint until the child reaches this limit.
Do not use this restraint until the child’s shoulders are above the lower shoulder height marker.
Infants are at risk of serious injury if they face forward too early.
Children are at risk of serious injury if they move to booster seats too early.
The child should not sit in this forward facing child restraint until their neck muscles are able to
support their head. Britax recommends that you keep your child in a rearward facing restraint for as
long as possible (up to approx 12 months).
Regional Road Rules may prohibit the use of this restraint in the front seat until the child is 4 years of
age. Check your Regional Rules for exemptions.
• Fit the restraint rmly to the car seat and then t the harness rmly to the child.
• A loose restraint or harness is dangerous.
• Do not use in a front seat, unless it has a child restraint anchorage point i.e.: utilities.
• Do not use the restraint without the Upper Anchorage Strap correctly attached.
• Do not use on any vehicle seat which faces sideways or rearwards.
• WHERE AN AIRBAG IS FITTED IN THE SEATING POSITION WHERE THE CHILD RESTRAINT IS TO
BE FITTED, FOLLOW THE VEHICLE MANUFACTURERS WARNINGS AND INSTRUCTIONS.
• Always use lap or lap-sash seat belt and upper anchorage strap to attach the child restraint to the
vehicle seat.
• Ensure that the SLIDEGUARD™ Converter is stored in the recess under the cover when the seat is
used in Toddler mode, to avoid injury or discomfort.
SUITABLE FOR USE
TODDLER USE
(WITH IN-BUILT HARNESS)
TODDLER USE
(WITH IN-BUILT HARNESS)
UPPER ANCHORAGE
Refer to your vehicle owner’s manual for
the location of the anchor tting in the car. If
the vehicle is not tted with a child restraint
anchor tting then refer to page 64 for the
installation of the anchor tting provided with
this child restraint.
Attachment Clip Car's Anchor
Fitting

Instructions for Installation & Use - Series No. 8100/A/2010Instructions for Installation & Use - Series No. 8100/A/2010
NOTE: If child’s shoulders touch the headrest side wings,
raise the headrest to the next headrest position.
NOTE: This child restraint does not require the straps to
be disconnected to adjust their height, only the headrest
needs to be moved to adjust the shoulder strap positions.
14
HOW TO SET-UP
HOW TO SET-UP
15
Gently lift the
lever at the
top of the
headrest then
pull up or
push down
D. Release AHR Easy Adjust Headrest Lever
so that it locks into position. Ensure
that it has locked in position by gently
pushing down on it.
E. If the headrest is adjusted with the
child in the seat, always check that the
headrest cover has not bunched up
behind child’s back.
ADJUSTING SHOULDER HARNESS STRAPS HEIGHT
Correct tment of the harness is very important as it restrains
the child in the restraint. The harness must t rmly around the
upper torso of the child and be positioned so as to leave the
child’s arms and legs free.
1. Harness shoulder slots in headrest
2. AHR Easy Adjust Headrest lever
3. Shoulder harness straps
4. Harness tongues & buckle
5. Lap strap slots
6. Crotch strap slots
7. Harness adjustment strap
8. Shoulder Height Markers
1
33
2
4
55
66
8
7
The shoulder straps must be in the slots which are nearest to
the child’s shoulders, but not more than 25mm below the child's
shoulders. If shoulders are above the middle shoulder height marker
then the child is too large for toddler use with the in-built harness and
the restraint must then be converted for child use as a booster seat.
(Booster Seat Mode - see pages 25 onwards).
25MM
TODDLER USE
(WITH IN-BUILT HARNESS)
TODDLER USE
(WITH IN-BUILT HARNESS)
NOTE: For comfort ensure the bottom
edges of the headrest are not contacting
the child’s shoulders.
ADJUSTING AHR EASY ADJUST HEADREST AND
HARNESS STRAP HEIGHT
A. Loosen the harness straps before adjusting the headrest.
B. You do not need to remove the restraint from the vehicle to
adjust the harness or headrest positions. Small adjustments
maybe done with the child in the seat, the child will need to
lean forward to allow the headrest to be adjusted.
C. To adjust the headrest, gently lift the lever at the top of the
headrest then pull up or push down so that the shoulder
strap slots are level with or slightly above your child’s
shoulders. If the headrest is just above the shoulders then
the harness level will be correct.
AHR Easy Adjust
Headrest lever

Instructions for Installation & Use - Series No. 8100/A/2010Instructions for Installation & Use - Series No. 8100/A/2010
16
HOW TO SET-UP
HOW TO SET-UP
17
You must adjust the crotch strap to the correct length for your child before installing the restraint
as it cannot be adjusted in the car. The crotch strap should only be extended if the harness
tongues are located low against your child's legs, thus creating discomfort.
Always return the crotch strap to its correct length when using the seat with a smaller child.
The buckle should always be positioned low down on your child's abdomen.
ADJUSTING THE BUCKLE POSITION
The Child restraint is supplied with the crotch straps
set at the correct position for use with the in-built
harness.
The buckle needs to be positioned as shown. If the
buckle is too low it will be uncomfortable and needs
to be lengthened. See next page.
IMPORTANT :
ADJUSTING THE CROTCH BUCKLE HEIGHT
The crotch buckle height is adjusted by threading the 3 bar
anchor plates into extra slots to shorten the buckle height. The
seat has the crotch straps tted in position when supplied.
Position 1 is generally used with the in-built harness or toddler
mode.
A. Remove the seat from car.
B. Lift trim cover to reveal crotch strap slot. B
4 crotch strap slots
TODDLER USE
(WITH IN-BUILT HARNESS)
TODDLER USE
(WITH IN-BUILT HARNESS)
When replacing cover, ensure none of the harness straps are twisted and that all straps are
secure by pulling each harness strap.
IMPORTANT :
1. Longest Length
for Toddler mode with
built-in harness and
largest child in Booster
3. Mid Length
for Booster Mode-
Mid size Child
2. Shortest Length
for Booster Mode-
Smallest Child
3 Bar Anchor
Slot
C. Turn the crotch 3-bar slide and push through each slot as shown right until the Crotch strap
assembly is free from the seat.
D. Insert Crotch strap through restraint slot which will position Crotch strap level with the child’s
crotch and feed back through other slot as shown right.
E. For Toddler mode use the adjustment shown in illustration 1. shown below. If this is too high then
one of the other positions may be suitable.
Center of button on buckle,
level with top of legs (with
all slack removed from
crotch strap.)
Buckle Position
OK

Instructions for Installation & Use - Series No. 8100/A/2010Instructions for Installation & Use - Series No. 8100/A/2010
18 19
HOW TO INSTALL
HOW TO INSTALL
INSTALLING INTO VEHICLE
(FORWARD FACING) (UPRIGHT OR RECLINED)
A. Determine whether an upright or reclined installation
is preferred as shown right.
B. To move the Recline Foot from upright to reclined
mode or vice versa. Pull the Foot outwards to unlock
it, then rotate the foot. Push to lock in place. See
diagrams below. Reclined
Upright
Pull out Rotate
Push in
to lock
TODDLER USE
(WITH IN-BUILT HARNESS)
TODDLER USE
(WITH IN-BUILT HARNESS)
C. Position restraint centrally to the chosen position in forward facing mode and align restraint centrally
to the chosen seating position. Some vehicle seat fabrics (particularly velours) may be damaged by
a child restraint used continuously. We recommend the use of the Safe-n-Sound™ Messy Mat or
other protection to keep the vehicle seat in good condition.
Pull the centre panel ap down and gently lift headrest
trim end.
Fully lengthen seat belt and feed the seat belt through
the closest seatbelt path slot and pass across the
seating surface through the opposite slot. Follow the
yellow belt path label - FORWARD-FACING BELT PATH
Engage
into Seat
belt buckle
Seat belt feeds
through slot in
seat between
trim and seat
back.
Yellow Belt Path label
FORWARD-FACING
BELT PATH
Near seat
belt slot
Far seat
belt slot
If the car seat belt does not remain rm in everyday
use, then contact the retailer, or Safe-n-Sound customer
service for a gated 3-bar slide (order No. 0215).
Rolled up
towel or
padding
NOTE: Some car seats have more rearward slope than others.
Use a rolled up towel or padding under the seat for contoured
vehicle seats to prevent excessive recline.
Headrest trim end
Centre
panel ap
Feed through
seatbelt path.
Car's Seatbelt

Instructions for Installation & Use - Series No. 8100/A/2010Instructions for Installation & Use - Series No. 8100/A/2010
20 21
HOW TO INSTALL HOW TO INSTALL
D. Engage car seat belt buckle
and tongue. Push down on
the restraint while pulling on
the lap portion to remove all
slack from the belt. Then,
pull the remaining slack
in the sash belt and allow
excess belt to feed back into
the retractor.
Engage
seatbelt
Remove all
slack from
lap portion,
then sash.
Feed through
seatbelt path.
Car's Seatbelt
TODDLER USE
(WITH IN-BUILT HARNESS)
TODDLER USE
(WITH IN-BUILT HARNESS)
E. To lengthen the Upper Anchorage Strap, fully
press Adjuster Button (A) while pulling Upper
Anchorage Strap (B) to slacken as shown right.
F. Connect the Attachment Clip to the
Anchor Fitting in the car making
sure to remove as many twists as
possible.
G. Pull Upper Anchorage Adjustment Strap (C)
to remove any slack but do not tighten so
much that the restraint lifts off the car seat.
Fold up excess strap and use Storage band
to rmly store excess strap behind seat.
Always attach hook and remove slack.
E
Attachment Clip Car's Anchor
Fitting
Always ensure that the car seat belt and upper anchorage strap are rmly restraining the restraint
on the vehicle seat.
Make sure Cup Holders (If tted) do not interfere with closure of the car door.
IMPORTANT :
Storage
Band
B
A
Roll up excess
strap and store with
the storage band.
Fully press Adjuster Button (A) while pulling
Upper Anchorage Strap (B) to lengthen.
Pull Adjustment Strap
to remove slack
Storage
Band C
A

Instructions for Installation & Use - Series No. 8100/A/2010Instructions for Installation & Use - Series No. 8100/A/2010
TO REMOVE TODDLER FROM RESTRAINT
A. Press the red button on Harness Buckle then both
Harness Tongues will be released. Move each shoulder
strap to the toddler's side, then remove the toddler.
TO REMOVE RESTRAINT FROM
VEHICLE
A. Disengage seat belt tongue from buckle and
remove from restraint.
B. Fully press Upper Anchorage Strap Adjuster
Button (A) while pulling Upper Anchorage Strap
(B) to slacken as shown right. In some vehicles
loosening of the Upper Anchorage Strap may
be difcult. If so, try pushing the restraint
against the vehicle seat back or slightly lifting
the restraint to release the tension.
C. Disengage Attachment Clip from the Car's
Anchor Fitting. The child restraint is now
disconnected and can be removed from the car.
HOW TO INSTALL HOW TO USE
22 23
Roll up excess strap
and store with the
storage band to
avoid tripping when
moving the restraint.
Fully press Adjuster Button (A) while pulling
Upper Anchorage Strap (B) to lengthen.
Storage
Band
B
A
TODDLER USE
(WITH IN-BUILT HARNESS)
TODDLER USE
(WITH IN-BUILT HARNESS)
PLACING TODDLER IN THE
RESTRAINT
A. Lengthen harness by pressing Harness
Adjustment button while pulling on either
shoulder strap until the harness will
accommodate the child.
B. Place child in the restraint and feed each arm
through shoulder straps. Pull harness buckle
up between child's legs.
Engage the buckle tongues and tighten the
harness as described on the next page.
Pull harness
adjuster
strap to
tighten.
Pull to
lengthen
Press and hold
A
B C

Instructions for Installation & Use - Series No. 8100/A/2010Instructions for Installation & Use - Series No. 8100/A/2010
24
HOW TO USE
25
C. Fit either harness buckle tongues into the harness
buckle followed by the other tongue. A click is heard
when the last tongue is fully engaged.
Should the second tongue not insert - press the
red button and reinsert the tongues. Ensure secure
engagement by pulling harness straps. If the harness
buckle does not engage correctly then it
may require cleaning - refer to page 55.
D. Ensure slack is removed from harness lap strap by
pulling shoulder straps then pull harness adjustment
strap to adjust harness to a comfortable but rm t.
Ensure that any slack in harness straps is removed.
Shoulder Harness Straps must t rmly to the child.
A loose harness could result in serious injury in an
accident.
E. Pull the harness adjustment strap to remove slack so
the harness ts the child with minimal slack. Do not
over tighten.
Do not use restraint if straps do not tighten and contact
your local authorised service agent for repair.
Press red button on harness buckle then both harness tongues will be released. Lift the shoulder
straps from the child’s shoulders and remove the child.
TO REMOVE TODDLER
Harness
Lap Straps
Shoulder
Straps
Crotch
Straps
Pull to remove slack from
harness lap straps
Click
Tongue
Buckle
C
D
TODDLER USE
(WITH IN-BUILT HARNESS)
SPECIAL FEATURES - CHILD USE
To be used with either a lap-sash seatbelt or an add-on accessory child harness by children whose
shoulders are in-line with or above the middle shoulder height marker (approximately 4 years of
age). This mode can be used until the child's shoulders reach the upper shoulder height marker
(approximately 6 to 8 years of age).
2
5
6
7
4
8
9
33
10
11
12
1
1. AHR Easy Adjust Headrest Lever
2. Harness stored under cover
3. Red Booster Seat belt path labels
4. Armrests
5. Recline Foot in upright position
6. Cup Holder 1 each side
7. Harness Adjustment strap
8. Harness Adjustment button
9. Lap belt SLIDEGUARD™ Converter (with the
harness buckle)
10. Shoulder Height Markers
11. Sash guide in headrest (Red seat belt path Label)
12. Adjustable Headrest (with speakers if tted)
Storage location of the SLIDEGUARD™
converter under the cover.
CHILD USE
(BOOSTER SEAT MODE)

Instructions for Installation & Use - Series No. 8100/A/2010Instructions for Installation & Use - Series No. 8100/A/2010
26 27
SPECIAL FEATURES - CHILD USE
13. Car's Anchor Fitting
14. Upper Anchorage Strap Adjuster
15. Upper Anchorage Storage Band
16. Adjustable Upper Anchorage Strap
17. Attachment Clip
4
14
15 16
17
13
CHILD USE
(BOOSTER SEAT MODE)
CHILD USE
(BOOSTER SEAT MODE)
NOTE: Not all features are supplied on some models. "If tted" is used to indicate some of the
features that may not be on the seat supplied.
3
SUITABLE FOR USE
To be used with either a lap-sash seatbelt or an add-on accessory child harness by children whose
shoulders are above the lower shoulder height marker with the head restraint in the lowest position
(approximately 4 years of age) until their shoulders reach the upper shoulder height marker with the
head restraint in the highest position (approximately 6 to 8 years of age).
Continue to use this child restraint until child reaches the limit. Children are safest in a booster seat
until their shoulders reach the upper shoulder height marker of the booster seat.
Do not use in this mode until the shoulders reach the middle shoulder height marker.
THIS RESTRAINT MUST BE USED IN CARS WITH FORWARD-FACING SEATS WITH A LAP-SASH SEAT
BELT OR WITH A SEAT BELT AND CHILD HARNESS.
THIS BOOSTER SEAT MAY ONLY BE SUITABLE FOR USE WITH A CHILD HARNESS IN THE UPRIGHT
POSITION. IN THE RECLINE POSITION, THE CAR'S SEATBELT MAY NOT BE LONG ENOUGH.
THE BOOSTER SEAT MODE MAY NOT FIT IN RECLINE POSITION, IN SOME VEHICLES WITH SHORT
SEATBELTS.
Suitable only for use with Safe-n-Sound™Protecta PLUS™harness series 220/2010 or
Babylove Ezygo Harness™ series BL220/2010 child harnesses.
DO NOT USE WITH JUST A LAP BELT. You must use with a lap-sash belt or with a seat belt and child
harness. If used with a child harness, the lap strap of the seat belt must be adjusted rmly rst and
then the harness, so that the lap strap is not lifted off the child’s lap when the harness is adjusted.
ALWAYS USE THE SLIDEGUARD™ Converter IN BOOSTER SEAT MODE.
Do not use the restraint without the Upper Anchorage Strap correctly attached.
Do not use with the integral harness when in booster mode.
This integral harness must be stored (see page 28-30).
Do not use in a front seat, unless it has a child restraint anchorage point.
Do not use on any vehicle seat which faces sideways or rearwards.
WHERE AN AIRBAG IS FITTED IN THE SEATING POSITION WHERE THE CHILD RESTRAINT IS TO BE
FITTED, FOLLOW THE VEHICLE MANUFACTURERS WARNINGS AND INSTRUCTIONS.
Do not use with just a lap seat belt (unless using a Child Harness - refer to page 39- 52).

Instructions for Installation & Use - Series No. 8100/A/2010Instructions for Installation & Use - Series No. 8100/A/201028 29
HOW TO SET-UP
CONVERTING THE TODDLER RESTRAINT INTO BOOSTER SEAT
To use this child restraint as a booster seat the harness needs to be stored under the cover.
Disengage and remove the seat belt from the restraint.
You will need to remove the upper anchorage strap from the anchor tting when converting to a
booster seat.
Upper anchorage strap must always be used in this booster position when re installed.
If tted, remove all comfort accessories from the restraint.
STORING ACCESSORIES IN SEAT RECESS
When used as a Booster seat, the SLIDEGUARD™ converter is found in storage recesses under the
cover, as shown below and is connected to the buckle to form the SLIDEGUARD™Converter.
Toddler Use Child Use with
SLIDEGUARD™ Converter
SLIDEGUARD™ converter
Place Harness strap and Harness
Tongue behind trim in recess
CHILD USE
(BOOSTER SEAT MODE)
CHILD USE
(BOOSTER SEAT MODE)
HOW TO SET-UP
STORING THE IN-BUILT HARNESS
A. Disengage harness buckle. Fully lengthen the
harness by pressing the Harness Adjustment lever
and pulling the harness shoulder straps.
B. Place shoulder straps behind trim and slide the
tongues down into the storage inserts in the seat
base.
C. Remove the elastic loops holding the cover in place
at the lower front of the seat. Lift the cover to expose
the storage inserts in the seat base.
A
B
C
NOTE: Do not disconnect the harness at the
back of the restraint when storing the harness.

Instructions for Installation & Use - Series No. 8100/A/2010Instructions for Installation & Use - Series No. 8100/A/2010
30 31
D. Remove SLIDEGUARD™ converter from storage
recess and engage into harness buckle to create the
SLIDEGUARD™Converter
E. Adjust the crotch strap length if necessary. See page 34.
F. Align cover and re-engage elastic loops at the front of the
cover.
G. Store shoulder pads and Padded Insert (if tted) in a safe
place, for future use.
Click
Remove SLIDEGUARD™
converter and engage in
harness buckle.
D
HOW TO SET-UP HOW TO SET-UP
CHILD USE
(BOOSTER SEAT MODE)
CHILD USE
(BOOSTER SEAT MODE)
ADJUSTING THE SLIDEGUARD™ CONVERTER POSITION
AND AHR EASY ADJUST HEADREST
Red Sash Belt
Guide markers
Red Lap Belt
Guide markers
Centre of button on buckle, level with top of thighs.
To adjust buckle height, see page 34.
Adjust headrest so that the integral Sash Guide is
level with or just above the child's shoulder.
Gently lift the lever at the top of the headrest,
then pull up or push down so that the sash guide
is just above your child's shoulders. Release
the adjustment lever and ensure it has locked in
position by gently pushing down on it.
If using with a Protecta PLUS™ Child Harness,
then the headrest must be in the top position,
(see page 39).
Buckle tted with
SLIDEGUARD™
Converter (Always
use this device).
NOTE: All slack removed from crotch strap when buckle is in the correct position.
NOTE: Stop using this Booster Seat if the child’s shoulders are above the Upper Shoulder Height
Marker.

Instructions for Installation & Use - Series No. 8100/A/2010Instructions for Installation & Use - Series No. 8100/A/2010
32 33
HOW TO USE
You must adjust the crotch strap to the correct length for your child before installing the restraint
as it cannot be adjusted in the car.
The crotch strap should only be extended if the buckle and SLIDEGUARD™ Converter are located
too low against your child's legs, causing discomfort.
Always return the crotch strap to its original shorter length when using the seat with a smaller
child.
The buckle SLIDEGUARD™Converter should always be positioned low down on your child's body.
DO NOT attempt to remove the crotch strap from the adjuster.
IMPORTANT: ALWAYS USE THE SLIDEGUARD™ CONVERTER
WARNING:
A sash belt under the arm or behind the back is dangerous.
IMPORTANT:
CHILD USE
(BOOSTER SEAT MODE WITH SEAT BELT)
CHILD USE
(BOOSTER SEAT MODE WITH SEAT BELT)
A. Sit the restraint against a wall for stability and get the child to sit comfortably in position.
B. Determine the correct buckle position. The bottom edge of the buckle needs to be level with the top
of the legs.
Center of button on
buckle, level with top
of legs (with all slack
removed from crotch
strap.)
SLIDEGUARD™ Clip
Position
TOO HIGH
SLIDEGUARD™ Clip
Position
OK
C. Remove the child and adjust the buckle strap length as on the next page.
NOTE: The SLIDEGUARD™ Clip ensures that the child does not slump and
ensures the lap belt is always positioned on the child’s hips and thighs. If the
seat belt rides up on to the stomach then a child can be seriously injured in a
crash.
SETTING UP THE SLIDEGUARD™ CLIP POSITION
HOW TO SET-UP

Instructions for Installation & Use - Series No. 8100/A/2010Instructions for Installation & Use - Series No. 8100/A/2010
34
HOW TO USE
35
HOW TO USE
ADJUSTING THE CROTCH BUCKLE HEIGHT
The crotch buckle SLIDEGUARD™Converter height adjustment is
by threading the 3 bar anchor plates into extra slots to shorten the
buckle height. The seat has the crotch straps tted in position when
supplied.
A. Lift trim cover to reveal crotch strap slot.
B. Turn the crotch 3-bar slide and push through each slot as shown
right until the Crotch strap assembly is free from the seat.
C. Insert Crotch strap through restraint slot which will position Crotch
strap level with the child’s crotch and feed back through other slot as shown right.
Use Position 2 for smaller children and Position 1 and 3 for larger children.
B
4 Slots
CHILD USE
(BOOSTER SEAT MODE WITH SEAT BELT)
CHILD USE
(BOOSTER SEAT MODE WITH SEAT BELT)
When replacing cover, ensure none of the harness straps are twisted and that all straps are
secure by pulling each harness strap.
IMPORTANT :
1. Longest Length
for Toddler mode and
largest child in Booster
3. Mid Length
for Booster Mode-
Mid size Child
2. Shortest Length
for Booster Mode-
Smallest Child
3 Bar Anchor
Slot
PLACING CHILD IN THE RESTRAINT USING LAP SASH SEAT BELT &
UPPER ANCHORAGE STRAP
A. Determine whether an upright or reclined
installation is preferred as shown right.
B. To move the Recline Foot from reclined to
upright mode or vice versa pull the Foot
outwards to unlock it, then rotate the foot.
Push to lock in place. Swing the seat back
until it sits rmly on the vehicle seat. Reclined
Upright

Instructions for Installation & Use - Series No. 8100/A/2010Instructions for Installation & Use - Series No. 8100/A/2010
36
G. Position the lap-sash belt over the child ensuring
the lap portion is positioned into the lap recess area
under the armrest and on the child's thighs. The
seat belt should follow the red Seat Belt path labels
marked -BOOSTER SEATBELT PATH
Fit the SLIDEGUARD™ Converter to the lap belt as
shown below. The SLIDEGUARD™ Converter must
be used at all times in Booster mode, to position
the lap belt on the child's thighs and prevent your
child from submarining in the event of an impact. If
the lap belt is not on the child's thighs then shorten
the length of the crotch strap, see page 34.
H. Engage seat belt buckle and tongue ensuring there
are no twists in the belt. If the seat belt buckle is
adjustable, adjust the buckle as low as possible
away from the child.
Remove SLIDEGUARD™
converter from recess area and
engage into harness buckle.
Click
Lap part of seat
belt in recess area
(under armrests).
Hook the Lap Belt
SLIDEGUARD™
Converter over the
lap belt with the Red
button (of the buckle)
facing forward.
HOW TO USE
G
37
HOW TO USE
Always attach hook and remove slack.
C. The restraint is now ready for use
as a child booster, ensure the upper
anchorage strap is still engaged into
the anchor tting (as shown right) and
tighten if necessary. Do not overtighten
causing the seat to lift.
F
E. To tighten pull strap (C) but do not over
tighten. Fold up excess strap and use the
storage band to rmly store excess strap
behind the seat.
F. Sit the child on the seat.
Fully press Adjuster Button
(A) while pulling Upper
Anchorage Strap (B) to
lengthen.
Pull Adjustment Strap
to remove slack
Red seat belt path labels
BOOSTER SEATBELT PATH
Storage
Band C
B
A
Rolled up towel
or padding
Attachment Clip Car's Anchor
Fitting
IMPORTANT:
A SASH BELT UNDER THE ARM OR
BEHIND THE BACK IS DANGEROUS.
CHILD USE
(BOOSTER SEAT MODE WITH SEAT BELT)
CHILD USE
(BOOSTER SEAT MODE WITH SEAT BELT)
NOTE: Some car seats have more rearward
slope than others. Use a rolled up towel or
padding under the seat for contoured vehicle
seats to prevent excessive recline.
D. To lengthen the Upper Anchorage Strap,
fully press Adjuster Button (A) while
pulling Upper Anchorage Strap (B) to
slacken as shown right.

Instructions for Installation & Use - Series No. 8100/A/2010Instructions for Installation & Use - Series No. 8100/A/2010
TO REMOVE CHILD
Disengage seat belt tongue and buckle, remove the lap portion of seat belt from the SLIDEGUARD™
Clip and remove belt from child.
When Booster is not being used, secure in position, by engaging seat belt over the booster seat.
38
HOW TO USE
39
Lap part of seat
belt in recess area
must be under
armrests (if tted)
on both sides.
Sash Guide
I. Place the sash belt across the child's
chest and through the sash guide in the
headrest.
The Sash Guide built in to the headrest
is used to position the sash portion of
the lap-sash seat belt across the child’s
shoulders and chest.
Always use this sash guide.
J. Adjust lap and sash portion of seat
belt rmly but comfortably across the
child’s lap and chest.
K. If using the Inertia Reel Retractor seat
belt, adjust the lap portion of the seat
belt rmly around the child and restraint,
then let the slack sash portion retract up
into the sash retractor.
Sash Guide
I
CHILD USE
(BOOSTER SEAT MODE WITH SEAT BELT)
The SLIDEGUARD™ Converter must be used
when the child is using the Booster Seat.
Always ensure the seat belt is across the
child's thighs and across the chest.
IMPORTANT:
Sash
Seatbelt
USING WITH Safe-n-Sound™Protecta PLUS™HARNESS SERIES 220/2010
VERSATETHER™ compatible child harnesses are suitable with this child restraint and are sold
separately. Refer to the Harness instructions for full details of using and installing the Child Harness.
When installing the harness, connect its attachment clip to the VERSATETHER™ Catch on the Booster
Seat's upper tether strap (as shown in pages 42 and 43).
Use the extension strap (supplied with the Protecta PLUS™) for all other instances to attach the
harness to anchor points in the luggage area such as the vehicle oor or ceiling.
This Booster Seat is not suitable for child harnesses that are not VERSATETHER™compatible.
HOW TO INSTALL WITH A CHILD HARNESS
HEADREST POSITION:
Before installation ensure that the headrest is set to the correct height for your child (refer to page 8).
Headrest should be just above the child's shoulders.
The Child Harness shoulder straps
must be in the slots which are
nearest to the child's shoulders,
but not lower than the child's
shoulders.
Harness
cross bar
Orange =Child Harness straps (over existing harness)
Green = In-built Harness (stored)
Black = Upper Anchorage Strap
CHILD USE
(BOOSTER SEAT MODE WITH CHILD HARNESS)
/