Page is loading ...

1
lippertcomponents.com 574-537-8900 Rev: 02.17 - Solera
®
Awnbrella
™
Awnbrella
®
Installation and Owner’s Manual
(For Aftermarket Applications)
Table of Contents
Introduction ............................................ 1
Awnbrella Parts List ................................... 2
Resources Required ................................... 3
Installation .............................................. 3
Spacing Awnbrella Arms ............................ 3
Drilling the Roller Tube ................................ 4
Mounting Hanger Blocks .............................. 5
Inserting Awnbrella Arms .............................. 5
Velcro
®
Stabilizers ..................................... 6
Proper Awning Extention for Awnbrella Arms ......... 7
Awnbrella
®
Installation and
Owner’s Manual
(For Aftermarket Applications)
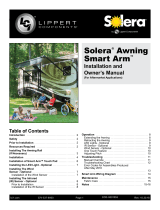
Introduction
Give your awning extra support and better angle for water
runoff with the Solera
®
Awnbrella. Rust-resistant aluminum
bows hold fabric taut and arched so water and debris can
easily run off.

2
lippertcomponents.com 574-537-8900 Rev: 02.17 - Solera
®
Awnbrella
™
Awnbrella
®
Installation and Owner’s Manual
(For Aftermarket Applications)
Awnbrella Parts List
Awnbrella 3-arm package -
Part number 362237
Letter Description Qty
A Awnbrella Arms Adjustable from 59” to 106” 2
B White Velcro
®
Pads with Adhesive Backing 2
C Black Velcro
®
Pads with Adhesive Backing 2
D Hanger Blocks 2
E Plastic Tightening Knobs 4
F
1-¼” Self-Tapping Mounting Screws
4
Letter Description Qty
A Awnbrella Arms Adjustable from 59” to 106” 3
B White Velcro
®
Pads with Adhesive Backing 3
C Black Velcro
®
Pads with Adhesive Backing 3
D Hanger Blocks 3
E Plastic Tightening Knobs 6
F
1-¼” Self-Tapping Mounting Screws
6
Awnbrella 2-arm package -
Part number 362238
A
B
C
D
E
F
A
B
C
D
E
F

3
lippertcomponents.com 574-537-8900 Rev: 02.17 - Solera
®
Awnbrella
™
Awnbrella
®
Installation and Owner’s Manual
(For Aftermarket Applications)
168"
42"
42"
42"
42"
Example
Installation
Spacing Awnbrella Arms
Awnbrella Arms should be evenly spaced with no more
than 54" between each. To nd the proper spacing,
measure the width of the awning fabric and divide the
measurement by the recommended number of arms + 1.
Keep in mind that two arms make three sections, three
arms make four sections, etc. It is recommended the
canvas not be divided into sections exceeding 54”. See
example to the right and installations instructions on the
next page.
Resources Required
• Cordless or Electric Drill or Screw Gun
• ⁄" Metal Drill Bit
• Phillips Screwdriver
• ¼" Fine Round File
• Punch
• Ladder
• Measuring Tape
Example: Awning canopy width measures 14' (168")
Recommended number of arms is 3 + 1 = 4
168" ÷ 4 = 42"
Space between each arm should be 42" wide
NOTE: Calculations will not always work out to be a
complete whole number. The outer most holes drilled into
the roller tube for the Awnbrella arms should not be placed
any closer than 42” from the end of the tube to protect the
roller tube spring.
awning width number of Awnbrella arms
10' - 14' 2 arms
14' - 18' 3 arms
18' - 22' 4 arms
22' - 27' 5 arms
FAILURE TO FOLLOW THE INSTRUCTIONS PROVIDED
IN THIS MANUAL MAY RESULT IN DEATH, SERIOUS
INJURY, COACH DAMAGE, OR VOIDING OF THE
COMPONENT WARRANTY.

4
lippertcomponents.com 574-537-8900 Rev: 02.17 - Solera
®
Awnbrella
™
Awnbrella
®
Installation and Owner’s Manual
(For Aftermarket Applications)
Drilling the Roller Tube
1. With the awning fully extended,
measure the distance calculated
using the chart on the previous page
from the edge of the awning fabric.
(Fig.1). Mark the roller tube at that
predetermined distance and 1/2”
down from the fabric seam. (Fig.2).
This is where the rst Awnbrella
arm will later be installed. Continue
to make all measurements and
markings along the roller tube for
placement of the remaining arms.
Verify the correct spacing before
proceeding to the next step.
2. Using a metal punch, indent the
marks just made to create a dimple
to center the drill bit and keep it from
wandering (Fig.3).
3. Drill through the roller tube using a
7/16" bit (Fig.4).
4. Use a 1/4" round le to remove
any sharp burrs around the edges of
the holes (Fig.5).
NOTE: It is important that all the
holes drilled on the roller tube are
aligned at 1/2" down from the fabric
retaining seam.
1
2
3
4
5
6
7
8
9
10
34
35
36
37
38
39
40
41
42
35
36
37
38
39
40
41
42
43
44
45
1
2
3
4
5
6
7
8
9
1
2
3
4
5
6
7
24
25
26
27
28
29
3
8”
8”
8”
1
2
3
4
5
6
7
8
9
10
34
35
36
37
38
39
40
41
42
35
36
37
38
39
40
41
42
43
44
45
1
2
3
4
5
6
7
8
9
1
2
3
4
5
6
7
24
25
26
27
28
29
3
8”
8”
8”
1
2
3
4
5
6
7
8
9
10
34
35
36
37
38
39
40
41
42
35
36
37
38
39
40
41
42
43
44
45
1
2
3
4
5
6
7
8
9
1
2
3
4
5
6
7
24
25
26
27
28
29
3
8”
8”
8”
1
2
3
4
5
6
7
8
9
10
34
35
36
37
38
39
40
41
42
35
36
37
38
39
40
41
42
43
44
45
1
2
3
4
5
6
7
8
9
1
2
3
4
5
6
7
24
25
26
27
28
29
3
8”
8”
8”
1
2
3
4
5
6
7
8
9
10
34
35
36
37
38
39
40
41
42
35
36
37
38
39
40
41
42
43
44
45
1
2
3
4
5
6
7
8
9
1
2
3
4
5
6
7
24
25
26
27
28
29
3
8”
8”
8”
Fig.1 Fig.2
Fig.3
Fig.4
Fig.5

5
lippertcomponents.com 574-537-8900 Rev: 02.17 - Solera
®
Awnbrella
™
Awnbrella
®
Installation and Owner’s Manual
(For Aftermarket Applications)
Mounting Hanger Blocks
1. The hanger blocks MUST be
mounted on the exterior wall of the
RV directly beneath the awning
hanger rail and opposite the
corresponding holes previously
drilled in the roller tube (Fig.6).
Measure and mark the position on
the RV wall for all Awnbrella arms.
2. Position the hanger blocks using
the marks as a center guide with
the wide side down and a ⁄" gap
between the hanger block and
awning hanger rail. Use a Phillips
screwdriver or drill bit to secure the
hanger blocks with 1-¼" self-tapping
screws. (Fig.7).
1
2
3
4
5
6
7
8
9
10
34
35
36
37
38
39
40
41
42
35
36
37
38
39
40
41
42
43
44
45
1
2
3
4
5
6
7
8
9
1
2
3
4
5
6
7
24
25
26
27
28
29
3
8”
8”
8”
1
2
3
4
5
6
7
8
9
10
34
35
36
37
38
39
40
41
42
35
36
37
38
39
40
41
42
43
44
45
1
2
3
4
5
6
7
8
9
1
2
3
4
5
6
7
24
25
26
27
28
29
3
8”
8”
8”
NOTE: Be sure there is backing behind
the skin of the RV where the hangers are
mounted to prevent pressure damage to
the wall. Do not overtighten the screws.
Inserting Awnbrella Arms
1. Thread the plastic tightening knobs into
the holes on the Awnbrella arms. Extend
one Awnbrella arm and measure from
the pointed tip end so that the knob is
approximately 8 inches from the end of
the C-channel. Tighten the knob
(Fig.8).
2. Line up the remaining Awnbrella arms
and adjust them as done in step 1.
(Fig.9). Adjusting the arms now will make
it easier to properly insert them later.
1
2
3
4
5
6
7
8
9
10
34
35
36
37
38
39
40
41
42
35
36
37
38
39
40
41
42
43
44
45
1
2
3
4
5
6
7
8
9
1
2
3
4
5
6
7
24
25
26
27
28
29
3
8”
8”
8”
1
2
3
4
5
6
7
8
9
10
34
35
36
37
38
39
40
41
42
35
36
37
38
39
40
41
42
43
44
45
1
2
3
4
5
6
7
8
9
1
2
3
4
5
6
7
24
25
26
27
28
29
3
8”
8”
8”
3. Slide the pointed tip of the arm into
the hole in the roller tube (Fig.10).
NOTE: If the tip doesn’t slide fully into
the roller tube, use a round ¼” le to
enlarge the opening until it does.
4. Loosen the knob on the rubber tip end
of the arm and push the Awnbrella arm
up against the fabric. Slip the rubber
tip end of the arm into the hanger block
mounted on the RV (Fig.11). The harder
the Awnbrella arm is pushed against the
fabric, the more tension will be applied
to the awning.
5. Tighten the knob so the arm will
remain rigidly in place. Be sure
Awnbrella arms are secure so they don’t
fall down.
1
2
3
4
5
6
7
8
9
10
34
35
36
37
38
39
40
41
42
35
36
37
38
39
40
41
42
43
44
45
1
2
3
4
5
6
7
8
9
1
2
3
4
5
6
7
24
25
26
27
28
29
3
8”
8”
8”
1
2
3
4
5
6
7
8
9
10
34
35
36
37
38
39
40
41
42
35
36
37
38
39
40
41
42
43
44
45
1
2
3
4
5
6
7
8
9
1
2
3
4
5
6
7
24
25
26
27
28
29
3
8”
8”
8”
Fig.6
Fig.7
Fig.8
Fig.9
Fig.10 Fig.11

6
lippertcomponents.com 574-537-8900 Rev: 02.17 - Solera
®
Awnbrella
™
Awnbrella
®
Installation and Owner’s Manual
(For Aftermarket Applications)
Velcro
®
Stabilizers
Velcro stabilizers are included as
a safety precaution to secure the
Awnbrella and prevent the arms from
shifting or falling. Adhere a black
patch of Velcro to the back of the
Awnbrella arm and a white patch to
the canopy.
1. Take the Awnbrella arms down
from the coach. On the top side of
one Awnbrella arm (side without
adjustment knobs), wipe rubbing
alcohol to remove any grease or oils
from handling on the center of the
arm where the Velcro patch will be
installed. Measure 28-1/2" from either
end of the channel and mark with a
pencil (Fig.12). This is where to install
a black patch of Velcro.
2. Center the black Velcro patch
over the mark, peel off the protective
backing and press rmly into place
(Fig.13).
3. Line up all the arms and apply all
the patches following steps 1 and 2.
4. Reposition the Awnbrella arm back
into the hanger blocks and roller
tube, then use alcohol to clean the
awning fabric directly opposite the
black Velcro patch on the back of the
Awnbrella arm. Attach a white Velcro
patch to the black Velcro patch on
the Awnbrella arm (Fig.14).
5. Remove the clear protective lm
from the back of the Velcro (Fig.15).
Carefully place the Awnbrella arm
back into position, pressing it rmly
against the awning fabric.
6. Repeat steps 2 and 4 for each
Awnbrella arm.
1
2
3
4
5
6
7
8
9
10
34
35
36
37
38
39
40
41
42
35
36
37
38
39
40
41
42
43
44
45
1
2
3
4
5
6
7
8
9
1
2
3
4
5
6
7
24
25
26
27
28
29
3
8”
8”
8”
1
2
3
4
5
6
7
8
9
10
34
35
36
37
38
39
40
41
42
35
36
37
38
39
40
41
42
43
44
45
1
2
3
4
5
6
7
8
9
1
2
3
4
5
6
7
24
25
26
27
28
29
3
8”
8”
8”
NOTE: Leave the Awnbrella arms in place for 48 hours to allow the adhesive to
set. Ideally, Velcro patches should be installed when the temperature is above
70º for the best bond. The adhesive may not bond tightly to some woven acrylic
fabrics. Use vinyl contact adhesive available at most hardware stores for a
better bond.
1
2
3
4
5
6
7
8
9
10
34
35
36
37
38
39
40
41
42
35
36
37
38
39
40
41
42
43
44
45
1
2
3
4
5
6
7
8
9
1
2
3
4
5
6
7
24
25
26
27
28
29
3
8”
8”
8”
1
2
3
4
5
6
7
8
9
10
34
35
36
37
38
39
40
41
42
35
36
37
38
39
40
41
42
43
44
45
1
2
3
4
5
6
7
8
9
1
2
3
4
5
6
7
24
25
26
27
28
29
3
8”
8”
8”
Fig.12 Fig.13
Fig.14 Fig.15

7
lippertcomponents.com 574-537-8900 Rev: 02.17 - Solera
®
Awnbrella
™
Awnbrella
®
Installation and Owner’s Manual
(For Aftermarket Applications)
Special Notes:
• For proper water drainage, the roller tube MUST be at
least 6" lower than the hanger rail on the RV. Check
drainage with a water hose to be sure.
• Follow all care instructions recommended by the awning
manufacturer.
• The awning may stretch slightly where it meets Awnbrella
arms. This should present no problem in performance.
Canvas should be in good condition when using the
Awnbrella or it could rip.
• Lippert Components is not responsible for damage or
injury due to improper use or installation.
Never:
• Leave the awning out in strong winds. Lippert
Components makes no claims regarding the
performance of this product in windy conditions.
• Drill into the roller tube closer than 42" from
each end to avoid striking the awning roller spring.
• Extend or retract the awning while the
Awnbrella arms are installed.
• Adjust the pitch of the awning side arms while
the Awnbrella arms are installed.
awning
fabric
awning
fabric
roller tube
roller tube
drilled holes at
3:00 position or more
correct
wrong
drilled holes at
1:30 - 2:00 position
awning
fabric
awning
fabric
roller tube
roller tube
drilled holes at
3:00 position or more
correct
wrong
drilled holes at
1:30 - 2:00 position
Proper Awning Extention for Awnbrella Arms
To use the awning in the carport position, put it in this
position before installing the arms and check to make
sure the holes in the roller bar are in an upward position
(Fig.16).
Fig.16

8
lippertcomponents.com 574-537-8900 Rev: 02.17 - Solera
®
Awnbrella
™
Awnbrella
®
Installation and Owner’s Manual
(For Aftermarket Applications)
Manual information may be distributed as a complete
document only, unless Lippert Components provides
explicit consent to distribute individual parts.
All manual information is subject to change without
notice. Revised editions will be available for free
download at www.lippertcomponents.com. Manual
information is considered factual until made obsolete by
a revised version.
Please recycle all obsolete materials and contact
Lippert Components with concerns or questions.
Notes
/