ACCO Brands 4400425 User manual
- Category
- Binding machines
- Type
- User manual
This manual is also suitable for
Page is loading ...
Page is loading ...
Page is loading ...

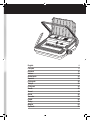
Location of controls
1
Document separator
2
Clippings tray (located at side of machine)
3
Wire closing handle
4
Comb opening teeth
5
Paper centering dial
6
Wire binding channel
7
Electric punch button (230E only)
8
Comb opening knob
9
Comb selector
J
A4/A5 switch
K
On/Off switch (230E only)
L
Punching slot
M
Punching handle (230 only)
4
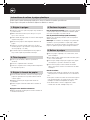
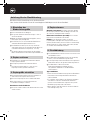
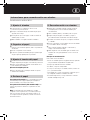
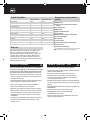
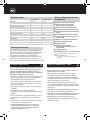
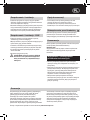
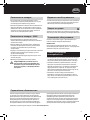
Special notice
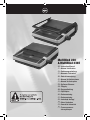
Thank you for choosing a GBC Binding machine. We aim to
produce quality binding machines at an affordable price, with
many advanced features to enable you to create excellent
results every time. Before using your machine for the first time,
please take a few minutes to read through this guide and retain
these instructions for future reference.
Safety instructions
YOUR SAFETY AS WELL AS THE SAFETY OF OTHERS IS
IMPORTANT TO ACCO BRANDS EUROPE. IN THIS INSTRUCTION
MANUAL AND ON THE PRODUCT ARE IMPORTANT SAFETY
MESSAGES. READ THESE MESSAGES CAREFULLY.
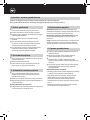
• In order to avoid overloading your machine, please refer
to the maximum punch guide located on the front of your
machine before punching.
• When punching PVC/PP covers,
we recommend the cover be
punched with some paper either side.
•
DO NOT punch metallic objects such as staples or paper
clips.
•
Please empty the waste tray regularly.
• Ensure that the machine is operated on a flat stable surface.
• Never lift the machine by the punching handle. Always use
the hand grips located on the side of the machine.
• T
o avoid risk of injury DO NOT put your fingers into the wire
binding channel.
• The binder is not to be exposed to tempera
ture / humidity
conditions that would cause condensation. Maximum ambient
temperature: 40ºC
m
MultiBind 230E is approved to EN60950 and CE Standards.
Technical data subject to change without notification.
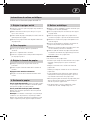
Safety tips - 230E
• DO NOT obstruct air inlets and outlets.
• DO NOT use the binder if the power cord (mains cable) is
damaged.
•
DO NOT place the power cord where it may be tripped over
or pulled. Ensure it does not come into contact with hot
surfaces such as pipes or radiators. Make sure the cable is
not squashed or pinched.
•
DO NOT use an extension cable unless it is absolutely
necessary and then only use one of a suitable current rating
(10A or greater).
•
DO NOT leave the binder connected to the electricity supply
when not in use.
•
DO NOT immerse the binder in water or other liquids. Doing
so will result in ELECTRIC SHOCK.
•
DO NOT attempt to disassemble the binder. Always consult a
qualified person.
m
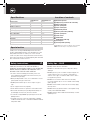
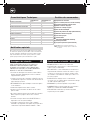
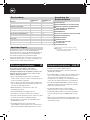
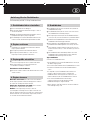
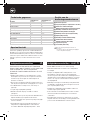
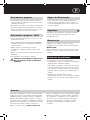
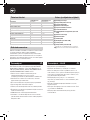
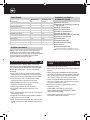
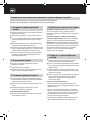
Specifications
Operation mode
Max. binding size
Hole pitch
Number of punch slots
Margin depth
Punching paper (80gsm)
Punching PVC plastic foils (0.2mm)
Max. comb diameter
Max. wire diameter
Binding capacity
Net weight
Dimensions WxDxH
Voltage
GBC MultiBind 230
manual
A4
US Pitch 9/6” / 14.28mm
21
variable
max. 30
max. 4
51mm
14mm
450/125 sheets
12.2kg
525x450x200mm
n/a
GBC MultiBind 230E
electric
A4
US Pitch 9/6” / 14.28mm
21
variable
max. 30
max. 4
51mm
14mm
450/125 sheets
18.8kg
525x450x200mm
230V 50Hz AC

5
G
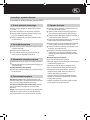
Setting up
• Your machine is ready to use when removed from the box.
Retain the packaging in case you need to return the machine
for repair.
• The punching mechanism is coated with a protective film of
lubricant, which will mark your paper. Clear this by punching
scrap sheets of paper until clean prior to binding.
MultiBind 230E is approved to EN60950 and CE Standards.
Technical data subject to change without notification.
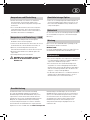
Setting up - 230E
• Connect the binder to the electricity supply with the power
cord supplied.
• Switch ON using the ON/OFF switch located at the rear of the
binder by the power inlet socket.
• W
ait while the binder goes through an automatic check
procedure, both LED’s light up.
• When complete the g
reen LED will remain ON.
• The binder is ready for operation.
WARNING: This appliance MUST be earthed.
If in doubt consult a qualified electrician.
m
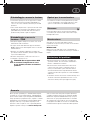
Maintenance options
• If you would like to extend your warranty coverage beyond
the stated manufacturers period, please consult your local
ACCO Brands Europe reseller for options.
Troubleshooting
• This machine has a recommended duty cycle of 5 operations
per minute, up to a maximum of 30 minutes on / 30 minutes
off.
• This machine is fitted with a thermal overload safety feature.
In extreme circumstances, the motor may overheat which
will activate the safety feature. This feature will prevent the
machine punching until it has cooled sufficiently.
• The thermal overload switch will automa
tically reset after
approximately 15 minutes. The machine will then operate as
if it had been overloaded (see step 4 below).
Security
A security slot is fitted for use with leading makes of security
leash. E.g. Kensington Microsaver.
Maintenance
Please ensure the clippings tray is emptied on a regular basis.
This may prevent your machine from overloading.
MultiBind 230E:
When the clippings tray is full, a yellow LED will be lit. Empty
the contents of the tray to continue binding.
Guarantee
Operation of this machine is guaranteed for two years from
date of purchase, subject to normal use. Within the guarantee
period, ACCO Brands Europe will at its own discretion either
repair or replace the defective machine free of charge. Defects
due to misuse or use for inappropriate purposes are not
covered under the guarantee. Proof of date of purchase will be
required. Repairs or alterations made by persons not authorised
by ACCO Brands Europe will invalidate the guarantee. It is our
aim to ensure that our products perform to the specifications
stated. This guarantee does not affect the legal rights which
consumers have under applicable national legislation governing
the sale of goods.
Register this product online at www.accoeurope.com

6
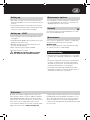
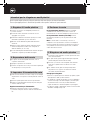
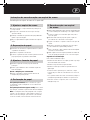
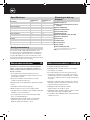
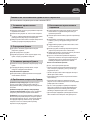
Comb binding instructions
Please open the quick start guide, located at the front of the machine for reference.
Each step relates to the illustrations throw-out at the front of this manual.
1. Set the comb
1
Lift the lid and punch handle to the upright position.
2
Place entire document so it rests on the lid.
3
Check the comb size (mm) needed using the pa
per
thickness guide.
4
Measure your comb using the comb size guide.
5
T
urn the comb selector (located at the side of the machine)
until the number matches your comb size (6 - 25+ mm).
6
The machine will now automa
tically prevent your comb from
over opening and will adjust the margin depth.
2. Sort paper
1
T
o manage large documents use the document separator.
2
Push the separa
tor into the document.
3
Lift the separa
tor upwards to reveal the first stack of paper
ready for easy punching.
3. Set paper size
1
On manual machines,
always ensure the punch handle is in
the upright position before centering the paper.
2
Load the first pa
per stack into the punch slot.
3
Centre the pa
per using the dial located at the front of the
machine.
Adjusting your machine for A5:
4
Adjust the machine by sliding the switch located at the front
of the machine from A4 to A5.
4. Punch paper
For manual punching:
Lower the raised handle until the paper is punched, and
support the machine when lifting the handle to the upright
position.
For electric punching (230E only):
Press the ‘punch button’ located on the right panel of the
machine.
Note:
If the machine is overloaded and fails to complete the punch
cycle, the red LED will be lit. Press the ‘punch button’ to cancel
the red LED. If this does not work contact the service helpline.
5. Comb binding
1
Place the plastic comb open side up on the metal teeth.
2
T
o open the comb, turn the comb opening knob (located at
the side of the machine).
3
Punch and then load each pa
per stack onto the opened
comb until the entire document is loaded.
4
T
o close the comb, rewind the comb opening knob and lift
the bound document from the metal teeth.
Binding tips:
•
Load the rear cover onto the open comb first, followed by the
internal sheets and front cover.
• T
o edit your document, additional sheets may be included or
removed by placing your document (comb open side up) onto
the metal teeth and following step 5 instructions again.
•
For further hints and tips please visit our website:
www.gbceurope.com

7
G
Wire binding instructions
For use with GBC 21 loop wire elements.
1. Set the wire
1
Lift the lid and punch handle to the upright position.
2
Place entire document so it rests on the lid.
3
Check the wire size (mm) needed using the pa
per thickness
guide.
4
Measure your wire using the wire size guide.
2. Sort paper
1
For mana
ging large documents use the document
separator.
2
Push the separa
tor into the document.
3
Lift the separa
tor upwards to reveal the first stack of paper
ready for easy punching.
3. Set paper size
1
Load the first pa
per stack into the punch slot.
2
Centre the pa
per using the dial located at the front of the
machine.
Adjusting your machine for A5:
3
Slide the switch loca
ted at the front of the machine from A4
to A5.
4. Punch paper
For manual punching:
Lower the raised handle until the paper is punched and support
the machine when lifting the handle to the upright position.
For electric punching (230E only):
Press the ‘punch button’ located on the right panel of the
machine.
Note:
If the machine is overloaded and fails to complete the punch
cycle, the red LED will be lit. Press the ‘punch button’ to cancel
the red LED. If this does not work contact the service helpline.
5. Wire binding
1
Open the hinged cover a
t the front of the machine to reveal
the wire binding channel.
2
Place the wire (open side up) on the wire support.
3
Feed each pa
per stack onto the wire and repeat until your
document is complete.
4
Support the document and wire on removal from the wire
support.
5
Insert the document into the wire closing ja
ws (wire opening
face down).
6
Support the document and pull down the handle a
t the side
of the machine to close the jaws.
7
Use the wire closing guide (loca
ted in the wire closing jaws)
to ensure correct closure of the wire.
Binding tips:
To hide the spine of the wire:
• Load the internal sheets onto the wire first, repeating until all
are loaded.
•
Load the front PVC cover onto the wire element.
• Load the rear cover onto the wire element last.
• It is best to close the wire a little, check, and then close the
wire a little more until you are happy with the wire closure.
• Always use the wire size closing guide (located in the wire
closing jaws) to prevent over closing the wire.
•
For further hints and tips please visit our website:
www.gbceurope.com
Page is loading ...
Page is loading ...
Page is loading ...
Page is loading ...
Page is loading ...
Page is loading ...
Page is loading ...
Page is loading ...
Page is loading ...
Page is loading ...
Page is loading ...
Page is loading ...
Page is loading ...
Page is loading ...
Page is loading ...
Page is loading ...
Page is loading ...
Page is loading ...
Page is loading ...
Page is loading ...
Page is loading ...
Page is loading ...
Page is loading ...
Page is loading ...
Page is loading ...
Page is loading ...
Page is loading ...
Page is loading ...
Page is loading ...
Page is loading ...
Page is loading ...
Page is loading ...
Page is loading ...
Page is loading ...
Page is loading ...
Page is loading ...
Page is loading ...
Page is loading ...
Page is loading ...
Page is loading ...
Page is loading ...
Page is loading ...
Page is loading ...
Page is loading ...
Page is loading ...
Page is loading ...
Page is loading ...
Page is loading ...
Page is loading ...
Page is loading ...
Page is loading ...
Page is loading ...
Page is loading ...
Page is loading ...
Page is loading ...
Page is loading ...
Page is loading ...
Page is loading ...
Page is loading ...
Page is loading ...
Page is loading ...
Page is loading ...
Page is loading ...
Page is loading ...
Page is loading ...
Page is loading ...

ACCO Brands Europe
Oxford House
Aylesbury HP21 8SZ
United Kingdom
www.accoeurope.com
Ref: 230-230E/5469
Issue: 1 (08/07)
G ACCO Service Division
Hereward Rise, Halesowen, West Midlands, B62 8AN
Tel: 0845 658 6000, Fax: 0870 421 5576
www.acco.co.uk/service
F ACCO France
Service Aprés-Vente
Tel: 0820 872 356, Fax: 03 80 68 60 49
D ACCO Deutschland
Arnoldstrasse 5, 73614 Schorndorf, Germany
Tel: +49 7181/887-420, Fax: +49 7181/887-498
E ACCO Iberia SL
P Isaac Peral 19, 28820 Coslada (Madrid)
Tel: 91 669 9391, Fax: 91 672 07 11
I ACCO Brands Italia Srl
Via Pietro Nenni 13, Settimo Torinese (TO)
Tel: +39 011 896 11 11, Fax: +39 011 896 11 13
B ACCO Brands Benelux B.V.
Peppelkade 64, 3992AK Houten, Nederland/Les Pays-Bas
Tel: 0800-73362, Fax: 02-4140784
[email protected], www.accobenelux.be
o ACCO Brands Benelux B.V.
Peppelkade 64, 3992AK Houten, Nederland/Les Pays-Bas
Tel: 0800-21132, Fax: 02-4140784
[email protected], www.accobenelux.be
O ACCO Brands Benelux B.V.
Peppelkade 64, 3992AK Houten, Nederland/Les Pays-Bas
Tel: 030-6346060, Fax: 030-6346070
[email protected], www.accobenelux.nl
S ACCO Brands Nordic AB
c Makadamgatan 5, 254 64 Helsingborg, Sweden
N Tel: +46 42 38 36 00, Fax: +46 42 38 36 10
o
o
o
o
XERTEC a.s.
o U Továren, 770/1b, 102 00, Praha 10, Ceska Republika
Tel: +420 271 741 800, Fax: +420 271 743 143
www.xertec.cz
Q SERWIS ACCO
05-300 Mińsk Mazowiecki, Ul. Grobelnego 4, Polska
Tel: +48 25 758 11 90, Fax: +48 25 758 11 90
H ACCO Hungária Kft
Budapest, Ócsai út 4., 1239, Hungária
Tel: +36 1 283 1645, Fax: +36 0 283 0928
o
Представительствокомпании
«АККОДойчландГМБХиКО.КГ»
Россия 105005, Москва, Денисовский пер., д.26
Тел: (495) 933-51-63, Факс: (495) 933-51-64
o
ПолиграфическиеСИСТЕМБ
03110 Киев, Украина, Пр.Червонозоряний, 51,
офис 216 лабораторного корпуса НИИ СП
Тел: (+38)
044 495-1293, Факс: (+38) 044 248-4923
o ACCO Australia Pty Ltd
Level 2, 8 Lord Street, Botany, NSW, Australia 2019
Tel: +61 2 9700 0180, Fax: +61 2 9700 0195
A ACCO Österreich
Sallmann Bürotechnik GmbH, Schumacherstr.13, 5020 Salzburg
Tel: 0662 4345 160, Fax: 0662 4345 164
C ACCO Schweiz
ABC Bürotechnik AG, Winkelbüel 4, 6043 Adligenswil
Tel: 041 375 6060, Fax: 041 375 6061
o ACCO-Rexel Ltd
Clonshaugh Business & Technology Park, Clonshaugh, Dublin 17, Ireland
Tel: 01 816 4300, Fax: 01 816 4302
[email protected], www.accorexel.ie
o GBC Asia Pte Ltd
o 47 Ayer Rajah Crescent, #05-08/17, Singapore 139947
o Tel: +65 6776 0195, Fax: +65 6779 1041
o GBC-Japan K.K.
14F Harmony Tower, 1-32-2 Honcho, Nakano-ku, Tokyo 164-8721
Tel: (81)-03-5351-1801, Fax: (81)-03-5351-1831
[email protected], www.gbc-japan.co.jp
IRL
RUS
AUS
Service
LUX
CZ
LV
EST
LT
SK
UR
JPN
IND
PAK
BD
-
 1
1
-
 2
2
-
 3
3
-
 4
4
-
 5
5
-
 6
6
-
 7
7
-
 8
8
-
 9
9
-
 10
10
-
 11
11
-
 12
12
-
 13
13
-
 14
14
-
 15
15
-
 16
16
-
 17
17
-
 18
18
-
 19
19
-
 20
20
-
 21
21
-
 22
22
-
 23
23
-
 24
24
-
 25
25
-
 26
26
-
 27
27
-
 28
28
-
 29
29
-
 30
30
-
 31
31
-
 32
32
-
 33
33
-
 34
34
-
 35
35
-
 36
36
-
 37
37
-
 38
38
-
 39
39
-
 40
40
-
 41
41
-
 42
42
-
 43
43
-
 44
44
-
 45
45
-
 46
46
-
 47
47
-
 48
48
-
 49
49
-
 50
50
-
 51
51
-
 52
52
-
 53
53
-
 54
54
-
 55
55
-
 56
56
-
 57
57
-
 58
58
-
 59
59
-
 60
60
-
 61
61
-
 62
62
-
 63
63
-
 64
64
-
 65
65
-
 66
66
-
 67
67
-
 68
68
-
 69
69
-
 70
70
-
 71
71
-
 72
72
-
 73
73
-
 74
74


ACCO Brands 4400425 User manual
- Category
- Binding machines
- Type
- User manual
- This manual is also suitable for
Ask a question and I''ll find the answer in the document
Finding information in a document is now easier with AI
in other languages
- italiano: ACCO Brands 4400425 Manuale utente
- français: ACCO Brands 4400425 Manuel utilisateur
- español: ACCO Brands 4400425 Manual de usuario
- Deutsch: ACCO Brands 4400425 Benutzerhandbuch
- русский: ACCO Brands 4400425 Руководство пользователя
- Nederlands: ACCO Brands 4400425 Handleiding
- português: ACCO Brands 4400425 Manual do usuário
- dansk: ACCO Brands 4400425 Brugermanual
- polski: ACCO Brands 4400425 Instrukcja obsługi
- čeština: ACCO Brands 4400425 Uživatelský manuál
- Türkçe: ACCO Brands 4400425 Kullanım kılavuzu
- svenska: ACCO Brands 4400425 Användarmanual
- suomi: ACCO Brands 4400425 Ohjekirja
Related papers


Other documents
-
GBC WireBind W20 User manual
-
GBC 7700160 Datasheet
-
Rexel WB656 User manual
-
-
-
Electrolux WOGL9062CN Installation guide
-
-
GBC ThermaBind T500Pro User manual
-
Swingline GBC CombBind C450E User manual
-
 Acco Europe Swingline GBC W15 User manual
