Korg LP-380 Owner's manual

Category
Digital pianos
Type
Owner's manual

This manual is also suitable for

DIGITAL PIANO
E
F
G
S
3
Owner’s manual
Manuel d’utilisation
Bedienungsanleitung
Manual de usuario
Thank you for purchasing the Korg LP-380 digital piano.
The LP-380 is available in the 88-key or 73-key version.
Unless otherwise noted, the 88-key version appears in the
illustrations of this manual.
Merci d’avoir choisi la piano numérique LP-380 de Korg.
Le LP-380 est disponible en versions 88 touches et 73 touches.
Sauf avis contraire, les illustrations figurant dans ce mode
d'emploi font référence à la version 88 touches.
Vielen Dank, dass Sie sich für einen LP-380 digtal-Klavier
von Korg entschieden haben.
Das LP-380 ist als 88-Tasten- oder 73-Tasten-Version verfügbar.
In dieser Anleitung ist - soweit nicht eigens gekennzeichnet - die
88-Tasten-Version abgebildet.
Gracias por su compra del Korg LP-380 Piano digital.
El LP-380 está disponible en versión de 88 y de 73 teclas.
A menos que se indique lo contrario, la versión de 88
teclas aparece en las ilustraciones de este manual.
2
Precautions
Location
Using the unit in the following locations can result
in a malfunction.
• In direct sunlight
• Locations of extreme temperature or humidity
• Excessively dusty or dirty locations
• Locations of excessive vibration
• Close to magnetic elds
Power supply
Please connect the designated AC adapter to an AC
outlet of the correct voltage. Do not connect it to an
AC outlet of voltage other than that for which your
unit is intended.
Interference with other electrical
devices
Radios and televisions placed nearby may experience
reception interference. Operate this unit at a suitable
distance from radios and televisions.
Handling
To avoid breakage, do not apply excessive force to the
switches or controls.
Care
If the exterior becomes dirty, wipe it with a clean,
dry cloth. Do not use liquid cleaners such as benzene
or thinner, or cleaning compounds or ammable pol-
ishes.
Keep this manual
Aer reading this manual, please keep it for later ref-
erence.
Keeping foreign matter out of your
equipment
Never set any container with liquid in it near this
equipment. If liquid gets into the equipment, it could
cause a breakdown, re, or electrical shock.
Be careful not to let metal objects get into the equip-
ment. If something does slip into the equipment,
unplug the AC adapter from the wall outlet. Then
contact your nearest Korg dealer or the store where
the equipment was purchased.
*
All product names and company names are the trade-
marks or registered trademarks of their respective own-
ers.
IMPORTANT NOTICE TO CONSUMERS
This product has been manufactured according to strict
specications and voltage requirements that are applicable in
the country in which it is intended that this product should
be used. If you have purchased this product via the internet,
through mail order, and/or via a telephone sale, you must
verify that this product is intended to be used in the country
in which you reside.
WARNING: Use of this product in any country other than
that for which it is intended could be dangerous and could
invalidate the manufacturers or distributors warranty.
Please also retain your receipt as proof of purchase otherwise
your product may be disqualied from the manufacturer’s or
distributor’s warranty.
Notice regarding disposal (EU only)
When this crossed-out wheeled bin” symbol is dis-
played on the product, owners manual, baery, or bat-
tery package, it signifies that when you wish to dis-
pose of this product, manual, package or baery you
must do so in an approved manner. Do not discard
this product, manual, package or battery along with
ordinary household waste. Disposing in the correct
manner will prevent harm to human health and po-
tential damage to the environment. Since the correct method
of disposal will depend on the applicable laws and regula-
tions in your locality, please contact your local administrative
body for details. If the baery contains heavy metals in excess
of the regulated amount, a chemical symbol is displayed be-
low the crossed-out wheeled bin” symbol on the baery or
baery package.
THE FCC REGULATION WARNING (for USA)
NOTE: This equipment has been tested and found to comply
with the limits for a Class B digital device, pursuant to Part 15
of the FCC Rules. These limits are designed to provide reason-
able protection against harmful interference in a residential
installation. This equipment generates, uses, and can radiate
radio frequency energy and, if not installed and used in ac-
cordance with the instructions, may cause harmful interfer-
ence to radio communications. However, there is no guaran-
tee that interference will not occur in a particular installation.
If this equipment does cause harmful interference to radio or
television reception, which can be determined by turning the
equipment o and on, the user is encouraged to try to correct
the interference by one or more of the following measures:
Reorient or relocate the receiving antenna.
Increase the separation between the equipment and receiver.
Connect the equipment into an outlet on a circuit dierent
from that to which the receiver is connected.
Consult the dealer or an experienced radio/TV technician
for help.
If items such as cables are included with this equipment, you
must use those included items.
Unauthorized changes or modication to this system can void
the users authority to operate this equipment.
3
Table of Contents
Introduction ---------------------------------------3
Main features ------------------------------------------3
Parts and their functions ---------------------4
Preparation and demo performances ----5
Before you begin playing ---------------------------5
Listening to demo performances -----------------7
Playing the LP-380 ------------------------------8
Playing a single sound (Single mode) -----------8
Playing two sounds
at the same time (Layer mode) -----------8
Performing with
another person (Partner mode) ----------9
Using pedals -------------------------------------------9
Effects ---------------------------------------------------9
The metronome -------------------------------------10
Other functions -------------------------------- 11
Touch settings --------------------------------------- 11
Transpose -------------------------------------------- 11
Function mode -------------------------------------- 11
MIDI ------------------------------------------------ 14
What is MIDI? --------------------------------------- 14
What can you do with MIDI? -------------------- 14
Connections ----------------------------------------- 14
MIDI function mode -------------------------------- 14
Appendix ----------------------------------------- 16
Troubleshooting -------------------------------------16
Specications --------------------------------------- 16
Assembling the Stand ----------------------- 17
Caution during assembly ------------------------- 17
Other cautions -------------------------------------- 17
Assembly procedure ------------------------------ 17
Check following assembly -----------------------18
MIDI implementation chart ----------------- 87
Introduction
Main features
Thirty high-quality sounds
The LP-380 provides 30 built-in expressive high-quality
sounds, including a stereo concert grand piano. You can
use Layer mode to simultaneously play two sounds at
once, or you can use Partner mode, which allows two
people to play the same range, one on each half of the key-
board.
Effects
The LP-380 provides 3 built-in digital eects. These eects
can adjust the brightness of the tone (Brilliance), simulate
the natural ambience of a concert hall (Reverb) and add
richness to the sound (Chorus).
Pedal effects
As on an acoustic piano, the LP-380 has three pedals that
control the damper, sostenuto and so eects. The damper
pedal and so pedal will respond to half-pedaling, allow-
ing you to vary the depth of the eect by how far you’re
pressing the pedal. When pressing the damper pedal, you
can also add the damper resonance to the classic piano
and the grand piano tone (bank 1 and 2 of Piano1).
Metronome
The built-in metronome allows you to select the time sig-
nature, tempo, and volume, and you can even choose a
bell sound as the accent.
Touch control
You can choose from three dierent seings to adjust how
the sound will respond to your keyboard playing dynamics.
Temperaments
For authentic performance of a wide range of music, the
LP-380 allows you to select from nine temperaments, in-
cluding the equal temperament, pure temperaments (ma-
jor and minor), classical temperaments (Kirnberger and
Werckmeister) as well as temperaments used with Middle
Eastern and Indian folk music. When an acoustic piano
sound is selected, the stretched tuning used on pianos is
automatically selected.
Adjustable pitch
The Transpose function lets you change the pitch of the
piano, and the Pitch Control function allows you to make
nely tuned adjustments.
Two headphone jacks
Two headphone jacks are provided, allowing two people
to listen simultaneously.
LINE OUT jack
An amplied speaker or recording equipment can be con-
nected by using the LINE OUT jack.
MIDI capabilities
The LP-380 supports the MIDI protocol, the standard
that allows music data to be transferred between musi-
cal instruments and computers. MIDI allows two or more
devices to control or be controlled by each other, and also
allows you to use the LP-380 as a 16-part multitimbral tone
generator.
The LP-380 is available in the 88-key or 73-key version.
Unless otherwise noted, the 88-key version appears in
the illustrations of this manual.
4
12.Soundbuons:
This button is used to select from 30 sounds (10 × 3
banks). Two buons can be pressed to play two sounds
simultaneously (Layer mode).
13.Display:
The display shows seings, for example, for the Func-
tion mode and the metronome.
14.UP/DOWNbuons:
These buons are used to select a value for the various
seings.
15.METRONOMEbuon:
This buon is used to start/stop the metronome. While
the metronome is being used, the buon lights up. In
addition, hold down the buon to enter the Metronome
seings mode, where various metronome seings can
be specied.
16.MIDI(IN,OUT)connectors:
These are jacks that are used to connect other MIDI de-
vices (sequencer, keyboards, etc.).
OUT: Data output
(to be connected to the MIDI IN connector of an-
other MIDI device).
IN: Data input
(to be connected to the MIDI OUT connector of an-
other MIDI device).
17.LINEOUTjack:
This is the main audio output jack, where a stereo mini
plug can be connected to the input jack of an amplier
or powered speakers, or to the AUX In jack of other
gear.
Use the VOLUME knob to set the output volume.
18.DC19Vjack:
Connect the included AC adapter here.
19.Speakerconnector:
Connect the cable from the speaker box here (cf. As-
sembling the stand).
20.Pedalconnector:
Connect the cable from the pedal unit here (cf. Assem-
bling the stand).
1
2
12
14
3
13
5
4
6
8
7
10
11
9
15
17
18
16 19 20
Connector box
Control panel
Connector box
(on the back)
1. Headphone( )jacks(Frontoftheconectorbox):
Two stereo mini plugs for headphones can be inserted
here. When the headphone plug is inserted, the inter-
nal speaker will not produce sound.
2. Powerbuon:
This buon turns the LP-380 on or o.
3. VOLUMEKnob:
This knob adjusts the volume for the speakers, the Out-
put and the Phones connectors.
4. PIANOSONGbuon:
This buon is used to enter the Piano song mode, aer
which the button lights up. Simultaneously pressing
this button and the TRANSPOSE button enters the
Sound demo song mode.
5. TRANSPOSEbuon:
This buon is used to adjust transposition. While trans-
posing, the buon lights up. Simultaneously pressing
this button and the PIANO SONG button enters the
Sound demo song mode.
6. FUNCTIONbuon:
This buon is used to enter the Function mode, where
pitch, temperament and other settings can be speci-
ed. Hold down the buon to enter the MIDI function
mode, where MIDI seings can be specied. The buon
lights up when the LP-380 enters the Function mode
and blinks when it enters the MIDI function mode.
7. TOUCHbuon:
This buon lets you select the keyboard sensitivity.
8. BRILLIANCEbuon:
This buon is used to adjust the brightness of the tone.
9. REVERBbuon:
This button is used to turn on/off the reverb, which
adds ambience to the sound. When this eect is on, the
buon will be lit up.
10.CHORUSbuon:
This button is used to turn on/off the chorus, which
adds richness to the sound. When this eect is on, the
buon will be lit up.
11.BANKbuon/LEDs:
This button is used to select the desired sound bank.
The LED for the bank thats currently selected will
light up.
Parts and their functions
5
Preparation and demo performances
Before you begin playing
About the included stand
The LP-380 is used with the included stand.
Make sure that you read the “Assembling the stand” section that can be found on page 17
before proceeding.
Connecting the Power
Connect the supplied AC adapter to the power cord. Insert the DC plug end into the
DC19V jack on the rear of the conector box. Next, plug the power cord into an AC outlet.
Pass the AC adapter cord through the cord hook so that the plug won’t be
removed from the jack accidentally
(Fig. 1)
. When you unhook the cord,
dont pull on the cord with force.
Be sure to use the AC adapter that came with your unit. Using other AC
adapters may cause the malfunctions or other unforeseen events.
Be sure to plug the unit into an AC outlet of the appropriate voltage.
Opening or closing the key cover
Opening the key cover
1. Usingbothhands,gentlylithekeycovertoopenit.
2. Folddowntheedgeontheendofthekeycover.
Closing the key cover
1. Raisetheedge,andgentlypullthekeycovertowardyourself.
2. Whenthekeycoverbeginstocloseonitsown,releaseit.
The key cover is designed to close soly on its own from about mid-way down.
Do not forcibly pull the key cover when closing this. In addition,
do not forcibly close the key cover by applying strong pressure.
Doing so will damage the unit.
Be careful not to pinch your ngers or hands when closing the key
cover.
The temperature and humidity will aect how fast the key cover
closes.
The key cover may make a faint clicking sound when its be-
ing closed slowly. This is normal behavior for the unit.
Be careful not
to bend this part
too much when
you insert the
power cord.
Fig. 1
to AC outlet
AC adapter
Power cord for
the AC adapter
Cord hook
DC plug
6
Using the headphones
Use stereo headphones with a stereo 1/8” mini plug.
Since there are two headphone jacks on the lower le side of the LP-380 keyboard,
two people can enjoy the sound.
If headphones are plugged into the headphone jack, the LP-380’s speakers will not
produce sound.
Use headphones at night or when you dont want disturb others.
If your headphones feature a standard-to-mini adapter plug, be sure to hold the
adapter plug when you connect or disconnect the headphones.
To protect your hearing, do not listen to loud, high-volume sounds for extended
periods of time through headphones.
Using the music stand
The key cover serves as a convenient music stand. (Fig. 2)
When placing opened music, do not apply strong pressure onto the key cover.
Turning the instrument on
Press the power buon to turn on the LP-380. (Fig. 3)
When the instrument is turned on, the buons on the control panel will light up.
To turn the instrument o, press the power buon again.
When the instrument is turned off, all functions and parameters, except the
auto power o function return to their factory default seings.
Auto power off function
When 30 minutes have passed without user input or demo performance, the in-
strument will be automatically turned o. To disable this function, turn o the
auto power o function (see page 13).
Adjust the volume
Rotate the VOLUME knob thats located next to the power switch toward “MAX” to
raise the volume level.
Rotate it le toward “MIN” to lower the level. (Fig. 3)
The VOLUME knob controls the output level of the built-in speakers, the head-
phones jacks and the LINE OUT jacks.
It is always beer to start with a low volume and then increase gradually.
Using the LINE OUT jack
Use the LINE OUT jack, if you want to connect your LP-380 to a mixer, stereo hi-,
or a couple of active monitors. When using a stereo hi-, connect the LINE OUTs to
the AUX or LINE inputs.
You must only connect devices with the power turned o. Careless operation
may damage the LP-380 or the device where its connected, or malfunctions
may be caused.
Connection cables are sold separately. You will need to obtain the appropriate
commercially-available cables for your equipment.
Fig. 2
Fig. 3
Softer
Louder
7
Listening to a piano song
1. PressthePIANOSONGbuon.
The PIANO SONG and PIANO1 buons will light up,
and the number for the piano song (001) will appear in
the display.
1,3
2. Aerabout3seconds,thePIANO1buonwillblink,
andplaybackofthepianosongwillbegin.
When playback of the rst piano song is nished, play-
back continues sequentially with second, third, etc.
When playback of the twentieth piano song is nished,
playback begins again with the rst piano song.
Listeningtoaspecicpianosong
The number for the song that you want to hear can be
selected by pressing the UP or DOWN button beside
the display. If a dierent number is selected by press-
ing the buttons, even while a song is being played,
playback of the corresponding song will begin aer a
few seconds.
3. Tostopplaybackofapianosong,pressthePIANO
SONGbuonagain.
Piano song list
No. display
Songtitle Composer
1 001 Etude Op.10-12 F.Chopin
2 002 Claire de lune C.Debussy
3 003 Fantaisie-Impromptu Op.66 F.Chopin
4 004 Waltz No.6 Db-major Op.64-1 F.Chopin
5 005
“Prelude 1” The Well-Tempered
Clavier, Book 1 J.S.Bach
6 006 “Turkish March” Sonata K.331 W.A.Mozart
7 007 Arabesque No.1 C.Debussy
8 008 Für Elise L.v.Beethoven
9 009 Liebesträume Nr.3 F.Liszt
10 010 La Campanella F.Liszt
11 011 Nocturne Op.9-2 F.Chopin
12 012 Spring Song Op.62-6 F.Mendelssohn
13 013 Reets dans I'eau C.Debussy
14 014 Gymnopédie No.1 E.Satie
15 015 Etude Op.10-3 F.Chopin
16 016 Old Feather Blues KORG original
17 017 La lle aux cheveux de lin C.Debussy
18 018 The Entertainer S.Joplin
19 019 Sunowers KORG original
20 020 Amazing Grace Hymn
Listening to demo performances
The LP-380 contains a total of 30 demo performances (10
demo songs using 10 high-quality sounds and 20 familiar
piano songs using the piano sounds).
During playback of a sound demo song, you can play
using the keyboard; however, the sound cannot be
changed by using the sound buons.
During playback of a sound demo song, the settings
for eects (reverb and chorus) cannot be changed.
Listening to a demo song
1. SimultaneouslypressthePIANOSONGbuonand
theTRANSPOSEbuon.
The PIANO SONG button blinks, and the sound but-
tons blink sequentially.
In addition, the number for the sound demo song (d01)
appears in the display.
1
1,3
2. Aerabout3seconds,thePIANO1buonwillblink,
andplaybackofthedemosongcorrespondingtothat
buonwillbegin.
When playback of the PIANO1 demo song is fin-
ished, playback continues sequentially with PIANO2,
E.PIANO1, etc. When playback of the CHOIR demo
song is nished, playback begins again with the PIA-
NO1 demo song.
Listeningtoaspecicsounddemosong
When the sound buttons are blinking sequentially,
press the sound button for the demo song that you
want to hear.
If a different sound button is pressed, even while a
song is being played, playback of the corresponding
demo song will begin aer a few seconds.
In addition, a song can be selected by pressing the UP
or DOWN buon beside the display.
3. Tostopplaybackofademosong,pressthePIANO
SONGbuonagain.
Sound demo song list
display
Soundbuon
Songtitle Composer
d01 PIANO1 Jardins sous la pluie C.Debussy
d02 PIANO2 Danny boy
Irish Folk Song
d03 E.PIANO1 Jam Session N. Nishi
d04 E.PIANO2 In Memory M.Giesel
d05
HARPSI/
CLAV Invention No.8 J.S.Bach
d06
VIBES/
GUITAR Jazz in Spain
KORG
original
d07 ORGAN1 Improvisation M.Geisel
d08 ORGAN2 Toccata in D moll J.S.Bach
d09 STRINGS Scoring Interlude M.Geisel
d10 CHOIR Autumn Flares M.Geisel
8
In addition, the bank selected for a sound button re-
mains the same, even if a different sound button is
pressed.
2
1
Each time the LP-380 is turned on, the sound in bank
1 is selected for all sound buons.
Playing two sounds at the same time
(Layer mode)
You can play two sounds at the same time on the key-
board. This is called the Layer mode.
Simultaneously press the two sound buttons for the
sounds to be played at the same time.
The two selected sound buons will light up.
The lemost or uppermost selected sound buon is layer 1,
and the other (rightmost or lowermost) one is layer 2 (see
the diagram at the below).
For example, if E.PIANO1 and ORGAN1 are selected,
E.PIANO1 is layer 1 and ORGAN1 is layer 2. In order to
use sounds in dierent banks, rst select the banks in the
Single mode for the sound buons to be pressed.
For example, to play by layering the grand piano and
jazz organ 2 sounds, select bank 1 (grand piano) for the
PIANO1 buon and bank 2 (jazz organ 2) for the ORGAN1
buon, and then press both buons simultaneously.
When selecting Layer mode, the total number of voic-
es that can play at the same time is reduced, depend-
ing on the total number of oscillators used by the se-
lected sounds. (refer to About maximum polyphony”
on page 16.)
Sounds in dierent banks for the same sound buon
(grand piano and jazz piano for the PIANO1 buon)
cannot be selected.
Returning to the Single mode
To return to Single mode, just press a single sound se-
lection buon.
Layer mode settings
In Layer mode, the volume balance between sounds
can be adjusted, the octave for each sound can be shi-
ed, and the damper pedal can be enabled or disabled
for each sound. (refer to “Function mode” on page 11.)
Layer 1
Layer 2
Playing the LP-380
Playing a single sound (Single mode)
You can select a sound from the thirty sounds supplied
with the instrument (10 sounds x 3 banks).
Soundbuon Bank Soundname #
PIANO1 1 Classic Piano 3
2 Grand Piano 3
3 Jazz Piano 2
PIANO2 1 Live Piano 2
2 Honky-Tonk 2
3 Elec.Grand 1
E.PIANO1 1 Stage E.piano 1
2 Bright E.Piano 2
3 Tremolo EP 3
E.PIANO2 1 Dig.E.Piano1 2
2 60's E.Piano 1
3 Dig.E.Piano2 2
HARPSI/CLAV 1 Harpsichord 2
2 Clav 1
3 Synth Clav 2
VIBES/GUITAR 1 Vibraphone 1
2 Marimba 1
3 Acoustic Guitar 2
ORGAN1 1 Jazz Organ1 2
2 Jazz Organ2 2
3 Jazz Organ3 2
ORGAN2 1 Pipe Organ1 2
2 Pipe Organ2 2
3 Positive Organ 2
STRINGS 1 Strings 2
2 Cinema Strings 2
3 Analog Strings 2
CHOIR 1 Aah Choir 2
2 Ooh Voices 2
3 Classical Choir 3
(#) These columns show the number of oscillators per voice
that are used by each sound. (refer to About maximum
polyphony” on page 16.)
1. Pressthesoundbuonforthesoundthatyouwant
toplay.
The selected buon will light up.
2. PresstheBANKbuttontoselectoneofthethree
sounds.
Each press of the BANK button switches the bank in
the order 1, 2, 3, 1, ..., and the corresponding LED to the
right of the BANK buon will light up.
For example, to select the electric grand piano sound,
press the PIANO2 buon, aer which its buon lights
up.
Then, press the BANK button twice to select bank 3
(electric grand piano); the LED below and to the right
of the BANK buon will light up.
9
In Layer mode, you can select the sound(s) where you
want to apply the pedal. (refer to “Specifying layer
pedals” on page 13)
In Partner mode (see page 12), the damper eect can be
applied independently by both players.
Effects
Brilliance
This eect changes the brightness of the tone.
TheseingcanbechangedbyholdingdowntheBRIL-
LIANCEbuttonandpressingtheUPorDOWNbutton
besidethedisplay.
The setting appears in the display with 3 producing a
brighter sound and 1 producing a less bright sound.
The same seing is applied to all sounds and remains ap-
plied until the LP-380 is turned o. When the instrument
is turned on, the default seing 2 is selected.
Brilliance cannot be turned o.
Reverb
This eect adds ambience and depth to the sound, produc-
ing the sense of performing in a concert hall. As a factory
default, the on/o seing for this eect as well as this ef-
fect’s seing are saved with each sound.
EachpressoftheREVERBbuttonturnsthereverbon
(buonlightsup)oro(buonturnso).
Tochangethissetting,holddowntheREVERBbutton
andpresstheUPorDOWNbuonbesidethedisplay.
The seing appears in the display with 3 producing a deep
reverb eect and 1 producing a light reverb eect.
If a different sound is selected or if the LP-380 is turned
o, the on/o seing for this eect as well as this eects
seing return to their factory defaults (default seings).
Chorus
Chorus adds modulation to the sound, producing an ex-
pansively rich sound. As a factory default, the on/o set-
ting for this eect as well as this eects seing are saved
with each sound.
EachpressoftheCHORUSbuonturnstheChorusef-
fecton(buonlightsup)oro(buonturnso).
Tochangethisseing,holddowntheCHORUSbuon
andpresstheUPorDOWNbuonbesidethedisplay.
The seing appears in the display with 3 producing a deep
chorus eect and 1 producing a light chorus eect.
If a different sound is selected or if the LP-380 is turned
o, the on/o seing for this eect as well as this eects
seing return to their factory defaults (default seings).
Performing with another person
(Partner mode)
Two people can play in the same range with the keyboard
divided in half between them. This is called the Partner
mode.
1. PresstheFUNCTIONbuon.
The FUNCTION and PIANO1 buons will light up.
2. PresstheE.PIANO1buon.
The E.PIANO1 sound button lights up, and oFF ap-
pears in the display.
3. PresstheUPbuonbesidethedisplaytoselecton.
Partner mode is turned on, and the PIANO1 sound is
used for both the le and right sides of the keyboard.
While the Partner mode is ON, a dot in the lower right
of the display appears.
The right side of the keyboard, from E4 to C8(E7*), pro-
duces sounds in a range two octaves lower (E2–C6(E5*)).
The le side of the keyboard, from A0(E1*) to E
b
4, produc-
es sounds in a range two octaves higher (A2(E3*)–E
b
6).
* refers to the 73-key version.
4. ToexitPartnermode,presstheDOWNbuonbeside
thedisplaytoselectoFF.
5. PresstheFUNCTIONbuon.
The FUNCTION buon turns o.
In Partner mode, the sound for the le and right sides can
be changed, and the volume can be adjusted. For details,
refer to “Partner mode seings” on page 12.
Using pedals
The LP-380 has three pedals; damper,
sostenuto, and so.
You can use the pedals to make your
playing more expressive and realistic.
Soft pedal (left)
Pressing this pedal will make the tone soer. You can con-
trol the soness of the tone by how far down you press the
on pedal (half-pedaling).
Sostenuto pedal (center)
Pressing this pedal will apply the damper eect only to the
notes that are already being held down on the keyboard,
and will sustain only those notes. The damper eect will
not be applied to any additional notes that you play while
holding down the Sostenuto pedal.
Damper pedal (right)
Pressing this pedal will sustain the sound, producing a
richly resonant decay. You can also add the damper reso-
nance to the classic piano and the grand piano tone (bank
1 and 2 of Piano1). You can also use halfpedalling, with a
gradual resonance effect depending on the depth of the
pedal pressure (“half-pedaling”).
Partner mode indication
2
3
4
1,5
Pitches A2(E3*) to E
6 for the
player on the left side
Pitches E2 to C6(E5*) for the
player on the right side
E
4
A0 E1*
E4
C8E7*
73-key version
Soft pedal
Damper pedal
Sostenuto pedal
10
Selecting a bell for the accent
1. HolddowntheMETRONOMEbuonuntiltheMet-
ronomeseingsmodeisentered.
2. PresstheE.PIANO1buon,andtheaccentsoundset-
tingwillappearinthedisplay.
3. SelecttheseingwiththeUPorDOWNbuonbe-
sidethedisplay.
The seing range consists of oFF (no accent sound), on1
(emphasized sound for the accent beat) and on2 (bell
sound for the accent beat); the default seing is oFF.
2
1,4
3
3
4. PresstheMETRONOMEbuttontoexittheMetro-
nomeseingsmode.
Specifying the tempo (Metronome settings mode)
1. HolddowntheMETRONOMEbuonuntiltheMet-
ronomeseingsmodeisentered.
2. PresstheE.PIANO2buon,andthetempowillap-
pearinthedisplay.
3. SpecifythesettingwiththeUPorDOWNbutton
thatslocatedbesidethedisplay.
The seing range is
q
= 40240; the default seing is 120.
To return to the default setting, simultaneously press
the UP and DOWN buons.
2
1,4
3
3
4. PresstheMETRONOMEbuttontoexittheMetro-
nomeseingsmode.
Selecting the Metronome Sound
1. HolddowntheMETRONOMEbuonuntiltheMet-
ronomeseingsmodeisentered.
2. PresstheHARPSI/CLAVbuon,andthemetronome
soundseingwillappearinthedisplay.
3. SpecifythesettingwiththeUPorDOWNbutton
thatslocatedbesidethedisplay.
The setting range consists of 1 (acoustic) and 2 (elec-
tronic sound); the default seing is 1.
2
1,4
3
3
4. PresstheMETRONOMEbuttontoexittheMetro-
nomeseingsmode.
The metronome
The LP-380 is equipped with a metronome, which can be
changed to a bell sound, which is convenient for practicing.
Turning on/off the metronome
Press the METRONOME button. The
button lights up, and the metronome
starts.
To stop the metronome, press the METRONOME button
again. The buon turns o.
Specifying the tempo
When the tempo appears in the dis-
play (default seing of 120), regardless
of whether the metronome is turned
on or off, the tempo can be specified
with the UP and DOWN buons beside the display.
The seing range is
q
= 40
240.
To return to the default seing, simultaneously press the
UP and DOWN buons.
Selecting the time signature
1. HolddowntheMETRONOMEbuonuntiltheMet-
ronomeseingsmodeisentered.
The METRONOME buon blinks, the PIANO1 sound
buon lights up, and the time signature (04) appears in
the display.
When the Metronome settings mode is entered, the
time signature seing normally appears.
2. Toselectthetimesignatureafterchangingother
settingsintheMetronomesettingsmode,pressthe
PIANO1buon.
3. SelecttheseingwiththeUPorDOWNbuonbe-
sidethedisplay.
The setting range consists of 02 (2/4), 03 (3/4), 04 (4/4)
and 06 (6/4); the default seing is 04.
To return to the default setting, simultaneously press
the UP and DOWN buons.
2
1,4
3
3
4. PresstheMETRONOMEbuttontoexittheMetro-
nomeseingsmode.
Adjusting the metronome volume
1. HolddowntheMETRONOMEbuonuntiltheMet-
ronomeseingsmodeisentered.
2. PressthePIANO2button,andthevolumewillap-
pearinthedisplay.
3. SpecifythesettingwiththeUPorDOWNbutton
thatslocatedbesidethedisplay.
The seing range is 1–13; the default seing is 10.
To return to the default setting, simultaneously press
the UP and DOWN buons.
2
1,4
3
3
4. PresstheMETRONOMEbuttontoexittheMetro-
nomeseingsmode.
11
Touch settings
The keyboard sensitivity, or touch, can be programmed.
To change the seing, hold down the TOUCH buon and
press the UP or DOWN buon beside the display.
Loud
Loudness
Quiet
Quiet
Loud
Playing
strength
Light
Normal
Heavy
Display
Touchsensitivity
1 Light. Loud notes can be produced even by
playing lightly.
2 Normal. Normal piano touch.
3 Heavy. Loud notes can be produced only by
playing very hard.
When the instrument is turned on, the touch seing is
reset to Normal.
The seings are applied to all sounds.
Transpose
In some cases, a song may be wrien in a dicult key (e.g.,
many black keys), or you may wish to shift the pitch to
match another instrument or vocalist. In such cases, you
can transpose (shi the pitch) so that you can use an easier
fingering, or use the same familiar fingering to play at a
dierent pitch. This is called the Transpose function.
You can shift within a range of 11 semitones (10 semi-
tones*) so that when transposing upward by one semitone,
playing the notes shown at the left produces the pitches
shown at the right.
When the instrument is turned on, the transposing is
reset.
While holding down the TRANSPOSE button, press the
keyboard key (F#6–F7(E7*)) for the desired transposition.
If a keyboard key other than C7 is pressed, the TRANS-
POSE button lights up to indicate that the keyboard is
transposed.
The pitch of the entire keyboard is transposed according
to the pitch of the pressed keyboard key in relation to C7.
To return to the original pitches, hold down the TRANS-
POSE buon and press the C7 key. The TRANSPOSE but-
ton turns o, and transposition is canceled.
* refers to the 73-key version.
C4
C7
F7
F 6
E7*
73-key version
Other functions
key Eect
F
#
6–B6 61 semitones below
C7 Standard pitch
C
#
7–F7(E7*) 15(4*) semitones higher
Function mode
The temperament as well as other pitch settings can be
specied from the Function mode.
SeingprocedureforfunctionsintheFunctionmode.
1. PresstheFUNCTIONbuon.
The FUNCTION and PIANO1 buons light up.
2. Pressthesoundbuoncorrespondingtothedesired
function.
The current seing appears in the display.
3. Specifythedesiredseing.
4. After specifyingthedesiredsettings,press the
FUNCTIONbuontoreturntothemodeforplaying.
The FUNCTION buon turns o.
2
3
1,4
3
When the LP-380 is turned off, all functions, except
the auto power o function, return to their default set-
tings.
The seings are applied to all sounds.
Fine tuning
In order to adapt the LP-380 pitch to that of another instru-
ment, you can adjust the pitch in steps of 0.5 Hz over a
range of A4 = 427.5–452.5 Hz
.
27.552.5 appears in the display.
The standard pitch is A = 440 Hz, and the default seing is
40.0.
1. WhenyouentertheFunctionmode,thePIANO1
soundbuonlightsup.
When the Function mode is entered, the pitch seing
normally appears.
2. Tospecifythepitchaerchangingotherseingsin
theFunctionmode,pressthePIANO1buon.
3. SpecifytheseingwiththeUPorDOWNbuonbe-
sidethedisplay.
Simultaneously press the UP and DOWN buttons to
return to 440 Hz.
3
3
22
1
12
The right side of the keyboard, from E4 to C8(E7*), pro-
duces sounds in a range two octaves lower (E2–C6(E5*)).
The le side of the keyboard, from A0(E1*) to E
b
4, produces
sounds in a range two octaves higher (A2(E3*)–E
b
6).
* refers to the 73-key version
The division for the le and right sides of the keyboard
as well as the range (pitches) cannot be changed.
In the Partner mode, the transposition settings are
ignored. In addition, keyboard information (Note On
and Note O) is not sent with MIDI.
Selectingthesoundfortheleside
Exit the Function mode, and then press the sound but-
ton for the sound to be used with the left side of the
keyboard. The right side of the keyboard remains set to
the PIANO1 sound.
In this case, only the sound buon for the le side of
the keyboard will light up.
Selectingsoundsfortheleandrightsides
Exit the Function mode, and then simultaneously press
the two sound buons for the sounds to be used.
The two selected sound buons light up.
Sound for left side of keyboard
Sound for right side of keyboard
The lemost or uppermost selected sound buon is for
the le side of the keyboard, and the other (rightmost
or lowermost) one is for the right side of the keyboard.
For example, if E.PIANO1 and ORGAN1 are selected,
E.PIANO1 is for the le side of the keyboard and OR-
GAN1 for the right side of the keyboard.
In order to use sounds in different banks, first select
the banks in the Single mode for the sound buons to
be pressed.
If the Partner mode is turned off and the Function
mode is exited with the le and right sides of the key-
board set to different sounds, the sounds whose but-
tons are lit will be selected.
Usingthesamesound(otherthanPIANO1)forboththe
leandrightsides
Exit the Function mode, and then simultaneously press
two sound buttons, making sure that the rightmost
one is for the sound to be used. Then, press the right-
most selected sound button again. For example, after
pressing the PIANO2 and ORGAN1 buons, press the
ORGAN1 buon again to use the ORGAN1 sound with
both the le and right sides of the keyboard.
Changingthevolumefortheleandrightsides
I
f the sounds for the left and right sides of the key-
board have been changed, the volume can be specied
for each sound. refer to “Specifying the volume balance
for layers” on page 13.
Usingdampers
The damper pedal and the soft pedal can be used as
separate damper pedals for the right and le sides of
the keyboard respectively.
Damper: Used as a damper pedal for the player on the
right side of the keyboard.
Sostenuto: Not used
So: Used as a damper pedal for the player on the le
side of the keyboard.
Selecting a temperament
You can select from nine temperaments, including the
equal temperament, pure temperaments (major and mi-
nor), classical temperaments (Kirnberger and Werckmeis-
ter) as well as temperaments used with Middle Eastern
and Indian folk music.
Display
Temperament
00 Equaltemperament(defaultseing):
Spacing all semitones at equal pitch intervals,
this temperament is the most widely used.
01 Puretemperament[major]:Major chords in the
selected key are perfectly tuned.
02 Puretemperament[minor]:Minor chords in
the selected key are perfectly tuned.
03 Arabic:This scale includes the quarter-tone in-
tervals used in Arabic music.
04 Pythagorean:This ancient Greek scale is espe-
cially eective for playing melodies. It consists
of perfect hs; however, other intervals the
major third in particular – is out of tune.
05 Werckmeister:The Werckmeister III scale was
created in the later Baroque period to allow
relatively free transposition.
06 Kirnberger:The Kirnberger III scale is used
mainly for tuning harpsichords.
07 Slendroscale:This is an Indonesian gamelan
scale with ve notes per octave.
08 Pelogscale:This is an Indonesian gamelan
scale with seven notes per octave.
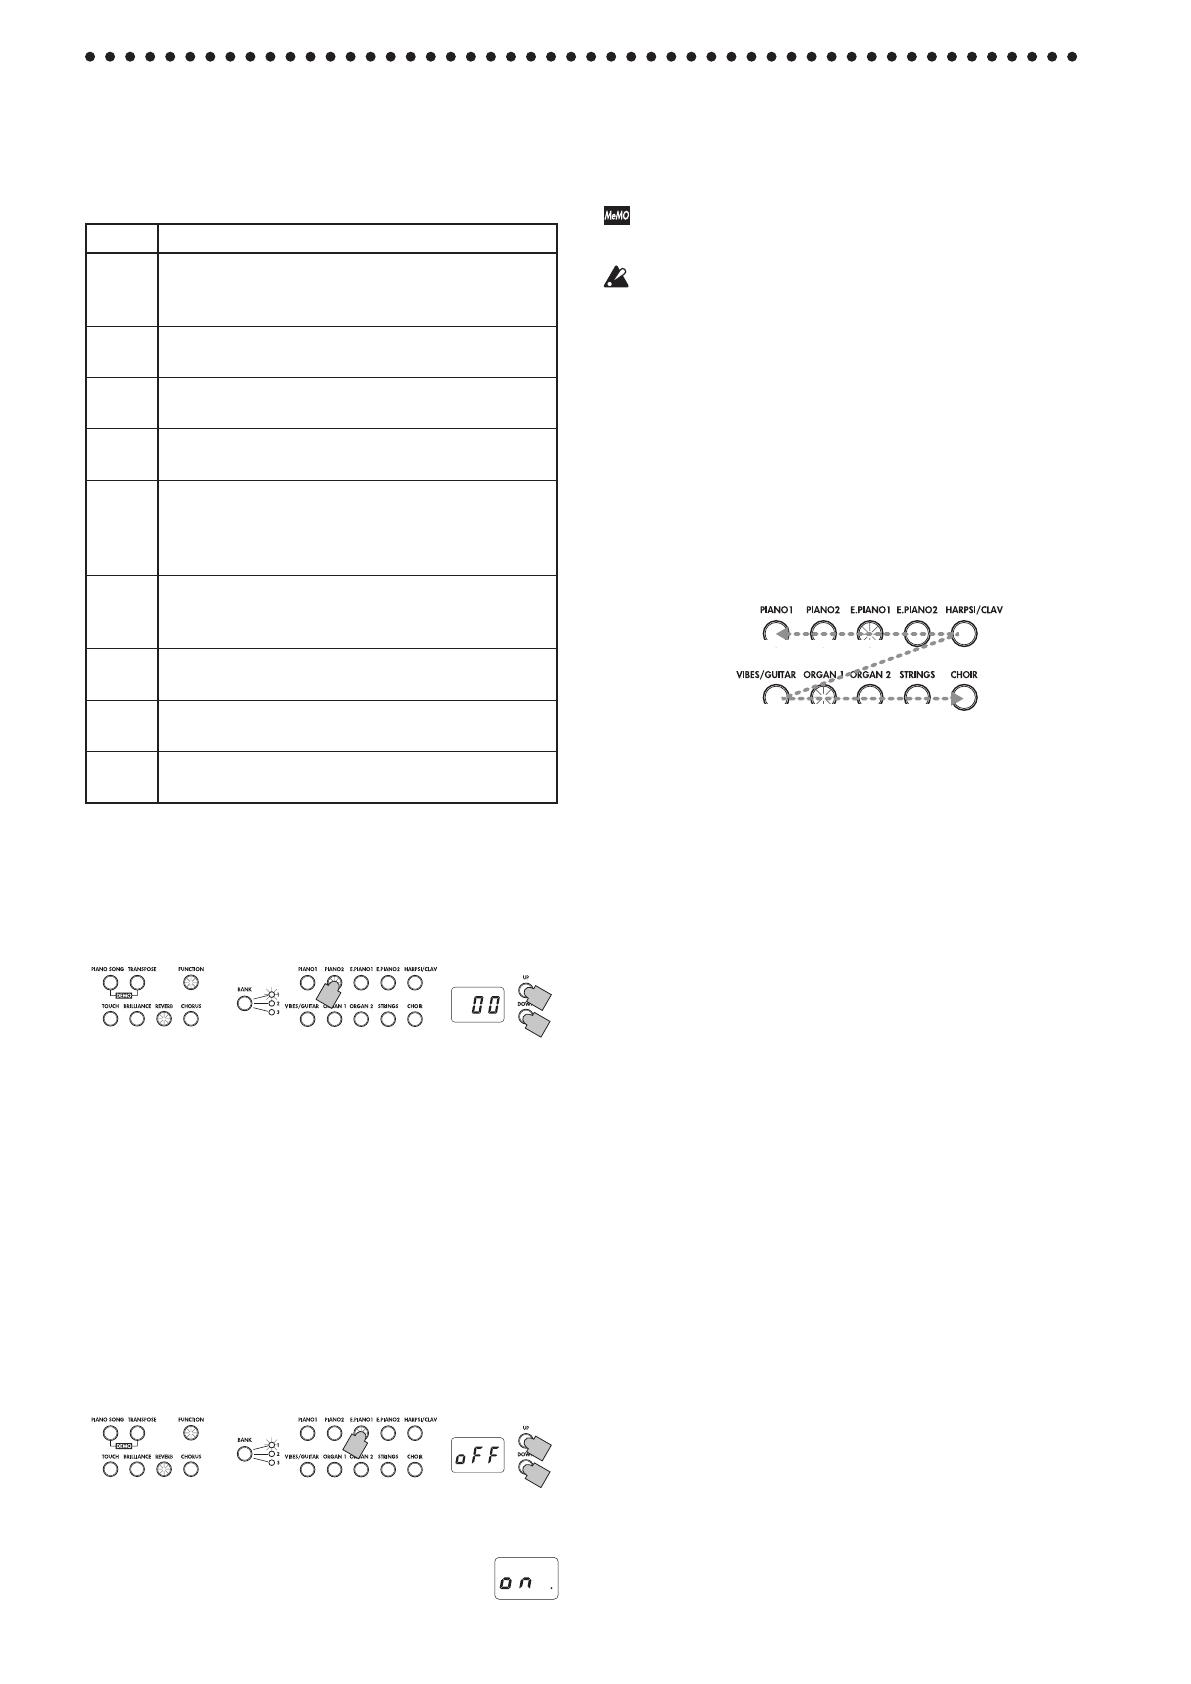
1. EntertheFunctionmode,andthenpressthePIANO2
buon.
The PIANO2 sound buon lights up, and the tempera-
ment seing (00) appears in the display.
2. SelecttheseingwiththeUPorDOWNbuonbe-
sidethedisplay.
2
2
1
Aboutstretchedtuning
In order to produce the most natural resonance, PIANO1
and PIANO2 sounds use a stretched tuning” that makes
the notes of the lower range slightly aer than equal tem-
perament, and the upper range slightly sharper. This is
how an acoustic piano is normally tuned by professional
tuners.
Partner mode settings
1. Enter the Function mode, and then press the
E.PIANO1buon.
The E.PIANO1 sound buon lights up, and the on/o
seing appears in the display.
2. EachpressoftheUPorDOWNbuonbesidethedis-
playturnsthemodeon(on)oro(oFF).
2
2
1
When the Partner mode is turned on, the PIANO1 sound
is used for both the left and right sides of the keyboard,
and the PIANO1 buon lights up.
Simultaneously, a dot on the lower right of the
display appears (Partner mode indication).
13
Specifying layer pedals
In the Layer mode, a damper seing can be specied for
each sound.
The seings are only for the layer 1 sound (o –), only for
the layer 2 sound (– – o) and for both sounds (o – o).
The default seing is o – o.
1. EntertheFunctionmode,andthenpresstheVIBES/
GUITARbuon.
The VIBES/GUITAR sound button lights up, and the
damper seing (o – o) appears in the display.
2. SelectthedamperseingwiththeUPorDOWNbut-
tonbesidethedisplay.
2
2
1
If the sound is in the Single mode, – – – appears in the
display, and a seing cannot be specied.
Specifying the auto power off function
When 30 minutes have passed without a key pressed on
the keyboard or without an automatic performance played,
the instrument is automatically turned o. To disable this
function, turn o (oFF) this function. The default seing is
this function turned on. If this seing is changed, the new
seing is saved and remains selected, even if the LP-380 is
turned o.
1. EntertheFunctionmode,andthenpresstheOR-
GAN1buon.
The ORGAN1 sound buon lights up, and the seing
(on) appears in the display.
2. Selecttheon/oseingwiththeUPorDOWNbut-
tonbesidethedisplay.
2
2
1
Specifying the volume balance for layers
The volume balance for sounds in the Layer mode (or the
Partner mode) can be adjusted. The seing range is 1 9...
9 9...9 1, with the number on the le for layer 1 (or the
le side of the keyboard) and the number on the right for
layer 2 (or the right side of the keyboard).
The default seing is 9 – 9.
1. EntertheFunctionmode,andthenpresstheE.PIANO2
buon.
The E.PIANO2 sound buon lights up, and the balance
seing (9 – 9) appears in the display.
2. SpecifythevolumebalancesettingwiththeUPor
DOWNbuonbesidethedisplay.
To return to the default setting, simultaneously press
the UP and DOWN buons.
2
2
1
If the sound is in the Single mode, – – – appears in the
display, and a seing cannot be specied.
Specifying layer octaves
In the Layer mode, the octave for each sound can be speci-
ed. The seing range is ±1 octave for each sound, and –01,
00 and 01 appear in the display. The default seing is 00.
1. EntertheFunctionmode,andthenpresstheHARP-
SI/CLAVbuon.
The HARPSI/CLAV sound button lights up, and the
layer (L1) whose octave is to be specied appears in the
display.
2. SelectthelayerwiththeUPorDOWNbuonbeside
thedisplay.
L1 appears for layer 1, and L2 appears for layer 2.
3. PresstheBANKbuon.
The octave seing (00) appears in the display.
4. SelecttheoctaveseingwiththeUPorDOWNbut-
tonbesidethedisplay.
To return to the default setting, simultaneously press
the UP and DOWN buons.
To select the octave for the other layer, press the HARPSI/
CLAV buon to select the layer.
2,4
1
3
2,4
If the sound is in the Single mode, – – – appears in the
display, and a seing cannot be specied.
14
4. After specifyingthedesiredsettings,press the
FUNCTIONbuontoreturntothemodeforplaying.
The FUNCTION buon turns o.
2
3
3
1,4
When the LP-380 is turned o, all parameters return
to their default seings.
Changing the MIDI channels
Data can be transmied and received on MIDI channels 1
through 16 (C01C16).
When the LP-380 is turned on, transmission channel 1 (C01)
is automatically selected.
• WhenyouentertheMIDIfunctionmode,thePIA-
NO1soundbuonlightsup.
When the MIDI function mode is entered, the MIDI
channel seing normally appears.
To specify the MIDI channel setting after changing
other settings in the MIDI function mode, press the
PIANO1 buon.
In the Layer mode, selecting the transmission channel
specifies the channel for layer 1. The transmission chan-
nel for layer 2 will automatically be set to the following
channel. For example, if MIDI channel 7 is selected for the
sound of layer 1, MIDI channel 8 will automatically be
specied for the sound of layer 2. If MIDI channel 16 is se-
lected for the sound of layer 1, channel 1 will be specied
for the sound of layer 2.
Local On/Off
With the Local On seing, playing the LP-380’s keyboard
produces the sounds of the performance as well as trans-
mits MIDI data. With the Local Off setting, playing the
LP-380s keyboard does not produce the sounds of the
performance; MIDI data is only transmied. Normally this
parameter is set to Local On (default seing: on).
The Local Off setting should be selected when using the
LP-380 as a master keyboard, for example, to play sounds
from a connected MIDI device (a keyboard, sound module,
etc.). The LP-380 will not produce sound, but the perfor-
mance will be played by the connected MIDI device.
Select the Local Off setting (oFF) when using the LP-380
as a sound module, for example, when the LP-380 is con-
nected to a sequencer with its Echo Back seing (function
that sends back data that the sequencer received) selected
in order to prevent echoing of returned data.
• EntertheMIDIfunctionmode,andthenpressthe
PIANO2buon.
The PIANO2 sound buon lights up, and the Local On/
O seing (on) appears in the display.
MIDI
What is MIDI?
MIDI, is the abbreviation of Musical Instrument Digital
Interface. It is an international standard that was created
to connect and transfer data between electronic musical
instruments, computers and other devices.
What can you do with MIDI?
Thanks to MIDI, you can use the LP-380 to control other
instruments, use other instruments to control the LP-380,
and use a sequencer to create complex musical pieces.
When you use the LP-380 keyboard or pedal, or select a
sound, the notes, pedal activation and change in sound are
transmitted to another instrument, or are recorded by a
sequencer.
Connections
Commercially available MIDI cables are used to transfer
MIDI data. Connect these cables from the MIDI connectors
of the LP-380 to the MIDI connectors of the external MIDI
device that you want to exchange data with. There are two
types of MIDI connector.
MIDIINconnector
This connector receives MIDI messages.
The MIDI IN connector lets you play the LP-380’s sounds
from an external MIDI device (e.g., MIDI keyboard or se-
quencer). Use a MIDI cable to connect the LP-380’s MIDI
IN connector to your external MIDI devices MIDI OUT
connector.
MIDIOUTconnector
This connector transmits MIDI messages.
The MIDI OUT connector lets you control an external
MIDI device using the MIDI messages transmitted from
the LP-380. Use a MIDI cable to connect the LP-380’s MIDI
OUT connector to your external MIDI device’s MIDI IN
connector.
MIDI function mode
When the LP-380 is turned on, the MIDI parameters are
set to transmission channel 1, all reception channels (1–16),
Local On and Omni O.
These settings can be changed from the MIDI function
mode.
Setting procedure for parameters in the MIDI
function mode
1. HolddowntheFUNCTIONbuonwiththefunction
modenotestablished.
The PIANO 1 buon lights up, and the MIDI channel
setting (C01) appears in the display. The FUNCTION
buon is blinking.
2. Pressthesoundbuoncorrespondingtothedesired
parameter.
The current seing appears in the display.
3. Specifythedesiredseing.
15
Enabling/disabling control change transmission/
reception ltering
Messages, such as usage of the LP-380s damper pedal, can
be transmied to a connected external MIDI device to con-
trol it, and these messages can be received from the exter-
nal MIDI device to control the LP-380.
To transmit/receive control change messages, disable this
function (oFF: default seing). To not transmit/receive the
messages, enable this function (on).
• EntertheMIDIfunctionmode,andthenpressthe
E.PIANO2buon.
The E.PIANO2 sound buon lights up, and the seing
(oFF) appears in the display.
Using the LP-380 as a multi-timbral sound module
The LP-380 can operate as a 16-part multi-timbral sound
module when an external MIDI device is used to control
its internal sound generator.
1. ConnectaMIDIcabletotheLP-380sMIDIINcon-
nectorandtotheMIDIOUTconnectorofasequencer
orotherMIDIdevice.
2. TransmitMIDIdatafromtheconnectedsequenceror
otherMIDIdevice.
For details on transmitting data from the connected
sequencer or other MIDI device, refer to its user’s man-
ual.
3. WhentheLP-380receivestheprogramchangemessage
alongwiththeperformancedata,itwillplaywiththe
soundcorrespondingtothatprogramnumber.
If the LP-380 is not to be used as a multi-timbral sound
module, disable this function (oFF).
• EntertheMIDIfunctionmode,andthenpressthe
HARPSI/CLAVbuon.
The HARPSI/CLAV sound button lights up, and the
seing (on: default seing) appears in the display.
Enabling/disabling program change transmis-
sion/reception ltering
The programs on a connected MIDI device can be changed
by sending a MIDI change number from the LP-380. In
addition, the programs on the LP-380 can be changed by
receiving a MIDI change number from a connected MIDI
device.
For program change numbers and their corresponding
sounds, refer to “Table of sounds and corresponding pro-
gram change numbers” below.
To transmit/receive program change messages, disable this
function (oFF: default seing). To not transmit/receive the
messages, enable this function (on).
• EntertheMIDIfunctionmode,andthenpressthe
E.PIANO1buon.
The E.PIANO1 sound buon lights up, and the seing
(oFF) appears in the display.
Transmiingprogramchanges
When a sound is selected using the sound buttons and
BANK buon on the LP-380, the corresponding MIDI pro-
gram change number is transmied.
Receivingprogramchanges
When the LP-380 receives a MIDI program change num-
ber, the sound is changed to the corresponding number.
If an incompatible program change number is re-
ceived, the LP-380 sound is not changed.
Tableofsoundsandcorrespondingprogramchange
numbers
CC0: Bank Select (MSB) for all sounds is set to 121.
SoundBuon Bank
CC32 PC
Sound
PIANO1 1 1 0
Classic Piano
2 0 0
Grand Piano
3 0 1
Jazz Piano
PIANO2 1 2 0
Live Piano
2 0 3
Honky-Tonk
3 0 2
Elec.Grand
E.PIANO1 1 0 4
Club E.piano
2 1 4
Vintage E.Piano
3 3 4
Tremoro EP
E.PIANO2 1 0 5
Dig.E.Piano1
2 2 4
60's E.Piano
3 1 5
Dig.E.Piano2
HARPSI/CLAV 1 0 6
Harpsichord
2 0 7
Clav
3 1 7
Synth Clav
VIBES/
GUITAR
1 0 11
Vibraphone
2 0 12
Marimba
3 0 24
Acoustic Guitar
ORGAN1 1 0 16
Jazz Organ1
2 1 16
Jazz Organ2
3 0 17
Jazz Organ3
ORGAN2 1 0 19
Pipe Organ1
2 1 19
Pipe Organ2
3 2 19
Positive Organ
STRINGS 1 0 48
Strings
2 0 50
Cinema Strings
3 1 50
Analog Strings
CHOIR 1 0 52
Aah Choir
2 1 52
Ooh Voices
3 2 52
Classical Choir
16
Specications
Keyboard
RH3 (Real weighted hammer action 3)
keyboard:
88 note (A0–C8)/73 note (E1–E7)
Touchselection Light, Normal, Heavy
Pitch Transpose, Fine tuning
Temperament Nine kinds
Soundgeneration
Stereo PCM System
Polyphony 120 notes (max)
Sounds 30 sounds (10 x 3 banks)
Eects Brilliance, Reverb, Chorus (3 levels each)
Demo 30 (Sound demo song x 10, Piano Song x 20)
Metronome
Tempo, Time signature, Accent, sound and Volume
controls
Pedal
Damper*, Sostenute, So* (*half-pedaling supported)
Connections
LINE OUT, MIDI (IN, OUT), Headphones×2, PEDAL,
SPEAKER
Controls
Power, VOLUME, PIANO SONG, TRANSPOSE,
FUNCTION, TOUCH, BRILLIANCE, REVERB,
CHORUS, BANK, Sound × 10, UP, DOWN,
METRONOME
Amplication 22 W × 2
Sperkers 10 cm x 2
Powersupply DC 19 V, AC adapter (included)
Powerconsumption 15 W
Dimensions
(
W×D×H
)
88-keyversion:
1355 × 351 × 772 mm / 53.35 × 13.82 × 30.39 inches
1355 × 351 × 936 mm / 53.35 × 13.82 × 36.85 inches
(with the key cover opened)
73-keyversion:
1135 × 351 × 772 mm / 44.68 × 13.82 × 30.39 inches
1135 × 351 × 936 mm / 44.68 × 13.82 × 36.85 inches
(with the key cover opened)
Weight 88-keyversion:
37 kg / 81.57 lbs. (including Stand)
73-keyversion:
32 kg / 70.55 lbs. (including Stand)
Includedaccessories
AC adapter ( ), Power cord, Stand, Pedal unit.
Specifications and appearance are subject to change
without notice for improvement.
Appendix
Troubleshooting
If during use any of the following problems should occur,
carefully examine the instrument to see if you can nd out
what the problem is, and try resolving it by following the
suggestions below. If the instrument will still not function
properly refer to your dealer.
The instrument will not turn on
Check that the AC adapter is correctly connected to the
piano and the outlet.
No sound
Is the speaker cord of the speaker box on the stand con-
nected with the speaker connector on the LP-380 cor-
rectly?
Make sure that the volume is not set on MIN. If it is,
bring it up to an adequate level.
Make sure that the MIDI Local function is not set on
OFF. If it is, set it to ON (or turn the instrument o and
then on again).
Make sure there is not a jack plugged into one of the
Headphones jacks. This would turn the internal speak-
ers o. if so, unplug the jack.
Notes are interrupted
You have exceeded the maximum polyphony. see
About maximum polyphony.
The pitch or tone of the piano sounds wrong in some
key regions
The LP-380’s piano sounds replicate the sound of an
actual piano as faithfully as possible. This means that
in some regions of the keyboard, you may feel that
the overtones seem stronger, or that the tone or pitch
seems wrong. This is not a malfunction.
The connected MIDI device does not respond to trans-
mitted MIDI data
Make sure that all MIDI cables are correctly connected.
Make sure that the LP-380 is receiving MIDI data on
the same channel as the MIDI device.
About maximum polyphony
If the number of notes being played simultaneously ex-
ceeds the maximum polyphony, some notes will be lost
since the LP-380 is equipped with a mechanism that stops
the rst note being played to give priority to notes played
with keys pressed later. Some LP-380 sounds, although
they may be a single sound, are generated by two or more
oscillators (one note of a sound-generating circuit). Sounds
using just one oscillator, such as those in banks 1 and 2 of
VIBES/GUITAR, have a maximum polyphony of 120 notes.
Sounds using two oscillators, such as those in banks 1 and
2 of PIANO2 and in banks 1 and 3 of E.PIANO2, have a
maximum polyphony of 60 notes.
120 ÷ Number of sound oscillators = Maximum polyphony
Keep the maximum polyphony in mind and carefully
choose sounds when using Layer mode to play two sounds
simultaneously or when using the damper pedal.
17
The73-keyversionhasfourscrews(M4).Inaddition,
thepushrivetisnotincluded.
Screws (M6) x 6 pcs.
Screws (M4) x 8 pcs.
Caps x 6 pcs.
Push rivet x 1 pc.
Cord holder x 1 pc.
3. FastentheLP-380andthespeakerboxtotherightandle
sidepanelsusingeightscrews(M6).
Position the speaker box so that the speaker cord is on the le
side. In this position, the speaker (the side covered with cloth)
faces you.
First temporarily tighten* the screws on the right side panel,
and then temporarily tighten* the screws on the le side pan-
el.
* To temporarily tighten the screws is to tighten them leav-
ing a clearance of about 2 mm.
LP-380
the side covered with cloth
Speaker box
(M6)
Screws
(M6)
Side panel (right)
Side panel (left)
Positioning tab
Be careful not to pinch your ngers.
4. Connecttheaachedpedalcord,observingthecorrectori-
entation,totheconnectoronthereversesideofthepedal
unit,andthenengageitwithaslotinthepedalunit.
The pedal cord can be aached to or detached from the con-
nector with its locking tab held down.
Thepedalunitforthe73-keyversionhasadifferent
shape,butispreparedinthesameway.
Locking
tab
88-key version
73-key version
Assembling the Stand
Warning
● Atleastoneotherpersonmusthelpyouassem-
blethestand.
Caution during assembly
In order to assemble the stand safely, please observe the follow-
ing points.
• Make sure that you have the correct part in the correct orien-
tation, and perform the assembly in the order given.
Other cautions
Please check the following points aer assembly.
• Loosenedscrews
The screws may loosen as time passes after assembly. You
should periodically check whether any screws have become
loose. If you feel that the stand vibrates excessively, it is pos-
sible that screws have come loose. If so, re-tighten them.
• Whenmovingthedigitalpianotoanotherlocation
To move the assembled stand, remove the AC adapter cord
from the stand, close the key cover, and then move it slowly
with at least two people keeping it as level as possible.
• Disassembly
If you need to disassemble the stand, do so by reversing the steps
of the assembly procedure. Aer disassembly, keep the screws
and other parts in a safe place so that they are not lost.
The LP-380 should always be laid down before disas-
sembled.
Assembly procedure
You’ll need a Phillips (+) screwdriver.
1. Puttheprotectivesheet,whichhadcoveredtheLP-380,on
aatoor,andplacetheLP-380onthatsheetwithitsrear
facingtheoor.
In addition, place cloths or magazines so that you may easily
put your hands under the LP-380 when assembling and rais-
ing the stand.
Ensure that the LP-380’s key cover will not to open until
the end of the assembly.
Protective sheet
LP-380
2. Makesurethatallofthefollowingpartsareavailable.
The73-keyversiondoesnothaveapedalboard.Inad-
dition,thehardwareforinstallingthepedalboardis
notinstalledontheinsideofthesidepanels.
Anti-tipping Bracket (left)
Anti-tipping Bracket (right)
Pedal unit
Pedal board
Speaker box
Side panel (right)
Side panel
(left)
Pedal cord
18
10. Ensurethatthestandhasnogapsandisnottilted,andthat
allthescrewsaretightenedrmly.
11. Putcapsonthescrewheadsontherightandlesidepanels.
Caps
12. Connectthepedalcordandthespeakercordtotheconnec-
torsontherearoftheLP-380sconnectorbox.
When connecting the pedal cord and the speaker cord, ob-
serve the correct orientations of the connectors.
The pedal cord or the speaker cord can be detached from the
connector with its locking tab held down.
Cord
holder
Speaker cord
Pedal cord
Speaker cord
Pedal cord
Locking tab
73-key version
13.Usethecordholdertoholdthepedalcord.
After securing the cord with the cord holder, ensure
that excess pressure is not applied to the connectors.
14.ConnectthededicatedcordtotheACadapter.Then,
plugtheACadapterintotheDCINconnector,and
wrapthecordaroundthecordhookofthepiano.For
details,referto“ConnectingthePower”onpage5.
15.PlacetheLP-380whereyouintendtouseit.Make
suretoplaceitinasafelocationwheretheoorisat
andstable.
Onthe73-keyversion,thepedalunitandstandare
separate,andonlythepedalcordisattachedtothe
stand.Becarefulwhenmovingthedigitalpianotoan-
otherlocation.
When seing the digital piano in place, make sure that
the stand does not rest on the AC adapter cable or pedal
cable.
For greater safety, be sure to attach the anti-tipping
brackets to the rear of the le and right side panels.
Check following assembly
□ Areanypartsleover?
If any parts are le over, carefully review the assembly proce-
dure to see where those parts should have been used.
□ Makesurethatallscrewsaretight.
5. Forthe88-keyversion,insertthepedalunitintothepedal
board,andthenfastenitbypressingapushrivetintothe
hole(abovethecutout)attherearofthepedalboard.
Aer pressing it into there, li the pedal board to check that
the pedals do not drop.
The push rivet will prevent the pedal unit from falling out.
Therefore, it cannot be fully fastened to the pedal board.
Thisstepisnotnecessarywiththe73-keyversion.
Front
Front of pedal board
Rear of pedal board
Rear
Push
Push rivet
6. Forthe88-keyversion,temporarilyfastenthepedalboard
(withthepedalunitattached)tothehardwareinsidethe
sidepanelsofthestand,usingfourscrews(M4).
Thisstepisnotnecessarywiththe73-keyversion.
Screws
(M4)
Screws
(M4)
7. Raisetheassembledstandslowlywithtwopeople.
8. Makesuretoaachtheanti-tippingbracketsbehindboth
sidepanels.Andtheanti-tippingbracketfastenedtothe
leofthecodeholderatthistime.
Joints between the side panels and the aached anti-tipping
brackets should be even (with no level dierence le).
Anti-tipping
Bracket
Screws (M4)
Screws (M4)
Reverse
Reverse
Cord holder
73-key version
9. Then,firmlytightenallthescrewsthataretemporarily
tightenedinstep3and6.
When tightening the screws on the LP-380, adjust the up/
down and front/rear positions on the le and right side pan-
els so that they are equal.
70
Model: LP-380
[Digtal piano]
MIDI implementation chart
Function... Transmitted Received Remarks
Basic
Channel
Default
Changed
Default
Messages
Altered
Mode
Note
Number
True Voice
Velocity
Note On
Note Off
After
Touch
Key’s
Channel
Pitch Bend
Control
Change
Program
Change
True Number
System Exclusive
System
Common
Song Position
Song Select
Tune Request
Date: Aug. 31. 2014
Version: 1.0
0, 32
1
6
38
5
65
7
11
10
91, 93
64, 66, 67
71
72, 73
74
75, 76, 77, 78
100, 101
120
121
1
1—16
X
**************
3—125/10—117
**************
O 9n, V=1—127
X
V= 64
X
X
1—16
3
X
0—127
0—127
O 9n, V=1—127
X
X
O
X O
1
O
X
X
X
X
X
O
X
X
X
O
X
X
X
X
X
X
O
O
O
O
O
O
O
O
O
O
O
O
O
O
O
O
O
O
O
*1
*1
*1
*1
*1
*1
*1
*1
*1
*1
*1
*1
*1
*1
*1
*1
*1
*1
Reception range differs depending on sound.
O
**************
X
X
X
X
X
O
X
O
X
O
O
X
X
X
X
X
O
O
(123
125)
O
X
*1: Transmitted and received when the MIDI filter is disabled.
*2: Includes Inquiry and GM Mode On. Received when GM Mode On, but all GM sounds are unsupported.
O
*2
*1
*1
X
*1
System
Real Time
Clock
Commands
Aux
Meassages
Local On/Off
All Notes Off
Active Sense
System Reset
Notes
Mode 1: Omni On, Poly
Mode 3: Omni Off, Poly
Mode 2: Omni On, Mono
Mode 4: Omni Off, Mono
O: Yes
X: No
Consult your local Korg distributor for more information on MIDI IMPLEMENTATION.
Bank Select (MSB, LSB)
Modulation
Data Entry MSB
Data Entry LSB
Portamento Time
Portamento On/Off
Volume
Expression
Pan
Reverb Send, Chorus Send
Damper, Sostenuto, Soft
Resonance
EG Time (Release, Attack)
Brightness
Decay Time, Vibrato Rate, Depth, Delay
RPN (LSB, MSB)
All Sounds Off
Reset All Controllers
88-key version/73-key version.
  • Page 1 1
  • Page 2 2
  • Page 3 3
  • Page 4 4
  • Page 5 5
  • Page 6 6
  • Page 7 7
  • Page 8 8
  • Page 9 9
  • Page 10 10
  • Page 11 11
  • Page 12 12
  • Page 13 13
  • Page 14 14
  • Page 15 15
  • Page 16 16
  • Page 17 17
  • Page 18 18
  • Page 19 19
  • Page 20 20
  • Page 21 21
  • Page 22 22
  • Page 23 23
  • Page 24 24
  • Page 25 25
  • Page 26 26
  • Page 27 27
  • Page 28 28
  • Page 29 29
  • Page 30 30
  • Page 31 31
  • Page 32 32
  • Page 33 33
  • Page 34 34
  • Page 35 35
  • Page 36 36
  • Page 37 37
  • Page 38 38
  • Page 39 39
  • Page 40 40
  • Page 41 41
  • Page 42 42
  • Page 43 43
  • Page 44 44
  • Page 45 45
  • Page 46 46
  • Page 47 47
  • Page 48 48
  • Page 49 49
  • Page 50 50
  • Page 51 51
  • Page 52 52
  • Page 53 53
  • Page 54 54
  • Page 55 55
  • Page 56 56
  • Page 57 57
  • Page 58 58
  • Page 59 59
  • Page 60 60
  • Page 61 61
  • Page 62 62
  • Page 63 63
  • Page 64 64
  • Page 65 65
  • Page 66 66
  • Page 67 67
  • Page 68 68
  • Page 69 69
  • Page 70 70
  • Page 71 71

Korg LP-380 Owner's manual

Category
Digital pianos
Type
Owner's manual
This manual is also suitable for

Ask a question and I''ll find the answer in the document

Finding information in a document is now easier with AI