Page is loading ...

C
C
a
a
r
r
S
S
h
h
o
o
w
w
™
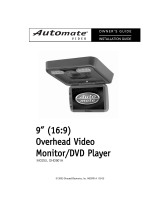
10.4” OVERHEAD MONITOR
Car Show
USERS MANUAL
V1.0

1
INDEX
NO CONTENT PAGE
1 Specifications 2
2 Installation Instructions 3-4
3 Monitor Controls 6-7
4 OSD Settings 8-9
5 Wiring Harness 10
6 Precautions 11
Intended Use/Registrations 12

2
1. Specifications
Resolution 800(H) × 600(V) x 3(RGB) (1,440,000) Pixels
Display Area 211.2(H) × 158.4(V)
Size 10.4" TFT
Brightness
280 cd/
㎡
㎡㎡
㎡
Response Time 15 millisecond
View Angle
Top=30°, Bottom=50°
Left=50°, Right=50°
Video Input
Composite Video (RCA)(F) ×2
(NTSC, PAL, SECAM)
Audio Input Stereo Sound Input (RCA)(F) ×2
Power Input DC 12~35V, 3A(Max)
Audio Output
IR Transmitter 2.3MG&2.8MG
Left and Right Composite Audio Out
Display Key (6 Key) Control
Control Function
Wireless Remote Control
Monitor
Adjustments
BRIGHTNESS
CONTRAST
SHARPNESS
HUE
SATURATION
Power
Consumption
10W (MAX)
Operating
Temperature
Operating: 0~50
℃
℃℃
℃
/ 32~122
o
F
Storage: 0~60℃
℃℃
℃ / 32~140
o
F
Weight/
Dimensions
2.5kg ±200g / 5.5 lbs
1.70”(H) x 12.18”(W) x 12.27”(L)

3
2. Installation
Step 1
NOTE: The mounting bracket is directional and
must be aligned to the monitors mounting
holes. Pay special attention to the proper
screw locations.
Mounting Bracket
Screw Locations
Step 2
Attach the mounting bracket to the vehicles
roof support beam using the provided screws.
NOTE:
2 different screw lengths are included.
Use the correct length for the installation.
Outer Roof Roof Support Beam
Installation Bracket
Car Show
™
10.4 Monitor

4
Step 3
Attach the monitor to the mounting bracket with
the provided screws. Screw locations shown
with arrows
See Step 1
Note bracket alignment to monitor position

5
3. Monitor Controls
Monitor Mounted Control Operation
1 2 3 4 6 5 Dome Lights ON/OFF
1. Power:
::
: Push this button to Power ON or OFF the LCD.
2. ”
-
“:
::
: Push this button to decrease the degree of the
function that you selected.
3. ” + “:
::
:Push this button to decrease the degree of the
function that you selected.
4. MENU/SELECT:
::
:Push this button to show the menu list
and select the menu function.
5. V1
:
::
:
Push this button to select Video 1 input.
6. V2: Push this button to select Video 2 input.

6
Remote Control Operation
(1) POWER:
::
:Push the RED button to Power On or Off the
LCD.
(2) SELECT
:
::
:
Push this button to select Video 1 or 2 Input.
(3) MENU:
::
: Push this button to show the menu list and
select the menu function.
(4) UP:
::
: Push this button to decrease the degree of
the function that you selected.
(5) DOWN:
::
: Push this button to decrease the degree of
the function that you selected.
(1
)
(2)
(3)
(4)
(5)
Car Show ™

7
4. OSD Functions
OSD MENU LIST
BRIGHTNESS:
Adjust the brightness of screen.
Adjustment Range:
::
: 0 ~ 15
CONTRAST:
Adjust the contrast of screen.
Adjustment Range:
::
:0 ~ 31
SHARPNESS:
Adjust the sharpness of screen.
Adjustment Range:
::
:0 ~15
HUE:
Adjust HUE function.
Adjustment Range:
::
:0 ~ 62
SATURATION:
Adjust the Saturation of picture.
Adjustment Range:
::
:0 ~ 62
VIDEO 1
CONTRAST 21
VIDEO 1
BRIGHTNESS 15
VIDEO 1
SHARPNESS 7
VIDEO 1
HUE 31
VIDEO 1
SATURATION 31

8
DEFAULT:
Return to the original LCD settings
SAVE AND EXIT:
Save your personal settings and
exit to Menu mode.
VIDEO 1
DEFAULT (VX.XX)
VIDEO 1
SAVE AND EXIT

9
5. Wiring Harness
Accessories Description
1
Power cable w/ 3A/250V Fuse
Yellow
:
::
:
Video input 1,
Video input 2
Red: Audio input (R)1,
Audio input (R)2
White: Audio input (L)1,
Audio input(L)2
Power input connector:
Red: 12v+ Switched
Black: Ground

10
6. Precautions
USING YOUR MONITOR
•= Do not press directly on the LCD screen.
•= Do not apply any liquid directly on the LCD screen
to clean. If you need to clean the LCD screen
use an approved LCD cleaning cloth.
•= Do not add any parts or use any accessories
which are not provided by Rosen.
•= Do not use or store in the temperatures exceeding:
(Operating 0~50℃/32~122
o
F, Storage 0~60℃/32~140
o
F)
•= Be careful when moving the monitor so as not to
damage the LCD screen.
INSTALLATION
•= Connect power (+) to ACC, instead of ACC/Start.
If you connect the power to ACC/Start the monitor
might shutdown during vehicle start-up. If the
monitor shuts down due to this reason, please
re-start the car.
•= Make sure to use the correct screws for mounting
the mounting bracket to the vehicles roof beam
and when connecting the monitor to the mounting
bracket. The following screws are provided with
this monitor:
Mounting Bracket to Roof Support Beam: M4×0.7x6
Monitor to Mounting Bracket: M4×¼ “x8

11
NOTICE OF INTENDED USE
ROSEN ENTERTAINMENT SYSTEMS ARE DESIGNED TO ENABLE
VIEWING OF VIDEO RECORDINGS ONLY FOR REAR-SEAT
OCCUPANTS. MOBILE VIDEO PRODUCTS ARE NOT INTENDED FOR
VIEWING BY THE DRIVER WHILE THE VEHICLE IS IN MOTION. SUCH
USE MAY DISTRACT THE DRIVER OR INTERFERE WITH THE DRIVER’S
SAFE OPERATION OF THE VEHICLE, AND THUS RESULT IN SERIOUS
INJURY OR DEATH. SUCH USE MAY ALSO VIOLATE STATE LAW.
ROSEN ENTERTAINMENT SYSTEMS DISCLAIMS ANY LIABILITY FOR
ANY BODILY INJURY OR PROPERTY DAMAGE THAT MAY RESULT
FROM ANY IMPROPER OR UNINTENDED USE.
About the Registered Marks
This product incorporates copyright protection technology that is protected by
method claims of certain U.S. patents and other intellectual property rights
owned by Macrovision Corporation and other rights owners. Use of this
copyright protection technology must be authorized by Macrovision
Corporation, and is intended for home and other limited viewing uses only
unless otherwise authorized by Macrovision Corporation. Reverse engineering
or disassembly is prohibited.
Car Show
™
ROSEN ENTERTAINMENT SYSTEMS
1120 CALIFORNIA AVENUE • CORONA, CA 92881
PH: (951) 898-9808 • FAX: (951) 898-9897
EMAIL: [email protected]om
WEB: www.rosenentertainment.com
PN 9100471-90 Rev A
/