Celestron 11068 User guide

Category
Telescopes
Type
User guide
Extend tripod legs 6 to 8 inches by
loosening the tripod leg locking knob
and pulling the leg to desired length and
re-tightening knob.
Assemble tripod by spreading the legs
out until fully extended.
Quick Set-up Guide
1
2
3
To attach accessory tray, remove threaded
nut and washer from accessory tray rod.
4
7
Once tripod is level, put away the bubble
level. Grab scope by the fork arm and
line up holes on bottom of telescope
with the screws on the tripod mounting
platform.
Slide accessory tray onto rod.Replace
threaded nut.Tighten to secure.
5
Tripod legs should be the same length to
provide a level platform for the telescope.A
bubble level is included to assist in leveling.
6
Tighten three screws under tripod
mounting platform to secure the
fork arm to the tripod.
8
Hand control comes mounted in the fork
arm. Hand control should fit snugly in
fork arm as shown above.
9
Your NexStar 6SE or 8SE includes:fork arm
with optical tube; tripod; accessory tray;
bubble level; computerized hand control;
one 25mm eyepiece; StarPointer
finderscope; Star diagonal; owners manual,
The Sky® CD, NexRemote Telescope Control
CD, RS-232 cable.
Item #
11069
Item #
11068
NexStar 6SE, 8SE
Quick Set-up Guide [cont]
Slide StarPointer finderscope onto
mounting platform as shown above.
Tighten screws located on side of
StarPointer to secure.
11
Insert silver barrel of diagonal into the
visual back as shown above.Tighten
silver screw to secure.
12
Tighten silver screw on the diagonal to
secure in place.
13
Insert silver barrel of 25mm eyepiece
into the diagonal as shown above.
Tighten silver screw (inset) to secure.
14
To power up telescope, you will first
need to insert batteries. Remove battery
cover on fork arm base as shown above.
15
Place AA batteries (user supplied) inside the
battery compartment located at the base
of the fork arm and replace battery cover.
16
Before you begin viewing, please
remember to remove tube lens cap.
17 18
In order to get the best view through the
telescope, slowly turn the focus knob until
the objects are in sharp focus.
10
While observing, tube should be
positioned as shown above.
Before you can begin observing, you must setup your hand control,
align your finderscope and align your telescope. Step by step
instructions are included in the following Hand Control Setup action.
Focus
Knob
Hand Control Guide
1
Turn power switch (located at the base of
the fork arm) to on”position.The light will
come on and the hand control will
display “NexStar SE”.
2
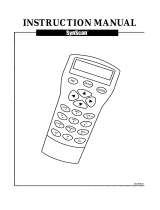
You will notice that there are directional
arrows in the center of the hand control.
These only move the telescope. They
cannot be used to scroll through
menu features.
3
Now you will need to align the finderscope.
Turn on the red LED light by turning the
knob shown above. When used for the first
time,remove the clear plastic disk that is
located between the battery clip and the
battery.See inset.
4
Use the hand control direction arrow
buttons to point telescope at a distant
land object, like a telephone pole or at
night you can use the moon. Center and
focus the object in the 25mm eyepiece
of the telescope.
5
In order to accurately center an object
in the eyepiece it may be necessary to
change the slew speed of the motors.
To change the slew speed, press the
RATE button then select a number from
1 (slowest) to 9 (fastest).
Before you can begin using your NexStar 6SE or 8SE, you must setup your computerized hand control and
go through the SkyAlign alignment procedure. In order for the NexStar to accurately point to the objects in
the sky, it must first be aligned with known positions (stars) in the sky.With this information, the telescope
can create a model of the sky, which it uses to locate any object in its database
Once you have aligned your finderscope,
make sure to turn off the LED light to
conserve the battery. Now you are ready
to align the telescope.This will have to
be done at night.
7
9
Use the UP and DOWN scroll buttons
(located on #6 and #9) to select
“SkyAlign”then press ENTER. Now
you will need to enter your site/time
information.
With the object centered in the eyepiece,
use the azimuth (right/left) and altitude
(up/down) adjustment knobs on the
finderscope to place the red alignment
dot directly over the centered object.
10
The hand control will display the last
entered time and site information. Since
this is your first time using the NexStar,
press UNDO to enter your site and time
information.
11 12
Using the numeric key pad enter your
time information. Press ENTER to
continue. Press UNDO to backspace.
Press ENTER to select City Database. Use
the Up and Down scroll buttons (located
on #6 and #9) and choose the closest city
to your present location. Press ENTER after
selecting the country, state and city.
8
When the display reads NexStar SE, press
ENTER to begin the alignment
procedure.
6
Power Switch
Power Switch
Hand Control Guide
[cont]
If you have questions or problems with set-up, please contact
Celestron Technical Support: 310.803.5955
16
If the finderscope has been properly
aligned, the alignment star should now be
visible in the field of view of the eyepiece.
17
The hand control will prompt you to
center the bright alignment star in the
center of the eyepiece. Once centered,
press ALIGN.This will accept the star as
your first alignment position.
18
19
Repeat the process for the third
alignment star. When the telescope has
been aligned to the final star, the display
will read “Match Confirmed”. Press UNDO
to display the names of the three bright
objects you aligned to, or press ENTER to
accept these three objects for alignment.
20
Now that your telescope is properly
aligned, you are ready to find your first
object. Press the TOUR button on the
hand control.The hand control will
display a list of objects that are visible for
the date and location entered.
For the second alignment object, choose
a bright star or planet as far from the first
alignment object as possible. Once again
use the directional arrow buttons to
center the object in the finderscope and
press ENTER. Once object is centered in
the eyepiece, press ALIGN.
15
Use the directional arrow keys on the hand
control to slew (move) the telescope
towards any bright celestial object in the
sky. Center the object in the finderscope
and press ENTER.
13
Now, using the Up and Down scroll
buttons (located on #6 and #9), verify the
time zone you are in and press ENTER.
14
Using the numeric key pad enter the
date. Press ENTER to continue. Press
UNDO to backspace.
21
Press INFO to read information about the
object displayed. Press the DOWN scroll
key to display the next object. Press
ENTER to slew (move) to the displayed
object.
For general usage information, please consult your users manual.
TOUR
INFO
  • Page 1 1
  • Page 2 2
  • Page 3 3
  • Page 4 4

Celestron 11068 User guide

Category
Telescopes
Type
User guide

Ask a question and I''ll find the answer in the document

Finding information in a document is now easier with AI