Page is loading ...

Nomadic 270 Awning

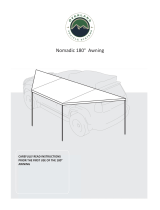
Nomadic Awning
SET-UP &CAREINSTRUCTIONS
GET TO KNOW YOUR AWNING
We recommend you check all parts are included prior to first use.
Nomadic 270° awning contents
1 270° Awning
6 25mm M8 mounting bolts and
nuts
2 Tension
straps
3 Mounting brackets
6 Twist-lock leg poles
13 Pegs
6 'U’ Bolts with nuts and washers
(3 in a canvas bag)
13 Guy ropes
ATTACHING BRACKET TO ROOF-RACK
The Nomadic 270° awning brackets have been designed roof racks. The bracket can also be mounted on roof
to fit most common roof rack configurations. However, bars, however, additional specific attachment may be
ever-increasing number of roof rack designs need to be sourced from your roof rack supplier.
available it is difficult to supply a mounting bracket to
accommodate all. Below are examples of how to mount
the
Awning brackets to Flat style and Basket style
ATTACH AWNING TO BRACKET
We recommend using an experienced after-market 4x4
Accessories fitter to mount the Awning to
your vehicle. Fasteners and fixing connections should
be checked regularly on both the awning and root rack
to
ensure the awning is always mounted securely to your
vehicle
roof rack.
If in doubt, please visit your roof rack specialist for
specific roof rack mounting options and advise on
Load capacities
PROLONGED TRAVELING ON UNEVEN ROUGH
OR CORRUGATED TERRAIN WILL REQUIRE MORE
FREQUENT INSPECTIONS.
Insert supplied 25mm M8 bolts into grooves in aluminum backing plate.

Nomadic awning
SET-UP & CAREINSTRUCTIONS
SET-UP
Remove Cover
Unzip cover and fold it over
the awning body
Release Awning
Release the three Velcro
straps and allow canvas to
drape

Nomadic awning
SET-UP & CAREINSTRUCTIONS
SET-UP
To begin setting up the
awning
follow steps @ to
AWNING WILL SELF—
SUPPORT DURING
SET
UP ONLY
SWING OUT LEFT ARM
FULL AND ATTACH
TO RO F RACK USING
SUP LIED TENSION
STRAP
SWING OUT
LEFT ARM FULLY
SWING OUT
RIGHT ARM TO 90°
SWING OUT RIGHT
ARM FULLY TOWARD
REAR OF VEHICLE
AND ATTACH TO ROOF
RACK USING SUPPLIED
TENSION STRAP
STRAP ARMS TO
ROOF RACK

Nomadic awning
SET-UP & CAREINSTRUCTIONS
SET-UP
POLE SET-UP
•
Undo the Velcro straps securing
each support leg. Leg will pivot
down to a vertical position. Adjust
to desired height by unlocking
and locking the internal twist
locking mechanism.
•
Attach individual support legs to
the remaining rafters by inserting
into holes at the end of each
rafter.
•
Secure the end of each rafter by
anchoring and tensioning guy
ropes.
•
Ensure all guide ropes are
secured
IF ATTACHING OPTIONAL
WALLS, EACH RAFTER
MUST BE SUPPORTED BY A
LED POLE.
IN CASE OF RAIN,
LOWER
THE SUPPORT
LEGS TO
ALLOW DOWNWARD
SLOPE
AND GUY OFF
BETWEEN
RAFTERS TO
FORM VALLEYS FOR
WATER
RUN—OFF.

Nomadic awning
SET-UP & CAREINSTRUCTIONS
PACK-DOWN
PACK-DOWN
•
Undo all pegs / guy ropes.
•
Fold away legs and stow away
using attached Velcro straps.
•
Stow 3 x additional legs in canvas
carry bag.
•
Release front and rear
tension straps.
•
Fold the RHS of awning back 90°
from the awning body ensuring the
top rafters sit directly on top of the
bottom rafters.
•
Fold the LHS of awning back 90°
from the awning body ensuring
the top rafters sit directly on top of
the bottom rafters.
•
At this point fold the LHS of the
awning toward the awning body
followed by the RHS. Canvas
should drape down in a triangular
shape.
•
Roll canvas and secure using
Velcro straps.
•
Position PVC bag over awning and zip
up to complete pack down.
DO NOT STOW THE CANVAS
CARRY BAG CONTAINING
THE ADDITIONAL LEGS
INSIDE THE AWNING’S
TRANSIT COVER.

Nomadic awning
CARE INSTRUCTIONS
Cleaning
Clean with cold water and a soft bristle brush. Do not use
soaps
and detergents. Do not expose to petrol, diesel, oils or
chemicals of
any nature.
Correct storage is vital for the longevity of your Nomadic 270°
awning. If on occasion the awning is required to be stowed wet, it is
essential it is unpacked and dried as soon as possible. Rot, mildew
damage and incorrect storage is not covered under warranty.
STRUCTUALINTEGRITY
The Nomadic
27O°
awning has been designed for general
camping use under normal conditions. Always ensure all
guy
ropes are anchored correctly. It may be necessary
to re-adjust guy ropes and pegs at times to maintain the
structural integrity of the awning.
To avoid chances of personal injury and
property damage, we highly recommends
the
N o m a d I c 27o° Awning should NOT be
erected during windy conditions.
Damaged caused by wind and or adverse weather will
not be covered under warranty.
VEHICLE FITTING
We recommend using an experienced aftermarket 4x4
accessories fitter to mount t h e Nomadic 27O° Awning to
your
vehicle. Fasteners and fixing connections should
be checked regularly on both the awning and roof rack
to
ensure the awning is always mounted securely to your
vehicle
root rack.
Prolonged travelling on uneven rough or corrugated
terrain
will require more frequent inspections.
Nomadic
270° Awning brackets have been designed to fit
most common roof rack configurations. However, with the
ever-
increasing number of roof rack design now available it
is difficult
to supply a mounting bracket to accommodate all. If
in doubt, please
visit your roof rack specialist for specific
roof rack mounting options
and advice on load capacities.
FIXING THE OPTIONAL WALLS
The zip on awning walls will provide a sheltered / protected area
around the awning. When attached to the awning, they
are
designed to create a shaded area and help reduce dust.
IN WINDY CONDITIONS IT IS HIGHLY RECOMMENDED NOT
TO ERECT THE AWNING AND WALLS AS PERSONAL INJURY
AND OR PROPERTY DAMAGE MAY OCCUR.
For any further questions, please contact
Overland Vehicle Systems at 833.226.4863 or
visit www.overlandvehicelsystems.com
• KEEP ALL FLAMES AND HEAT SOURCES AWAY FROM THE FABRIC
• UNDER NO CIRCUMSTANCES SHOULD ANY NAKED FLAME SOURCES BE USED NEAR THE
AWNING, KEEP FIRES AWS FROM THE AWNING
• KEEP A LOOK OUT FOR ANY AIRBONE BURNING EMBERS THAT MAY COME IN CONTACT
WITH THE TENT. KEEP A FIRE EXTINGUISHER OR BUCKET OF WATER NEAR BY
• DO NOT OPERATE ANY DEVICES WHICH BURN FUEL INSIDE THE AWNING WHILE THE
WALLS ARE ATTACHED.
• KEEP EXITS CLEAR
• REMAIN CAUTIOUS WHEN GUIDE ROPES ARE IN USE
• KEEP AN EYE OUT FOR CHILDREN WHEN AWNING IS IN USE
/