Page is loading ...

INSTRUCTION MANUAL
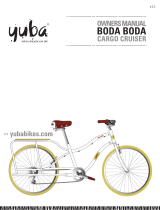
KMART

TABLE OF CONTENTS
IT IS IMPORTANT TO READ THIS MANUAL THOROUGHLY
BEFORE ASSEMBLING,RIDING, OR PERFORMING
MAINTENANCE ON THIS BICYCLE.
KEEP THIS MANUAL FOR FUTURE REFERENCE.

RULES OF THE ROAD
1.
IN THE INTEREST OF SAFER CYCLING, MAKE SURE YOU READ AND
UNDERSTAND YOUR OWNER’S MANUAL.
2.
NOTICE: Some state and local traffic laws may require that your bicycle be equipped
with a warning device, such as a horn or bell and a light, if the bicycle is to be ridden
after dark.
3.
4.
Always ensure that appropriate footwear is worn whilst riding this bike.
Lace up shoes with rubber soles, never ride barefooted or in sandals, and ensure that
shoelaces are tied and kept out of the way of the wheels and drive system.
CAUTION: WET WEATHER WARNING: Check your brakes frequently. The ability to
stop your bicycle is critical. Roads are slippery in wet weather so avoid sharp turns and
allow more distance for stopping. Caliper brakes may become less efficient when wet.
Leaves, loose gravel and other debris on the road can also effect stopping distance.
The kickstand is designed to support the bicycle only. Not the rider.
Replace bent or broken spokes, and bent or damaged wheel rims.
Obey all traffic regulations. Most traffic regulations apply to bike riders as well as
automobile operators.
5.
6.
7.
8.
9.
Follow the traffic flow in a straight line close to the curb. Watch for cars moving in and
out of traffic.
Always ride alone. Never carry other riders. This is dangerous and it makes the bicycle
harder to control.
10. When riding in pairs or in larger groups, form a single line along the left side of road.
Set up a sensible distance between riders. Don’t tailgate.
11. Always be alert. Animals or people may dart in front of you. Be on the alert. People
have the right of way. Be alert to people opening car doors when passing parked cars.
Your bicycle was not designed for stunting and experimentation. Enjoy riding it in a safe
manner.
12. Be careful at all intersections. Slow down and look both ways before crossing.
13. Use hand signals. Always let other drivers and pedestrians know what you are going to
do. Signal 100 ft(30.48 cm). before turning unless your hand is needed to control the
bike.
14. CAUTION: NIGHT TIME OPERATION: We do NOT recommend riding your bike at
night. If you have an emergency that makes it necessary to ride at right, have proper
lights and reflectors. Do NOT ride at night without a headlight, taillight, a white front
reflector, a red rear reflector and yellow wheel reflectors.
15. Do not carry packages or objects which obstruct vision.
16. Never hitch rides. Never hold onto moving vehicles while riding. Never Stunt.
17. ON AND OFF ROAD OPERATION: Avoid the following hazards: drain grates, pot holes,
ruts, soft road edges, gravel, and leaves especially when they are wet.
OWNER’S INFORMATION
Throughout this manual you will find WARNINGS, CAUTIONS and NOTES or NOTICES.
WARNINGS: Pay special attention to these since failure to do so could result in injury to the
rider or others.
CAUTIONS: If not followed these could result in mechanical failure or damage.
NOTES OR NOTICES: These specify something that is of special interest.
Owner’s information continued next page.
1

OWNER’S INFORMATION continued
It is the responsibility of the person who initially assembles the bicycle to do so correctly and
make any necessary adjustments for proper operations. The owner or principal rider is then
responsible for normal maintenance of the bicycle to keep it in good condition.
1. Make certain that all assembly instructions and necessary adjustments have been
followed.
2. Perform the safety check list and mark each item listed.
3. Know how to operate all standard and accessory equipment on the bicycle.
4. Make certain that anyone who uses the bicycle has been fully instructed in its operation.
5. If your bicycle was obtained assembled, we recommend that you review the complete
assembly instructions and perform checks specified in this manual before riding the
bicycle.
OWNER’S RECORD
Keep this information as a permanent record
In the event of theft or loss, your law enforcement agency will require this information for
identification purposes.
The same information will be required when ordering parts and service.
Serial number(if you have one):
Wheel Size (On tire sidewall):
Model Number:
Color of bike:
Name of bike (On top tube or chain guard ):
Date purchased:
Where Purchased:
2

SAFETY WARNINGS

The correct frame size is the largest frame that the rider can automatically straddle keeping both
feet on the ground and allowing 25 mm (1 inch) clearance between the rider’s crotch and the top
of the frame tube (see illustration) Noted Ladies can use men’s bicycle to determine their correct
frame size.
Rider must be able to straddle bicycle with at least 1 inch (2.54cm) clearance above the
horizontal bar when standing.
UNPACKING
Important: Remove the bicycle and all parts from the carton. Lay out all unassembled parts
and READ THE ASSEMBLY INSTRUCTIONS In this manual before assembling our bicycle.
The instructions are a step by step procedure. Follow the steps that pertain to your model.
NOTE: Your bicycle may be equipped with a different component than the one illustrated.
However, the procedure for assembly or adjustment is basically the same.
RECORD SERIAL NUMBER
Note: This information is only available on
the bicycle itself. Be sure to keep your
own record of this number. Each bicycle
has a serial number stamped into the
bottom of the frame or on the head tube.
(See illustration) Record this number on
page 2 of your owner’s manual to keep it
for future reference.
TOOLS REQUIRED FOR ASSEMBLY
7mm Phillips screw driver 7mm flat edge screw driver
Standard slip joint pliers hammer Torque Wrench Set
2 in 1 of 5mm & 6mm Allen wrenches and open end set of metric flat wrenches 6”(15 cm) and 10” (25.4
cm) Adjustable wrench (Or Open End Set Of Metric Flat Wrenches). These tools should be available to
perform the basic steps of assembling the bicycles. They can also be used to make maintenance
adjustments outlined in this manual. Special tools are required to disassemble chain, remove the rear
hub parts and true wheels. Special tools are not required for assembly and normal maintenance.
NOTE: Use a hand or foot pump to Inflate tires. Never inflate tire with an air compressor at a
gas station. WARNING: IMPROPER INFLATIOIN IS THE BIGGEST CAUSE OF TIRE
FAILURE.
DUE TO THE SLIGHTLY POROUS NATURE OF BICYCLE INNER TUBES, IT IS NORMAL
FOR YOUR TYRES TO LOSE PRESSURE OVER TIME. FOR THIS REASON, IT IS CRITICALLY
IMPORTANT TO MAINTAIN THE PROPER TIRE INFLATION ON YOUR BIKE.
Many bicycles are sold unassembled in cartons. For these bikes it is the responsibility of the
owner to make sure the assembly instructions in this book are followed exactly. For bicycles
that are purchased in an assembled condition, it is the responsibility of the owner to carefully
check and test the bike. The bicycle product does not provide above tools.
4

START TO ASSEMBLE YOUR BICYCLE
STEP#1 – REMOVE BIKE FROM CARTON
STEP#3 – KICKSTAND ASSEMBLY Not Every bike comes with kickstand
STEP#2- ASSEMBLE THE FRONT WHEEL TO FORK

STEP#4 – INSTALL STEM AND HANDLEBAR
STEM

STEM #5 – INSTALL SEAT POST AND SEAT

STEP #6
–
IF YOUR BIKE HAS A FRONT OR REAR HAND BRAKE FOLLOW
THESE INSTRUCTIONS FOR ADJUSTMENT.

V
IF YOUR BIKE HAS V-BRAKES
-BRAKE INSTALLATION


STEP #7 - INSTALL PEDALS.
STEP #8 INSTALL REFLECTORS


STEP #9 - AXLE PEG ASSEMBLY
STEP #10 -CABLE INSTALLATION & ADJUSTMENT ILLUSTRATION


SAFETY CHECKLIST

12 MONTH WARRANTY
16

MAINTENANCE

/