Page is loading ...

1
ATOMIC WALL CLOCK with REMOTE TEMPERATURE SENSOR
Model CL030027
Instruction Manual
Congratulations on purchasing your ATOMIC CLOCK with REMOTE TEMPERATURE SENSOR. Please read these
instructions carefully and store them in a safe place for future reference.
FEATURES
Super Accurate Atomic Time using the WWVB
Radio Signal from the Atomic Clock in Colorado,
USA
Alarm/Snooze function
Optional 12 Hour or 24 Hour Time Display
Four Time Zone Settings: Pacific, Mountain,
Central and Eastern
Automatic adjustment for Daylight Savings Time
in the Spring and Fall
Indoor thermometer and 434MHZ wireless
outdoor temperature sensor. No wire installation is required.
Works with up to 3 remote temperature sensors (one remote sensor is included with the clock). Additional wireless
remote sensors available separately.
Displays Indoor/Outdoor Temperature in Celsius or Fahrenheit
Indoor and outdoor temperature trends
Low battery indicator
IMPORTANT: The wireless remote temperature sensor must have batteries installed before installing batteries
in the main unit.
REMOTE WIRELESS TEMPERATURE SENSOR
Inserting batteries
The remote unit uses two “AAA” batteries. To install or replace the batteries, please follow these steps:
1. Remove kickstand base.
2. Unscrew the 4 screws on the back of the compartment and remove the cover.
3. Insert the batteries observing the correct polarity.
4. Replace the battery cover on the unit and seal by re-screwing firmly.
5. When a “Low Battery” symbol appears on the LCD screen in the Outdoor Temperature section, please replace
the batteries of the remote unit.
6. In some instances, the LCD display might be abnormal after new batteries are installed. If this happens, remove and
reinstall the batteries until the display is normal.
7. After installation of the new batteries, the setup procedures need to be performed. (See Setting the remote
transmitter(s))
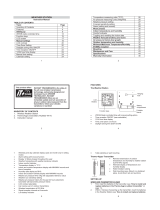
Setting the remote transmitter(s)
1. There are 2 buttons inside the back of the remote sensor unit.

2
1)
O
C/
O
F---A multifunction button that is used to either change the house code and channel number of the remote, or
change the remote displays between Centigrade or Fahrenheit
2) SET---To confirm the change of house code
2. After inserting the batteries, House Code will be flashing with “01”. Press
O
C/
O
F button to change the House Code.
3. The range of House Code is from “01” to “30”. Make sure all other transmitters in your system are set to the same
House Code.
4. When you have a new house code shown that you wish to use, press and hold the SET button and the channel
number will start to flash. Also if no buttons are pressed for 10 seconds, the channel Number will also start to flash.
5. Use the
O
C/
O
F button to select a different Channel Number (1-3) for each of your transmitters.
6. The Channel Number will be confirmed if SET button is pressed, or if no button is pressed for 10 seconds.
7. After setting, please do not change the House code or Channel Number again. Otherwise the Learn procedure of the
receiver needs to be repeated again.
Operation
1. Pressing
O
C/
O
F button will select the unit of temperature displayed between
O
C and
O
F.
2. After setting, the current temperature will be displayed. For the remote, the temperature reading will be displayed.
3. The data will also be transmitted to the receiver on the main unit regularly. During transmission, the “Antenna”
symbol on the LCD panel and the red LED will flash.
MAIN UNIT
The main unit uses two “AA” batteries. To install or replace the batteries, please follow these steps:
1) Remove the battery compartment cover.
2) Replace the old batteries with the same type of new batteries (size: “AA x 2). Notice the correct polarity of the
battery.
3) Replace the battery compartment cover.
NOTE: The LCD display might be abnormal (segments missing) or there might be a button malfunction because of
potential magnetic interference. In this case, remove and then reload the batteries until the LCD display and button
function is ok.
First reception after power-up
NOTE: THE TIME CANNOT BE SET MANUALLY FOR THE FIRST FIFTEEN MINUTES WHEN THE
CLOCK IS POWERED UP.
1) After installing batteries, the LCD will display and a beep will sound. The Temperature, Time and Date are shown
in the display.
2) At the same time, all channels of the Radio Frequency (RF) reception will register and this will last four minutes,
with the channel code flashing. When a channel is received, the channel code and its data will appear in the display.
At the same time the user code will be recorded. Every time the RF signal is received successfully, the antenna
symbol will flash. (Ensure that batteries are placed in the remote sensor before placing them in the clock.)
3) Then the clock will start to search for the WWVB time signal from the Atomic Clock.
4) Under optimal conditions, the correct time can be displayed within 3 to 15 minutes. If after 15 minutes the signal
has not been received, use MODE/ALM SET button to set the time manually (see Setting Time instructions
below).
5) Once the signal is received, the wave will display, and the clock will automatically reset the time to the correct

3
time.
6) During the search for the WWVB signal, the wave will keep flashing. The flashing icon indicates that the radio
control circuit is working; the larger the circle, the stronger the signal. Other buttons will not function except
WAVE/+/MONTH/HR button at this time. Press WAVE/+/MONTH/HR button to stop reception manually.
Radio control feature
The National Institute of Standards and Technology (NIST) is located in Fort Collins, Colorado. The NIST
continuously broadcasts the time signal (WWVB, 60KHz) which can be received anywhere in the continental United
States and parts of Canada where long wave (AM) radio reception is possible. The signal can reach approximately
2,000 miles through the internal antenna in the Radio Controlled Clock. However, due to the nature of the Earth’s
atmosphere, reception is very limited during daylight hours. The radio controlled clock will automatically search for a
signal every night when reception is best.
The WWVB radio station delivers its signal from the NIST Atomic Clock in Boulder Colorado.
Possible reception interference sources
All radio-receivers of the radio-controlled clock may be subject to certain interference. Interference can be caused by a
thunderstorm or metallic elements in buildings (such as-windows with metal frames), domestic appliances, TV sets and
PCs. Moreover, the transmitter may shut off temporarily.
If your alarm clock cannot receive the transmitter signal, change the location of the alarm clock.
If reception is interfered, hold the button WAVE/+/MONTH/HR continuously until the signal search is started or the
time is set manually.
Time update
1) The clock will automatically update its time everyday at 01:00AM and 01:00PM. It will make another attempt the
next hour if the signal isn’t received.
2) Reception can start anytime by pressing the WAVE/+/MONTH/HR button.
Important:
It is recommended to place the Radio controlled clock near a window. Please move the clock to another location if
difficulty in signal reception is encountered.

4
1) The clock receives the time signals via its built-in antenna and adjusts automatically. Once the correct time is set,
the alarm clock continues running on with an internal quartz-controlled mechanism.
2) The internal quartz-mechanism is very accurate; therefore it does not matter if the clock is occasionally unable to
receive the time signals.
434 MHz reception
The unit will receive outside temperature readings, utilizing wireless 434 MHz transmissions. Please see the following
instructions when selecting a location for the installation of your main unit and remote unit.
1) The maximum transmission range is 80-100 feet (in open space). However, this depends on the surrounding
environment.
2) The distance of the main unit or remote should be at least 6 feet away from any interference source.
3) Avoid positioning the base unit or remote onto or in immediate proximity of metal window frames.
4) Neighbors using other electrical devices operating on the 434 MHZ signal may cause interference.
5) Extreme temperatures may affect the Wireless Remote range, if it has been extremely cold (under –4
O
F) for an
extended period of time.
6) Place the remote unit(s) away from direct sunlight as this will ensure greater temperature accuracy.
Losing signal indication
1) If there is no reading received, it shows the last reading
2) Last reading will flash after about 60 minutes of no reception to remind the user that there is a problem. (Flashes
every 5 seconds)
3) Holding YEAR/CHANNEL button for 2 seconds can reset the data on all channels. At this time, all the channels
must register again.
4) The display will return to normal once a new reading is received
Setting the alarm time
During the normal mode, press the MODE/ALM SET key to enter the desired alarm time.
1) Press the MODE/ALM SET button and hold 2 seconds to set alarm time.
2) Press the WAVE/+/MONTH/HR button to advance the hours for alarm time.
3) Press the ALM/-/DATE/MINUTE button to advance the minutes for alarm time.
4) When the intended alarm hour and alarm minute appear, press the MODE/ALM SET button to confirm and exit the
alarm time setting mode.
5) During the alarm time display mode or normal mode, you can switch the alarm on or off by depressing
ALM/-/DATE/MINUTE button for 2 seconds. The bell icon appearance indicates that the alarm is on.
Note: In the setting mode, if there isn’t any operation for 30 seconds, it will exit from the setting mode automatically
and return to normal display.
Snooze function
If Alarm is turned on, it will sound when set Alarm Time arrives. Pressing the SNOOZE button will activate the Snooze
function, the icon flashes, and the alarm rings again after 5 minutes. Pressing any other key will silence the alarm.
Setting time and calendar
During the normal mode, depress and hold the MODE/ALM SET button for 2 seconds to set time and calendar. The
order is as follows: 12/24 Hour format,
O
C/
O
F Temperature format, Time, Calendar.
Setting time format
Depress MODE/ALM SET, until the 12H or 24H display flashes.

5
Press WAVE/+/MONTH/HR button or ALM/-/DATE/MINUTE button to choose 12H or 24H.
Press MODE/ALM SET button once to confirm and enter the setting temperature format mode.
Setting temperature format
In the setting temperature format mode, press WAVE/+/MONTH/HR button or ALM/-/DATE/MINUTE button to
choose
O
C or
O
F.
Press MODE/ALM SET button once to confirm and enter the setting time mode.
Setting time
In the setting time mode, depress WAVE/+/MONTH/HR button to increase the value of Time Hour.
Depress ALM/-/DATE/MINUTE button to advance Minutes.
When the intended Time Hour and Time Minute appear, press MODE/ALM SET button once to confirm and enter
the state of setting calendar.
Setting calendar
In the state of setting calendar, depress the WAVE/+/MONTH/HR button to increase the value of Month.
Depress the ALM/-/DATE/MINUTE button to increase the value of Date.
Depress the YEAR/CHANNEL button to increase the value of Year.
When the intended Month, Date and Year appear, press MODE/ALM SET button once to confirm and exit the
setting time mode.
Note: At the setting mode, if there isn’t any operation within 30 seconds, it will exit from the setting mode automatically
and return to normal display.
Daylight Saving Time
1) If you live in an area that does observe DST, slide the DST switch on the back of the clock to the ON position. The
Letters DST will appear on the display next to the Atomic Signal ICON confirming you are in the Daylight Saving
Time mode. The clock will now adjust automatically each spring and fall to correct for the 1-hour time change.
2) If you live in an area that does not observe Daylight Saving Time (DST), slide the DST switch on the back of the
clock to the OFF position to deactivate the DST function.
Setting time zones
There are four time zones to choose from: PST (Pacific Time), MST (Mountain Time), CST (Central Time), and EST
(Eastern Time). Slide the switch on the back of the clock to the time zone you want, then the current time will change
correspondingly and the map of the time zone will display at the same time.
Trend symbols
1. The trend shows UP , if there is a 1
O
C increase compared with the last hourly reading.
2. The trend shows DOWN , if there is a 1
O
C decrease compared with the last hourly reading.
3. The trend shows STANDARD , if change is less than 1
O
C within a 1 hour period.
Cycle symbol
When the signal is being received from over two channels, the cycle function will be activated, and the cycle symbol
appears. At this time, the data of the corresponding channel will automatically alternate every 10 seconds. It can also
display each channel by pressing the YEAR/CHANNEL button by hand, but the cycle symbol will disappear.
To activate this function, it needs more than two remote sensors.
Low battery symbol
When a “Low Battery” symbol appears in the indoor temperature field, please replace the batteries of the main unit.
After installation of new batteries, the setup procedures need to be performed.
Note: When the main unit is abnormal in display and function, please reload the batteries or use new ones.

6
Specifications
Main Unit
Power Requirements: 2 X AA Batteries
Operating Frequency: 434 MHz
Operating /Detected Temperature: -9.5
O
C to +50
O
C (-14
O
F) to + 122
O
F))
Remote Temperature Display: -49
O
C to + 70
O
C (-57
O
F) to +158
O
F))
Resolution: 0.1
O
C
Temperature Accuracy: +/-1.5
O
C
Digital clock display hours and minutes
Daily Alarm
Indoor and Outdoor Temperature
Can be expandable up to 3 remote sensor units
Low battery Indicator
Remote Unit
Power requirements: 2 X AAA batteries
Operating Frequency: 434MHz
Operating Temperature: -20
O
C to +50
O
C (-4
O
F) to +122
O
F))
Detected Temperature using internal sensor: -20
O
C to +50
O
C (-4
O
F) to +122
O
F))
Detected Temperature using external sensor: -49
O
C to 70
O
C (-57
O
F) to +158
O
F))
Transmission Distance: 35 meters (open area)
LED Indicator for Transmission
30 Selectable House Codes to avoid interference with other systems
Low battery Indicator
SAFETY INSTRUCTIONS
Do not expose the clock to strong temperature variations, humidity, direct sunlight or dust.
Keep the radio-controlled alarm clock out of reach of small children.
CAUTION: Batteries can be life threatening if swallowed. Keep batteries and the ATOMIC CLOCK with WIRELESS
REMOTE SENSOR out of reach of small children. If a battery has been swallowed, seek medical advice immediately.
The batteries provided must not be charged or re-activated by any other means, taken apart, thrown into fire or
short-circuited. Batteries need to be properly disposed of. For this purpose, stores selling batteries provide special
containers for environmentally friendly disposal. Also, empty batteries will be accepted at public waste collection
points.
/