Page is loading ...

AiP-D6
HD IP VIDEO DECODER
INSTRUCTION MANUAL

HD IP Video Decoder AiP-D. Manual
1
Introduction
This model is a standalone 4-channel HD IP Decoder AiP-D that can display live video and
remotely playback video from multiple NVR’s and DVR’s. This model can decode live video or
recorded video clips of DVR’s/NVR’s via the TCP/IP network to form part of a video wall.
The virtual matrix feature stores the IP addresses of the cameras and video decoders in a
database, making access and identification quick and easy. IP addresses can be automatically
imported via the IP scan utility. HD IP Video Decoder AiP-D has an IP scan facility, (WS
Discovery) which locates all the cameras on the network and imports a preview thumbnail of each
channel. This automated installation wizard speeds up commissioning.
HD IP Video Decoder AiP-D can be controlled via multiple methods including; IR remote control,
keyboard with PTZ joystick, touch screen monitor, or USB mouse. When connected to a touch
screen monitor, Smartphone style features like ‘pinch and zoom’ can be used to navigate the
system.
HD IP Video Decoder AiP-D provides various export methods including USB flash disk and HTTP
download playable via Backup Manager. Extensive support for iPhone, iPad, BlackBerry and
Android allows for remote viewing of the connected cameras at high frame rates. Browser based
remote live monitoring and video playback features are also supported.
Features
Standalone HD IP Video Decoder
No PC required
Touch screen supported
Full HD 1920*1080P HD output
Remote playback for 16-channel/9-channel/4-channel DVR/NVR
Remote control and keyboard supported
HTTP browser based viewing including HD IP Video Decoder AiP-D configuration, PTZ
control, playback, and live monitoring
IP scan utility
Extensive support for iPhone, iPad, BlackBerry and Android devices
AiM 2.6 software supported

HD IP Video Decoder AiP-D Manual
2
Trademarks and registered trademarks
Microsoft, Windows 2000, Windows XP, Internet Explorer are registered trademarks of
Microsoft Corporation in the U.S and/or other countries.
Adobe and Adobe PDF are registered trademarks of Adobe Systems Incorporated in the
U.S and/or other countries.
JavaScript and all Java-based trademarks and logos are trademarks or registered
trademarks of Sun Microsystems, Inc. in the U.S and/or other countries.
Linux, Macintosh, Mozilla, and Netscape Navigator are registered trademarks of the
respective holders.
Pelco is a trademark of Pelco - Clovis, CA, and may be registered in certain jurisdictions.
Other names of companies and their products mentioned in this manual may be
trademarks or registered trademarks of their respective owners.
Caution
Do not drop or strike the equipment
Do not install the equipment near naked flames or heat sources
Do not expose this unit to rain, moisture, smoke or dusty environments
Do not cover the opening of the cabinet with cloth or plastic or install this unit in a
ventilated place. Allow 10cm between this unit and its surroundings
Do not continue to operate the unit under abnormal conditions such as detection of
smoke, strange smell or no display on screen whilst power is turned on
Do not touch the power connection with wet hands
Do not damage the power cord or leave it under pressure
To avoid unnecessary magnetic interference, do not operate this unit near magnets,
speaker systems, etc.
All connection cables must be grounded properly
CAUTION
RISK OF EXPLOSION IF BATTERY IS REPLACED
BY AN INCORRECT TYPE.
DISPOSE OF USED BATTERIES ACCORDING
TO THE INSTRUCTIONS

HD IP Video Decoder AiP-D Manual
3
Contents page
User Guide ........................................................................................................................................ 5
Chapter 1: Basic Operation ................................................................................................................ 5
1.1 HD IP Video Decoder AiP-D rear panel ........................................................................... 5
1.2 Remote control ................................................................................................................... 6
1.3 Keyboard ............................................................................................................................ 7
1.5 Mouse operations ............................................................................................................... 8
1.6 Menu symbols .................................................................................................................... 9
Chapter 2: Camera selection ........................................................................................................... 10
Chapter 3: Digital zoom .................................................................................................................... 10
Chapter 4: Freeze ............................................................................................................................ 11
Chapter 5: PTZ ................................................................................................................................. 12
Chapter 6: Audio .............................................................................................................................. 13
Chapter 7: Playback ......................................................................................................................... 13
7.1 Accessing playback .......................................................................................................... 13
7.2 Select time and date for playback .................................................................................... 14
7.3 Playback controls ............................................................................................................. 15
Chapter 8: Alarm Management ........................................................................................................ 16
Chapter 9: Backup / Export .............................................................................................................. 17
Chapter 10: Event ............................................................................................................................ 18
Chapter 11: Basic web-based browser viewing ............................................................................... 19
Chapter 12: Backup Manager .......................................................................................................... 19
12.1 Playback exported files .................................................................................................. 20
12.2 FTP Download ............................................................................................................... 20
12.3 Convert already downloaded files .................................................................................. 21
Quick Installation Guide ................................................................................................................ 22
Chapter 1: Rear Panel ..................................................................................................................... 22
1.1 HD IP Video Decoder AiP-D4 rear view ........................................................................... 22
Chapter 2: Time and Date Settings .................................................................................................. 22
Chapter 3: Network Settings ............................................................................................................ 23
Chapter 4: Adding Cameras............................................................................................................. 24
Menu configuration ........................................................................................................................ 25
Chapter 1: Setup Menu .................................................................................................................... 25
1.1 Camera setup ................................................................................................................... 25

HD IP Video Decoder AiP-D Manual
4
1.2 Monitor setup ................................................................................................................... 29
1.3 Streaming setup ............................................................................................................... 30
1.4 Alarm setup ...................................................................................................................... 31
1.6 System setup ................................................................................................................... 36
1.7 PTZ setup ......................................................................................................................... 39
1.8 Virtual matrix .................................................................................................................... 41
1.9 DVR/NVR playback by time search ................................................................................. 45
Chapter 2: Web-based Viewing/Setup ............................................................................................. 46
2.1 Before using Internet browser .......................................................................................... 46
2.2 Logon ............................................................................................................................... 47
2.3 Configuring the HD IP Video Decoder AiP-D via web page ........................................... 48
Chapter 3: Keyboard Operations ..................................................................................................... 52
3-1 Keyboard connections of DVR/NVR ............................................................................... 52
3-2 Live video of DVR/NVR via HD IP Video Decoder .......................................................... 52
3-3 DVR/NVR Playback ........................................................................................................ 53
3-4 Live video of AiP camera feature via HD IP Video Decoder ........................................... 54
3-5 Control PTZ ..................................................................................................................... 54
Appendix A Keyboard connection ................................................................................................... 55
Appendix B ....................................................................................................................................... 56
1. RS-485 Input and Output Pin Assignment ......................................................................... 56
2. Alarm I/Os .......................................................................................................................... 56
Appendix C Supported USB Flash Disk .......................................................................................... 57
Appendix D Touch Screen Monitor Support List ............................................................................. 57
Appendix E ....................................................................................................................................... 57
Specification ..................................................................................................................................... 60

HD IP Video Decoder AiP-D Manual
5
User Guide
Chapter 1: Basic Operation
1.1 HD IP Video Decoder AiP-D6 rear panel
HD IP Video Decoder AiP-D LED Panel
The status of each LED is described in the table below:
LED
Description
Colour
RESET
Manufacturing default button
POWER
Constant on
Green
ACT
Network ACT LED
Green (flashing)
LINK
Network LINK LED
Orange
Extra IR
To use IR remote control, first connect the IR receiver to the HD IP Video Decoder
RESET
Hardware Factory Default
Use hardware to restore factory default settings, follow these steps:
1. Hold Load Default Button for 10 seconds, then release.
2. Green and Yellow Network LED blinks, On->Off->ON.
3. HD IP Video Decoder AiP-D has completed the factory default settings, and then reboot.
Note: Do not connect any devices to ‘Keyboard In’ other than the keyboard as the connection
contains 12VDC and may damage other devices.
Note: Hardware Factory reset does affect IP address, video system, and language settings.

HD IP Video Decoder AiP-D4 Manual
6
1.2 Remote control
The remote control is a small wireless handheld device with an array of buttons for adjusting
settings. The buttons are separated in regions based on their features including operational keys,
Pan, Tilt, and Zoom (PTZ) and numerical keys.
Video Decoder AiP-D6 remote control operational keys
MENU
Setup menu
ESC
Escape/exit/stop
SHIFT
Split and full screen switch
ZOOM
Digital video zooming
REC
Record/stop recording
FREEZE
Live video freeze
Pause
Playback
Stop
Fast forward
Rewind
Next single channel
Previous single channel
4 split display
8 split display
9 split display
13 split display
16 split display
AUDIO
Audio/mute
BACKUP
Video backup
Video Decoder
Addressable video Decoder AiP-D control
LANGUAGE
Language selection
BACKSPACE
Delete character
Auto Pan
Perform auto pan feature
Move up/tilt up
Zoom in
Zoom in
Move down/tilt down
Zoom out
Zoom out
Move left/pan left
Preset
Call preset
Move right/pan right
0 to 9
Numerical keys
Enter/set

HD IP Video Decoder AiP-D Manual
7
1.3 Keyboard
Keyboard controls
1. LCD display – display the keyboard system setup menu and operation information
2. Joystick – 3 axis (Pan/Tilt/Zoom) / 2 axis (Pan/Tilt)
3. Keypad panel – there are 54 keys which can control PTZ, matrix, DVR and telemetry
receivers
4. Power indicator
5. Alarm indicator
6. R/T indicator – data communication indication
7. Auto pan indicator
8. Shift indicator – shift key status indication
9. Auto focus indicator
10. Auto iris indicator
11. RJ-45 connector

HD IP Video Decoder AiP-D Manual
8
1. Set – enter setup menu mode
2. ESC – exit
3. Alarm reset – reset alarms and video
loss alarms
4. Keyboard lock – press for 2 seconds
to enter locking mode, press again to
unlock the keyboard
5. Cam – select a particular camera
6. DVR – select a DVR
7. Mon – select a monitor
8. Matrix – press shift + matrix to switch to
matrix control mode
9. Present – recall and store preset
options
10. Function keys
11. Numerical keys – 0-9 for entering
monitor, DVR, camera number
12. CLR – clear to setting data
13. ENT – enter or confirm data
programming
14. Wiper/lens
15. Spray
16. Light/C.ESC
17. CTRL 1 / C.SET
18. CTRL 2 / 180
19. Search
20. Shift
21. Auto pan
22. SEQ
23. Zoom in / zoom out
24. Focus far / focus near
25. Auto focus
26. Iris open / iris close
27. Auto iris
28. DVR control keys
1.4 Touch screen
Pinch and zoom:
Pinch the area on the touch screen where you want to zoom. To zoom in move your fingers
outwards, and to zoom out move your fingers inwards
Scroll screen: Swipe the screen left and right to navigate through the menus
Single tap: Tap icons to select
Double tap: Double tap in camera view to return to previous menu
1.5 Mouse operations
The HD IP Video Decoder AiP-D4 has a USB mouse interface
General mouse operations can be used to navigate the device
Pinch Zoom Out
Swipe

HD IP Video Decoder AiP-D Manual
9
1.6 Menu symbols
Home short cut keys:
Menu
Pause
Alarm
Matrix mode
Additional menu keys:
– Return to previous screen
– Return to live mode
Main menu keys:
PTZ
Screen view
Shut down
Alarm manager
Live display
Configuration menu
Event
Right mouse click
Mouse scroll
Left mouse click
Note: The HD IP Video Decoder AiP-D Touch can be controlled via multiple methods; a) keyboard, b) IR
remote control, c) touch screen monitor or d) USB mouse. For the purpose of this manual, USB mouse and
touch screen will be referred to as one operation where applicable, “Touch screen monitor/mouse”
hereinafter. For specific operations, “Touch screen” or “Mouse” will be referred to separately.

HD IP Video Decoder AiP-D Manual
10
Chapter 2: Camera selection
a. Via remote control
To select multiple screen views press
To select a single full screen view, enter the numerical value of the camera, e.g. for camera 3,
press ‘03’.
b. Via keyboard
To select multiple screen views, press
To select a single full screen view, enter the numerical value followed by the cam button,
e.g. +
c. Via touch screen monitor / mouse
To select multiple screen views, press
Chose your required view by selecting or or or or or
Select
To revert back to multi screen view, click anywhere on the image screen
Chapter 3: Digital zoom
The HD IP Video Decoder AiP-D provides 64x digital zoom for live monitoring and video playback
modes. To digitally zoom, follow the steps below:
a. Via remote control
Select desired channel
To zoom in and out, press ‘zoom’ button to activate
Use directional keys to move around the screen
To return to live view, press depending on required view
b. Via keyboard
Select desired channel
To zoom in and out, press Enter button to activate
Use joystick (left, right, up and down) to pan and tilt around the image
Twist the joystick to zoom around the image
To return to live view, press depending on required view
Note: When the camera title is yellow, you have control over that camera.

HD IP Video Decoder AiP-D6 Manual
11
c. Via touch screen monitor
Select desired channel
To zoom in and out, use pinch and zoom technique
Swipe touch screen monitor to move around the screen
To return to live view, tap once anywhere on the image
d. Via mouse
Select desired channel
To zoom in and out use mouse wheel
To move around the screen press right or left mouse button, drag and release
To return to live view click once anywhere on the image
Chapter 4: Freeze
The HD IP Video Decoder AiP-D6 can freeze screen images in live and playback modes. Whilst
frozen the HD IP Video Decoder AiP-D6 is still recording.
a. Via remote control
Press ‘pause’ on the remote control
Once paused, the pause icon at the top left hand side of the screen will be highlighted in blue
To return to live mode press ‘pause’ again
b. Via keyboard
Press the pause button on the keyboard
Once paused, the pause icon at the top left hand side of the screen will be highlighted in blue
To return to live mode press pause again
c. Via touch screen monitor / mouse
Press the pause icon at the top left hand side of the screen
Once paused, the pause icon will be highlighted in blue
To return to live mode, press pause icon again

HD IP Video Decoder AiP-D6 Manual
12
Chapter 5: PTZ
If the camera is a Pan, Tilt and Zoom (PTZ) camera, you can control it via the following methods:
a. Via remote control
Select required channel
Use direction arrows to pan and tilt around the image
Use and keys to zoom around the image
To send a dome to a preset position, press ‘preset’, followed by the number required. For
example, for preset 3, press ‘preset’ followed by ‘003’.
Press ‘auto’ to start auto pan tour
To deactivate the tour, press ‘auto’ again
b. Via keyboard
Select required channel
Use joystick (left, right, up and down) to pan and tilt around the image
Twist the joystick to zoom around the image
To send dome to a preset position, press numerical key followed by ‘preset’ For example, ‘5’
followed by ‘preset’.
Press ‘auto pan’ to start auto pan tour
To deactivate the tour, press ‘auto pan’ again
c. Via touch screen monitor/ mouse
Select required channel
Select menu button, press PTZ icon
Use the below controls to navigate the PTZ. The red joystick can be dragged to navigate the
image
Press ‘ESC’ to return to menu

HD IP Video Decoder AiP-D6 Manual
13
Chapter 6: Audio
a. Via remote control
To enable audio, select the required channel
Press ‘audio’ on the remote control to enable live audio
Press ‘audio’ on remote control again to disable live audio
For all other methods, mute volume to disable audio
Chapter 7: Playback
7.1 Accessing playback
a. Via remote control
To access playback press stop to enter the virtual matrix menu
In the virtual matrix menu use arrows to select the DVR/NVR from the table
Select play to begin playback
Note: ACUMEN's AiD series, and AiP cameras 2MP and 3MP with audio
models are supported. DVR/NVR playback is also supported.

HD IP Video Decoder AiP-D6 Manual
14
b. Via keyboard
To access virtual matrix press stop
In the virtual matrix menu use the joystic to select the DVR/NVR from the table
To access playback press ‘play’
c. Via touch screen monitor / mouse
To access virtual matrix press the virtual matrix icon
In the virtual matrix menu select the DVR/NVR from the table and press
7.2 Select time and date for playback
a. Via remote control
Use to navigate time frame (minute, hour, month, year)
Use to select date and time
To start playback, press ‘enter’
b. Via keyboard
Use joystick directions up and down to navigate time frame (minute, hour, month, year)
To start playback press enter
c. Via touch screen monitor
Navigate time frame by pressing the desired period, select time using the up and down buttons
d. Via mouse
Navigate time frame via pressing desired period
or
Use mouse to enter time and date in time search bar using the scroll wheel or up and down
arrows on screen
To start playback, press OK icon

HD IP Video Decoder AiP-D6 Manual
15
7.3 Playback controls
Step rewind
Rewind
Play
Fast forward
Step fast forward
Pause
Stop
USB backup
Audio
Full screen view
Quad view
8-screen view
9-screen view
13-screen view
16-screen view
a. Via remote control
Use remote keypad to play, stop or pause
Use to rewind
Use to fast forward. Press once for 2x and subsequent press to increase speed
For step rewind/ forward, press pause then use your controller keys to move frames
To select individual cameras use
For grid screen view, follow camera selection process
To turn audio on or off, press the ‘audio’ key
To activate WYSIWYG (What You See Is What You Get) backup, press ‘backup’
The USB icon will light to show backup has commenced
To stop recording, press ‘backup’ again
To exit playback, press stop or escape
b. Via keyboard
Use keyboard keys to play, stop, or pause
Use to rewind. Use to fast forward
Press once for 2x and subsequent press to increase speed
For step rewind/ step fast-forward press ‘pause’ then use your controller keys to
move frames

HD IP Video Decoder AiP-D6 Manual
16
c. Via touch screen monitor / mouse
Use on screen keys to play, stop or pause
Use to rewind. Use to fast forward
Press once for 2x and subsequent press to increase speed
For step rewind/step fast-forward, use keys to move frames
To exit playback press stop or escape
To activate WYSIWYG backup, insert USB and press ‘backup’. The USB icon will light to show
backup has commenced. To stop recording, press ‘backup’ again.
Chapter 8: Alarm Management
Alarm events:
Motion – created by movement
Sensor – created by hardwired normally open / normally closed alarm input at the back
of the unit
a. Via remote control
To select alarm indicator press ‘menu’ and use left and right direction keys until correct icon is
reached
Press ‘enter’ to select
To scroll through alarm events use up and down direction keys
Choose alarm event and press enter
Use up and down direction keys to select recorded event
Use right and left direction keys to select action
b. Via keyboard
To select alarm indicator, press ‘search’
To scroll through alarm events use up and down direction on joystick
Choose alarm event and press ‘enter’
Use up and down direction on joystick to select recorded event
Use right and left direction on joystick to select action
Note: See installation guide for information on how to set up alarms.
Note: For all methods, with WYSIWYG backup, all channels will be exported regardless of on screen
camera selection. Once backup has been activated, playback will slow down. If fast-forward is selected,
when playing back the file, the speed will be normal however the frame rate will be reduced.

HD IP Video Decoder AiP-D6 Manual
17
c. Via touch screen monitor
To select alarm indicator touch alarm key at the top left hand side of the screen
Use touch screen interface to select alarm events
Use up and down scroll bar to select recorded event
Press USB, email, playback to select action
Chapter 9: Backup / Export
In playback mode, press to save recording to USB flash disk.
MULTI-CHANNEL file format will be exported into the USB flash disk.
a. Via remote control
Once the HD IP Video Decoder AiP-D6 is in DVR/NVR playback mode, press REC button.
Recordings will export to the USB flash disk.
b. Via keyboard
Once the HD IP Video Decoder AiP-D6 is in DVR/NVR playback mode, press on REC
button. Recordings will export to the USB flash disk.
c. Via touch screen monitor
Once the HD IP Video Decoder AiP-D6 is DVR/NVR playback mode, press USB button.
Recordings will export to the USB flash disk.
Note: For all methods, when selecting backup period ensure file size is less than your backup device
capacity. Longer periods may take more time to calculate.

HD IP Video Decoder AiP-D6 Manual
18
Chapter 10: Event
Within the event menu, there are 2 options:
System event – refers to the systems performance
Operating event – refers to designated areas selected by the user
a. Via remote control
To access event manager press ‘menu’ key
Use to locate the event manager icon
Press ‘enter’ to select
b. Via keyboard
To access event manager press ‘set’
Use left and rights keys to locate the event manager icon
Press ‘enter’ to select
c. Via touch screen/mouse
To access event manager press the menu icon
Scroll through the menu to locate the event manager icon
Press ‘enter’ to select

HD IP Video Decoder AiP-D6 Manual
19
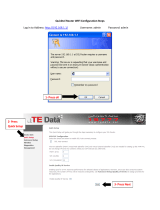
Chapter 11: Basic web-based browser viewing
Open Internet explorer and enter the HD IP Video Decoder’s IP address into the address bar
The log on screen will appear
Enter your details
The default username is ‘admin’, the default password is ‘1111’.
To bring up a full screen, double click on the required camera view
Double click to return to multi screen
Chapter 12: Backup Manager
Backup Manager is a program provided to playback-recorded files from the HD IP Video Decoder
AiP-D4 and H.264 DVRs
Backup Manager allows you to complete the following actions:
Playback exported files
Complete an FTP download
Convert already downloaded files
Note: For first time Backup Manager users, please follow the onscreen instructions.
/