Yamaha UD-WL01 User manual

Type
User manual

Yamaha UD-WL01 is a USB Wireless LAN Adaptor that allows you to connect your Yamaha instrument to a smart device or computer via Wi-Fi, enabling you to manage music files and take advantage of various functions. With the UD-WL01, you can establish a wireless connection with your instrument and use specific applications to expand its potential and enhance your musical experience.

Yamaha UD-WL01 is a USB Wireless LAN Adaptor that allows you to connect your Yamaha instrument to a smart device or computer via Wi-Fi, enabling you to manage music files and take advantage of various functions. With the UD-WL01, you can establish a wireless connection with your instrument and use specific applications to expand its potential and enhance your musical experience.

The UD-WL01 USB Wireless LAN Adaptor allows you to easily establish a wireless connection between your
instrument and your smart device, such as an iPhone, iPad, or iPod touch, or your computer. With this setting and
the help of some specific applications, you can manage your music files more easily and take advantage of various
functions — expanding the potential of your instrument and making it even more integral part of your total music
life.
NOTE In this manual, iPhone, iPad, and iPod touch are hereafter collectively called a smart device.
NOTE The UD-WL01 can be used with Yamaha products having wireless-LAN capability. For information on UD-WL01 compatible products,
visit the UD-WL01 product page on the Yamaha website.
Setting up
1. Turn off the power to the instrument.
Quit any open application software on your smart device/computer.
2. Connect the UD-WL01 to the [USB TO DEVICE] terminal of the instrument.
3. Turn on the power to the instrument.
When you are finished with the setup, go on to the next page, and connect your instrument to a network.
Required devices
USB Wireless LAN Adaptor: UD-WL01
Access point with router (When your computer is using a modem with router capability, no router is required.)
NOTE When you set your instrument to Accesspoint mode for direct wireless connection between your instrument and your smart device/
computer, no access point is required (see “Choosing the connection type” on page 2).
Access point
An “access point” refers to a device which acts as a base station when data is transmitted/received via a wireless LAN.
Some access points are combined with router or modem functions.
USB Wireless LAN Adaptor: UD-WL01
Connection Manual
USB Wireless LAN Adaptor: UD-WL01 Connection Manual
2
Choosing the connection type
To connect your instrument to a network, you can use one of the four types of connections below. Select one which
is most suitable for your network environment. For types (A) through (C), you need to set up an access point. If your
access point supports WPS, choose type (A), which makes network connection easier.
Access point required:
(A) Setting automatically by WPS; Do this when your access point supports WPS (see page 3).
(B) Selecting from a network list; Do this when your access point does not support WPS (see page 4).
(C) Setting manually; Do this when your access point does not support WPS, and also you cannot
find your access point on the instrument’s display (see page 4).
Access point NOT required:
(D) Using Accesspoint mode; Do this when you do not have an access point, or there is no access point
available nearby, such as when you are away from home (see page 5).
Connection types (A), (B), and (C) – Infrastructure mode
When you use type (A), (B), or (C), connection will be established via an access point.
Connection type (D) – Accesspoint mode
You can use your instrument as an access point to achieve a direct wireless connection between your instrument
and your smart device/computer.
If you cannot find your access point on the instrument’s display, or when there is no access point nearby, select this
type. Please note that when your instrument is set to Accesspoint mode, no Internet access is available on your
smart device/computer, limiting part of their functions, such as mailing and searching.
WPS (Wi-Fi Protected Setup)
WPS refers to a structure to easily make settings of a wireless LAN, just by pressing the WPS button of a wireless LAN
adaptor and an access point. This helps you save time and effort in making all the settings necessary for connecting to a
network.
UD-WL01
Access point
Wireless LANWireless LAN
Computer
iPhone
iPad
UD-WL01
Wireless LAN
Computer
iPhone
iPad
USB Wireless LAN Adaptor: UD-WL01 Connection Manual
3
Connecting to a network
(A) Setting automatically by WPS
When your access point supports WPS, you can easily connect your instrument to a network just by following the
procedures below, without making any additional settings, such as entering a password.
NOTE To check whether your access point supports WPS, refer to the owner’s manual supplied with your access point.
1. Connect the UD-WL01 to the instrument, and then hold down the [WPS] button on the UD-
WL01 for at least three seconds.
The LED lamp on the UD-WL01 flashes every 0.5 seconds.
2. Press the WPS button on your access point within two minutes after step 1.
When the UD-WL01 is successfully connected to the access point, the LED lamp on the UD-WL01 lights, and
then flashes during communication over the network.
Connection between the UD-WL01 and the access point is now established. Once your instrument is connected to
your access point by WPS, the setting will be stored automatically to the instrument, and you no longer need to
repeat the same setting next time.
Once this is done, be sure to make the necessary settings on your smart device/computer (see page 6).
Infrastructure mode and Accesspoint mode
The “Infrastructure” mode uses an access point for data communication, between a USB wireless LAN adaptor and a
network. When you select connection type (A), (B), or (C) above, your instrument will be set to this mode. The “Accesspoint”
mode allows you to directly connect a USB wireless LAN adaptor and your smart device/computer, without using an access
point. With connection type (D) above, your instrument will use this mode.
LED lamp
[WPS] button
Press the WPS button on your access point
USB Wireless LAN Adaptor: UD-WL01 Connection Manual
4
(B) Selecting from a network list
You can use a network list shown on your instrument’s display to select the network for connecting to your
instrument. For details, refer to the Owner’s Manual or the Reference Manual for your instrument, since the
operation and setting may vary depending on the instrument used.
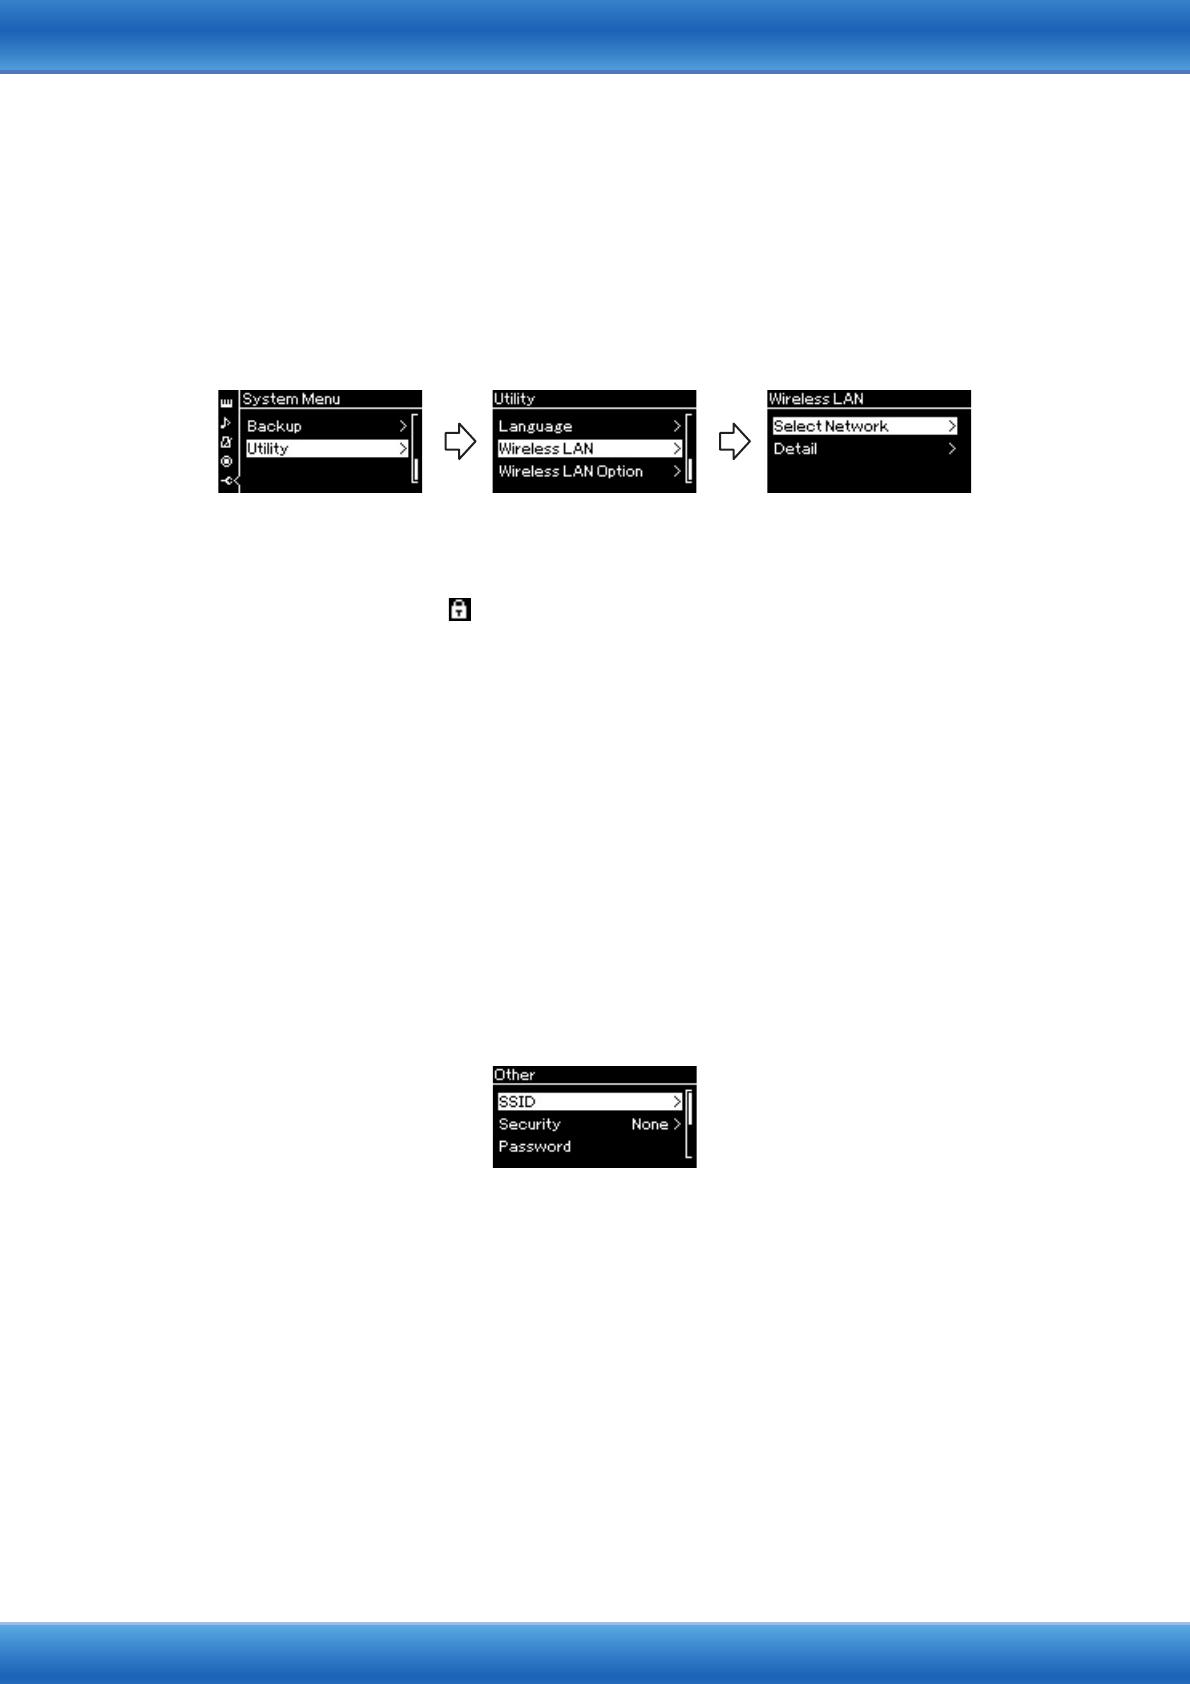
1. Call up the wireless LAN display on your instrument, and then go to the network list.
Example: CLP-585/CLP-575/CLP-545/CLP-535
NOTE If no signal from a network is received, the network will not be listed. Also, no closed networks will be listed.
2. Connect the instrument to a network.
The networks near your instrument will be listed on the display. From the networks listed, select the desired
one. For a network with a lock icon ( ), you need to enter the password, and for a network without a lock
icon, you can connect to the network just by selecting it.
Connection between the UD-WL01 and the access point is now established.
Once this is done, be sure to make the necessary settings on your smart device/computer (see page 6).
(C) Setting manually
If you cannot find a desired network on the instrument’s display, the network may be closed. In this case, you need
to manually input the SSID, security setting, and password for connection. For details on how to input security
information on the display, refer to the Owner’s Manual or the Reference Manual for your instrument.
NOTE For more information on how to check or change access point settings, refer to the owner’s manual supplied with your access point.
1. Call up the wireless LAN display, and then input the SSID, security setting, and password.
Example: CLP-585/CLP-575/CLP-545/CLP-535
System Menu > Utility > Wireless LAN > Select Network > Other
2. On the instrument’s display, touch the [Connect] button, or select an appropriate setting for
connection.
Connection between the UD-WL01 and the access point is now established.
Once this is done, be sure to make the necessary settings on your smart device/computer (see page 6).
System Menu display Utility display Wireless LAN display
USB Wireless LAN Adaptor: UD-WL01 Connection Manual
5
(D) Using Accesspoint mode
You will use your instrument as an access point to achieve a direct wireless connection between your instrument
and your smart device/computer.
NOTE Only an instrument which has the Accesspoint mode function can serve as an access point.
NOTE When your instrument is set to Accesspoint mode, no Internet access is available using a wireless LAN.
1. Call up the wireless LAN display on the instrument.
For more information on how to call up the wireless LAN display, refer to the Owners Manual or the Reference
Manual for your instrument.
2. Set the instrument to the Accesspoint mode.
In the default setting, your instrument is set to Infrastructure mode. Select Accesspoint mode in the wireless
LAN display.
Example: CLP-585/CLP-575/CLP-545/CLP-535
System Menu > Utility > Wireless LAN Option > Wireless LAN Mode
The LED lamp on the UD-WL01 lights up, when the instrument is set to Accesspoint mode.
3. If necessary, set the SSID, security, password, and channel.
When you are using more than one instrument, set a different SSID and channel for each instrument to avoid
interference.
4. Store the settings.
Now your instrument is available as an access point, enabling a direct wireless connection between your
instrument and smart device/computer (see page 6).
Checking the IP and MAC addresses
You can check the IP address of your instrument and the MAC address of the UD-WL01 on the instrument’s
Wireless LAN display. For more information, refer to the Owner’s Manual or the Reference Manual for your particular
instrument.
The MAC address is also shown at the back of the UD-WL01.
MAC address
USB Wireless LAN Adaptor: UD-WL01 Connection Manual
6
Setting your smart device/computer
For a smart device:
1.
Call up the Wi-Fi display on your smart device by tapping Settings > Wi-Fi.
2. Turn on the Wi-Fi.
3. From the network list shown on the display, tap on the network to which you connected your
instrument, or the instrument that you set to Accesspoint mode.
If necessary, enter a password, and then connect.
For a computer:
Set your computer to a wireless network connection.
For details, refer to the owner’s manual supplied with your computer.
Connection to a desired network is now completed. Try using some applications on your smart device/computer to
communicate with your instrument.
NOTE Some applications need a certain setting to communicate with the instrument. For details, refer to the relevant manuals for those
applications.
The illustrations and screens as shown in this manual are for instructional purposes only, and may appear somewhat
different from those on your instrument.
iPad, iPhone and iPod touch are trademarks of Apple Inc., registered in the U.S. and other countries.
The company names and product names in this manual are the trademarks or registered trademarks of their respective
companies.
C.S.G., DMI Development Division
© 2014 Yamaha Corporation
Published 03/2014 MW-A0
  • Page 1 1
  • Page 2 2
  • Page 3 3
  • Page 4 4
  • Page 5 5
  • Page 6 6

Yamaha UD-WL01 User manual

Type
User manual

Yamaha UD-WL01 is a USB Wireless LAN Adaptor that allows you to connect your Yamaha instrument to a smart device or computer via Wi-Fi, enabling you to manage music files and take advantage of various functions. With the UD-WL01, you can establish a wireless connection with your instrument and use specific applications to expand its potential and enhance your musical experience.

Ask a question and I''ll find the answer in the document

Finding information in a document is now easier with AI