Page is loading ...

Assembly Instructions
Caution : You must read this before you proceed.
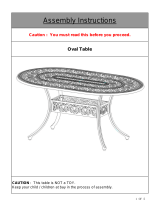
CAST TABLE
CAUTION : This table is NOT a TOY.
Keep your child / children away during the process of assembly.
Do not use power tools for assembly.
REMINDER : In the event of intent to return, please disassemble by reversing the assembly
process and pack item into its ORIGINAL CARTON BOX with original packing materials.
Contact Oakland Living at service@oakland-living.com or call 1-866-656-8666 (M-F 10am to
5pm) for any questions, missing parts, or other customer service issue.
1 OF 4

No. Picture Description Qty
Table Top 1
A
Leg Support Panels 4
B
Table Legs 4
C
No. Picture Description Qty
D Studs(M8*40mm) 12
Washers ( 8mm ) 12
E Springs Washers ( 8mm) 12
Nuts ( 8mm ) 12
J Screwdriver 1
K Wrench 1
Before Beginning Assembly:
2 OF 4

Step 1
Unpack and place all parts on a clean soft surface.
Note : It is recommended that you have a partner to assist in the assembly process.
Step 2
Place the Table Top(A) with the underside facing up.
Fit the Studs(D) by turning into the 4 holes on the underside of Table Top(A) with the
Screwdriver(J). Tighten only to snug fit. Similarly, fit 8 Studs(D) into holes in legs (2 per
leg, not pictured). DO NOT OVERTIGHTEN AS YOU MAY DAMAGE THE THREADS.
Step 3
Next, place and fit the four Table Legs (C) over the Studs previously fitted in Step 2 with
Washers, Spring Washers and Nuts(E) using the Wrench(K) . Do not tighten. Legs should be
very loose to allow for next steps.
3 OF 4

Step 4
NOTE : Please see that the Leg Support Panels(B) have 2 types of ends (1# and 2# in
photo above). 1# style end should be closest to leg (has cutout on inner surface). 2#
style end should be closest to Nut (has cutout on outer surface). By design, the
LEGS SUPPORT PANELS WILL OVERLAP AT ALL 4 (four) CORNERS, giving you
maximum stability.
First, place the Leg Supports(B) with end style 1# onto the studs of the legs. Then place leg
support with end style 2# onto the studs.
Then attach Washers, Spring Washers and Nuts(E) to the studs. Do not tighten at this
point, leave very loose to make it easy to position other legs and supports.
Repeat the same process for all 4 (four) contact points of the Table Legs and the Legs
Support Panels.
Once all the panels are in place, hold the legs in place in a centered position, and proceed to
FINGER-TIGHTEN all the nuts on the legs from Step 3 and Step 4 above, in a rotational
sequential manner. Tighten each nut a little more each time you come around to it.
Legs should be in final centered position and wobble should be greatly reduced.
Step 5
Turn the table right side up.
While holding table in level position, do final tightening of all nuts with Wrench(K) to SNUG FIT.
Do not over tighten as you may damage the threads. Loosen and retighten as needed for
leveling. For additional leveling, adjust the pre-installed Levellers at the end of each table leg
until the table is level with the ground. Your table is now ready for use.
4 OF 4
/


