Cafe CHS90XM2NS5 Owner's manual

Category
Microwaves
Type
Owner's manual

This manual is also suitable for

Owners Manual
TM
Write the model and serial numbers here:
Model # _______________________________
Serial # _______________________________
You can find them on a label behind the door
or drawer.
49-2000387 Rev. 0 09-19 GEA
Owner's Manual
Español
Para consultar una version en español de este manual de instrucciones,
visite nuestro sitio de internet cafeappliances.com.
Induction Front Control Ranges
Models: CHS900M and CHS90XM
Contents
Safety Information ...............................3
Using the Range
Surface Units ..................................7
Precision Cooking ..............................8
Cookware for Induction Cooktop ..................10
Oven Controls ................................12
Settings .....................................13
Sabbath Mode ................................14
Oven Racks ..................................15
Aluminum Foil and Oven Liners ...................16
Cookware ....................................16
Cooking Modes ...............................16
Oven Door Camera ............................17
Probe .......................................18
Cooking Guide ................................19
Care And Cleaning
Cleaning the Range – Exterior ....................20
Cleaning the Range – Interior ....................21
Glass Cooktop ................................22
Probe .......................................24
Oven Light ...................................24
Oven Doors ..................................26
Removable Storage Drawer ......................27
Troubleshooting Tips ...........................28
Limited Warranty ...............................34
Accessories ...................................35
Consumer Support .............................36
2 49-2000387 Rev. 0
TM
THANK YOU FOR MAKING CAFÉ A PART OF YOUR HOME.
We take pride in the craftsmanship, innovation and design that goes into every Café product, and
we think you will too. Among other things, registration of your appliance ensures that we can deliver
important product information and warranty details when you need them.
Register your Café appliance now online. Helpful websites are available in the Consumer Support
section of this Owner’s Manual. You may also mail in the pre-printed registration card included in the
packing material.
49-2000387 Rev. 0 3
READ AND SAVE THESE INSTRUCTIONS
IMPORTANT SAFETY INFORMATION
READ ALL INSTRUCTIONS BEFORE USING THE APPLIANCE
SAFETY INFORMATION
WARNING
Read all safety instructions before using the product. Failure to follow these instructions may result
in fire, electrical shock, serious injury or death.
ANTI-TIP DEVICE
To reduce the risk of tipping the range,
the range must be secured by a properly
installed anti-tip bracket. See installation
instructions shipped with the bracket for
complete details before attempting to
install.
For Free-Standing and Slide-In Ranges
To check if the bracket is installed and
engaged properly, look underneath the
range to see that the rear leveling leg is engaged in the bracket. On
some models, the storage drawer or kick panel can be removed for easy
inspection. If visual inspection is not possible, slide the range forward,
confirm the anti-tip bracket is securely attached to the floor or wall, and
slide the range back so the rear leveling leg is under the anti-tip bracket.
If the range is pulled from the wall for any reason, always repeat this
procedure to verify the range is properly secured by the anti-tip bracket.
Never completely remove the leveling legs or the range will not be secured
to the anti-tip device properly.
• A child or adult can tip the range and be killed.
• Install the anti-tip bracket to the wall or floor.
• Engage the range to the anti-tip bracket by sliding the
range back such that the foot is engaged.
• Re-engage the anti-tip bracket if the range is moved.
• Failure to do so can result in death or serious burns
to children or adults.
Tip-Over Hazard
WARNING
Anti-Tip
Bracket
Leveling Leg
Free-Standing and Slide-In Ranges
WARNING
GENERAL SAFETY INSTRUCTIONS
Ŷ 8VHWKLVDSSOLDQFHRQO\IRULWVLQWHQGHGSXUSRVHDV
described in this Owner’s Manual.
Ŷ %HVXUH\RXUDSSOLDQFHLVSURSHUO\LQVWDOOHGDQG
grounded by a qualified installer in accordance with
the provided installation instructions.
Ŷ 'RQRWDWWHPSWWRUHSDLURUUHSODFHDQ\SDUWRI\RXU
range unless it is specifically recommended in this
manual. All other servicing should be transferred to
a qualified technician.
Ŷ %HIRUHSHUIRUPLQJDQ\VHUYLFHXQSOXJWKHUDQJH
or disconnect the power supply at the household
distribution panel by removing the fuse or switching
off the circuit breaker.
Ŷ 'RQRWOHDYHFKLOGUHQDORQH²FKLOGUHQVKRXOGQRW
be left alone or unattended in an area where an
appliance is in use. They should never be allowed
to climb, sit or stand on any part of the appliance.
Ŷ
CAUTION
Do not store items of interest to
children above a range or on the backguard of a
UDQJH²FKLOGUHQFOLPELQJRQWKHUDQJHWRUHDFK
items could be seriously injured.
Ŷ 8VHRQO\GU\SRWKROGHUV²PRLVWRUGDPSSRW
holders on hot surfaces may result in burns from
steam. Do not let pot holders touch hot surface
units or heating elements. Do not use a towel or
other bulky cloth in place of pot holders.
Ŷ 1HYHUXVH\RXUDSSOLDQFHIRUZDUPLQJRUKHDWLQJ
the room.
Ŷ 'RQRWWRXFKWKHVXUIDFHXQLWVWKHKHDWLQJHOHPHQWV
or the interior surface of the oven. These surfaces
may be hot enough to burn even though they are
dark in color. During and after use, do not touch,
or let clothing or other flammable materials contact
the surface units, areas nearby the surface units or
any interior area of the oven; allow sufficient time
for cooling first. Other surfaces of the appliance
may become hot enough to cause burns. Potentially
hot surfaces include the cooktop, areas facing the
cooktop, oven vent opening, surfaces near the
opening and crevices around the oven door.
Ŷ 'RQRWKHDWXQRSHQHGIRRGFRQWDLQHUV3UHVVXUH
could build up and the container could burst,
causing an injury.
4 49-2000387 Rev. 0
READ AND SAVE THESE INSTRUCTIONS
IMPORTANT SAFETY INFORMATION
READ ALL INSTRUCTIONS BEFORE USING THE APPLIANCE
SAFETY INFORMATION
WARNING
KEEP FLAMMABLE MATERIALS AWAY FROM THE RANGE
Failure to do so may result in fire or personal injury.
Ŷ 'RQRWVWRUHRUXVHIODPPDEOHPDWHULDOVLQDQRYHQ
or near the cooktop, including paper, plastic, pot
holders, linens, wall coverings, curtains, drapes and
gasoline or other flammable vapors and liquids.
Ŷ 1HYHUZHDUORRVHILWWLQJRUKDQJLQJJDUPHQWVZKLOH
using the appliance. These garments may ignite if
they contact hot surfaces causing severe burns.
Ŷ 'RQRWOHWFRRNLQJJUHDVHRURWKHUIODPPDEOH
materials accumulate in or near the range. Grease
in the oven or on the cooktop may ignite.
WARNING
IN THE EVENT OF A FIRE, TAKE THE FOLLOWING
STEPS TO PREVENT INJURY AND FIRE SPREADING
Ŷ 'RQRWXVHZDWHURQJUHDVHILUHV1HYHUSLFNXS
a flaming pan. Turn the controls off. Smother a
flaming pan on a surface unit by covering the pan
completely with a well-fitting lid, cookie sheet or flat
tray. Use a multi-purpose dry chemical or foam-type
fire extinguisher.
Ŷ ,IWKHUHLVDILUHLQWKHRYHQGXULQJEDNLQJVPRWKHU
the fire by closing the oven door and turning the
oven off or by using a multi-purpose dry chemical or
foam-type fire extinguisher.
Ŷ ,IWKHUHLVDILUHLQWKHRYHQGXULQJVHOIFOHDQWXUQ
the oven off and wait for the fire to go out. Do not
force the door open. Introduction of fresh air at
self-clean temperatures may lead to a burst of flame
from the oven. Failure to follow this instruction may
result in severe burns.
WARNING
COOKTOP SAFETY INSTRUCTIONS
Ŷ 1HYHUOHDYHWKHVXUIDFHXQLWVXQDWWHQGHG%RLORYHUV
cause smoking and greasy spillovers that may catch
on fire.
Ŷ 1HYHUOHDYHRLOXQDWWHQGHGZKLOHIU\LQJ,IDOORZHG
to heat beyond its smoking point, oil may ignite
resulting in fire that may spread to surrounding
cabinets. Use a deep fat thermometer whenever
possible to monitor oil temperature.
Ŷ 7RDYRLGRLOVSLOORYHUDQGILUHXVHDPLQLPXP
amount of oil when shallow pan-frying and avoid
cooking frozen foods with excessive amounts of ice.
Ŷ 2QO\FHUWDLQW\SHVRIJODVVJODVVFHUDPLF
earthenware or other glazed containers are suitable
for cooktop service; others may break because of
the sudden change in temperature.
Ŷ 7RPLQLPL]HWKHSRVVLELOLW\RIEXUQVLJQLWLRQRI
flammable materials and spillage, the handle of a
container should be turned toward the center of the
range without extending over nearby surface units.
WARNING
GENERAL SAFETY INSTRUCTIONS (Cont.)
Ŷ 'RQRWXVHDQ\W\SHRIIRLORUOLQHUWRFRYHUWKH
oven bottom or anywhere in the oven, except as
described in this manual. Oven liners can trap heat
or melt, resulting in damage to the product and risk
of shock, smoke or fire.
Ŷ $YRLGVFUDWFKLQJRULPSDFWLQJJODVVGRRUVFRRN
tops or control panels. Doing so may lead to glass
breakage. Do not cook on a product with broken
glass. Shock, fire or cuts may occur.
Ŷ &RRNPHDWDQGSRXOWU\WKRURXJKO\²PHDWWRDWOHDVW
an internal temperature of 160°F and poultry to at
least an internal temperature of 180°F. Cooking
to these temperatures usually protects against
foodborne illness.
Ŷ Remote Operation - This appliance is configurable to
allow remote operation at any time. Do not store any
flammable materials or temperature sensitive items
inside, on top or near surface units of the appliance.
49-2000387 Rev. 0 5
READ AND SAVE THESE INSTRUCTIONS
IMPORTANT SAFETY INFORMATION
READ ALL INSTRUCTIONS BEFORE USING THE APPLIANCE
SAFETY INFORMATION
WARNING
GLASS COOKTOP SAFETY INSTRUCTIONS
Ŷ 8VHFDUHZKHQWRXFKLQJWKHFRRNWRS7KHJODVV
surface of the cooktop will retain heat after the
controls have been turned off.
Ŷ 'RQRWFRRNRQDEURNHQFRRNWRS,IJODVVFRRNWRS
should break, cleaning solutions and spillovers
may penetrate the broken cooktop and create a
risk of electric shock. Contact a qualified technician
immediately.
Ŷ $YRLGVFUDWFKLQJWKHJODVVFRRNWRS7KHFRRNWRS
can be scratched with items such as knives, sharp
instruments, rings or other jewelry, and rivets on
clothing.
Ŷ 8VHFHUDPLFFRRNWRSFOHDQHUDQGDQRQVFUDWFK
cleaning pad to clean the cooktop. Wait until the
cooktop cools and the indicator light goes out
before cleaning. A wet sponge or cloth on a hot
surface can cause steam burns. Some cleaners can
produce noxious fumes if applied to a hot surface.
NOTE: Sugar spills are an exception. They should
be scraped off while still hot using an oven mitt
and a scraper. See the Cleaning the glass cooktop
section for detailed instructions.
Ŷ 5HDGDQGIROORZDOOLQVWUXFWLRQVDQGZDUQLQJVRQWKH
cleaning cream label.
Ŷ 'RQRWSODFHRUVWRUHLWHPVWKDWFDQPHOWRUFDWFK
fire on the glass cooktop, even when it is not being
used. If the cooktop is inadvertently turned on, they
may ignite. Heat from the cooktop or oven vent after
it is turned off may cause them to ignite also.
Ŷ 'RQRWSODFHPHWDOOLFREMHFWVVXFKDVNQLYHVIRUNV
spoons and lids on the cooktop surface since they
can get hot.
WARNING
OVEN SAFETY INSTRUCTIONS
Ŷ 6WDQGDZD\IURPWKHUDQJHZKHQRSHQLQJWKHRYHQ
door. Hot air or steam which escapes can cause
EXUQVWRKDQGVIDFHDQGRUH\HV
Ŷ 'RQRWXVHWKHRYHQLIDKHDWLQJHOHPHQWGHYHORSV
a glowing spot during use or shows other signs
of damage. A glowing spot indicates the heating
element may fail and present a potential burn, fire,
or shock hazard. Turn the oven off immediately and
have the heating element replaced by a qualified
service technician.
Ŷ .HHSWKHRYHQYHQWXQREVWUXFWHG
Ŷ .HHSWKHRYHQIUHHIURPJUHDVHEXLOGXS*UHDVHLQ
the oven may ignite.
Ŷ 3ODFHRYHQUDFNVLQGHVLUHGORFDWLRQZKLOHRYHQLV
cool. If rack must be moved while oven is hot, do not
let pot holder contact hot heating element in oven.
Ŷ :KHQXVLQJFRRNLQJRUURDVWLQJEDJVLQWKHRYHQ
follow the manufacturer’s directions.
Ŷ 3XOOWKHRYHQUDFNWRWKHVWRSORFNSRVLWLRQZKHQ
loading and unloading food from the oven. This
helps prevent burns from touching hot surfaces of
the door and oven walls.
Ŷ 'RQRWOHDYHLWHPVVXFKDVSDSHUFRRNLQJXWHQVLOV
or food in the oven when not in use. Items stored in
an oven can ignite.
Ŷ 1HYHUSODFHFRRNLQJXWHQVLOVSL]]DRUEDNLQJVWRQHV
or any type of foil or liner on the oven floor. These
items can trap heat or melt, resulting in damage to
the product and risk of shock, smoke or fire.
6 49-2000387 Rev. 0
SAFETY INFORMATION
READ AND SAVE THESE INSTRUCTIONS
IMPORTANT SAFETY INFORMATION
READ ALL INSTRUCTIONS BEFORE USING THE APPLIANCE
WARNING
SELF-CLEANING OVEN SAFETY INSTRUCTIONS
The self-cleaning feature operates the oven at temperatures high enough to burn away food soils in the oven.
Follow these instructions for safe operation.
Ŷ 'RQRWWRXFKRYHQVXUIDFHVGXULQJVHOIFOHDQ
RSHUDWLRQ.HHSFKLOGUHQDZD\IURPWKHRYHQGXULQJ
self-cleaning. Failure to follow these instructions
may cause burns.
Ŷ %HIRUHRSHUDWLQJWKHVHOIFOHDQF\FOHUHPRYHSDQV
shiny metal oven racks and other utensils from the
oven. Only gray porcelain-coated oven racks may
be left in the oven. Do not use self-clean to clean
other parts, such as drip pans or bowls.
Ŷ %HIRUHRSHUDWLQJWKHVHOIFOHDQF\FOHZLSHJUHDVH
and food soils from the oven. Excessive amount
of grease may ignite leading to smoke damage to
your home.
Ŷ ,IWKHVHOIFOHDQLQJPRGHPDOIXQFWLRQVWXUQWKH
oven off and disconnect the power supply. Have it
serviced by a qualified technician.
Ŷ 'RQRWFOHDQWKHGRRUJDVNHW7KHGRRUJDVNHWLV
essential for a good seal. Care should be taken not
to rub, damage or move the gasket.
Ŷ 'RQRWXVHRYHQFOHDQHUV1RFRPPHUFLDORYHQ
cleaner or oven liner protective coating of any kind
should be used in or around any part of the oven.
How to Remove Protective Shipping Film and Packaging Tape
Carefully grasp a corner of the protective shipping film
with your fingers and slowly peel it from the appliance
surface. Do not use any sharp items to remove the film.
Remove all of the film before using the appliance for the
first time.
To assure no damage is done to the finish of the
product, the safest way to remove the adhesive from
packaging tape on new appliances is an application of
a household liquid dishwashing detergent. Apply with a
soft cloth and allow to soak.
NOTE: The adhesive must be removed from all parts. It
cannot be removed if it is baked on.
Remote Enable Equipment
This device complies with part 15 of the FCC Rules.
Operation is subject to the following two conditions: (1)
This device may not cause harmful interference, and
(2) this device must accept any interference received,
including interference that may cause undesired operation.
The wireless communication equipment installed on this
range has been tested and found to comply with the
limits for a Class B digital device, pursuant to part 15 of
the FCC Rules. These limits are designed to:
(a) provide reasonable protection against harmful
interference in a residential installation. This equipment
generates, uses, and can radiate radio frequency energy
and, if not installed and used in accordance with the
instructions, may cause harmful interference to radio
communications. However, there is no guarantee that
interference will not occur in a particular installation. If
this equipment does cause harmful interference to radio
or television reception, which can be determined by
turning the equipment off and on, the user is encouraged
to try to correct the interference by one or more of the
following measures:
Ŷ5HRULHQWRUUHORFDWHWKHUHFHLYLQJDQWHQQD
Ŷ,QFUHDVHWKHVHSDUDWLRQEHWZHHQWKHHTXLSPHQWDQG
receiver.
Ŷ&RQQHFWWKHHTXLSPHQWLQWRDQRXWOHWRQDFLUFXLW
different from that to which the receiver is connected.
Ŷ&RQVXOWWKHGHDOHURUDQH[SHULHQFHGUDGLR79
technician for help.
(b) accept any interference received, including interference
that may cause undesired operation of the device.
Note that any changes or modifications to the wireless
communication device installed on this oven that are not
expressly approved by the manufacturer could void the
user’s authority to operate the equipment.
49-2000387 Rev. 0 7
USING THE RANGE: Surface Units
Surface Units
Operating the Cooktop Elements
WARNING
FIRE HAZARD: Never leave the
range unattended with the cooktop on medium or
high settings. Keep flammable items away from the
cooktop. Turn off all controls when done cooking.
Failure to follow these instructions can result in fire,
serious injury or death.
Before using the cooktop for the first time, clean it with
ceramic cooktop cleaner. This helps protect the top and
makes cleanup easier.
Turn element(s) On: Touch and hold On/Off pad about
half a second. A chime can be heard with each touch to
any pad.
Power level can be selected in any of the following ways:
1. Swipe the gray arc (on the graphics) to the desired
power level. There is no sensor on the LEDs, or;
2. Touch Anywhere along the gray arc, or;
3. Touch + or - pads to adjust power level, or;
4. Shortcut to Hi: Immediately after turning unit on, touch
the + pad, or;
5. Shortcut to Low: Immediately after turning unit on,
touch the - pad.
NOTE: When changing from a high heat setting to a
lower heat setting, the surface unit may stop glowing.
This is normal. The unit is still on and hot.
NOTE: This cooktop has a rapid heat-up feature. If the
cooktop is cool when turned on, it will glow red for a short
period of time until the desired power setting is reached.
Graphics are representative;
your control may have alternate graphic details.
Gray Arc
Swipe Area
LED
Lights
Gray Arc Swipe Area
8 49-2000387 Rev. 0
Surface Units (Cont.)
Using the Warming Zone
WARNING
FOOD POISON HAZARD: Bacteria may grow in food at
temperatures below 140°F.
Ŷ Always start with hot food. Do not use warm setting to
heat cold food.
Ŷ Do not use warm setting for more than 2 hours.
The WARMING ZONE, located in the back center of
the glass surface, will keep hot, cooked food at serving
temperature. Always start with hot food. Do not use to
heat cold food. Placing uncooked or cold food on the
WARMING ZONE could result in foodborne illness.
To use the WARMING ZONE:
Press the WARMING ZONE pad, select the desired level
(1, 2 or 3) using the number pads, and press start.
To turn off the WARMING ZONE:
Press the WARMING ZONE pad.
NOTE: &DQFHO2IIZLOO127WXUQRIIWKHZDUPLQJ]RQH
For best results, all foods on the WARMING ZONE
should be covered with a lid or aluminum foil. When
warming pastries or breads, the cover should be vented
to allow moisture to escape.
The initial temperature, type and amount of food, type of
pan, and the time held will affect the quality of the food.
Always use pot holders or oven mitts when removing
food from the WARMING ZONE, since cookware and
plates will be hot.
NOTE: The surface warmer will not glow red.
How To Synchronize Left Elements
The Sync Burners feature is only intended for cookware
that completely spans both burners.
To Turn On
Hold the Sync Burners pad for about half a second to
connect the two elements. Operate either element as
described in Operating the Cooktop Elements to adjust
power level.
To Turn Off
1. Touch the On/Off pad on either element to turn off
the Sync Burners.
or
2. Touch the Sync Burners to turn both elements off.
USING THE RANGE: 6XUIDFH8QLWV3UHFLVLRQ&RRNLQJ
Precision Cooking
The Precision Cooking feature allows precise
temperature control of certain cooking devices for
improved results.
Pairing a Bluetooth
®
Device
To Activate Wifi refer to Settings section in this Owner's
Manual.
Press the Settings pad and select Bluetooth
®
. Select
Pair and activate your device to initiate the device's
pairing mode. Refer to the table below for device specific
instructions. The range will cancel pairing mode after two
minutes if no mating device is detected. Select Remove
to confirm product is paired or to un-pair from range.
Supported Devices How to Initiate Pairing
Hestan Cue fry pan Firmly double tap the black plastic endcap
Hestan Cue pot Firmly double tap the black plastic endcap
Precision Probe Press side button once
49-2000387 Rev. 0 9
Precision Cooking (Cont.)
USING THE RANGE: Precision Cooking
Precision Cooking Control Modes
There are two control modes available:
Ŷ App Control – the user interacts with an application
on a smart phone.
Ŷ Local Control – the user interacts with the burner to
set a target temperature and no App use is required.
App Control
After activating your device on your selected burner,
open the App designed to control the selected device.
Depending on the device and application, the set
temperature may be shown in the unit display, in the
App, or hidden from view. NOTE: Use of Local Control
mode is blocked upon entering App Control mode.
Local Control
After activating your device on your selected burner,
move touch control to desired temperature. The set
temperature will be shown in the display. NOTE: Use
of App Control mode is blocked upon entering Local
Control mode.
Precision Cooktop Sensor
Your cooktop or range includes a built-in Precision
Cooktop Sensor on the front left burner. This sensor,
when used in a cooktop precision cooking mode, will
precisely control the temperature of a pan's cooking
surface. Any induction compatible pan can be used on
the Precision Cooktop Sensor. On your LCD display,
select TO COOKTOP and then press START. Press the
On/Off button on the front left burner or Sync Burners
button to use the Precision Cookware Sensor. When
correct burner location shows Ready on your LCD
display, select your cookware material. Move touch
control to set precision cooking temperature. The set
temperature will be shown in the display.
Activating a Precision Cooking Device
1. The unit must identify which device you intend to use
to adjust control parameters appropriately.
2. The display will read “Activate Cookware”, instructing
you to activate a device to use on the Precision
Cooking burner.
3. Activation instructions for approved devices are listed
in the table below.
Supported
Devices How to Activate Control with this App
Hestan Cue
fry pan
Firmly double tap the
black plastic endcap
Hestan Cue
(by Hestan Smart Cooking)
Hestan Cue
pot
Firmly double tap the
black plastic endcap
Hestan Cue
(by Hestan Smart Cooking)
Precision
Probe Press side button once
&DIp.LWFKHQ
(by Café)
10 49-2000387 Rev. 0
Cookware for Induction Cooktop
USING THE RANGE: Cookware for Induction Cooktop
Suitable Cookware
Use quality cookware with heavier bottoms for better
heat distribution and even cooking results. Choose
cookware made of magnetic stainless steel, enamel
coated cast iron, enameled steel or combinations of
these materials.
Some cookware is specifically identified by the
manufacturer for use with induction cooktops. Use a
magnet to test if the cookware will work.
Flat-bottomed pans give best results. Pans with rims or
slight ridges can be used.
Round pans give best results. Pans with warped or
curved bottoms will not heat evenly.
For wok cooking, use a flat-bottomed wok. Do not use a
wok with a support ring.
NOTE: The warming zone is NOT an induction element
and will work with flat bottomed cookware that is NOT
ferrous.
Using the correct size cookware
Pans that are not ferrous or are too small will not allow
the induction elements to turn on, and the ON indicator
for that element location will flash for 25 seconds and
then turn off. If a pan is removed from or not centered on
the induction coil for more than 30 seconds, the power for
that element will be shut off.
Cookware larger than the element ring may be used;
however, heat will only occur above the element.
For best results, the cookware must make FULL contact
with the glass surface.
Do not allow the bottom of the pan or cookware to touch
the surrounding metal cooktop trim.
For best performance, match the pan size to the element
size. Using a smaller pot on a larger burner will generate
less power at any given setting.
Cookware “Noise”
Slight sounds may be produced by different types
of cookware. Heavier pans such as enameled cast
iron produce less noise than a lighter weight multi-ply
stainless steel pan. The size of the pan, and the amount
of contents, can also contribute to the sound level.
When using adjacent elements that are set at certain power
level settings, magnetic fields may interact and produce
a low whistle or intermittent “hum”. These noises can be
reduced or eliminated by lowering or raising the power
level settings of one or both of the elements. Pans that
completely cover the element ring will produce less noise.
A low “humming” noise is normal particularly on high
settings.
Sounds you may here: You may hear a slight “Buzz”
when cooking with Hi mode. This is normal. The sound
depends on the type of pot being used. Some pots will
“Buzz” louder depending on the material. A “Buzz” sound
may be heard if the pan contents are cold. As the pan
heats, the sound will decrease. If the power level is
reduced, the sound level will go down.
Power Control
If a surface unit is on power level H (high), for an
extended period of time or if multiple surface units are
on, there may be a slight reduction in power to the
surface unit. Water under pans may also cause the
controls to reduce the power delivered to the cookware.
Use a griddle.
Use a flat-bottomed wok.
Use flat-bottomed pans.
Use the minimum size pan shown
for each cooking element.
5” Min. Dia.
Pan Size
5” Min. Dia.
Pan Size
´
Min. Dia.
Pan Size
7” Min. Dia.
Pan Size
49-2000387 Rev. 0 11
USING THE RANGE: Cookware for Induction Cooktop
Cookware for Induction Cooktop (Cont.)
Cookware not centered on
cooking element surface.
Curved or warped pan bottoms
or sides.
Pan does not meet the minimum
size required for the cooking
element used.
Cookware centered correctly
on cooking element surface.
Flat pan bottom.
Pan size meets or exceeds the
recommended minimum size
for the cooking element used.
INCORRECT
CORRECT
Pan bottom rests on cooktop
trim or does not rest completely
on the cooktop surface.
Heavy handle tilts pan.
Pan is partially magnetic
on the bottom.
Pan is completely magnetic
on the bottom.
Pan bottom rests completely on
the cooktop surface.
Pan is properly balanced.
Cookware recommendations
Cookware must fully contact the surface of the cooking
element.
Use flat-bottomed pans sized to fit the cooking element
and also to the amount of food being prepared.
Induction interface disks are NOT recommended.
Precision Device Minimum Temperatures
Device temperature ranges are dependent on burner size:
Using the Precision Probe at low temperatures
If you are experiencing trouble maintaining lower set
temperatures with a precision probe, try changing your
set-up by:
Ŷ 5HPRYHWKHOLGIURPWKHSRW
Ŷ 8VHDODUJHUGLDPHWHUSRW
Ŷ 8VHDVPDOOHUEXUQHUZLWKDSRWODUJHUWKDQWKHEXUQHU
A
A
B
A
Device
Small to Medium
Burners (A) Large Burners (B)
Hestan Cue pan 100°F – 500°F 150°F – 500°F
Precision Probe 100°F – 200°F 120°F – 200°F
12 49-2000387 Rev. 0
Oven Controls
USING THE RANGE: Oven Controls
Bake
This option allows the user to access traditional the
traditional bake mode.
Broil
Broil can be selected to access Broil Low and Broil High.
See the Cooking Modes section for more information.
Convection
This option allows you to utilize the convection system
to cook in a variety of modes. See the Cooking Modes
section for more information.
More
Select this option to access the Proof, Probe, Warm, Self
Clean, and Steam Clean options.
Precision Cooking
Precision Cooking is a suite of customized cooking
cycles that have been designed for specific foods. The
display will guide you through setting the oven and food
appropriately for the cycle selected. Precision cooking
cycles vary based on food type; see the Cooking Modes
section for more detailed information.
Oven Light
To turn on or off the oven cavity lights, press the . Both
cavity lights will be illuminated if using a double oven.
Settings
Press the to access the Settings. See the Settings
section for more information.
Favorite
This option allows the user to save their favorite cycles
for easy access in the future. After selecting a cooking
mode and setting the temperature and any timers, press
the to save it as a favorite for future use. After saving
a cycle, press the on the main menu to quickly access
the saved mode.
Kitchen Timer
This feature works as a countdown timer. Press the
, select the amount of time for the timer to operate, and
press Start. The oven will continue to operate once the
timer countdown is complete. To turn off the timer, select
the and press Clear.
Cook Time
This function counts down cooking time and turns off the
oven when the cooking time is complete. Press the
during a cycle, select the amount of cooking time, and
press Start.
Delay Time
This feature delays the start time for an oven cycle. Use
this feature to set a time when you want the oven to
start. Select a cycle, then press the . Select the time of
day for the oven to turn on and press Start. A cook time
can also be programmed if desired.
Wi-Fi & Remote Enable
Press
GET CONNECTED
to connect your oven to Wi-Fi.
This option allows you to download content to your
oven and control it remotely. The oven must be
connected to Wi-Fi before Remote Enable can be
activated. For instructions on how to connect your oven,
VHHWKH:L)L&RQQHFW5HPRWH(QDEOHVHFWLRQXQGHU
Settings in this manual.
Bake Broil Convection
Precision
Cooking
More
12:30 PM
GET CONNECTED
49-2000387 Rev. 0 13
* Compatible Apple or Android devices and home WiFi network required.
There are numerous settings that are accessed by pressing in the top right corner of the main screen.
Wi-Fi & Remote Enable
This appliance is configurable to allow remote operation
at any time. Do not store any flammable materials or
temperature sensitive items inside or on top of this
appliance. By using the Wi-Fi Connect feature, you will
be able to control essential oven operations such as
temperature settings, timers and cooking modes using
your smartphone or tablet.*
Select the then Wi-Fi & Remote Enable - follow the
instructions on your oven display and phone app. It is
necessary to turn on Wi-Fi before using Remote Enable
on your oven.
Connecting your Wi-Fi Connect Enabled oven
1. Have your smart phone or tablet ready with the ability
to access the internet and download apps.
2. You will need to know the password of your home
Wi-Fi router. Have this password ready while you are
setting up your GE Appliances oven.
3. On your smart phone or tablet, visit
GEAppliances.com/connect to learn more about
connected appliance features and to download the
app to connect to your oven.
4. Follow the onscreen instructions in the app to connect
your GE Appliances oven. When connected, your
oven should show that it is connected to your home
Wi-Fi network.
5. If there are issues connecting wirelessly to your oven,
please call 800.220.6899 and ask for assistance
regarding oven wireless connectivity.
To connect additional smart devices, repeat steps 3 and 4.
Remote Starting your Oven
To be able to start the oven remotely once connected
to Wi-Fi, press Remote Enable on the main menu or
access Wi-Fi & Remote Enable in the settings menu
and turn Remote Enable on. The oven can now be
started remotely using a connected device. The icon
must be active to start the oven remotely. To disconnect
your phone from Remote Enable, access the Wi-Fi &
Remote Enable settings and turn Remote Enable off.
NOTE: )RRGVWKDWVSRLOHDVLO\²VXFKDVPLONHJJVILVK
VWXIILQJVSRXOWU\DQGSRUN²VKRXOGQRWEHDOORZHGWR
sit for more than 1 hour before or after cooking. Room
temperature promotes the growth of harmful bacteria. Be
sure that the oven light is off because heat from the bulb
will speed harmful bacteria growth.
Set Clock
This feature allows you to set the clock and specifies
how the time of day will be displayed. Options are for a
standard 12-hour clock with AM and PM selections or
24-hour military time display.
Lock Control
Select this option in order to lock the LCD from any
undesired screen selections. To unlock the screen, press
and press Unlock on the next screen.
Sabbath
Sabbath mode disables the oven lights (the oven light
will not turn on when the door is opened), all sounds
(the control will not beep when the screen is pressed),
Convection modes, Broil modes, Warm, Proof, and all
time functions. Sabbath mode can only be used with
WUDGLWLRQDO%DNH7KLVIHDWXUHFRQIRUPVWRWKH6WDU.
Jewish Sabbath requirements. Please reference the
Sabbath Mode section for more information.
Sound
This setting screen allows you to change the volume, the
end of cycle tone, and turn on or off the touch sound.
Slide up and down to access all the settings
USING THE RANGE: Settings
Settings
COOKING
SYSTEM
SETTINGS
SABBATH
SOUND
DISPLAY
12:30 PM
SETTINGS
12:30 PM
Wi-Fi & REMOTE ENABLE
BLUETOOTH
SET CLOCK
SABBATH
LOCK CONTROL
14 49-2000387 Rev. 0
Bluetooth
®
- Chef Connect
This is a pairing feature for use with other compatible
Chef Connect enabled products like an over-the-range
microwave oven or range hood. To pair those products to the
range Press the Settings pad and select Bluetooth
®
. Select
Pair and follow the corresponding instructions included with
the mating Chef Connect enabled product. The range will
cancel pairing mode after two minutes if no mating device is
detected. Select Remove to confirm product is paired or to
un-pair from range. The Precision Cooking Probe can also
be paired using the Bluetooth
®
feature.
Display
This screen shows the options for brightness, clock off,
energy saver, and screen time out. Clock off will remove
the clock from the display when the screen is inactive,
but it will be shown after pressing the screen. The screen
can be set to never time out or it can be set to shut off
after 1, 5, or 10 minutes.
Cooking
Ŷ The oven is set to Fahrenheit, however, in this setting
the cooking unit can be changed to Celsius.
Ŷ Auto Recipe Conversion can be turned on in order
to automatically reduce the programmed cooking
temperature for Convection Bake or Convection Bake
Multi. Note that this will only reduce the cooking
temperature, not the baking time. When the 12 Hour
Shut Off option is turned on, it will automatically shut
off the oven after 12 hours of continuous use.
Ŷ Adjust Temperature allows the oven temperature to
be adjusted up to 35°F hotter or down to 35°F cooler.
Use this feature if you believe your oven temperature
is too hot or cold and wish to change it. For double
ovens, the upper and lower oven temperatures are
adjusted separately.
System
This screen allows you to clear your saved user data and
shows the current software version.
Sabbath mode disables the oven lights (the oven light will not turn on when the door is opened), all sounds (the
control will not beep when the screen is pressed), Convection modes, Broil modes, Warm, Proof, and all time
IXQFWLRQV6DEEDWKPRGHFDQRQO\EHXVHGZLWKWUDGLWLRQDO%DNH7KLVIHDWXUHFRQIRUPVWRWKH6WDU.-HZLVK6DEEDWK
requirements.
NOTE: If a power outage occurs during when the oven is in Sabbath Mode, the unit will return to Sabbath Mode
when power is restored.
Entering Sabbath Mode
Press the on the main screen to access the Settings
menu and scroll down to Sabbath.
Start a Sabbath Bake
Use the keypad on the screen to enter the temperature
that you would like to use for Sabbath Bake. Once
the temperature is set, press the to set the cook
time for the cycle in hours and minutes. If using a
double oven, you can then set the temperature and
time desired for the other cavity by selecting it to the
left of the temperature display. If a timer is not set, the
oven will start a bake cycle during Sabbath mode and
continue until Sabbath mode is turned off. You can also
set whether the oven light will be on or off by pressing
the on this screen. Once you have programmed the
temperature and time, press Start. The next screen
will display the settings that you programmed for your
Sabbath Bake.
Adjusting the Temperature During a
Sabbath Bake
If the temperature needs to be adjusted after
programming the oven for a Sabbath Bake, press one
of the temperature icons displayed on the Sabbath cycle
screen and press Enter. This will allow you to adjust the
temperature for the cycle. Note that the display will not
show that the oven temperature has been changed.
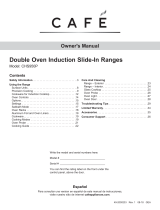
Exit the Sabbath Mode
To exit Sabbath mode, either press the X in the upper
right corner if in the programming screen, or press Exit
Sabbath if in the cycle screen. There is also an option
to turn off the cycle when on
the cycle screen by pressing
Turn Off, but your oven will still
remain in Sabbath mode until
you exit the mode. NOTE: If
a power outage occurs while
the oven is in Sabbath Mode,
the unit will return to Sabbath
Mode when power is restored,
however the oven will return to
the off state even if it was in the
middle of a bake cycle when the
power outage occurred.
Settings (Cont.)
Sabbath
USING THE RANGE: 6HWWLQJV 6DEEDWK
SABBATH
ENTER TURN OFFOven On
EXIT SABBATH
12:30 PM
Select temperature, then press ENTER to edit.
200°F 250°F 300°F 350°F 400°F
Programming Screen
Sabbath Cycle Screen
12:30 PM
SABBATH
BAKE TEMP
123
456
789
0
i
---
°F
START
49-2000387 Rev. 0 15
The number of rack positions may vary by model.
Upper Front
Rail
Fully Open Position
Grasp here
USING THE RANGE: Oven Racks
Oven Racks
Recommended rack positions for various types of
foods are provided in the Cooking Guide. Adjusting
rack position is one way to impact cooking results. For
example, if you would prefer darker tops on cakes,
muffins, or cookies, try moving food one rack position
higher. If you find foods are too brown on top try moving
them down next time.
When baking with multiple pans and on multiple racks,
ensure there is at least 1½" between pans to allow
sufficient space for air to flow.
<RXU2YHQPD\KDYHH[WHQVLRQUDFNVDQGRUWUDGLWLRQDO
flat racks.
To avoid possible burns, place the racks in the desired
position before you turn the oven on.
Extension Racks
Always pull the rack out by its upper front rail to its fully open
position, when placing or removing cookware.
If extension racks are difficult to extend, lubricate the racks
with the graphite lubricant provided with your oven. Remove
the rack from the oven, remove debris in the side tracks with
a paper towel, shake the graphite lubricant and place 4 small
drops on the two bottom tracks of the left and right sides. Open
and close the rack several times to distribute the lubricant.
To order additional graphite lubricant, see the Accessories and
Consumer Support sections at the end of this manual.
To Remove An Extension Rack:
1. Make sure the rack is pushed all the way into the oven
so that side paddles on the rack disengage from the oven
support.
2. Slide the rack toward you to the bump (stop position) on the
rack support.
3. Firmly grasp both sides of the rack frame and the sliding
rack, tilt the front end up and pull it out.
To Replace An Extension Rack:
1. Firmly grasp both sides of the rack frame and the sliding
rack.
2. Place the curved end of the rack (stop-locks) onto the oven
supports, tilt up the front of the rack and push it in as far as
it will go.
If extension racks are difficult to replace or remove, wipe
the oven rack supports with cooking oil. Do not wipe oil
on the rack slides.
To Lubricate the Paddle:
Shake lubricant and apply to the moving parts of the paddle
mechanisms as shown.
16 49-2000387 Rev. 0
USING THE RANGE: Aluminum Foil and Oven Liners &RRNZDUH&RRNLQJ0RGHV
Cookware
Cookware Guidelines
The material, finish, and size of cookware affect baking
performance.
Dark, coated and dull pans absorb heat more readily
than light, shiny pans. Pans that absorb heat more
readily can result in a browner, crisper, and thicker crust.
If using dark and coated cookware check food earlier
than minimum cook time. If undesirable results are
obtained with this type of cookware consider reducing
oven temperature by 25°F next time.
Shiny pans can produce more evenly cooked baked
goods such as cakes and cookies.
Glass and ceramic pans heat slowly but retain heat well.
These types of pans work well for dishes such as pies
and custards.
Air insulated pans heat slowly and can reduce bottom
browning.
.HHSFRRNZDUHFOHDQWRSURPRWHHYHQKHDWLQJ
Stoneware heats slowly and retains heat well. It is
recommended to preheat this type of cookware if
possible. Additional cook time may be required.
CAUTION
Do not use any type of foil or oven liner to cover the oven bottom. These items can trap heat
or melt, resulting in damage to the product and risk of shock, smoke or fire. Damage from improper use of
these items is not covered by the product warranty.
Foil may be used to catch spills by placing a sheet on a lower rack, several inches below the food. Do not use more
IRLOWKDQQHFHVVDU\DQGQHYHUHQWLUHO\FRYHUDQRYHQUDFNZLWKDOXPLQXPIRLO.HHSIRLODWOHDVW´IURPRYHQZDOOV
to prevent poor heat circulation.
Aluminum Foil and Oven Liners
Cooking Modes
Your new oven has a variety of cooking modes to help you get the best results. These modes are described below.
Refer to the Cooking Guide section for recommendations for specific foods. Remember, your new oven may perform
differently than the oven it is replacing.
Temperature Setting
When selecting a temperature, the traditional preset
temperatures are shown and can be selected by
scrolling horizontally and selecting the desired
temperature. If you wish to cook at an alternate
temperature, press the temperature in the middle of the
screen and a number pad will appear so the desired
temperature can be input.
Bake
The traditional bake mode is intended for single rack
cooking. This mode uses heat primarily from the lower
element but also from the upper element to cook food.
To use this mode press the Bake option on the main
menu and scroll to the desired temperature and press
Start. Preheating is generally recommended when using
this mode.
Broiling Modes
Always broil with the door closed. The broil element in
this oven is very powerful. Monitor food closely while
broiling. Use caution when broiling on upper rack
positions as placing food closer to the broil element
increases smoking, spattering, and the possibility
of fats igniting. Broiling on rack position 6 is not
recommended.
Broiling can be used for foods that would typically be
grilled. Adjust the rack position in order to vary the
intensity of the heat to the food. Place foods closer to the
broil element when a seared surface and rare interior are
desired. For best performance, center the food below the
broil heating element.
Broil
Select Broil on the main menu, then select High or Low
depending on the amount of searing and the internal
temperature that is preferred. The High setting is best for
WKLQQHUFXWVRIPHDWDQGRUIRRGV\RXSUHIHUOHVVGRQHRQ
the interior. The Low setting is preferred for thicker cuts of
meat and foods you like to be cooked all the way through.
It is not necessary to preheat the oven for these modes.
49-2000387 Rev. 0 17
USING THE RANGE:&RRNLQJ0RGHV2YHQ'RRU&DPHUD
Cooking Modes (Cont.)
Convection Modes
These modes utilize heat from the traditional upper and
lower elements combined with the convection element
and consistent airflow to enhance evenness. Your
oven is equipped with Auto Recipe Conversion so that
it automatically adjusts the amount of heat to maintain
the proper temperature when using the modes with
specified temperatures. Preheating is recommended for
these modes.
Convection Bake Multi Rack
This mode has been designed to allow for more even
cooking when multiple racks are utilized. Baking time
may be slightly longer than what would be expected for
a single rack. To use this mode, select Convect, then
Bake Multi-Rack, scroll to the desired temperature, and
press Start. Preheating is generally recommended when
using this mode.
Convection Roast
This mode is intended for roasting whole cuts of meat
on a single rack. The utilization of all three elements and
direct airflow down from the top of the oven improves
browning and reduces cooking time. Check food earlier
than the recipe suggests or use the probe when using
this mode. To use this mode, select Convect, then press
Roast, scroll to the desired temperature, and press Start.
Proof
Proof mode is designed for rising (fermenting and
proofing) bread doughs. Press the More option on
the main menu, then Proof, then Start. Cover dough
well to prevent drying out. Bread will rise more rapidly
than at room temperature. NOTE: Do not use the
Proof mode for warming food or keeping food hot. The
proofing oven temperature is not hot enough to hold
foods at safe temperatures.
Warm
Warm mode is designed to keep hot foods at a higher
temperature for up to 3 hours. To use this mode, select
More from the main menu, then Warm, then press Start.
Preheating is not required. Do not use warm to heat cold
food other than crisping crackers, chips, or dry cereal.
It is also recommended that food not be kept warm for
more than 2 hours.
Precision Cooking
These modes provide guidance or pre-set cooking
algorithms to assist the user in cooking various types of
food. The selection you make in the Precision Cooking
menu will guide you to input the information required to
help cook your food. At the end of estimated cooking
time, check the food to see if it is done to your liking.
Note that differences in food shape, preparation and
preferences for doneness can impact the time required
to cook the food.
Some cycles require the food temperature probe
supplied with your oven. The target temperature for the
probe is automatically set based on selections made
for each food. Always check foods using a secondary
food thermometer as probe placement can impact the
measured temperature. See Probe section for more
details on using and positioning the probe properly.
On some pages
i
will show up. Press
i
to access
additional information that pertains to the cooking cycles
within that category.
Additional cycles will be available through software
updates. Connect your oven to have access to these
updates. See the Wi-Fi Connect section for details on
how to connect your oven.
Oven Door Camera (on some models)
The Oven Door Camera allows for remote viewing of the center of the oven cavity using the Café Appliances app.
Download the latest Café Appliances app and follow instructions in the app to connect your range. From the app's home
page, select your range, then tap on the camera icon to start the camera stream to your smart device. The oven lights
will illuminate while the camera is streaming. The camera stream will stop if the oven door is opened, and is not allowed
during certain modes such as Proof and Self Clean.
18 49-2000387 Rev. 0
Probe
USING THE RANGE: Probe
Proper Probe Placement
After preparing the meat and placing it on the cooking
pan follow these instructions for proper probe placement.
Ŷ ,QVHUWWKHSUREHLQWRWKHIRRGVRWKDWWKHWLSRIWKH
probe will rest in the center of the thickest part of
the food. For best performance the probe should
be fully inserted into the food. If the probe is not
located properly, it may not accurately measure the
temperature of the coolest portion of the food. Some
foods, particularly small items, are not well suited for
cooking with the probe due to their shape or size.
Ŷ 7KHSUREHVKRXOGQRWWRXFKERQHIDWRUJULVWOH
Ŷ )RUZKROHSRXOWU\LQVHUWWKHSUREHLQWRWKHWKLFNHVW
part of the breast.
Ŷ )RUERQHOHVVURDVWVLQVHUWWKHSUREHLQWRWKHFHQWHU
of the roast.
Ŷ )RUERQHLQKDPRUODPELQVHUWWKHSUREHLQWRWKH
center of the lowest large muscle or joint.
Ŷ )RUFDVVHUROHVRUGLVKHVVXFKDVPHDWORDILQVHUWWKH
probe into the center of the dish.
Ŷ )RUILVKLQVHUWWKHSUREHIURPMXVWDERYHWKHJLOOLQWR
the meatiest area, parallel to the backbone.
Probe Usage
To use the probe without preheating:
1. Insert the probe into the food (see Proper Probe
Placement).
2. Place the food in the oven and connect the probe into
the probe outlet in the oven.
3. Program the desired probe and cooking mode settings
by selecting More, then Probe, then choosing the
desired cooking mode. Next, choose the desired
cooking temperature and select Next. Finally, select
the desired internal food temperature and press Start.
To use the probe with preheating:
1. Press the desired cook mode (Traditional Bake,
Convection Bake, or Convection Roast) and select
the desired cooking temperature.
2. Insert the probe into the food (see Proper Probe
Placement).
3. Once the oven is preheated, place the food in the
oven and connect the probe to the probe outlet,
making sure it is fully inserted. Use caution, the oven
walls and probe outlet are hot.
4. Program the probe temperature by selecting More,
then Probe, then entering the desired internal food
temperature. The maximum internal food temperature
that you can set is 200° F.
Probe Care Guidelines
Ŷ 8VHRISUREHVRWKHUWKDQWKHRQHSURYLGHGZLWKWKLV
product may result in damage to the probe input jack.
Ŷ 8VHWKHKDQGOHVRIWKHSUREHDQGSOXJZKHQLQVHUWLQJ
and removing them from the meat and outlet
Ŷ 7RDYRLGGDPDJLQJ\RXUSUREHGRQRWXVHWRQJVWR
pull on the cable when removing it.
Ŷ 7RDYRLGEUHDNLQJWKHSUREHPDNHVXUHIRRGLV
completely defrosted before inserting the probe.
Ŷ 7RSUHYHQWSRVVLEOHEXUQVGRQRWXQSOXJWKHSUREH
from the outlet until the oven has cooled.
Ŷ 1HYHUOHDYHWKHSUREHLQVLGHWKHRYHQGXULQJDVHOIRU
steam clean cycle.
Ŷ 'RQRWVWRUHWKHSUREHLQWKHRYHQ
WARNING
Consuming undercooked food can result in foodborne illness. Use probe according to
the following instructions to ensure all portions of the food reach minimum safe cooking temperatures.
Recommendations for minimum safe food temperatures can be found at foodsafety.gov or IsItDoneYet.gov.
Internal food temperature is frequently used as an indicator of doneness, especially for roasts and
poultry. The Probe mode monitors the internal food temperature and turns the oven off when the internal
food temperature reaches the programmed temperature.
Always check the temperature at multiple locations in the food with a food thermometer after cooking to
ensure that all portions of the food have reached the minimum safe internal temperature for that food.
49-2000387 Rev. 0 19
USING THE RANGE: Cooking Guide
Cooking Guide
FOOD TYPE
RECOMMENDED
MODE(S)
RECOMMENDED
RACK POSITION(S) ADDITIONAL SUGGESTIONS
Baked Goods
Layer cakes, sheet cakes, bundt
cakes, muffins, quick breads on a
Single Rack
Bake
Bake Goods
3 Use shiny cookware.
Layer cakes* on Multiple Racks
Bake
Convection Bake
2 and 4 Use shiny cookware. Ensure adequate airflow (see illustration below).
Chiffon cakes (angel food)
Bake
Bake Goods
1 Use shiny cookware.
Cookies, biscuits, scones on a
Single Rack
Bake
Bake Goods
3 Use shiny cookware.
Cookies, biscuits, scones on
Multiple Racks
Convection Bake
2 and 4
2, 4, and 6
Use shiny cookware. Ensure adequate airflow.
Yeast Breads
Proof 2 or 3 Cover dough loosely.
Bake
Bake Goods
3
Beef & Pork
Hamburgers Broil High 6
8VHDEURLOSDQPRYHIRRGGRZQIRUPRUHGRQHQHVVOHVVVHDULQJ
Watch food closely when broiling. For best performance center food
below the broil heater.
Steaks & Chops Broil High 5 or 6
8VHDEURLOSDQPRYHIRRGGRZQIRUPRUHGRQHQHVVOHVVVHDULQJ
Watch food closely when broiling. For best performance center food
below the broil heater.
Roasts
Bake
Convection Roast
2 or 3 Use a low sided pan such as a broil pan. Preheating is not necessary.
Poultry
Whole chicken
Bake
Convection Roast
2 or 3 Use a low sided pan such as a broil pan. Preheating is not necessary.
Bone-in chicken breasts, legs,
thighs
Broil Low
Bake
3
If breaded or coated in sauce avoid Broil High modes. Broil skin side
down first. Watch food closely when broiling. For best performance
when broiling, center food below the broil heater.
Boneless chicken breasts
Broil Low
Bake
3
0RYHIRRGGRZQIRUPRUHGRQHQHVVOHVVVHDULQJDQGXSIRUJUHDWHU
VHDULQJEURZQLQJZKHQEURLOLQJ)RUEHVWSHUIRUPDQFHZKHQEURLOLQJ
center food below the broil heater.
Whole turkey
Bake
Convection Roast
1 Use a low sided pan such as a broil pan. Preheating is not necessary.
Turkey Breast
Bake
Convection Roast
3 Use a low sided pan such as a broil pan. Preheating is not necessary.
Fish Broil Low
LQFKWKLFNRUOHVV
!LQFK
Watch food closely when broiling. For best performance center food
below the broil heater.
Casseroles Bake 3 or 4
Frozen Convenience Foods
Pizza on a Single Rack Frozen Pizza Single 3 Place food in oven prior to starting mode.
Pizza on Multiple Racks Frozen Pizza Multi 2 and 4 Stagger pizzas left to right, do not place directly over each other.
Potato products, chicken nuggets,
appetizers on a Single Rack
Frozen Snacks Single 4 or 5
'RQRWSUHKHDW8VHGDUNFRRNZDUHIRUPRUHEURZQLQJFULVSLQJ
use shiny cookware for less browning.
Potato products, chicken nuggets,
appetizers on Multiple Racks
Frozen Snacks Multi 2 and 4
8VHGDUNFRRNZDUHIRUPRUHEURZQLQJFULVSLQJXVHVKLQ\FRRNZDUH
for less browning.
*When baking four cake layers at a time use racks 2
and 4. Place the pans as shown so that one pan is not
directly above another.
Cook food thoroughly to help protect against food
borne illness. Minimum safe food temperature
recommendations for food safety can be found at
IsItDoneYet.gov. Make sure to use a food thermometer
to take food temperatures.
Rear Placement
Front Placement
  • Page 1 1
  • Page 2 2
  • Page 3 3
  • Page 4 4
  • Page 5 5
  • Page 6 6
  • Page 7 7
  • Page 8 8
  • Page 9 9
  • Page 10 10
  • Page 11 11
  • Page 12 12
  • Page 13 13
  • Page 14 14
  • Page 15 15
  • Page 16 16
  • Page 17 17
  • Page 18 18
  • Page 19 19
  • Page 20 20
  • Page 21 21
  • Page 22 22
  • Page 23 23
  • Page 24 24
  • Page 25 25
  • Page 26 26
  • Page 27 27
  • Page 28 28
  • Page 29 29
  • Page 30 30
  • Page 31 31
  • Page 32 32
  • Page 33 33
  • Page 34 34
  • Page 35 35
  • Page 36 36
  • Page 37 37
  • Page 38 38
  • Page 39 39
  • Page 40 40
  • Page 41 41
  • Page 42 42
  • Page 43 43
  • Page 44 44
  • Page 45 45
  • Page 46 46
  • Page 47 47
  • Page 48 48
  • Page 49 49
  • Page 50 50
  • Page 51 51
  • Page 52 52
  • Page 53 53
  • Page 54 54
  • Page 55 55
  • Page 56 56
  • Page 57 57
  • Page 58 58
  • Page 59 59
  • Page 60 60
  • Page 61 61
  • Page 62 62
  • Page 63 63
  • Page 64 64
  • Page 65 65
  • Page 66 66
  • Page 67 67
  • Page 68 68
  • Page 69 69
  • Page 70 70
  • Page 71 71
  • Page 72 72
  • Page 73 73

Cafe CHS90XM2NS5 Owner's manual

Category
Microwaves
Type
Owner's manual
This manual is also suitable for

Ask a question and I''ll find the answer in the document

Finding information in a document is now easier with AI

in other languages