MANUZOID
Explore
Explore
Bookmarks
Brother
MFC-8950DW
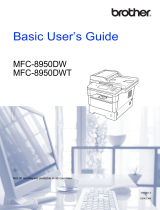
Brother MFC-8950DW Owner's manual
Type
Owner's manual
Brand
Brother
Size
3.98 MB
Category
Multifunctionals
Pages
44
Language
English
View document
Brother MFC-8950DW Software User's Guide
Type
Software User's Guide
Brand
Brother
Size
5.22 MB
Category
Multifunctionals
Pages
271
Language
English
View document
Brother MFC-8950DW User guide
Type
User guide
Brand
Brother
Size
926.83 KB
Category
Toners & Laser Cartridges
Pages
22
Language
English
View document
Brother MFC-8950DW User guide
Type
User guide
Brand
Brother
Size
2.34 MB
Category
Multifunctionals
Pages
14
Language
English
View document
Brother MFC-8950DW User guide
Type
User guide
Brand
Brother
Size
1.10 MB
Pages
12
Language
English
View document
Brother MFC-8950DW User guide
Type
User guide
Brand
Brother
Size
767.47 KB
Category
Fax machines
Pages
13
Language
English
View document
Brother MFC-8950DW User guide
Type
User guide
Brand
Brother
Size
335.92 KB
Pages
11
Language
English
View document
Brother MFC-8950DW User guide
Type
User guide
Brand
Brother
Size
914.78 KB
Category
Graphics software
Pages
29
Language
English
View document
Brother MFC-8950DW User guide
Type
User guide
Brand
Brother
Size
998.52 KB
Pages
31
Language
English
View document
Brother MFC-8950DW User guide
Type
User guide
Brand
Brother
Size
826.42 KB
Category
Networking
Pages
30
Language
English
View document
Brother MFC-8950DW User guide
Type
User guide
Brand
Brother
Size
547.26 KB
Pages
13
Language
English
View document
Brother MFC-8950DW User guide
Type
User guide
Brand
Brother
Size
743.36 KB
Pages
22
Language
English
View document
Brother MFC-8950DW User guide
Type
User guide
Brand
Brother
Size
1.05 MB
Pages
16
Language
English
View document
Brother MFC-8950DW User manual
Type
User manual
Brand
Brother
Size
3.64 MB
Category
Routers
Pages
198
Language
English
View document
Brother MFC-8950DW User manual
Type
User manual
Brand
Brother
Size
17.03 MB
Category
Multifunctionals
Pages
373
Language
English
Table of contents
REGULATION
12
SAFETY INFORMATION
18
CHAPTER 1 SPECIFICATIONS
28
1. SPECIFICATIONS LIST
29
1.1 General
29
1.2 Network Connectivity
34
1.3 Service Information
35
1.4 Supplies
36
1.5 Paper
38
1.5.1 Paper handling
38
1.5.2 Media specifications
39
1.5.3 Type and size of paper
39
1.6 Printable & Scannable Area
40
1.7 Telephone
40
1.8 FAX (Only for the models with FAX function)
41
1.9 Copy
41
1.10 Scanner
42
1.11 USB Direct Interface
42
CHAPTER 2 TROUBLESHOOTING
44
1. INTRODUCTION
46
1.1 Precautions
46
1.2 Checks before Commencing Troubleshooting
47
2. OVERVIEW
49
2.1 Cross-section Drawing
49
2.1.1 Printer part
49
2.1.2 ADF unit/Document scanner unit
50
2.2 Paper Feeding
52
2.2.1 Printer part
52
2.2.2 Scanning
53
2.3 Operation of Each Part
54
2.4 Block Diagram
56
2.5 Main Components
57
2.6 Life of Toner Cartridge and Drum Unit
58
3. ERROR INDICATIONS
63
3.1 Error Codes
63
3.2 Error Messages
69
3.3 Communication Errors
73
4. TROUBLESHOOTING
76
4.1 Error Cause and Remedy
76
4.2 Troubleshooting for Paper Feeding Problems
114
4.2.1 Multiple sheets of paper are fed
114
4.2.2 Paper becomes wrinkled
114
4.2.3 Paper is fed at an angle
114
4.2.4 Paper is curled
115
4.2.5 Only single surface is printed in duplex printing mode
115
4.3 Troubleshooting for Image Defects
116
4.3.1 Image defect examples
116
4.3.2 Troubleshooting according to image defect
117
4.4 Troubleshooting for Software Problems
130
4.4.1 Cannot print data
130
4.5 Troubleshooting for Network Problems
131
4.5.1 Cannot print via network connection
131
4.6 Troubleshooting for Control Panel Problems
132
4.6.1 Nothing is displayed on the LCD
132
4.6.2 Control panel is inoperable
132
4.7 Troubleshooting for Toner and Drum Problems
133
4.7.1 New toner is not detected
133
4.7.2 Cartridge error (toner cartridge cannot be detected)
133
4.7.3 Drum error
133
4.8 Troubleshooting for Fuser Unit Problems
134
4.8.1 Fuser unit failure
134
4.9 Troubleshooting for Laser Unit Problems
135
4.9.1 Laser unit failure
135
4.10 Troubleshooting for PCB Problems
136
4.10.1 Main PCB failure
136
4.10.2 High-voltage power supply PCB failure
136
4.10.3 Low-voltage power supply PCB failure
136
4.11 Troubleshooting for Document Feeding Problems
137
4.11.1 Multiple sheets of document are fed
137
4.11.2 Document becomes wrinkled
137
4.11.3 Document size is not detected correctly
137
4.12 Troubleshooting for Image Defects
138
4.12.1 Defect examples
138
4.12.2 Troubleshooting according to image defect
138
4.13 Troubleshooting for Fax Problems
141
4.13.1 Fax cannot be sent
141
4.13.2 Fax cannot be received
141
4.13.3 Bell does not sound
141
4.13.4 Communication error occurs
141
4.14 Troubleshooting for Other Problems
142
4.14.1 Machine is not turned ON
142
4.14.2 Main fan does not rotate
142
4.14.3 Main motor failure
142
4.14.4 Unusual noise is generated from the machine
142
4.14.5 Malfunction of the memory
142
CHAPTER 3 DISASSEMBLY/REASSEMBLY
144
1. SAFETY PRECAUTIONS
147
2. PACKING
148
3. SCREW CATALOGUE
149
4. SCREW TORQUE LIST
150
5. LUBRICATION
153
6. OVERVIEW OF GEARS
156
7. HARNESS ROUTING
158
8. DISASSEMBLY FLOW CHART
166
9. DISASSEMBLY PROCEDURE
168
9.1 Preparation
168
9.2 Paper tray 1
169
9.3 Back cover / Outer chute
171
9.4 Fuser cover
172
9.5 MP cover ASSY
173
9.6 Front cover ASSY
174
9.7 Side cover L / Access cover
175
9.8 Side cover R ASSY
176
9.9 ADF unit
177
9.9.1 Hinge ASSY L
179
9.9.2 Hinge R
179
9.9.3 ADF document output support flap
180
9.9.4 Document sub tray
180
9.9.5 ADF cover ASSY
180
9.9.6 Gear cover
182
9.9.7 Document separate roller ASSY
183
9.9.8 ADF separation pad spring / ADF separation pad
184
9.9.9 Second side CIS unit / Second side CIS flat cable (duplex scanning models only)
187
9.9.10 Upper ADF chute
189
9.9.11 ADF cover/document detection sensor PCB ASSY / First side document scanning position sensor PCB ASSY / Second side document scanning position sensor PCB ASSY (duplex scanning models only)
191
9.9.12 Drive frame ASSY / Document feed roller ASSY 1
193
9.9.13 ADF motor ASSY
198
9.9.14 First side document hold
198
9.10 Panel cover / Printed panel cover
199
9.11 Document scanner unit
206
9.11.1 First side CIS unit
208
9.12 Joint cover
213
9.13 Wireless LAN PCB ASSY
214
9.14 USB host PCB ASSY
214
9.15 Speaker unit
215
9.16 NCU PCB ASSY
216
9.17 Main PCB ASSY
217
9.18 Fuser unit
219
9.19 Laser unit
222
9.20 Low-voltage power supply PCB ASSY
223
9.21 Toner LED PCB ASSY
226
9.22 Main fan
228
9.23 Air duct / Filter
230
9.24 Relay front PCB ASSY
231
9.25 Registration clutch / T1 clutch
232
9.26 Main frame L ASSY
233
9.27 Main motor ASSY
235
9.28 Develop joint gear 37 / Develop joint
237
9.29 LT drive gear 29
238
9.30 Toner sensor PCB ASSY
239
9.31 MP solenoid
240
9.32 Develop clutch 51R / Develop one way clutch 53
241
9.33 New toner actuator
242
9.34 Internal temperature thermistor
243
9.35 Fuser drive gear 39
244
9.36 Duplex solenoid
246
9.37 Back cover sensor
247
9.38 LT connector (T1)
248
9.39 T1 roller holder ASSY
249
9.40 High-voltage power supply PCB ASSY
250
9.41 Eject sensor PCB ASSY
253
9.42 MP roller holder ASSY / MP separation pad ASSY / MP separation pad spring
254
9.43 T1 paper feed sensor PCB ASSY / T1 paper feed actuator / T1 paper feed actuator spring
255
9.44 MP paper empty sensor PCB ASSY / MP paper empty actuator 1 / MP paper empty actuator 2
257
9.45 Registration front/rear sensor PCB ASSY / Registration front actuator / Registration rear actuator / Registration actuator spring
260
10. DISASSEMBLY PROCEDURE (LT UNIT)
263
10.1 Paper tray 2
263
10.2 T2 roller holder ASSY
265
10.3 T2 side cover L
266
10.4 T2 side cover R
267
10.5 T2 front cover ASSY
268
10.6 T2 relay PCB ASSY
269
10.7 T2 clutch
270
10.8 T2 paper feed sensor PCB ASSY
271
10.9 T2 back cover
275
10.10 LT connector ASSY (T2)
276
CHAPTER 4 ADJUSTING AND UPDATING SETTINGS AS REQUIRED AFTER PARTS REPLACEMENT
278
1. IF YOU REPLACE THE MAIN PCB ASSY
279
1.1 Installing Firmware
280
1.1.1 Checking firmware version
280
1.1.2 Installing firmware using USB flash memory
280
1.1.3 Installing firmware using PC
281
1.2 Setting by Country
281
1.3 Initializing the EEPROM of the Main PCB ASSY
281
1.4 Setting Serial Number and Entering Adjusted Value of Laser Unit
282
1.5 Acquiring White Level Data
283
1.6 Adjusting Touch Panel (Touch Panel Models Only)
283
2. IF YOU REPLACE THE LASER UNIT
284
2.1 Entering Adjusted Value of Laser Unit
284
3. IF YOU REPLACE THE LOW-VOLTAGE POWER SUPPLY PCB ASSY
286
3.1 Resetting Irregular Power Supply Detection Counter
286
4. IF YOU REPLACE THE HIGH-VOLTAGE POWER SUPPLY PCB ASSY
287
4.1 Initializing Pre-discharge Detection Parameters
287
5. IF YOU REPLACE ANY PERIODIC REPLACEMENT PARTS
288
6. IF YOU REPLACE THE CONTROL PANEL ASSY OR TOUCH PANEL ASSY
289
6.1 Installing Firmware (Touch Panel Models Only)
289
6.1.1 Checking firmware version
289
6.1.2 Installing firmware using USB flash memory
290
6.1.3 Installing firmware using PC
290
6.2 Adjusting Touch Panel (Touch Panel Models Only)
291
6.3 Checking LCD Operation
291
6.4 Checking Control Panel Operation
291
7. IF YOU REPLACE THE DOCUMENT SCANNER UNIT, ADF UNIT (DUPLEX SCANNING MODEL), OR CIS UNIT
292
7.1 Acquiring White Level Data (function code: 55)
292
CHAPTER 5 SERVICE FUNCTIONS
294
1. MAINTENANCE MODE
296
1.1 How to Enter Maintenance Mode
296
1.1.1 Method of entering end-user accessible maintenance mode
296
1.1.2 Method of entering maintenance mode for service personnel
296
1.2 List of Maintenance Mode Functions
297
1.3 Details of Maintenance Mode Functions
298
1.3.1 Initialize EEPROM parameters (function code: 01, 91)
298
1.3.2 Print white level/black level data for document scanning compensation (function code: 05)
299
1.3.3 Move CIS unit to transportation position (function code: 06)
301
1.3.4 ADF performance test (function code: 08)
301
1.3.5 Print test pattern (function code: 09)
302
1.3.6 Set worker switches (WSW) and print worker switch setting data (function code: 10, 11)
303
1.3.7 Check LCD operation (function code: 12)
307
1.3.8 Check control panel button operation (function code: 13)
308
1.3.9 Display software version (function code: 25)
310
1.3.10 Check sensor operation (function code: 32)
311
1.3.11 Display LAN connection status (function code: 33)
313
1.3.12 Set PC print functions (function code: 43)
314
1.3.13 Change USB No. return value / Adjust left-end print start position on second side when duplex printing / Change ON/OFF setting for Deep Sleep function (function code: 45)
317
1.3.14 Set country/language (function code: 52)
319
1.3.15 Transfer received fax data/log information (function code: 53)
320
1.3.16 Fine-tune scanning position (function code: 54)
322
1.3.17 Acquire white level data and set CIS scan area (function code: 55)
322
1.3.18 Adjust touch panel (function code: 61)
323
1.3.19 Continuous print test (function code: 67)
324
1.3.20 Print frame pattern (single-side printing) (function code: 69)
326
1.3.21 Print frame pattern (duplex printing) (function code: 70)
328
1.3.22 Print solid pattern (function code: 71)
329
1.3.23 Setting by country (function code: 74)
330
1.3.24 Print maintenance information (function code: 77)
333
1.3.25 Check fan operation (function code: 78)
335
1.3.26 Display machine log information (function code: 80)
336
1.3.27 Display machine error code (function code: 82)
339
1.3.28 Send communication log information to telephone line (function code: 87)
339
1.3.29 Reset counters for periodic replacement parts (function code: 88)
339
1.3.30 Quit maintenance mode (function code: 99)
340
2. OTHER SERVICE FUNCTIONS
341
2.1 Change ON/OFF Setting for Deep Sleep Mode
341
2.2 Change ON/OFF Setting for Sleep Mode
342
2.3 Reset Periodic Replacement Parts
343
2.4 Reset Developer Roller Counter
344
2.5 Display ROM Version
345
2.6 Perform Demo Printing
345
CHAPTER 6 WIRING DIAGRAM
347
1. WIRING DIAGRAM
348
CHAPTER 7 PERIODICAL MAINTENANCE
350
1. SAFETY PRECAUTIONS
351
2. PERIODICAL REPLACEMENT PARTS
352
2.1 Preparation
352
2.2 Fuser unit
353
2.3 Laser unit
357
2.4 MP paper feeding kit
363
2.5 Paper feeding kit 1
364
2.6 Paper feeding kit 2
366
APPENDIX 1 SERIAL NUMBERING SYSTEM
369
APPENDIX 2 DELETING USER SETTING INFORMATION
371
APPENDIX 3 INSTALLING MAINTENANCE DRIVER
373
View document
Brother MFC-8950DW User manual
Type
User manual
Brand
Brother
Size
1.57 MB
Category
Multifunctionals
Pages
94
Language
English
View document
Brother MFC-8950DW User manual
Type
User manual
Brand
Brother
Size
896.40 KB
Pages
27
Language
English
View document
Brother MFC-8950DW User manual
Type
User manual
Brand
Brother
Size
1.96 MB
Category
Routers
Pages
187
Language
English
View document
Brother MFC-8950DW User manual
Type
User manual
Brand
Brother
Size
713.86 KB
Pages
21
Language
English
View document