Page is loading ...

1
Toll Free: 8 0 0 - 8 2 8 - 8 1 8 4
Phone: 4 0 6 - 5 8 7 - 9 4 6 6
Fax: 4 0 6 - 5 8 7 - 9 4 8 4
2020 Gilkerson Drive
Bozeman, MT 59715
w w w . h e a d p h o n e . c o m
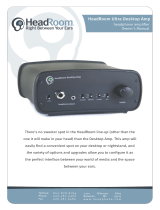
Balanced Desktop Amp
headphone amplifier
Owner’s Manual
Welcome to full-sized balanced headphone performance in a 6”X 6” foot-
print. The Balanced Desktop Amp demolishes all previous sound, size,
and price barriers, and it’s immersive sonics and spacious soundstage
are an audiophile breakthrough. We’ve condensed high-end balanced-
drive into a small but complete solution, delivering true balanced audio
from any analog or digital source. It’s the newest way HeadRoom gets it
perfectly Right Between Your Ears.

2
3
The Balanced Desktop Panel Descriptions
1.
Headphone
Outputs
2.
Crossfeed
Switch
4.
Volume
Control
1. Headphone Outputs The headphone outputs are where you plug in your head-
phones. The Balanced Desktop amp can drive either one headphone with stereo-XLR
balanced connectors or two headphones with single-ended unbalanced 1/4” plugs. You
can use either balanced or unbalanced headphones at any time.
2. Crossfeed Switch This switch engages the crossfeed circuit. Audio imaging on
headphones is often not very good; typically the image is a blob on the left, a blob on
the right, and a blob in the middle. The HeadRoom crossfeed provides the natural acous-
tic cross-feed normally heard at the left and right ear as heard from the left and right
speaker. Adding back the normally occurring crossfeed signal gives your brain enough
information to build the stable and natural audio image needed to have a quality listen-
ing experience. see page 7 for more info.
3. Gain Switch The 3-position Gain Switch accomodates various headphones’ pow-
er needs. For instance, the Low Gain setting would be used for ear canal headphones,
allowing a larger range on the volume control pot. Experimenting with your headphones
and the gain switch may help you to determine which setting you prefer. If have any ques-
tions regarding your headphones, feel free to call and ask us.
4. Volume Control As you turn the volume control knob clockwise, the volume in-
creases. You never know where the volume control should be set as different headphones
often have widely different impedances and efficiencies, so use your ears to choose your
listening level, not the level on the dial. (We recommend you choose a moderate level so
as not to blow out your ears.) You also need to turn the amp OFF or ALL THE WAY DOWN
before plugging in or unplugging your headphones.
3.
Gain
Switch
1. Unbalanced Analog Inputs One set of RCA connectors allow for connectiv-
ity of non-digital (analog) sources like a CD player, tape deck or pre-amp into the Bal-
anced Desktop Amp. If you are using balanced headphones, this input automatically
converts the signal to balanced.
2. Balanced Analog Inputs The balanced input accepts a signal from a bal-
anced output source (like from a quality CD player, for example) via stereo XLR connec-
tors.
3. +/- 15VDC Power Input Plug in your power supply here. The ‘brick’ power
supply included with the Balanced Desktop, as well as the Desktop Power Supply, will
use this connector.
4. Analog Input Selector Allows you to select between your balanced analog
inputs and your unbalanced analog inputs. You may want to plug more than one analog
source into your Balanced Desktop Amp. Whether you are using one input or both, you
will need to indicate which analog inputs you want to listen to by choosing either ‘bal-
anced’ or ‘unbalanced’ with the analog input selector.
5. Power Switch Turn the switch up to turn your Desktop Amp on. The green LED
will illuminute in the center of the HeadRoom logo in the upper left hand corner of the
amp.
3.
+/- 15
VDC
Power
Input
4.
Analog
Input
Selector
1.
Unbalanced
Analog
Inputs
5.
Power
Switch
The Balanced Desktop Rear Panel
(DAC Option)
2.
Balanced
Analog
Inputs
(See pg. 4
for DAC
description)

4
5
1. Coaxial Input The coaxial input is your typical coaxial connector. We recommend
using a 75 ohm digital cable when using the coaxial input.
2. Optical Input The optical input is your typical Toslink connector. You get this input
signal from the optical output of your player. Not so many portable audio players have
optical outputs, but many portable DVD players and some hard disk drive players do. Of
course, you can get this signal from many pieces of home equipment.
3. Digital Input Selector When using the DAC, the digital input selector allows
you to choose which digital input you would like to listen to.
4. USB Input The USB input gets its signal from a computer: laptop or desktop; PC,
Mac, or Unix.
5. Source Selector When using the DAC, you will need to choose whether you are
using a digital input or an analog input. The source selector switch allows you to have
both digital and analog sources connected at the same time, and you may change be-
tween the two with a simple flip of this switch.
The Digital-Analog Convertor Option
Your Balanced Desktop Amp also comes
with an internal “home” level Digital to
Analog Convertor. The Home DAC starts
to become a very serious digital to analog
converter: not only does it use the flagship
Cirrus Logic CS4398 DAC, it also uses the
spendy---but oh so sweet sounding---Burr-
Brown OPA627 op-amps in class “A” bias
as the output devices. The result is the kind
of liquid clarity found in multi-thousand
dollar high-end CD players.
To go along with the previously mentioned
class “A” biased OPA627s, only metal thin
film resistors and polyphenylenesulfide
(poly film) capacitors are used in the audio
circuits. Three low-noise, ultra-low dropout
power supply regulators isolate the various
digital, analog, and mixed signal circuits.
Internal Components
Your Balanced Desktop Amp comes equipped with the Home Modules. The Home
Module consists of two pair of 4-layer circuit boards (one each for the left and right
channel) that are connected with a series of header pins used to solder the module
to the main circuit board. This module is designed to sound great without going up
the ridiculously steep part of the diminishing returns curve. The output current ampli-
fier is our version of the highly regarded Diamond Buffer discrete transistor design by
Walt Jung; internal input buffer, crossfeed, summer, and gain stage use the Burr-Brown
OPA2134 op-amp. All these active circuits are forced in to class “A” bias with constant
current sources. Resistors are 1% metal thin film, and caps in the signal chain are poly-
phenylenesulfide (poly film). The sound of this module is not only well balanced and
punchy, it’s also liquid and integrated. This is a sweet listen.
Home DAC
Home Module
5. Source
Selector
3. Digital Input
Selector
4. USB Input
1. Coaxial Input
2. Optical Input
(See page 8 for DAC hook-up information.)
The DAC is an option that you may choose when purchasing the Desktop Amp. If you did
not purchase the DAC option with your amp initially, you can have this upgrade performed
at a later date.
HeadRoom’s DAC in the Balanced Desktop Amp allows you to convert a digital signal into
balanced drive. If you plug balanced headphones into your Desktop Amp, you will receive
a fully balanced signal from the DAC. If you plug in regular headphones, you will receive
an unbalanced signal from the DAC.
Home Modules
The Home DAC

6
7
Headphones share a common connection on the non-driven side of the driver elements.
You can see this by looking at a headphone plug; the left channel connection is at the tip,
the right channel connection is the ring, and the common connection were talking about
is the remainder of the plug shaft, called the sleeve. The problem is that the summed left
and right channel return current will develop a signal across the series resistance of the
common return path, which muddies the stereo presentation on headphones with cross-
talk. It is this headphone connector found on all headphones that makes it impossible
to drive the return side of the headphone coils with the separate left and right inverted
signals of a fully balanced amplifier. HeadRoom has overcome this problem with the Bal-
anced Desktop, Balanced Home, and Balanced Max Headphone Amplifiers, along with
Cardas custom headphone cables.
Driving headphones in balanced mode effectively delivers twice the slew rate, half the
amplifier output impedance, and rids the headphones of significant cross talk due to the
common return connection from the drivers. It really is a whole new headphone listening
experience.
For you scientifically inclined folks out there, here’s the techspeak about balanced amps:
Any time an electrical signal passes through a cable, outside (electrical) noise interfer-
ence can be induced, even when using shielded cables. In an unbalanced system, both
the positive and negative halves of the waveform travel together down the positive and
negative signal leads and can be influenced by the outside noise. In a balanced system,
the positive and negative halves of the waveform are separate; when these separate
halves pickup the same outside electrical noise interference, the noise components on
one half are out-of-phase with the noise components on the other half (almost like a
mirror image). When the negative and positive halves of the signal are combined in the
balanced amplifier, the out-of-phase noise components on the two halves cancel each
other out as they are combined, leaving only the original, clean output signal... Transla-
tion: superb sound!
Ground wire resistance of common
signal return develops inter-channel
cross-talk distortion
What is the HeadRoom Crossfeed?
Imagine you are listening to a pair of speakers. If you turn off the left speaker, both ears
hear the sound from the right speaker. But because the left ear is slight farther away
than the right ear, it hears the speaker’s sound slightly after the right ear; about 300
microseconds. This time difference is called the “inter-aural time difference” and it is
the main thing your brain listens for in order to tell where to place sound left-to-right.
But in headphones if you turn off the left channel, only the right ear hears the sound.
In headphones, if there is any sound that is only in the left channel, or only in the right
channel, then only that ear hears the sound. This is not natural, and you brain becomes
fatigued trying to figure out where sound is coming from when only one ear is hearing
it. This tends to create an audio image that is a blob on the left, blob on the right and
a blob in the middle.
HeadRoom amplifiers cure the problem by allowing you to cross-feed a little of the left
and right channels across to each other through a short time delay using the processor
switch. The usefulness of the circuit varies depending on what type of recording you
are listening to; mono and binaural recordings need no processor at all. Old studio
recordings that have instruments panned hard left or right, benefit greatly from the
processor. Live and classical recordings miked from a distance benefit somewhat less,
and can often be listened to without the processor quite comfortably.
Plain
Headphones
With
HeadRoom
The Crossfeed switch in
HeadRoom amplifiers al-
low you to cross-feed a
little of the left and right
channels across to eacho-
ther through a short time
delay.
Far ear
hears
slight delay.
Near ear
hears sound
first.
30 degrees
off axis
About Balanced Headphone Drive
Inter-Aural Time Difference

8
9
#2 To a home CD player or other Analog Sources (unbalanced) via RCA outputs
#4 Using the Digital to Analong Convertor
#1 Headphone Jack or Line-out
The most convenient and common way to get a high quality signal out of your computer
is with USB output. (If you have optical or coaxial outputs on your machine, then skip to
the next section.) Simply plug a USB cable into your computer, and plug the smaller end
into the back of the amp. In most cases your computer will instantly recognize the ampli-
fi er, but you will need to restart your music management program. If your computer does
not recognize the device, restart; if it still is not recognized, you may need to go into your
control panel/audio devices or system preferences/sound output and select ‘USB Audio
Codec’ as your default audio device.
- Switch the Source Selector Switch to ‘digital’.
- Switch the Digital Input Selector Switch to‘USB’.
If your source has RCA outputs, an RCA to RCA interconnect cable will connect the Balanced
Desktop. Plug the RCA inputs into the back of the Balanced Desktop Amp, and connect the
other end to the line output of your analog source. If your source only has a line out output
or a headphone jack, then go up to #1.
- Switch the Source Selector Switch to analog.
- Switch Analog Input Switch to unbalanced.
#3 Balanced home CD player or other Balanced Source via balanced analog
outputs
If you have a balanced CD player or other source, you will need a set of balanced intercon-
nects. To connect your Balanced CD player to the amp via balanced interconnects, simply
connect the balanced outputs to the balanced inputs on the back of the amplifi er.
- Switch the Source Selector Switch to analog.
- Switch Analog Input Switch to balanced.
If you have a source with a digital output- like a computer- the Balanced Desktop
DAC will give one the best possible signals for your headphones!
All hard drive players provide a headphone jack.* An RCA to Mini Cable will allow you to
connect the headphone jack/line out of your player into the RCA inputs on the Balanced
Desktop. Be sure to note that as always, red or ‘R’, designates right channel.
- Switch the Source Selector Switch to analog.
- Switch Analog Input Switch to unbalanced.
*Use line out if your player has it. Line out bypasses the player’s volume control completely; use the
amp’s instead.
Read the following hook-up instructions and look for the output you wil be using on your
Computer, CD Player, iPod or other HDP, or other source.
To other digital players with Optical/Coaxial outputs:
Connecting to your Computer:
You will need an appropriate coaxial or optical cable, visit headphone.com to purchase
a cable. Plug one end into your source and connect the other end into the appropriate
input on the back of the amp.
- Switch the Source Selector Switch to ‘digital’.
- Switch the Digital Input Selector Switch to ‘coaxial’ or ‘optical’.
RCA Inputs
You can get a fully balanced signal from any of the digital inputs below; all you
need are balanced headphones.
After your amp is hooked up, simply plug in your headphones; the Balanced
Desktop will automatically recognize balanced or unbalanced headphones.
How to Connect Your Balanced DesktopHow to Connect Your Balanced Desktop
Optical Cable
USB Cable
Interconnect Cable
RCA Mini Cable
USB
Portable DVD
Player
Headphone Jack
RCA
Inputs
RCA Outputs
Balanced Inputs
Balanced XLR Outputs
Balanced XLR
Interconnects
USB
Input
Optical
Input
Note- Even though you are using the unbalanced analog input with options #1 and #2, you
can still enjoy a balanced signal by plugging in your balanced headphones.
optical
To your Computer or other digital source via USB, coaxial, or optical output:

10
11
30 Day Guaranty
Balanced Desktop Amp Warranty
HeadRoom Manufactured Products under Warranty:
The Balanced Desktop is warrantied for two years. If anytime within the first
two years of your purchase you have a problem with your Balanced Desktop,
you can return it for repairs under the terms of our Warranty. Visit our web-
site for details about warranting your Desktop Balanced, or give us a call at
800.828.8184, and we will trouble shoot the problem, and if necessary au-
thorize a repair.
HeadRoom is the only authorized service center for HeadRoom products, ei-
ther in or out of warranty. If a unit is under warranty, there is no cost for the
repair labor, parts, or shipping from HeadRoom back to you (i.e., You’re re-
sponsible for paying the shipping charges to get the product to us).
Out of Warranty Repairs
If you have an older HeadRoom amp that is out of warranty, call us at
800.828.8184 ext.104 or email servic[email protected]om to troubleshoot the
problem with our Service Department. Upgrades fees are calculated by labor
and parts costs. HeadRoom’s non-warranty repair rate is $100 per hour (billed
in 1/2 hour increments) plus parts. If the cost of the repair is over $100, we
will call you with an estimate. Repairs are conducted only on HeadRoom prod-
ucts. When we receive the equipment, we will initiate repairs and upgrades
within 1-2 weeks and return the unit to you. You are responsible for shipping
costs to and from HeadRoom for all non-warranty repair items.
HeadRoom 30 Day Guaranty
Unless specifically stated otherwise, all HeadRoom purchases come with a
30-day satisfaction guaranty in order to give you the opportunity to evaluate
your purchases. We’re happy to provide you with the opportunity to refund or
exchange your product, but to keep costs down we do have a few conditions.
Products must be returned to us within 30 days of the date you receive the
product. So make sure you try your purchase out right away! Products must be
in “as-new” condition. This means that they’re in pristine cosmetic condition,
functioning perfectly, and include ALL materials (plastic bags, warranty cards,
tie wraps, etc). In other words, please send products back exactly as you re-
ceived them. If a product is returned within the 30-day return period, but is not
in “as-new” condition, we will charge you a 15% restocking fee plus any labor
and materials required to return the product to “as-new” condition. Sorry, but
after your 30 day trial, products are no longer exchangeable or refundable.
If you’re having trouble with a headphone amp or system, please contact us
first to troubleshoot the problem. You can email Sales, (sales@headphone.
com) or call 800.828.8184. If we can fix it while you’ve still got the product,
everyone’s happy!
Return Products to:
HeadRoom
Attn: Returns
2020 Gilkerson Drive
Bozeman, MT 59715
Contact Us:
www.headphone.com
Toll Free: 800-828-8184
Phone: 406-587-9466
Fax: 406-586-9484
Equipment Exchanges
If you would like to exchange your purchase for another item, you have two
options. You can simply purchase the item you want, and send the item you
don’t want back for refund within 30 days of the original purchase (don’t for-
get to fill out the back of the Return & Exchange card and include it with your
return). We will refund your credit card after we receive the item. Or, you can
send your product back as an exchange, and indicate the product you would
like on the Return card. We will adjust your credit card accordingly and ship
you the new item. Replacement products are shipped to you as soon as pos-
sible, typically within 3-5 days provided the replacement item is in stock.
Shipping Products back to HeadRoom
Please ship products back in the original shipping box (or another that is com-
parable); please don’t send headphones back in JUST the headphone box,
as it’s a sure bet that they will no longer be in “as-new” condition when we
receive them! We HIGHLY recommend that you ship returns using an insured
and “signature required” delivery method—we can’t be responsible for lost or
damaged packages. Finally, don’t forget to include the completed Return &
Exchange card and WRITE YOUR NAME on the outside of the box!
Defective Equipment Exchanges
In the uncommon event of receiving a defective product, contact us and we
will ship out a replacement product to you at no cost as soon as possible,
typically within 3-5 days provided the replacement item is in stock. You will
receive the replacement item along with a return shipping label and a card to
include with the defective item to return to HeadRoom. Important: Fill in your
name and original invoice number of your order on the card and return the
item to HeadRoom within 2 weeks. If we have not received the product after 2
weeks (allowing shipping time) we will charge your credit card the amount of
the defective item. Please understand that we enforce this policy as an incen-
tive for customers to get defective equipment back to us as soon as possible.

12
Toll Free: 8 0 0 - 8 2 8 - 8 1 8 4
Phone: 4 0 6 - 5 8 7 - 9 4 6 6
Fax: 4 0 6 - 5 8 7 - 9 4 8 4
2020 Gilkerson Drive
Bozeman, MT 59715
w w w . h e a d p h o n e . c o m
Contacting HeadRoom
A Word About
Your Hearing
People have a natural tendency to listen to music at much louder levels with
headphones than they would with speakers. To avoid permanent hearing
damage, it’s important to be careful not to listen at extremely loud levels (or
to listen for too long at moderately loud levels). Because HeadRoom amps
need to be able to drive even the most inefficient dynamic headphones to
satisfactory listening levels, they are also able to drive headphones of average
or higher efficiencies to extremely high levels. As a result, even though the
volume control on your HeadRoom amp may appear to be set to a low level,
you may not be listening at a safe level. Generally speaking, when listening
to headphones you should only turn up the volume to the point at which the
sound isn’t too quiet.
As a general rule, sound pressure levels under 80 decibels will not damage
hearing, even if experienced continually. On the other hand, anything over
100 decibels may cause permanent damage very quickly. Sustained exposure
to sound pressure levels anywhere in between can also be damaging —the
louder the sound, the shorter the time required to cause permanent damage.
Just to drive this message home, here’s a bit of information about hearing
damage. The most common type of damage caused by prolonged or exces-
sively loud sound is called tinnitus. It manifests itself as a sustained buzzing
and/or ringing in the ears, and can become a permanent condition.
If you find that your ears are ringing or that there is a sensation of pressure or
fatigue, your body is trying to tell you that your ears need a break. Give them
a rest for a few days (or until they feel fresh). If you ignore these symptoms,
you’re risking permanent hearing damage.
In addition, don’t fool yourself into thinking that you either have full-blown
tinnitus or you don’t have it at all—there are different degrees of hearing dam-
age. For example, you might have a mild case where you only notice ringing
in your ears in the quiet of your bedroom at night. However, once you have a
slight case of tinnitus, your ears are much more susceptible to further dam-
age. So if you do experience mild symptoms, it’s important to be much more
careful about your exposure to loud sounds.
Sorry to sound so sobering, but a lifetime of musical enjoyment requires ears
in tiptop shape. Now that we’ve told you to be careful, don’t blame us if you
blow it. If you have any more questions about hearing damage, call a doctor.
/