Acnodes RM9230 User manual
- Category
- Touch screen monitors
- Type
- User manual
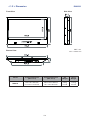
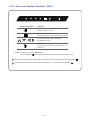
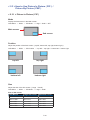
Acnodes RM9230 is an industrial-grade 23” 4K monitor designed for professional applications. With its rugged construction and high-quality display, the RM9230 is ideal for use in control rooms, broadcasting studios, and other demanding environments.
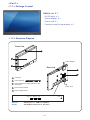
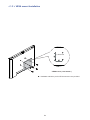
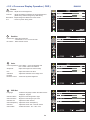
The RM9230 features a variety of video inputs, including DisplayPort 1.2, HDMI 1.4, and HDMI 2.0. This makes it compatible with a wide range of devices, including computers, laptops, and video cameras. The RM9230 also has a built-in speaker system, so you can connect it to your computer or other audio source and enjoy high-quality sound.
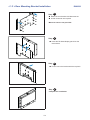
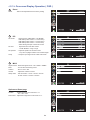
In addition to its excellent video and audio capabilities, the RM9230 also has a number of other features that make it a great choice for professional use. These features include:
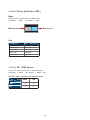
Acnodes RM9230 is an industrial-grade 23” 4K monitor designed for professional applications. With its rugged construction and high-quality display, the RM9230 is ideal for use in control rooms, broadcasting studios, and other demanding environments.
The RM9230 features a variety of video inputs, including DisplayPort 1.2, HDMI 1.4, and HDMI 2.0. This makes it compatible with a wide range of devices, including computers, laptops, and video cameras. The RM9230 also has a built-in speaker system, so you can connect it to your computer or other audio source and enjoy high-quality sound.
In addition to its excellent video and audio capabilities, the RM9230 also has a number of other features that make it a great choice for professional use. These features include:


-
 1
1
-
 2
2
-
 3
3
-
 4
4
-
 5
5
-
 6
6
-
 7
7
-
 8
8
-
 9
9
-
 10
10
-
 11
11
-
 12
12
-
 13
13
-
 14
14
-
 15
15
-
 16
16
-
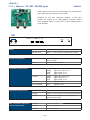 17
17
-
 18
18
-
 19
19
-
 20
20
-
 21
21
-
 22
22
-
 23
23
-
 24
24


Acnodes RM9230 User manual
- Category
- Touch screen monitors
- Type
- User manual
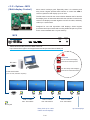
Acnodes RM9230 is an industrial-grade 23” 4K monitor designed for professional applications. With its rugged construction and high-quality display, the RM9230 is ideal for use in control rooms, broadcasting studios, and other demanding environments.
The RM9230 features a variety of video inputs, including DisplayPort 1.2, HDMI 1.4, and HDMI 2.0. This makes it compatible with a wide range of devices, including computers, laptops, and video cameras. The RM9230 also has a built-in speaker system, so you can connect it to your computer or other audio source and enjoy high-quality sound.
In addition to its excellent video and audio capabilities, the RM9230 also has a number of other features that make it a great choice for professional use. These features include:
Ask a question and I''ll find the answer in the document
Finding information in a document is now easier with AI
Related papers


Other documents
-
Xtech XTC-311 Datasheet
-
Eclipse Rackmount FMP Series (17″) Owner's manual
-
-
-
 MAVINEX M05 User manual
-
 Synergy Global Technology ID-HE19Aw User manual
-
 StarTech.com USBFAB6T Datasheet
-
 Synergy Global Technology LCDR7U19-02 User manual
-
-


