Olivetti d-Copia 1800 Owner's manual
- Category
- Multifunctionals
- Type
- Owner's manual
This manual is also suitable for
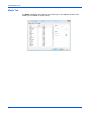
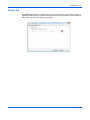
Olivetti d-Copia 1800 is a multifunctional printer that offers a range of features to meet your printing needs. It can print, copy, scan, and fax documents, and it also has the ability to print on both sides of the paper and create booklets. The d-Copia 1800 is easy to use, with a user-friendly control panel and a variety of connectivity options, including Wi-Fi and Ethernet.
Olivetti d-Copia 1800 is a multifunctional printer that offers a range of features to meet your printing needs. It can print, copy, scan, and fax documents, and it also has the ability to print on both sides of the paper and create booklets. The d-Copia 1800 is easy to use, with a user-friendly control panel and a variety of connectivity options, including Wi-Fi and Ethernet.


-
 1
1
-
 2
2
-
 3
3
-
 4
4
-
 5
5
-
 6
6
-
 7
7
-
 8
8
-
 9
9
-
 10
10
-
 11
11
-
 12
12
-
 13
13
-
 14
14
-
 15
15
-
 16
16
-
 17
17
-
 18
18
-
 19
19
-
 20
20
-
 21
21
-
 22
22
-
 23
23
-
 24
24
-
 25
25
-
 26
26
-
 27
27
-
 28
28
-
 29
29
-
 30
30
-
 31
31
-
 32
32
-
 33
33
-
 34
34
-
 35
35
-
 36
36
-
 37
37
-
 38
38
-
 39
39
-
 40
40
-
 41
41
-
 42
42
-
 43
43
-
 44
44
-
 45
45
-
 46
46


Olivetti d-Copia 1800 Owner's manual
- Category
- Multifunctionals
- Type
- Owner's manual
- This manual is also suitable for
Olivetti d-Copia 1800 is a multifunctional printer that offers a range of features to meet your printing needs. It can print, copy, scan, and fax documents, and it also has the ability to print on both sides of the paper and create booklets. The d-Copia 1800 is easy to use, with a user-friendly control panel and a variety of connectivity options, including Wi-Fi and Ethernet.
Ask a question and I''ll find the answer in the document
Finding information in a document is now easier with AI
Related papers
Other documents
-
HP FS 1000 - B/W Laser Printer User manual
-
KYOCERA FS-3640MFP Owner's manual
-
KYOCERA TASKALFA 7550CI User manual
-
KYOCERA FS-C2126MFP+ Owner's manual
-
KYOCERA TASKALFA 8000I User manual
-
KYOCERA FS-3920DN/KL3 User manual
-
KYOCERA FS-C5100DN User manual
-
KYOCERA 265ci User guide
-
KYOCERA TASKalfa 3050i Driver Manual
-
KYOCERA TASKalfa 5551ci User manual