Page is loading ...

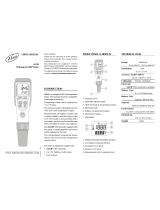
HI504
Panel-mounted,
Microprocessor-based
pH/ORP Process Controller
Instruction Manual

2
TABLE OF CONTENTS
WARRANTY ...............................3
MODEL IDENTIFICATION .....................4
PRELIMINARY EXAMINATION ..................5
GENERAL DESCRIPTION ......................5
FUNCTIONAL DESCRIPTION ..................7
SPECIFICATIONS ...........................9
MECHANICAL DIMENSIONS. . . . . . . . . . . . . . . . . . 10
INSTALLATION ............................11
CALIBRATION MODE .......................13
SETUP MODE. . . . . . . . . . . . . . . . . . . . . . . . . . . . . 23
CONTROL MODE .........................41
IN-LINE CLEANING ........................50
IDLE MODE ..............................53
HOLD MODE .............................54
ANALOG OUTPUT .........................56
PC COMMUNICATION .....................57
SHORT MESSAGING SERVICE (SMS) ............71
MODEM CONNECTION ....................79
pH/ORP PROBE CHECK .....................82
SOLUTION COMPENSATION .................83
TEMPERATURE COMPENSATION ..............84
LAST CALIBRATION DATA ....................86
OFFSET AND SLOPE DIRECT SELECTION ........88
EVENT LOG FILE SCROLLING .................90
FAULT CONDITIONS .......................92
SELFTEST PROCEDURES .....................94
ALARM - ERROR CONFIGURATION ...........102
pH VALUES AT VARIOUS TEMPERATURES ........105
ELECTRODE CONDITIONING AND MAINTENANE 106
DEFINITIONS ............................109
ACCESSORIES ...........................110

WARRANTY
HI504 is guaranteed for two years (sensors, electrodes and
probes for six months) against defects in workmanship and
materials when used for their intended purpose and main-
tained according to instructions. This warranty is limited to
repair or replacement free of charge.
Damages due to accident, misuse, tampering or lack of
prescribed maintenance are not covered.
If service is required, contact your local Hanna Instruments
Office.
If under warranty, report the model number, date of pur-
chase, serial number and the nature of the problem.
If the repair is not covered by the warranty, you will be
notified of the charges incurred. If the instrument is to be
returned to Hanna Instruments, first obtain a Returned Goods
Authorization number from the Technical Service department
and then send it with shipping costs prepaid.
When shipping any instrument, make sure it is properly
packed for complete protection.
Hanna Instruments reserves the right to modify the de-
sign, construction or appearance of its products without
advance notice.

4
All rights are reserved. Reproduction in whole or in part is prohibited without the
written consent of the copyright owner.
Dear Customer,
Thank you for choosing a Hanna Instruments Product.
Please read this instruction manual carefully before using this
instrument. This manual will provide you with the necessary
information for the correct use of this instrument, as well
as a precise idea of its versatility.
If you need additional technical information, do not hesitate
to e-mail us at [email protected] or view our worldwide
contact list at www.hannainst.com.
MODEL IDENTIFICATION
The models HI504XYZ-α are pH/ORP controllers.
The meaning of the last letters is according to the follow-
ing scheme:

5
PRELIMINARY EXAMINATION
Remove the instrument from the packing material and exam-
ine it carefully to make sure that no damage has occurred
during shipping. If there is any noticeable damage, please
contact your local Hanna Instruments Office.
Note Save all packing materials until you are sure that the instru-
ment functions correctly. Any damaged or defective items
must be returned in their original packing materials together
with the supplied accessories.
GENERAL DESCRIPTION
The product is a real time microprocessor-based pH/ORP
controller. It provides accurate measurements, flexible
control capabilities and dual alarm signals.
The system is composed of a case inside which the signal
conversion circuitry, the microprocessor circuitry and the
output power drivers are contained.
MAIN FEATURES
• Configurations: for measure and control of pH or ORP,
with two separate sets of control settings. Thus no loss of
settings occurs when changing from pH to ORP and vice
versa.
• Display: large LCD with 4 ½ 17 mm digits and 3 ½
10 mm digits.
• LEDs: a green LED (alarm relay) and a red LED for signal-
ing the device status.
• Alarm relay: one output relay for alarm condition (fail
safe mode: COM and NC are connected).
• Daily programmable control timing.
• Diagnostic features.
• pH/ORP probe check.
• Temperature sensor (Pt100 or Pt1000 type) with automatic
recognition and damage test.
• Hold management, including hold digital input to enter
hold mode with an external trigger.
• Logging of the last 100 error, configuration, calibration
and cleaning events.

6
• Calibration and Setup procedures are password pro-
tected.
• Calibration: pH calibration at 2 points with two possible
sets of buffers (either 7.01 - 4.01 - 10.01 or 6.86 - 4.01
- 9.18), or at 1 point with user-selectable value.
• Temperature compensation of the Hanna Instruments
Office standard buffers.
• GLP features: old probe check, dead probe check, cali-
bration time-out, last calibration data internally recorded
(nonvolatile EEPROM memory): calibration date and
time, pH offset, pH slope, number of calibration points
and correspondent pH values.
• Solution compensation of the pH reading.
• Manual temperature setting when the temperature probe
is not inserted or temperature is out of range.
• Input: pH/ORP electrode with BNC connector.
• Input: pH/ORP/Temperature Digital Transmitter
(HI504910) which can be connected up to 1.2 km (0.75
miles) far away.
• Output (0-20 or 4-20 mA): one analog output for record-
ing of pH/ORP or controlling (only for models with PID).
• RS485 communication with Short Messaging Service
(SMS) for GSM phones.
• RS485 communication with analog modem for remote
connection with PC.
• Data logging: 6000 samples pH/°C or ORP download-
able through RS485 and HI92500 application software.
• Real time clock.
OPTIONAL FEATURES (depending on model)
• LEDs: four yellow LEDs are provided for signaling the
energizing of relay 1, relay 2 (optional), relay 3 (optional)
and relay 4 (optional).
• Relays: 1, 2 or 4 output relays. The relays LEDs are
switched ON whenever the correspondent relay is ener-
gized (NO and COM connected).
• Advanced Cleaning is provided through two cleaning
commands and variety of trigger events (relays 3 and 4
only).
• Output (0-20 or 4-20 mA): second independent analog
output for recording of temperature or controlling (only
for models with PID).
• PID control.

7
FRONT PANEL
FUNCTIONAL DESCRIPTION
1. Liquid Crystal Display
2. LCD key enters and exits the event scrolling mode. During pH
calibration, alternately displays pH buffer value or current
temperature
3. SETUP key enters and exits setup mode
4. CAL DATA key last calibration data viewing (enters and exits)
5. CAL key initiates and exits calibration mode
6. key increases the blinking digit/letter by one when selecting
a parameter. Advances forward while in last calibration
data viewing mode or event scrolling mode. Increases
the temperature setting when temperature probe is not
inserted
7. key decreases the blinking digit/letter by one when selecting
a parameter. Reverts backward while in last calibration
data viewing mode or event scrolling mode. Decreases
the temperature setting when temperature probe is not
inserted
8. key moves to the next digit/letter (circular buffer) when selecting
a parameter. Same as key during last calibration data
viewing mode. Move to the next piece of information for
the current event while in event scrolling mode
9. CFM key confirms current choice (and skips to the next item) ENTER
10. LEDs Relay’s 1, 2, 3, 4 activation
11. LEDs Controller Status, alarm activation

8
REAR PANEL
1. BNC Socket for pH or ORP electrode
2. Connection for Potential Matching Pin
3. Connection for electrode reference
4. Connections for Pt 100/Pt 1000 temperature sensor
5. Not Connected, for future use
6. Digital Transmitter input
7. HOLD input
8. Advanced Cleaning input (optional)
9. Power supply input
10. Alarm terminal
11. Relay 2 - second dosing terminal (optional)
12. Second analog output (optional)
13. Relay 1 - first dosing terminal
14. First analog output
15. HOLD output
16. Relay 4 - for Advanced Cleaning feature (optional)
17. Relay 3 - for Advanced Cleaning feature (optional)
18. RS485 output terminal
Unplug the meter before starting any electrical connections.
Disconnect the Potential Matching Pin when setup item I.04=”OFF”

9
Range
-2.00 to 16.00 pH
-2000 to 2000 mV
-30 to 130.0 ºC
Resolution
0.01 pH
1 mV
0.1 ºC above -10 ºC; 1 ºC below
Accuracy
(@25 °C/77 °F)
±0.02 pH
±2 mV
±0.5 ºC (-9.9 to 130.0 ºC); ±1 ºC (-30 to -10 ºC)
Typical EMC
Deviation
±0.2 pH
±10 mV
±0.5 ºC
Digital Input for the pH/
ORP/°C Transmitter
RS485
Other Digital Insulated
Inputs
• 2 digital insulated inputs: 1 for hold and 1 for the
advanced cleaning
• ON state: 5 to 24 VDC
Digital Insulated Output A digital insulated contact closed upon hold mode
Temperature compensation Automatic or manual from -30 to 130 ºC
Temperature probe
With 3-wire or 2-wire Pt100/Pt1000 sensor
(with automatic recognition and damage test)
Installation Category II
Power Supply
(depending on model)
24 Vdc/ac
230 Vac, 115 Vac or 100 Vac ±10%; 50/60 Hz
Power Consumption 10VA
Over Current
Protection
400 mA 250V Quick Blow Fuse
Max. Oscillation Frequency 8 MHz
Relays 1, 2, 3, 4
Electromechanical relay SPDT contact outputs,
5A-250 VAC, 5A - 30 VDC (resistive load)
Fuse protected: 5A, 250V Quick Blow Fuse
Alarm Relay
Electromechanical Relay SPDT contact output,
5A - 250 VAC, 5A - 30 VDC (resistive load)
Fuse protected: 5A, 250V Quick Blow Fuse
SPECIFICATIONS

10
MECHANICAL DIMENSIONS
FRONT VIEW SIDE VIEW
Analog Output
• 2 independent outputs
• 0 - 22 mA (configuring as 0-20 mA or 4-20 mA)
Analog Output Resolution 0.1‰ f.s.
Analog Output Accuracy ± 2‰ f.s.
Data logging 6000 pH/°C or ORP samples
Environment 0 to 50 ºC; max 85% RH non-condensing
Casing IP20 (housing); IP54 (front panel)
Enclosure single case ½ DIN
Weight approximately 1.6 kg (3.5 lb.)

11
INSTALLATION
Refer to diagram on page #9
• Input power: Connect a 3-wire power cable
to the terminal strip line (L), earth (PE) and
neutral (N) terminal connections.
Power:100VAC-120mA / 115VAC-100mA / 230VAC-
50mA.
Line Contact: 400mA fuse inside.
PE must be connected to ground; leakage current 1mA.

12
• Electrode: Connect the pH or ORP electrode to the BNC
socket (#1 at page 9).
To benefit from the differential (symmetrical) input, con-
nect the proper electrode wire (if available) or a cable with
a potential matching pin (grounding bar) to the relevant
terminal (#2 at page 9) and enable the differential input
through the setup code I.04.
Note When it is not possible to immerse the Potential Matching Pin
together with the pH electrode in the solution (asymmetrical
input), disable the differential input through the setup code
I.04. In this case, detach the Potential Matching Pin from
its connector. Failure to do so may cause damage of the
reference electrode.
• Pt 100/Pt1000 Terminals: these contacts (#4 at page 9)
connect the Pt 100/Pt 1000 temperature sensor for au-
tomatic temperature compensation of pH measurement.
In the case of shielded wire, connect the shield to pin 4.
In the case of a 2-wire sensor
connect the Pt 100/Pt 1000 to
pins 1 and 3, and short pins 2
and 3 with a jumper wire.
If the Pt 100/Pt 1000 has more
than 2 wires, connect the two
wires of one end to pins 2 and
3 (pin 2 is an auxiliary input to
compensate for the cable resis-
tance) and one wire from the
other end to pin 1. Leave the fourth wire unconnected, if
present.
Note The instrument automatically recognizes the sensor type
(Pt100 or Pt1000).
• Analog Outputs: when using shielded cable, if the shield
is not connected at the other end of the cable, then con-
nect it to the “+” terminal, otherwise leave it floating.
All cables connected to rear panel should end with cable
lugs.
A circuit breaker (rated 10A max.) must be connected in
close proximity to the equipment, and in a position easy to
reach by the operator, for disconnection of the instrument
and of all the devices connected to the relays.

13
CALIBRATION MODE
The calibration mode allows to calibrate the pH/ORP input,
temperature input and 4-20 mA analog outputs.
The controller is factory calibrated for all these parameters.
Periodical calibration of the instrument is recommended, in
particular when greatest accuracy is required and at least
bi-yearly.
It is possible to calibrate the electrode over only one point,
but it is always good practice to perform a 2-point calibra-
tion.
To enter the calibration mode press the CAL key.
Enter the correct password and press the CFM key. If a
wrong password is entered, the instrument returns to the
previous mode.
Note If the meter is set as an ORP controller (setup item G.00),
the pH calibration, pH reading offset adjustment, and pH
offset and slope are not available. If the meter is selected
as a pH controller, no ORP calibration can be selected.
Note Any calibration procedure can be aborted at any time by
pressing the CAL key, and the instrument returns to the
previous mode.
The pH/ORP controller can be calibrated through a one-
point or two-point calibration.
The pH calibration can not be performed if the pH electrode
is broken or leaking or the reference electrode is broken
or dirty and an error is active. The ORP calibration can not
be performed if the “Reference electrode broken or dirty”
error is active. For pH calibration the temperature probe
should be connected to the process meter.
All calibrations refer to the process controller. No calibra-
tion for the Digital Transmitter can be performed by the
process controller, but the Digital Transmitter Calibrator
must be used for that.

14
The pH and ORP calibrations can not be initiated while the
process controller is configurated to take measurements
from the Digital Transmitter.
pH CALIBRATION
It is recommended to perform pH calibration when the probe
is replaced and after any cleaning action.
To perform any pH calibration procedure, the instrument
has to be set as pH controller.
Initial Preparation
Pour small quantities of pH7.01 (HI7007) and pH4.01
(HI7004) or pH10.01 (HI7010) solutions into individual
beakers. If possible, use plastic beakers to minimize any
EMC interference.
For accurate calibration use different beakers for each buf-
fer solution, the first one for rinsing the electrode and the
second one for calibration. By doing this, contamination
between buffers is minimized.
• Enter the calibration mode, select the pH calibration (by
moving through the menu with the and keys), then
press the CFM key.
• Choose the pH buffer set between the two available
ones: the standard set (4.01, 7.01, 10.01) and the NIST
set (4.01, 6.86, 9.18). For the standard set confirm the
“Std”; for the NIST set confirm the “niSt” (use the and
keys for select between the two options).

15
The default buffer set is the one used for last calibration,
even if the procedure was not completed.
• Once confirmed the set of buffer
values, the primary LCD shows the
measured pH value, while the sec-
ondary LCD displays the first required
buffer value.
Two-point calibration
• Remove the protective cap from the
pH electrode and immerse it into the
buffer solution (e.g. pH7.01) together
with the Potential Matching Pin and the
temperature probe, then stir gently.
Note The electrode should be submerged ap-
proximately 4 cm (1
1
/
2
’’) in the solution.
The temperature probe has to be located
as close as possible to the pH electrode.
Note When it is not possible to immerse the Potential Matching
Pin together with the pH electrode in the solution, disable
the differential input by setting setup item I.04 to “OFF”.
• When the reading becomes stable,
the probe indicator will stop flash-
ing (after about 30 seconds), and if
the pH value is close to the selected
buffer, the “CFM” indicator will start
blinking, otherwise the “WRONG”
indicator, the pot and the BUF tags
will start blinking.
• In the first case press the CFM key to confirm calibration.
The meter will show the scrolling message “Press CFM
again to confirm the current buffer or right to escape”
(to prevent from confirming the calibration point inad-
vertently).
Pressing again CFM, the secondary LCD will display the
second expected buffer value.

16
• In the second case (pH value not close to the buffer)
the meter will remain in the same state until the reading
becomes unstable or the calibration mode is quitted.
• For the second buffer value it is possible to choose be-
tween pH4.01 and pH10.01 (or pH4.01 and pH9.18 if
the NIST set has been selected). Use the or key to
switch between the two possibilities.
• Once selected the buffer, the procedure is the same as
for the first calibration point.
Note A time-out of 2.5 minutes is present for the pH electrode
response time. During calibration, if the pH reading is not
stable after 2.5 minutes, the device displays twice the scroll-
ing message “time-out”, then shows “WRONG” and it is
not possible to complete calibration.
• At the end of calibration, with the meter set as pH con-
troller, the instrument checks if the offset is between -30
and 30 mV and the slope between 53.5 and 62 mV/pH.
If the values are not within these ranges, the message
“OLd ProbE” scrolls twice across the LCD. The electrode
is still working, but it is necessary to perform a cleaning
procedure (see “Electrode conditioning and maintenance”
and “In-line Cleaning” sections) or replace it.
If the offset is outside the -60 to 60 mV range, the “dEAd
ProbE” message will scroll across the LCD and the cor-
responding error is activated. The electrode has to be
replaced as soon as possible because there is no reliability
on the measured pH values.
One-point calibration
A one-point calibration at a value different from the
standard buffer values is possible by entering the desired
calibration value. This is the actual pH value at the current
calibration temperature.
• Enter the pH calibration mode (no matter if the standard
or NIST buffer set is selected), then press the SETUP key
while the secondary LCD is displaying the
first buffer value (pH7.01 or pH6.86).

17
• The pH calibration value will switch
to 7.00, the first digit starts blinking
and it is possible to change its value
simply using the or key.
• Once selected the first digit value, press the key: the first
digit will be fixed and the second one will start blinking.
Pressing of the key repeatedly will result on circularly
moving on the secondary LCD.
• When the desired calibration value is reached (must be
within 0.00 to 16.00 pH), press the CFM key to confirm
and the calibration will proceed as described above.
• If the selected value is outside boundaries, the confir-
mation is not accepted and the first digit keeps blinking
(waiting for confirmation of a valid value).
Note If SETUP key is pressed instead of CFM, the calibration
value selection is aborted and the meter reverts back to a
two-point calibration.
ORP CALIBRATION
To perform ORP calibration it is necessary to connect an
HI931001 or HI8427 simulator to the BNC socket.
The meter has to be set as ORP controller.
• Set item I.04 to “OFF” to disable the Matching Pin.
• A two-point calibration has to be performed: the first
point value is 0 mV and the second one can be chosen
between 350 mV and 1900 mV.
• Enter the calibration mode, select the ORP calibration
(use the and keys to move through setup menu) and
press the CFM key.
• Set the HI931001 or HI8427 simulator to 0 mV.
• The primary LCD will display
the current mV measure and the
secondary LCD will show the first
calibration point (0 mV).

18
• When the reading becomes stable, if the ORP value is
close to the calibration point, the “CFM” indicator starts
blinking; otherwise the “WRONG” indicator blinks and
the “CAL” is fixed on.
• In the first case press CFM to confirm calibration. The
meter will proceed showing the scrolling message “Press
CFM again to confirm the current buffer or right to es-
cape” (to prevent from confirming the calibration point
inadvertently). Pressing again CFM the secondary LCD
will display the second calibration point.
• In the second case (blinking “WRONG”) the meter will
remain in the WRONG state until the reading becomes
unstable or the calibration mode is exited by pressing
the CAL key.
• For the second calibration point it is possible to choose
between 350 mV or 1900 mV. Pressing the or key
the value on the secondary LCD will switch between the
two possibilities.
• Once selected the second calibration point, set the
HI931001 (350 mV) or HI8427 (350 or 1900 mV)
simulator to the same value and the calibration proceeds
as for the first point.
Note In ORP calibration there is no time-out.
ANALOG OUTPUT CALIBRATION
The instrument can be provided with one or two analog
outputs, each of them can be calibrated.
• Connect an Ammeter or the HI931002 calibrator to
the analog output to measure the current erogated by
the meter.
• Enter the calibration mode and move through the menu
using the or key until “Out 1” or “Out 2” message
appears on the primary LCD.

19
TEMPERATURE CALIBRATION
•Prepare a beaker containing
crushed ice and water at 0 °C
(32 °F) and another one with hot
water at 25 °C (77 °F) or 50 °C
(122 °F).
•Use a Checktemp or another
calibrated thermometer with a
resolution of 0.1° as a reference
thermometer.
•Immerse the temperature probe
in the beaker with ice and water
as near to the Checktemp as
possible.
• Once visualized the selected output, press the key
to choose the range of the analog output (0-20 mA or
4-20 mA); then press the CFM key to confirm the choice.
• Once selected and confirmed the
range for the analog output, the
secondary LCD shows the first
point of calibration (1 or 4 mA)
and the primary LCD displays the
range of the actual calibration.
• With the tester check the real current value provided by
the instrument at the output port. If this value is different
from the expected one, it is possible to change the cur-
rent erogated by the instrument pressing the or key.
• Adjust the value until it matches with the first point of
calibration, then press CFM to confirm. The instrument
will turn to the second calibration point (20 mA).
• The calibration procedure is the same as for the first point.
• Once the instrument is calibrated for both points (and
confirmed), it will exit from the calibration menu.

20
Note The instrument can support Pt100 or Pt1000 temperature
sensor and calibration can be performed with anyone of
these two probes.
• After entering the calibration mode, move through the
menu (using the or key) to choose the temperature
and the correct kind of used
probe; the primary LCD shows
“°C” and the secondary LCD
gives indication about the kind of
probe (“100” indicates a Pt100
probe, while “1000” stands for a
Pt1000 probe).
Press the CFM key to confirm selection.
• The calibration has to be performed
over two points: the first point has
to be 0 °C and the second one
can be chosen between 25 °C
and 50 °C.
Once confirmed the type of calibration, the primary LCD
will display the current temperature measure and the
secondary LCD will show the first calibration point (0 °C).
• When the reading becomes stable, if the temperature
value is close to the calibration point the CFM tag starts
blinking, otherwise the WRONG indicator will flash.
• In the first case press the CFM key to confirm calibration.
The meter will proceed showing the scrolling message
“Press CFM again to confirm the current buffer or right
to escape” (to prevent from confirming the calibration
point inadvertently).
• Pressing again the CFM key, the
secondary LCD will display the
second calibration point.
• In the case the measured tempera-
ture is not close to the calibration value, the meter remains
in the WRONG status until the reading becomes unstable
or the calibration mode is exited (by pressing the CAL key).
/