Universal Cooker Hood Installation and Operation Manual
The instructions in this manual are for cooker hood models:
Safety Warning
Cleaning
Electrical Connection
Accessories
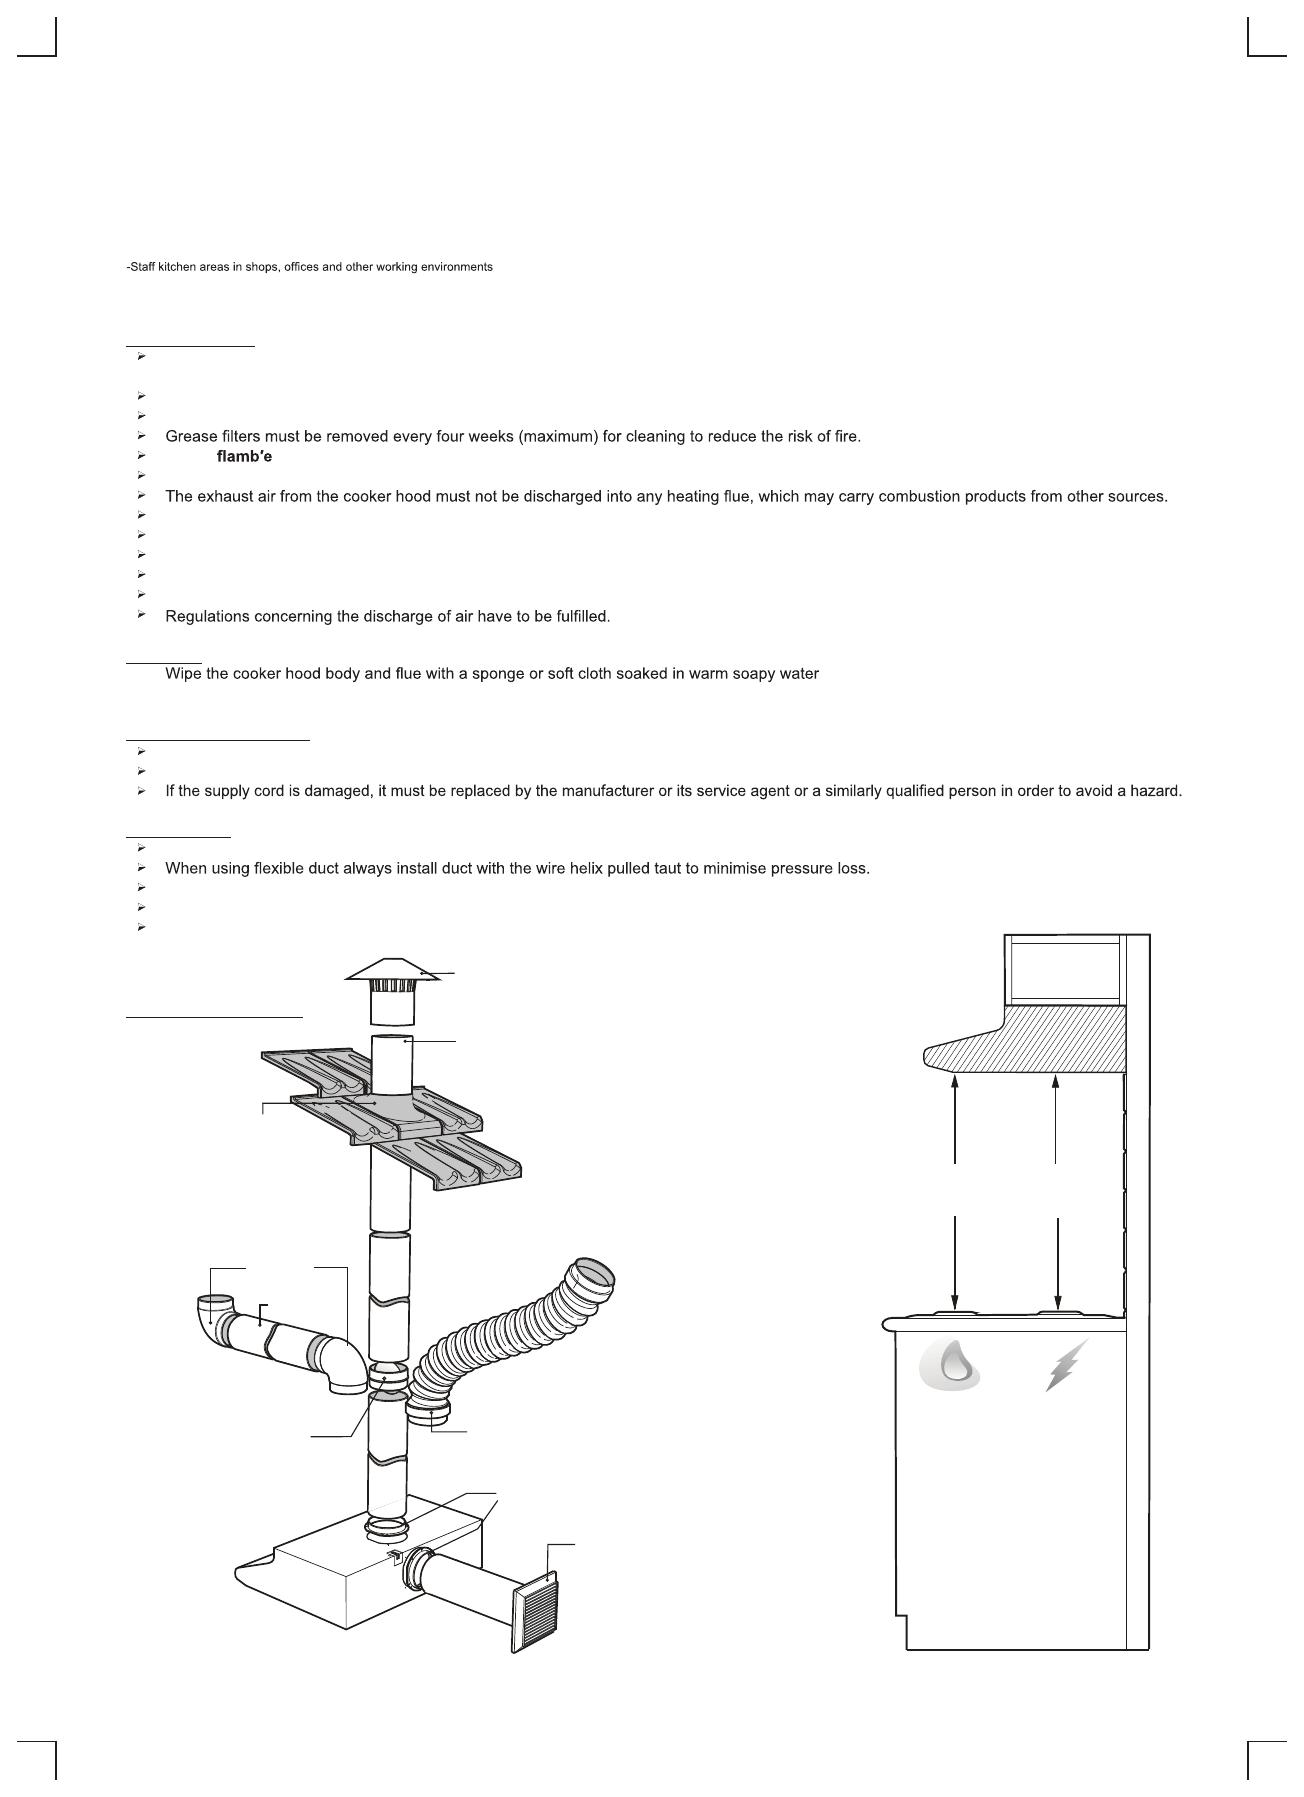
Ducting Accessories
WRJ903U, WRJ600U, WRJ603U, WRJ611U, WRJ900U,WRJ911U, RHN6, RHN9, RFD602W, RFD602S, RFD902W, RFD902S
These cooker hoods are domestic appliances which have been manufactured and tested to comply with Australian and New Zealand
Standard AS/NZS 3350.2.31.
This appliance is not intended for use by persons (including children) with reduced physical, sensory or mental capabilities, or lack of experience
and knowledge, unless they have been given supervision or insruction concerning use of the appliance by a person responsible for their safety.
Children should be supervised to ensure they do not play with the appliance.
Ensure the cooker hood is switched off before carrying out maintenance, to avoid any possibility of electric shock.
Do not under the cooker hood.
This cooker hood is not recommended for barbeques.
Exhaust air must not be discharged into a wall cavity, unless the cavity is designed for the purpose.
There must be adequate ventilation of the room when the cooker hood is used at the same time as appliances burning gas or other fuels.
Always cover lit gas burners with pots or pans when the cooker hood is in use.
Always switch off gas burners before you remove pots or pans.
CAUTION: Accessible parts may become hot when used with cooking appliance.
. Do not use oven cleaners or other abrasive
materials.
Check that the mains voltage matches with the voltage on the data plate inside the cooker hood.
Check that the installation complies with standards of local gas and electricity authorities.
Use 125mm round exhaust ducting for best performance.
Try to keep exhaust duct short and straight.
Keep bends in the exhaust duct to a minimum.
Do not reduce the size or restrict exhaust duct.
These appliances are intended to be used in household and similar applications such as:
-Farm Houses
-By clients in hotels, motels and other residential type environments
-Bed and breakfast type environments
AR125RC
AR125F
AR125FD
AR125WV
Roof cowl
Flue
1200mm length
Alternative flue connection
1 metre flexible duct with joiners
Wall vent
(includes 400mm of flue)
Flue collar
1 supplied
with hood
Flue joiner
-plain AR125FJ
-damper
AR125FJD
Flashing
Not Supplied
90 bend
AR125B
Flue
600650
GAS
ELECTRIC
(MINIMUM)(MINIMUM)


