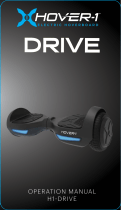
Dream H1-DRIVE Electric Hoverboard

Hover-1 Dream H1-DRIVE Electric Hoverboard, HOVER-1 Dream H1-DRIVE Electric Hoverboard User manual

  • Hello! I am an AI chatbot trained to assist you with the Hover-1 Dream H1-DRIVE Electric Hoverboard User manual. I’ve already reviewed the document and can help you find the information you need or explain it in simple terms. Just ask your questions, and providing more details will help me assist you more effectively!
  • How do I turn on my Hover-1 H1-DRIVE Electric Hoverboard?
    How do I turn off my Hover-1 H1-DRIVE Electric Hoverboard?
    What are the four sensors under the foot mats of my Hover-1 H1-DRIVE Electric Hoverboard?
    What does the battery indicator on my Hover-1 H1-DRIVE Electric Hoverboard display?
    What does the running indicator on my Hover-1 H1-DRIVE Electric Hoverboard display?
ELECTRIC HOVERBOARD
OPERATION MANUAL
H1DRIVE
DRIVEDRIVEDRIVE
HELMETS
SAVE
LIVES!
Always wear a properly itted helmet that
complies with CPSC or CE safety standards
when you ride your EScooter.
Correct Fit:
Make sure your helmet
covers your forehead.
Incorrect Fit:
Forehead is exposed and
vulnerable to serious
injury.
PLEASE READ THE OPERATION MANUAL THOROUGHLY.
Failure to follow the basic instructions and safety precautions listed in
the operation manual can lead to damage to your Drive, other
property damage, serious bodily injury, and even death.
Thank you for purchasing the Hover-1 Drive electric hoverboard. Please
read all instructions carefully before using and retain this manual for future
reference.
• To avoid collisions, falls, and loss of control, please learn how to ride the
Drive safely.
• You can learn how to ride the Drive by reading the operation manual and
watching videos.
• Hover-1 can not be held liable for damage or injury caused by failure to
understand and/or failure to follow the warnings and instructions in this
manual.
ATTENTION
1. Use only the supplied charger from Hover-1 with this hoverboard.
2. The operating temperature range of the Drive is 32°F - 104°F
(0°C - 40°C).
3. Do not ride on icy or slippery surfaces.
4. Read the operation manual and warning labels before riding.
5. Store the Drive in a dry, ventilated environment.
6. When transporting the Drive, avoid violent crashes or impact.
LOW TEMPERATURE WARNING
Low temperatures will aect the lubrication of moving parts inside the
Drive hoverboard, increasing internal resistance. Additionally, the
discharge capacity and the capacity of the battery will be signiicantly
decreased.
Use caution when riding the Drive in cold temperatures (below
40°F/4°C). Doing so may increase the risk of mechanical failures of the
hoverboard, which may lead to damage to your Drive, other property
damage, serious bodily injury, and even death.
SAFETY INSTRUCTIONS
• Keep the Drive away from heat sources, direct sunlight, humidity,
water, and any other liquids.
• Do not operate the Drive if it has been exposed to water, moisture, or
any other liquids to prevent electric shock, explosion, and/or injury to
yourself and damage to the Drive.
• Do not use the Drive if it has been dropped or damaged in
any way.
• Repairs to electrical equipment should only be performed by the
manufacturer. Improper repairs void the warranty and may place the
user at serious risk.
• Do not puncture or harm the exterior surface of the product in any
way.
• Keep the Drive free from dust, lint, etc.
• Do not use this Drive for anything other than its intended use or
purpose. Doing so may damage the Drive or lead to property damage,
injury, or death.
• This product is not a toy. Keep out of reach of children.
• Do not expose the batteries to excessive heat, such as direct sunlight
or open lame.
• Do not allow hands, feet, hair, body parts, clothing, or similar articles
to come in contact with moving parts, wheels, or the drivetrain while
the Drive is running.
WARNING!
11
PLEASE READ THE OPERATION MANUAL THOROUGHLY.
Failure to follow the basic instructions and safety precautions listed in
the operation manual can lead to damage to your Drive, other
property damage, serious bodily injury, and even death.
Thank you for purchasing the Hover-1 Drive electric hoverboard. Please
read all instructions carefully before using and retain this manual for future
reference.
• To avoid collisions, falls, and loss of control, please learn how to ride the
Drive safely.
• You can learn how to ride the Drive by reading the operation manual and
watching videos.
• Hover-1 can not be held liable for damage or injury caused by failure to
understand and/or failure to follow the warnings and instructions in this
manual.
ATTENTION
1. Use only the supplied charger from Hover-1 with this hoverboard.
2. The operating temperature range of the Drive is 32°F - 104°F
(0°C - 40°C).
3. Do not ride on icy or slippery surfaces.
4. Read the operation manual and warning labels before riding.
5. Store the Drive in a dry, ventilated environment.
6. When transporting the Drive, avoid violent crashes or impact.
LOW TEMPERATURE WARNING
Low temperatures will aect the lubrication of moving parts inside the
Drive hoverboard, increasing internal resistance. Additionally, the
discharge capacity and the capacity of the battery will be signiicantly
decreased.
Use caution when riding the Drive in cold temperatures (below
40°F/4°C). Doing so may increase the risk of mechanical failures of the
hoverboard, which may lead to damage to your Drive, other property
damage, serious bodily injury, and even death.
SAFETY INSTRUCTIONS
• Keep the Drive away from heat sources, direct sunlight, humidity,
water, and any other liquids.
• Do not operate the Drive if it has been exposed to water, moisture, or
any other liquids to prevent electric shock, explosion, and/or injury to
yourself and damage to the Drive.
• Do not use the Drive if it has been dropped or damaged in
any way.
• Repairs to electrical equipment should only be performed by the
manufacturer. Improper repairs void the warranty and may place the
user at serious risk.
• Do not puncture or harm the exterior surface of the product in any
way.
• Keep the Drive free from dust, lint, etc.
• Do not use this Drive for anything other than its intended use or
purpose. Doing so may damage the Drive or lead to property damage,
injury, or death.
• This product is not a toy. Keep out of reach of children.
• Do not expose the batteries to excessive heat, such as direct sunlight
or open lame.
• Do not allow hands, feet, hair, body parts, clothing, or similar articles
to come in contact with moving parts, wheels, or the drivetrain while
the Drive is running.
22
Do not operate or allow others to operate the Drive until the user
understands all instructions, warnings, and safety features described in
this manual.
Check with your doctor if you have a medical condition that could aect
your ability to use the Drive.
• Persons with head, back, neck ailments, or prior surgeries to those
areas of the body are not recommended to use the Drive.
• Do not operate if you are pregnant or have a heart condition.
• Persons with any mental or physical conditions that may make them
susceptible to injury or impair their physical or mental capabilities to
recognize, understand, and perform all of the safety instructions and
assume the hazards inherent in operation should not use the Drive.
In this manual, the above symbol with the word “NOTE” indicates instruc-
tions or relevant facts the user should understand prior to using the
device.
In this manual, the above symbol with the word “CAUTION” indicates a
hazardous situation which, if not avoided, can cause minor or moderate
injury.
In this manual, the above symbol with the word “WARNING” indicates a
hazardous situation which, if not avoided, can cause serious injury or
death.
Please keep your serial number on ile for warranty claims as well as proof
of purchase.
Prolonged Exposure to UV rays, rain, and the elements may damage the
enclosure materials. Store indoors when not in use.
WARNING
WARNING
SERIAL NUMBER
CAUTION
NOTE:
33
The Drive hoverboard is a personal transporter. Our production processes
are developed with strict testing for each hoverboard. Operating the
hoverboard without following the contents of this manual may lead to
damage to your hoverboard or bodily injury.
PACKAGE CONTENTS
• Hover-1 Drive Hoverboard
• Charger & Charging Cable
• Operation Manual
FEATURES/PARTS
1. Fender 5. Tire
2. Right Foot Mat 6. Charge Port (Located in Rear)
3. Battery Indicator 7. Power Button (Located in Rear)
4. Left Foot Mat 8. Protective Chassis Casing
OPERATING PRINCIPALS
The Drive uses digital electronic gyroscopes and acceleration sensors to
control balance and motion, depending on the user's center of gravity.
The Drive also uses a control system to operate the motors that are
located within the wheels. The Drive has a built-in inertia dynamic
stabilization system that can assist with balance when moving forward
and backward, but not while turning.
TIP – To increase your stability, you must shift your weight in order to
overcome the centrifugal force during turns, especially when entering a
turn at higher speeds.
Model: H1DRIVE
Net Weight: 14.45 lbs (6.55 kg)
Max Supported Weight: 160 lbs (72.5 kg)
Min Supported Weight: 44 lbs (20 kg)
Motor: 320W (dual 160W motors)
Max Speed: Up to 7 mph (11.3 km/h)
Max Range: Up to 3 miles (4.8 km)
Max Incline Angle: 10°
Minimum Turning Radius:
Charge Time: Up to 6 hours
Battery Type: Lithium-ion
Battery Voltage: 36V
Battery Capacity: 2Ah
Power Requirement: AC 100V240V, 50Hz/60Hz
Ground Clearance: 1.5 Inches (3.81 cm)
Platform Height: 4.5 Inches (11.43 cm)
Tire Size: 6.5 Inches (16.51 cm)
Tire Type: Non-Pneumatic Solid Tires
UL Certiication: UL2272 certiied
INTRODUCTION
1 1
55
67
234
8
44
The Drive hoverboard is a personal transporter. Our production processes
are developed with strict testing for each hoverboard. Operating the
hoverboard without following the contents of this manual may lead to
damage to your hoverboard or bodily injury.
PACKAGE CONTENTS
• Hover-1 Drive Hoverboard
• Charger & Charging Cable
• Operation Manual
FEATURES/PARTS
1. Fender 5. Tire
2. Right Foot Mat 6. Charge Port (Located in Rear)
3. Battery Indicator 7. Power Button (Located in Rear)
4. Left Foot Mat 8. Protective Chassis Casing
OPERATING PRINCIPALS
The Drive uses digital electronic gyroscopes and acceleration sensors to
control balance and motion, depending on the user's center of gravity.
The Drive also uses a control system to operate the motors that are
located within the wheels. The Drive has a built-in inertia dynamic
stabilization system that can assist with balance when moving forward
and backward, but not while turning.
TIP – To increase your stability, you must shift your weight in order to
overcome the centrifugal force during turns, especially when entering a
turn at higher speeds.
Model: H1DRIVE
Net Weight: 14.45 lbs (6.55 kg)
Max Supported Weight: 160 lbs (72.5 kg)
Min Supported Weight: 44 lbs (20 kg)
Motor: 320W (dual 160W motors)
Max Speed: Up to 7 mph (11.3 km/h)
Max Range: Up to 3 miles (4.8 km)
Max Incline Angle: 10°
Minimum Turning Radius:
Charge Time: Up to 6 hours
Battery Type: Lithium-ion
Battery Voltage: 36V
Battery Capacity: 2Ah
Power Requirement: AC 100V240V, 50Hz/60Hz
Ground Clearance: 1.5 Inches (3.81 cm)
Platform Height: 4.5 Inches (11.43 cm)
Tire Size: 6.5 Inches (16.51 cm)
Tire Type: Non-Pneumatic Solid Tires
UL Certiication: UL2272 certiied
SPECIFICATIONS
WARNING
55
PLEASE READ THE FOLLOWING INSTRUCTIONS CAREFULLY
TURNING YOUR DEVICE ON/OFF
Power On: Place your Drive lat on the loor and press the power button
(located on the rear of your Drive) once. Check the LED indicator (located
in the center of your Drive). The battery indicator should be lit, indicating
the Drive is powered on.
Power O: Press the power button once.
MAT SENSORS
There are four sensors under the foot mats of your Drive.
When riding the hoverboard, you must ensure you are stepping on the foot
mats. Do not step or stand on any other area of your hoverboard.
The hoverboard may vibrate or spin in one direction if weight and pressure
are applied to only one foot mat.
BATTERY INDICATOR
The display board is located in the middle of the Drive.
• A green LED Light indicates the hoverboard is fully charged.
• A red lashing LED light and beeping indicates low battery.
• A yellow lashing LED light indicates the hoverboard is charging.
When the LED light turns red, please recharge the Drive.
RUNNING INDICATOR
When the operater triggers the foot mats, the running indicator LED will
light up, which means that the hoverbaord has entered the running state.
When the hoverboard encounters an error during operation, the running
LED light will turn red (for more details, see “SAFETY ALERTS” on page 18).
CONTROLS AND DISPLAY
66
It is important that you fully understand all functions of your Drive. If these
functions are not used correctly, you will not have full control of your
Drive.
Practice using the Drive at slower speeds in a lat, open area before taking
the Drive out into public areas.
PRE-RIDE CHECKLIST
Ensure that your Drive is in proper working order each time you ride. If a
part of the hoverboard does not function correctly, please contact our
Customer Support Center.
• Ensure the battery is fully charged before riding your hoverboard.
• Please wear all appropriate safety gear before operating your
hoverboard.
• Make sure to wear comfortable clothes and lat, closed-toe shoes when
operating your hoverboard.
BEFORE RIDING
WARNING
Any Drive that does not work properly can
cause you to lose control and fall. Do not
ride a Drive with a part that is damaged.
Replace the damaged part before riding.
77
Dierent localities and countries have dierent laws about riding electric
transportation devices on public roads. You should check with local
oicials to ensure you are complying with these laws.
Hover-1 is not liable for tickets or violations given to riders who do not
follow local laws and regulations.
• For your safety, always wear a helmet that meets CPSC or CE safety
standards. In the event of an accident, a helmet can protect you from
serious injury and in some cases, even death.
• Obey all local traic laws. Obey red and green lights, one-way streets,
stop signs, pedestrian crosswalks, etc.
• Ride with traic, not against it.
• Ride defensively; expect the unexpected.
• Give pedestrians the right-of-way.
• Do not ride too close to pedestrians and alert them if you intend to pass
them from behind.
• Slow down at all street intersections and look to the left and right before
crossing.
• Your hoverboard is not equipped with relectors. It is not recommended
that you ride in low-visibility conditions.
SAFETY PRECAUTIONS
WARNING
When you ride in low-visibility conditions
such as fog, dusk, or night, you might be
diicult to see, which could lead to a
collision. Wear bright, relective clothing
when riding in low-visibility conditions.
88
• Do not ride above your skill level. Ensure you have had enough practice
with all functions and features of your Drive.
• Before stepping on your Drive, make sure it is placed lat on level ground,
the power is on, and the running indicator light is green. Do not step on if
the running indicator light is red.
• Do not try to open or modify your Drive. Doing so voids the
manufacturer warranty and may cause your Drive to fail, resulting in injury
or death.
• Do not use the Drive in a manner that would put people or property in
danger.
• If riding near others, keep a safe distance to avoid collision.
• Be sure to keep your feet on the foot mats at all times. Moving your feet
o your Drive while driving is dangerous and may cause the Drive to stop
or veer sideways.
• Do not operate the Drive while under the inluence of drugs or alcohol.
• Do not operate the Drive when you are restless or sleepy.
• Do not ride your Drive o of curbs, ramps, or in a manner similar to a
skateboard. Do not attempt to operate in a skate park or empty pool.
Misuse of your Drive voids the manufacturer warranty and may lead to
injury or damage.
• Do not continuously spin in place, it will cause dizziness and increases
your risk of injury.
• Do not abuse your Drive, doing so can damage your unit and cause
failure to the operating system, which may lead to injury. Physical abuse,
including dropping your Drive, voids the manufacturer warranty.
• Do not operate in or near puddles of water, mud, sand, stones, gravel,
debris, or near rough and rugged terrain.
• The Drive can be used on paved surfaces that are lat and even. If you
encounter uneven pavement, please lift your Drive over and past the
obstruction.
• Do not ride in inclement weather: snow, rain, hail, sleet, on icy roads, or in
extreme heat or cold.
99
• Bend your knees when riding on bumpy or uneven pavement to absorb
the shock and vibrations. This will help you keep your balance.
• If you are unsure if you can safely ride on a speciic terrain, step o and
carry your Drive. Always be on the side of caution.
• Do not attempt to ride over bumps or objects greater then ½ inch, even
when prepared and bending your knees.
• Pay attention - look at where you are riding and be conscious of the
road conditions, people, property, and objects around you.
• Do not operate the Drive in crowded areas.
• Operate your Drive with extreme caution when indoors, especially
around people, property, and narrow spaces.
• Do not operate the Drive while talking, texting, or looking at your phone.
• Do not ride your Drive where it is not permitted.
• Do not ride your Drive near motor vehicles or on public roads.
• Do not travel up or down steep hills.
• The Drive is intended for use by a single individual, DO NOT attempt to
operate the Drive with two or more people.
• Do not carry anything while riding the Drive.
• Individuals with lack of balance should not attempt to operate the
Drive.
• The Drive is recommended for riders ages 8 and older.
• At higher speeds, always take longer stopping distances into
consideration.
• Do not step forward o of your Drive.
• Do not attempt to jump on or o your Drive.
• Do not attempt any stunts or tricks with your Drive.
• Do not ride the Drive in dark or poorly lit areas.
1010
• Do not ride the Drive o-road, near or over potholes, cracks, or uneven
pavement or surfaces.
• Keep in mind that you are 4.5 inches (11.43 cm) taller when operating the
Drive. Make sure to go through doorways safely.
• Do not turn sharply, especially at high speeds.
• Do not step on the fenders of the Drive.
• Avoid riding the Drive in unsafe places, including areas with lammable
gas, steam, liquid, dust, or iber that could cause ire or explosion
accidents.
• Do not operate near swimming pools or other bodies of water.
WARNING
When a hoverboard and a kart attachment (sold
separately) are being used together, it is NOT
ADVISABLE to ride the combo uphill. If you attempt
to ride on a steep incline above 510°, a safety
mechanism built into the hoverboard will activate,
which will shut down your hoverboard automatically.
If this happens, dismount your hoverboard, place it
on a lat surface, wait 2 minutes, then power your
hoverboard on again.
WARNING
To reduce the risk of injury, adult supervision is
required. Never use in roadways, near motor
vehicles, on or near steep inclines or steps,
swimming pools, or other bodies of water. Always
wear shoes and never allow more than one rider at
a time.
1111
FAILURE TO FOLLOW ANY OF THE FOLLOWING SAFETY
PRECAUTIONS MAY LEAD TO DAMAGE TO YOUR DRIVE, DAMAGE
TO PROPERTY, VOID YOUR MANUFACTURER WARRANTY, AND MAY
CAUSE SERIOUS BODILY INJURY OR DEATH.
Before using your Drive, be sure to familiarize yourself with the operating
procedures.
OPERATING YOUR DRIVE
Make sure the Drive is fully charged before initial use. For charging
instructions, please refer to “CHARGING YOUR DRIVE” on page 19.
Stand directly behind your Drive and place one foot on the corresponding
foot mat (as shown in the diagram below). Keep your weight on the foot
that is still on the ground, otherwise the Drive may begin to move or
vibrate, making it diicult to step on evenly with your other foot. When you
are ready, shift your weight to the foot already placed on the Drive and
step on with your second foot quickly and evenly
.
Find your center of gravity. If your weight is distributed correctly on the
foot mats and your center of gravity is level, you should be able to stand
on your Drive just as if you were standing on the ground.
On average, it takes 35 minutes just to get comfortable standing on
RIDING YOUR DRIVE
Stay relaxed and step on quickly, conidently,
and evenly. Imagine climbing stairs, one foot,
then the other. Look up once your feet are even.
The hoverboard may vibrate or spin in one
direction if weight and pressure are applied to
only one foot mat. THIS IS NORMAL.
NOTES:
1212
your Drive and maintaining proper balance. Having a spotter will help you
feel more secure. The Drive is an incredibly sensitive device; it senses
even the slightest bit of motion. Having any anxiety or reservation about
stepping on may cause you to panic and trigger unwanted movement.
When you irst begin using your Drive, the fastest way to move in your
desired direction is to focus in that direction. You will notice that just
thinking about which way you would like to go will shift your center of
gravity, and that subtle movement will propel you in that direction.
Your center of gravity determines which direction you move and your
speed. Stand straight up to come to a complete stop. As shown in the
diagram below, tilt your center of gravity in the direction you wish to
move.
To turn, focus on the direction you wish to turn and stay relaxed. Apply
pressure on your right foot to turn right and apply pressure on your left
foot to turn left.
As you get comfortable on the Drive, you will notice it becomes easier to
maneuver. Remember at higher speeds, it is necessary to shift your
weight when making turns to maintain your stability.
Bend your knees if you encounter bumps or uneven surfaces, then
dismount and carry your hoverboard to a safe operating surface.
Dismounting your hoverboard can be one of the easiest steps, yet when
done incorrectly, may cause you to fall. To properly dismount from a
stopped position, lift your dominant leg up and set your foot down on the
ground behind you (STEP BACK). Then, step o the hoverboard with your
other foot, as shown in the diagram below.
SPEED AND WEIGHT LIMITATIONS
Speed and weight limits are set for your own safety. Please abide by the
limits listed here in the manual.
• Maximum Speed: 7 mph
• Maximum Weight: 160 lbs
• Minimum Weight: 44 lbs
Move Backward Stop Move Forward
WARNING
To avoid danger, do not turn sharply or at
high speeds. Do not turn or ride quickly along
slopes, as it may cause injury.
1313
your Drive and maintaining proper balance. Having a spotter will help you
feel more secure. The Drive is an incredibly sensitive device; it senses
even the slightest bit of motion. Having any anxiety or reservation about
stepping on may cause you to panic and trigger unwanted movement.
When you irst begin using your Drive, the fastest way to move in your
desired direction is to focus in that direction. You will notice that just
thinking about which way you would like to go will shift your center of
gravity, and that subtle movement will propel you in that direction.
Your center of gravity determines which direction you move and your
speed. Stand straight up to come to a complete stop. As shown in the
diagram below, tilt your center of gravity in the direction you wish to
move.
To turn, focus on the direction you wish to turn and stay relaxed. Apply
pressure on your right foot to turn right and apply pressure on your left
foot to turn left.
As you get comfortable on the Drive, you will notice it becomes easier to
maneuver. Remember at higher speeds, it is necessary to shift your
weight when making turns to maintain your stability.
Bend your knees if you encounter bumps or uneven surfaces, then
dismount and carry your hoverboard to a safe operating surface.
Dismounting your hoverboard can be one of the easiest steps, yet when
done incorrectly, may cause you to fall. To properly dismount from a
stopped position, lift your dominant leg up and set your foot down on the
ground behind you (STEP BACK). Then, step o the hoverboard with your
other foot, as shown in the diagram below.
SPEED AND WEIGHT LIMITATIONS
Speed and weight limits are set for your own safety. Please abide by the
limits listed here in the manual.
• Maximum Speed: 7 mph
• Maximum Weight: 160 lbs
• Minimum Weight: 44 lbs
WARNING
Make sure to lift your feet completely o
the foot mat to clear the hoverboard when
stepping back to dismount. Failure to do so
may send the hoverboard into a tailspin.
Try staying relaxed and focus on inding your
center of gravity to maintain full control of
your Drive.
NOTES:
1414
OPERATING RANGE
The Drive can travel up to 3 miles on a fully charged battery under ideal
conditions. The following are some of the major factors that will aect the
operating range of your Drive.
• Terrain: Operating range is highest when riding on a smooth, lat
surface. Riding uphill and/or on rough terrain will reduce operating range
signiicantly.
• Weight: A lighter user will have a higher operating range than a heavier
user.
• Ambient Temperature: Please ride and store the Drive in recommended
temperatures. This will increase operating range, battery life, and overall
performance of your Drive.
• Speed and Riding Style: Maintaining a moderate and consistent speed
while riding produces maximum operating range. Traveling at high
speeds for extended periods of time, frequent starts and stops, and idling
will decrease overall operating range.
If your Drive is unbalanced, vibrating, or not turning properly, you can
follow the steps below to calibrate it:
• First, place the Drive on lat ground or the loor.The foot mats should be
even with each other and not tilted forward or backward. Make sure the
charger is not plugged in and the hoverboard is turned o.
• Press and hold the power button for a total of 1015 seconds. The
hoverboard will turn on, and the battery indicator will light up.
• After the light lashes 5 times consecutively, you may release the power
button. Turn the hoverboard o and then back on. Calibration is now
complete.
BALANCE & CALIBRATION
WARNING
Riding the Drive while exceeding the
weight limit may increase the possibility of
injury or product damage.
When max speed is reached, the Drive will
beep to alert the user and tilt the rider slowly
back to prevent injury.
NOTES:
1515
If a system error occurs or an improper operation is performed while
riding the Drive, the device will alert the user in a variety
of ways.
You will notice the running indicator light will turn red and you will hear a
beep sound, alerting you to take precaution and cease operation. The
hoverboard may stop suddenly.
The following are common occurrences that will produce safety alerts.
These notices should not be ignored, and appropriate action should be
taken to correct any improper operation, failure, or errors.
• Unsafe riding surfaces (uneven, too steep, unsafe, etc.)
• Battery voltage is too low.
• The Drive is still charging.
• During operation, the platform self initiates to tilt due to excess speed.
• The hoverboard is overheating, or the motor temperature is too high.
• The Drive has been rocking back and forth for over 30 seconds.
• If the system enters protection mode, the alarm indicator will light up
and the hoverboard will vibrate. This typically occurs when the battery is
about to run out of power.
If the platform is tilted forward or backward more than 10 degrees, the
Drive will power o and stop suddenly, possibly causing the rider to lose
balance or fall o.
• If any or both tires are blocked, the Drive will stop after 2
seconds.
• When the battery level has depleted below protection mode, the Drive
will power o and stop after 15 seconds.
• If a high discharge current is produced during use (such as driving up a
steep slope for a long period of time), the Drive will power o and stop
after 15 seconds.
• Ensure that the charging port is clean and dry.
• Make sure that there is no dust, debris, or dirt inside the port.
• Plug the charger into a grounded wall outlet. The charging indicator light
on the charger will be green.
• Connect the charging cable to the power supply (100V240V; 50Hz/60
Hz).
• Align and connect the 3-pin charging cable into the charging port of the
Drive. DO NOT FORCE THE CHARGER INTO THE CHARGING PORT, AS
THIS MAY CAUSE THE PRONGS TO BREAK OFF OR CAUSE PERMANENT
DAMAGE TO THE CHARGING PORT.
• Once attached to the hoverboard, the charging indicator light on the
charger should change to red, indicating that your device is now being
charged.
• When the red light on your charger turns to green, then your
hoverboard is fully charged. A full charge may take up to 6 hours. While
charging, you will see a red light.
• If you charge the hoverboard while it is powered on, you will see a yellow
lashing light on the hoverboard that indicates it is charging.
•After fully charging your Drive, unplug the charger from your Drive and
the power outlet.
BATTERY SPECIFICATIONS
Battery Type: Rechargeable lithium-ion battery
Charge Time: Up to 6 hours
Voltage: 36V
Initial Capacity: 2Ah
BATTERY MAINTENANCE
• The lithium-ion battery is built into the Drive. Do not disassemble
the Drive to remove the battery or attempt to separate it from
the Drive.
• Use only the charger and charging cable supplied by Hover-1. Use of any
other charger or cable may lead to damage to the hoverboard,
overheating, and risk of ire. Use of any other charger or cable voids the
manufacturer warranty.
• Do not connect or attach the Drive or the battery to a power supply plug
or directly to a car’s cigarette lighter.
• Do not place the Drive near a ire or leave it out in direct sunlight. Heating
the Drive can break or ignite the battery inside the device.
• Do not continue charging the battery if it does not recharge within the
speciied charging time. Doing so may cause the battery to become hot,
rupture, or ignite.
• To preserve natural resources, please recycle or dispose of batteries
properly. This product contains lithium-ion batteries. Local, state, or
federal laws may prohibit disposal of lithium-ion batteries in ordinary
trash. Consult your local waste authority for information regarding
available recycling and/or disposal options.
• Do not attempt to modify, change, or replace your battery.
• Do not use your Drive if the battery begins to emit odor, overheats, or
begins to leak.
• Do not touch any leaking materials or breathe fumes emitted.
• Do not allow children or animals to touch the battery.
• The battery contains dangerous substances. Do not open the battery or
insert anything into the battery.
• Do not attempt to charge the Drive if the battery has discharge or emits
any substances. In that case, immediately distance yourself from the
battery in case of ire or explosion.
SAFETY ALERTS
1616
WARNING
If a system error occurs or an improper operation is performed while
riding the Drive, the device will alert the user in a variety
of ways.
You will notice the running indicator light will turn red and you will hear a
beep sound, alerting you to take precaution and cease operation. The
hoverboard may stop suddenly.
The following are common occurrences that will produce safety alerts.
These notices should not be ignored, and appropriate action should be
taken to correct any improper operation, failure, or errors.
• Unsafe riding surfaces (uneven, too steep, unsafe, etc.)
• Battery voltage is too low.
• The Drive is still charging.
• During operation, the platform self initiates to tilt due to excess speed.
• The hoverboard is overheating, or the motor temperature is too high.
• The Drive has been rocking back and forth for over 30 seconds.
• If the system enters protection mode, the alarm indicator will light up
and the hoverboard will vibrate. This typically occurs when the battery is
about to run out of power.
If the platform is tilted forward or backward more than 10 degrees, the
Drive will power o and stop suddenly, possibly causing the rider to lose
balance or fall o.
• If any or both tires are blocked, the Drive will stop after 2
seconds.
• When the battery level has depleted below protection mode, the Drive
will power o and stop after 15 seconds.
• If a high discharge current is produced during use (such as driving up a
steep slope for a long period of time), the Drive will power o and stop
after 15 seconds.
• Ensure that the charging port is clean and dry.
• Make sure that there is no dust, debris, or dirt inside the port.
• Plug the charger into a grounded wall outlet. The charging indicator light
on the charger will be green.
• Connect the charging cable to the power supply (100V240V; 50Hz/60
Hz).
• Align and connect the 3-pin charging cable into the charging port of the
Drive. DO NOT FORCE THE CHARGER INTO THE CHARGING PORT, AS
THIS MAY CAUSE THE PRONGS TO BREAK OFF OR CAUSE PERMANENT
DAMAGE TO THE CHARGING PORT.
• Once attached to the hoverboard, the charging indicator light on the
charger should change to red, indicating that your device is now being
charged.
• When the red light on your charger turns to green, then your
hoverboard is fully charged. A full charge may take up to 6 hours. While
charging, you will see a red light.
• If you charge the hoverboard while it is powered on, you will see a yellow
lashing light on the hoverboard that indicates it is charging.
•After fully charging your Drive, unplug the charger from your Drive and
the power outlet.
BATTERY SPECIFICATIONS
Battery Type: Rechargeable lithium-ion battery
Charge Time: Up to 6 hours
Voltage: 36V
Initial Capacity: 2Ah
BATTERY MAINTENANCE
• The lithium-ion battery is built into the Drive. Do not disassemble
the Drive to remove the battery or attempt to separate it from
the Drive.
• Use only the charger and charging cable supplied by Hover-1. Use of any
other charger or cable may lead to damage to the hoverboard,
overheating, and risk of ire. Use of any other charger or cable voids the
manufacturer warranty.
• Do not connect or attach the Drive or the battery to a power supply plug
or directly to a car’s cigarette lighter.
• Do not place the Drive near a ire or leave it out in direct sunlight. Heating
the Drive can break or ignite the battery inside the device.
• Do not continue charging the battery if it does not recharge within the
speciied charging time. Doing so may cause the battery to become hot,
rupture, or ignite.
• To preserve natural resources, please recycle or dispose of batteries
properly. This product contains lithium-ion batteries. Local, state, or
federal laws may prohibit disposal of lithium-ion batteries in ordinary
trash. Consult your local waste authority for information regarding
available recycling and/or disposal options.
• Do not attempt to modify, change, or replace your battery.
• Do not use your Drive if the battery begins to emit odor, overheats, or
begins to leak.
• Do not touch any leaking materials or breathe fumes emitted.
• Do not allow children or animals to touch the battery.
• The battery contains dangerous substances. Do not open the battery or
insert anything into the battery.
• Do not attempt to charge the Drive if the battery has discharge or emits
any substances. In that case, immediately distance yourself from the
battery in case of ire or explosion.
CHARGING YOUR DRIVE
WARNING
When the Drive turns o during a safety
alert, all operation systems will halt. Do not
attempt to ride the Drive when the system
initiates a stop. Turn your Drive o and back
on to unlock it from a safety lock.
1717
If a system error occurs or an improper operation is performed while
riding the Drive, the device will alert the user in a variety
of ways.
You will notice the running indicator light will turn red and you will hear a
beep sound, alerting you to take precaution and cease operation. The
hoverboard may stop suddenly.
The following are common occurrences that will produce safety alerts.
These notices should not be ignored, and appropriate action should be
taken to correct any improper operation, failure, or errors.
• Unsafe riding surfaces (uneven, too steep, unsafe, etc.)
• Battery voltage is too low.
• The Drive is still charging.
• During operation, the platform self initiates to tilt due to excess speed.
• The hoverboard is overheating, or the motor temperature is too high.
• The Drive has been rocking back and forth for over 30 seconds.
• If the system enters protection mode, the alarm indicator will light up
and the hoverboard will vibrate. This typically occurs when the battery is
about to run out of power.
If the platform is tilted forward or backward more than 10 degrees, the
Drive will power o and stop suddenly, possibly causing the rider to lose
balance or fall o.
• If any or both tires are blocked, the Drive will stop after 2
seconds.
• When the battery level has depleted below protection mode, the Drive
will power o and stop after 15 seconds.
• If a high discharge current is produced during use (such as driving up a
steep slope for a long period of time), the Drive will power o and stop
after 15 seconds.
• Ensure that the charging port is clean and dry.
• Make sure that there is no dust, debris, or dirt inside the port.
• Plug the charger into a grounded wall outlet. The charging indicator light
on the charger will be green.
• Connect the charging cable to the power supply (100V240V; 50Hz/60
Hz).
• Align and connect the 3-pin charging cable into the charging port of the
Drive. DO NOT FORCE THE CHARGER INTO THE CHARGING PORT, AS
THIS MAY CAUSE THE PRONGS TO BREAK OFF OR CAUSE PERMANENT
DAMAGE TO THE CHARGING PORT.
• Once attached to the hoverboard, the charging indicator light on the
charger should change to red, indicating that your device is now being
charged.
• When the red light on your charger turns to green, then your
hoverboard is fully charged. A full charge may take up to 6 hours. While
charging, you will see a red light.
• If you charge the hoverboard while it is powered on, you will see a yellow
lashing light on the hoverboard that indicates it is charging.
•After fully charging your Drive, unplug the charger from your Drive and
the power outlet.
BATTERY SPECIFICATIONS
Battery Type: Rechargeable lithium-ion battery
Charge Time: Up to 6 hours
Voltage: 36V
Initial Capacity: 2Ah
BATTERY MAINTENANCE
• The lithium-ion battery is built into the Drive. Do not disassemble
the Drive to remove the battery or attempt to separate it from
the Drive.
• Use only the charger and charging cable supplied by Hover-1. Use of any
other charger or cable may lead to damage to the hoverboard,
overheating, and risk of ire. Use of any other charger or cable voids the
manufacturer warranty.
• Do not connect or attach the Drive or the battery to a power supply plug
or directly to a car’s cigarette lighter.
• Do not place the Drive near a ire or leave it out in direct sunlight. Heating
the Drive can break or ignite the battery inside the device.
• Do not continue charging the battery if it does not recharge within the
speciied charging time. Doing so may cause the battery to become hot,
rupture, or ignite.
• To preserve natural resources, please recycle or dispose of batteries
properly. This product contains lithium-ion batteries. Local, state, or
federal laws may prohibit disposal of lithium-ion batteries in ordinary
trash. Consult your local waste authority for information regarding
available recycling and/or disposal options.
• Do not attempt to modify, change, or replace your battery.
• Do not use your Drive if the battery begins to emit odor, overheats, or
begins to leak.
• Do not touch any leaking materials or breathe fumes emitted.
• Do not allow children or animals to touch the battery.
• The battery contains dangerous substances. Do not open the battery or
insert anything into the battery.
• Do not attempt to charge the Drive if the battery has discharge or emits
any substances. In that case, immediately distance yourself from the
battery in case of ire or explosion.
BATTERY CARE / MAINTENANCE
WARNING
Failure to follow the safety precautions
listed below could lead to serious bodily
injury or death.
1818
/