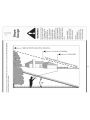
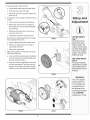
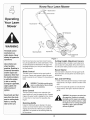
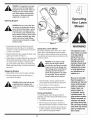
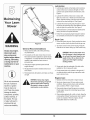
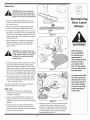
MTD 520 Series is suitable for mowing grass on various types of terrain, including lawns, fields, and slopes. It features a powerful engine and a durable cutting deck for efficient and precise cutting. The machine is equipped with safety features such as a blade control handle and a discharge cover to prevent injuries. Additionally, it has a self-propelled mechanism for easy maneuvering, adjustable cutting heights to suit different grass lengths, and a grass catcher for collecting clippings.
MTD 520 Series is suitable for mowing grass on various types of terrain, including lawns, fields, and slopes. It features a powerful engine and a durable cutting deck for efficient and precise cutting. The machine is equipped with safety features such as a blade control handle and a discharge cover to prevent injuries. Additionally, it has a self-propelled mechanism for easy maneuvering, adjustable cutting heights to suit different grass lengths, and a grass catcher for collecting clippings.


-
 1
1
-
 2
2
-
 3
3
-
 4
4
-
 5
5
-
 6
6
-
 7
7
-
 8
8
-
 9
9
-
 10
10
-
 11
11
-
 12
12
-
 13
13
-
 14
14
-
 15
15
-
 16
16


MTD 520 Series is suitable for mowing grass on various types of terrain, including lawns, fields, and slopes. It features a powerful engine and a durable cutting deck for efficient and precise cutting. The machine is equipped with safety features such as a blade control handle and a discharge cover to prevent injuries. Additionally, it has a self-propelled mechanism for easy maneuvering, adjustable cutting heights to suit different grass lengths, and a grass catcher for collecting clippings.
Ask a question and I''ll find the answer in the document
Finding information in a document is now easier with AI
Related papers
-
MTD 500 Series Owner's manual
-
Yard-Man 440 Series Owner's manual
-
MTD 11A-508N731 Owner's manual
-
-
-
-
Yard-Man 450 SERIES Owner's manual
-
-
MTD 520 Series User manual
-
Other documents
-
-
Yard-Man 560 Series Owner's manual
-
-
-
-
Yard-Man 12AV829C755 Owner's manual
-
Troy-Bilt 11A-426A711 Owner's manual
-
-
Troybilt 830 Owner's manual
-