5. Connecting the antenna adapter
Connect the provided antenna adapter to an antenna terminal on the wall, and then connect the antenna cable, which is
connected to ANT IN on the TV, to the antenna adapter.
The connected antenna adapter prevents overload that may occur due to potential difference between the antenna
terminal on the wall and the antenna cable, consequently being able to prevent product damage or fire.
• Be sure to use the provided antenna adapter.
• The method for connecting the antenna adapter and the markings on the antenna terminals may differ depending on
the model and geographical region.
• If you use the antenna adapter where antenna signals are weak, the screen may become blurry.
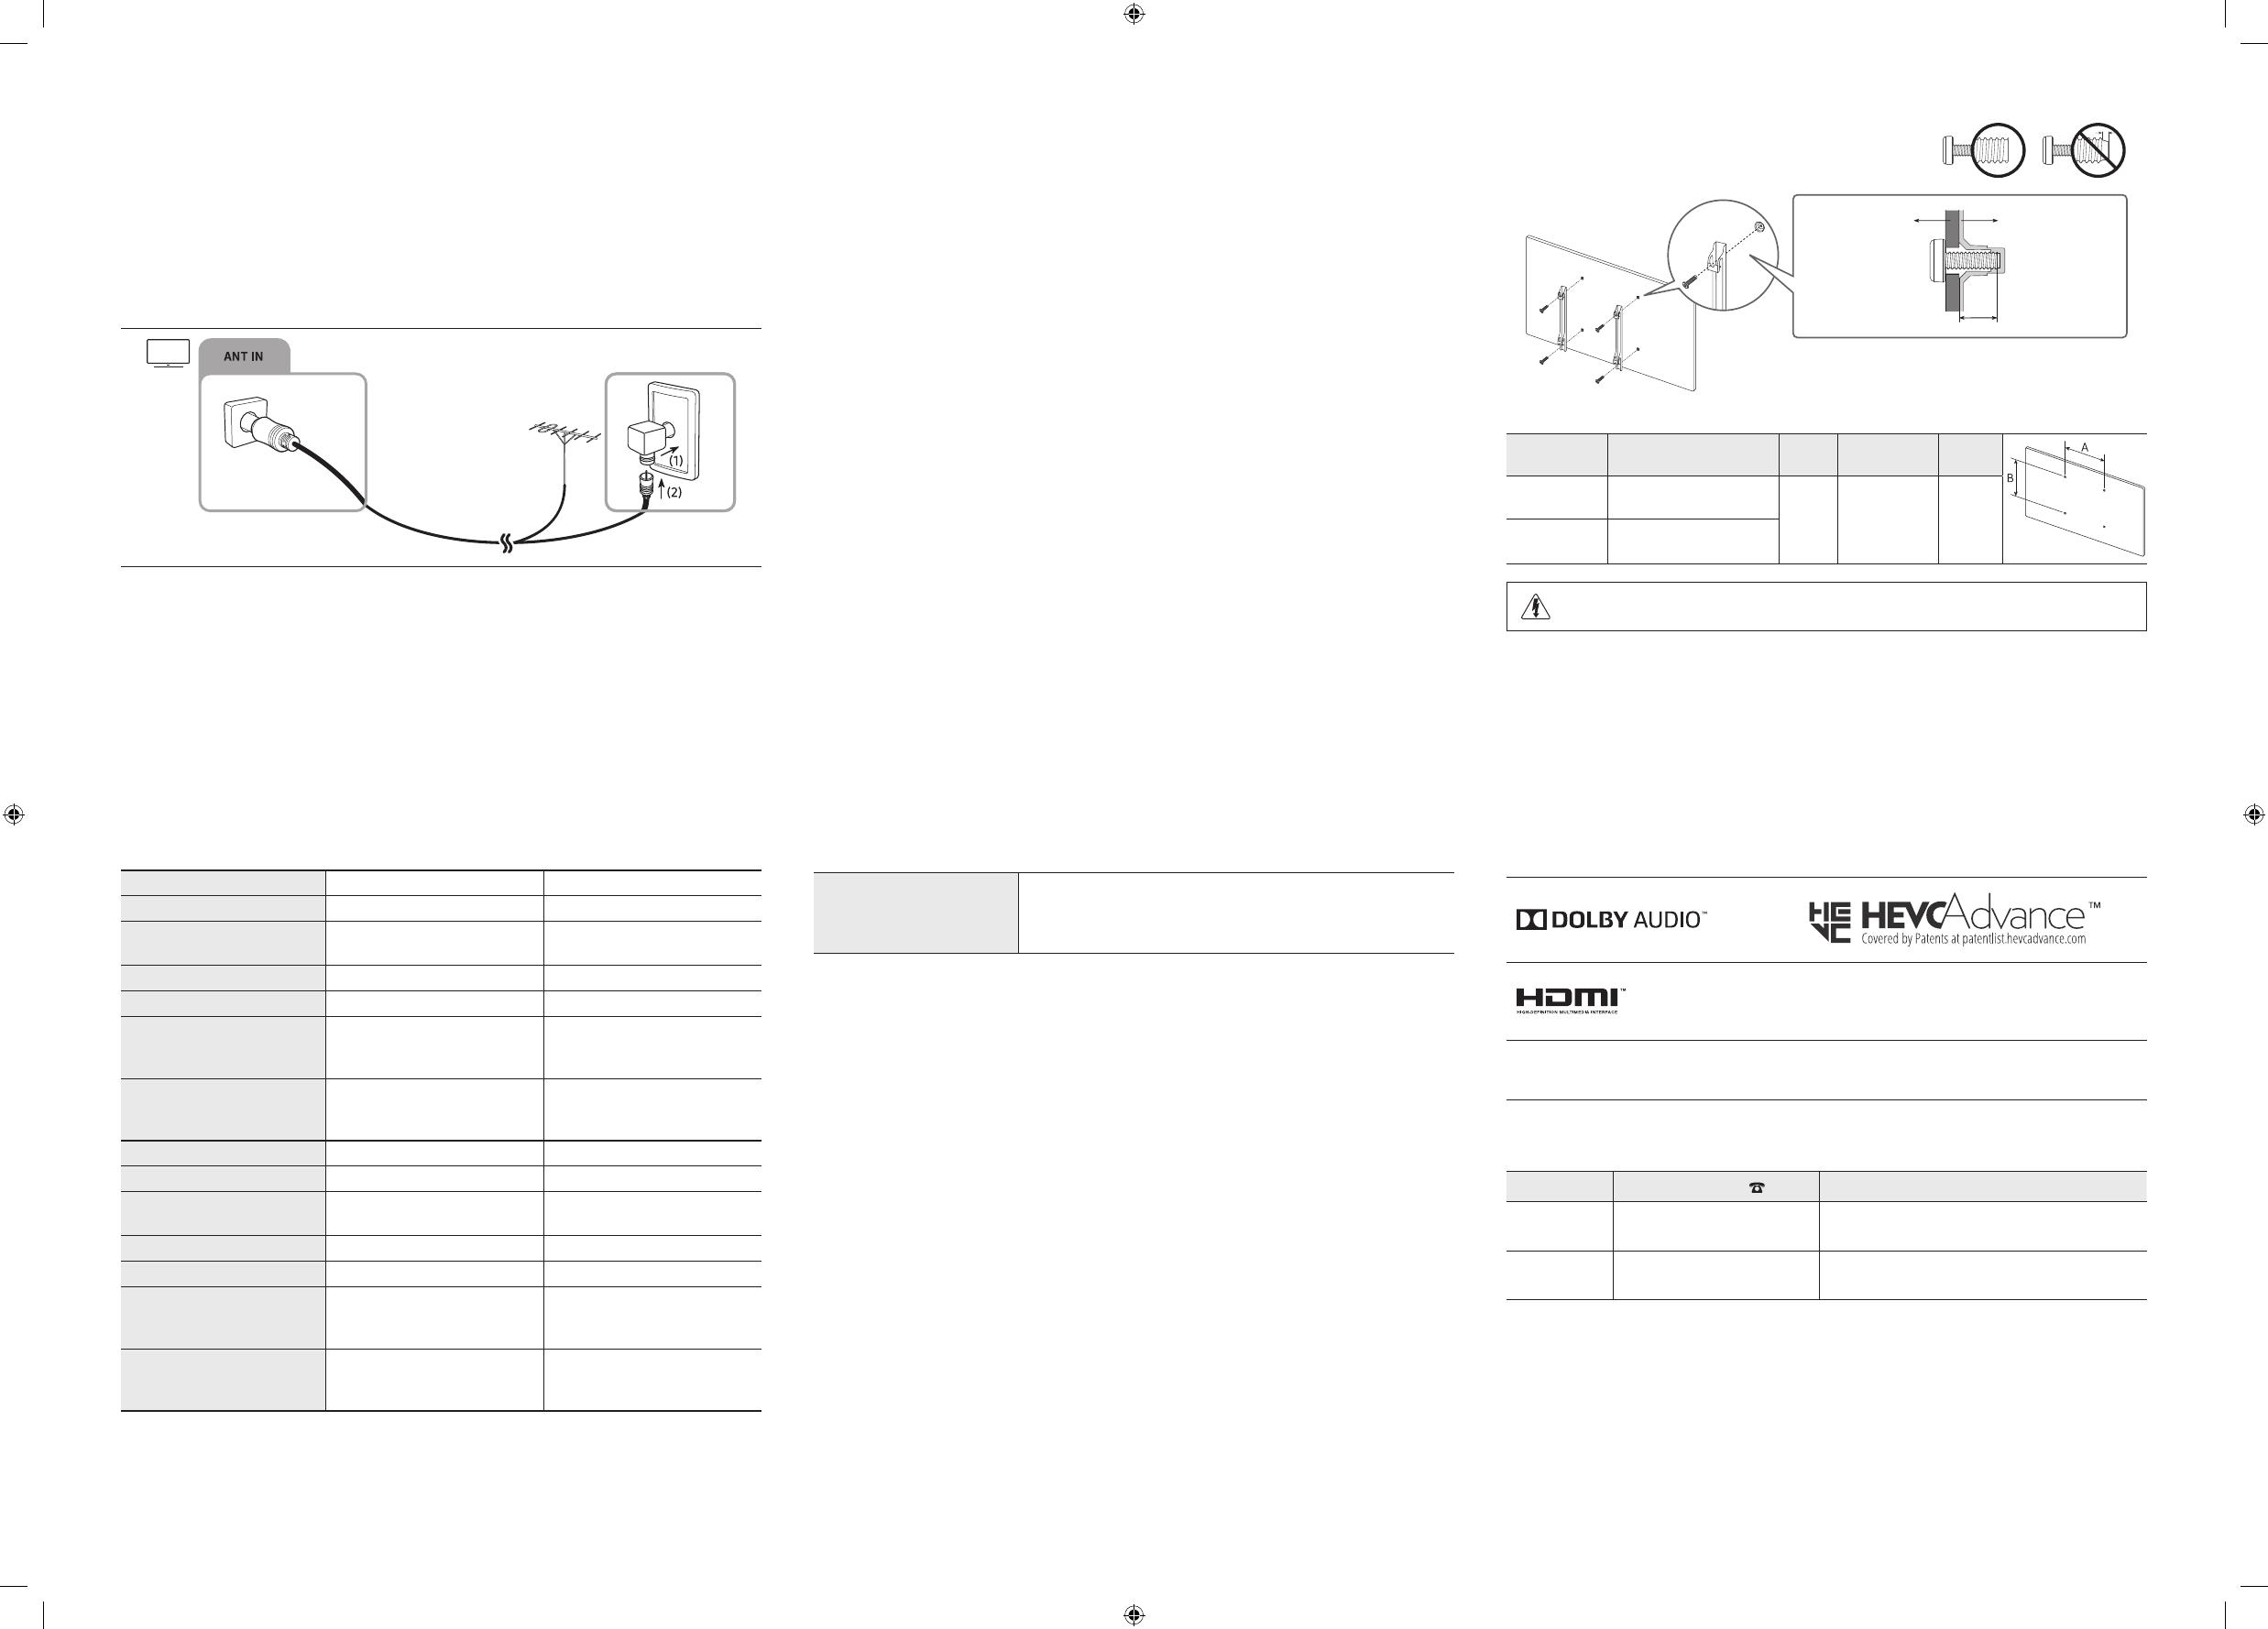
6. Wall Mount Kit Specifications (VESA)
• The Wall mount kit is not supplied but sold separately.
Install your wall mount on a solid wall, perpendicular to the floor. When attaching to other building materials, please
contact your nearest dealer. If installing on a ceiling or slanted wall, it may fall and result in severe personal injury.
• Standard dimensions for wall mount kits are shown in the table follow.
• When purchasing our wall mount kit, a detailed installation manual and all parts necessary for assembly are
provided.
• Do not use screws that do not comply with VESA standard screw specifications.
• Do not use screws longer than the standard dimensions, as they may cause damage to the inside of the TV set.
• For wall mounts that do not comply with the VESA standard screw specifications, the length of the screws may differ
depending on their specifications.
• Do not fasten the screws too tightly. This may damage the product or cause the product to fall, leading to personal
injury. Samsung is not liable for these kinds of accidents.
• Samsung is not liable for product damage or personal injury when a non-VESA or non-specified wall mount is used or
the consumer fails to follow the product installation instructions.
• Do not exceed a 15 degrees tilt when mounting this TV.
• When installing a wall mount kit, we recommend you fasten all four VESA screws.
• If you want to install a wall mount kit that attaches to the wall using two top screws only, be sure to use a Samsung
wall mount kit that supports this type of installation. (You may not be able to purchase this type of wall mount kit,
depending on the geographical region.)
Wall mount bracket TV
C
TV size in inches
VESA screw hole specs (A * B)
in millimetres
C (mm) Standard Screw Quantity
43-55 200 x 200
20-22 M8 4
65 400 x 300
Do not install your Wall Mount Kit while your TV is turned on. It may result in personal injury due to electric
shock.
7. Specifications
Model Name HG43AT690UJ HG50AT690UJ
Display Resolution 3840 x 2160 3840 x 2160
Screen Size
Measured Diagonally 43 inches 50 inches
Sound (Output) 20 W 20 W
Stand Swivel (Left / Right) 20° / 60° / 90° 20° / 60° / 90°
Dimensions (W x H x D)
Body
With Stand
963.9 x 558.9 x 59.6 mm
963.9 x 610.9 x 226.5 mm
1116.8 x 644.2 x 59.9 mm
1116.8 x 696.8 x 226.5 mm
Weight
Without Stand
With Stand
8.6 kg
11.8 kg
11.9 kg
15.1 kg
Model Name HG55AT690UJ HG65AT690UJ
Display Resolution 3840 x 2160 3840 x 2160
Screen Size
Measured Diagonally 55 inches 65 inches
Sound (Output) 20 W 20 W
Stand Swivel (Left / Right) 20° / 60° / 90° 0°
Dimensions (W x H x D)
Body
With Stand
1230.5 x 707.2 x 59.9 mm
1230.5 x 759.8 x 226.5 mm
1449.4 x 830.3 x 59.9 mm
1449.4 x 906.6 x 282.1 mm
Weight
Without Stand
With Stand
14.3 kg
17.5 kg
21.1 kg
21.4 kg
Environmental Considerations
Operating Temperature
Operating Humidity
Storage Temperature
Storage Humidity
10°C to 40°C (50°F to 104°F)
10% to 80%, non-condensing
-20°C to 45°C (-4°F to 113°F)
5% to 95%, non-condensing
Notes
• The design and specifications are subject to change without prior notice.
• For information about the power supply, and more information about power consumption, refer to the label-rating
attached to the product.
• You can see the label-rating attached to the back of the TV. (For some models, you can see the label-rating inside the
cover terminal.)
• The screen size on the energy label and package may have the tolerance within ±1 cm.
• Your TV and its accessories may look different than the product images presented in this manual, depending on the
model.
• All drawings are not necessarily to scale. Some dimensions are subject to change without prior notice. Refer to the
dimensions before installing your TV. Not responsible for typographical or printed errors.
8. Licences
The terms HDMI and HDMI High-Definition Multimedia Interface, and the
HDMI Logo are trademarks or registered trademarks of HDMI Licensing LLC
in the United States and other countries.
Open Source License Notice
Open Source used in this product can be found on the following webpage. (http://opensource.samsung.com)
Contact SAMSUNG WORLD WIDE
If you have any questions or comments relating to Samsung products, please contact the Samsung service centre.
Country/Area Samsung Service Centre Web Site
HONG KONG 3698 4698
www.samsung.com/hk/support (Chinese)
www.samsung.com/hk_en/support (English)
MACAU
0800 333
1800 7267864 | 1800-SAMSUNG
www.samsung.com/hk/support (Chinese)
www.samsung.com/hk_en/support (English)

