Page is loading ...

Width - 40cm
Depth - 53cm
Height - 100cm
Important – Please read these instructions fully before starting assembly
Customer Helpline: 08456 400800
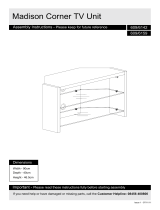
Assembly Instructions - Please keep for future reference
Dimensions
Issue 1 - 9/02/10
Winslow Bar stool
If you need help or have damaged or missing parts, call the
600/5580
600/5597
600/5607

Safety and Care Advice
Important – Please read these instructions fully before starting assembly
Care and maintenance
1
• Check you have all the
components and tools listed on
page 2.
• Remove all fittings from the
plastic bags and separate them
into their groups.
• Keep children and animals
away from the work area, small
parts could choke if swallowed.
• Make sure you have enough
space to layout the parts before
starting.
• Do not stand or put weight on
the product during assembly,
this could cause damage.
• Assemble the item as close
to its final position (in the same
room) as possible.
• Assemble on a soft level
surface to avoid damaging the
unit or your floor.
• Parts of the assembly will be
easier with 2 people.
• We do not
recommend the
use of power
drill/drivers for
inserting screws,
as this could damage the unit.
Only use hand screwdrivers.
• Dispose of all packaging
carefully and responsibly.
• Only clean using a damp cloth
and mild detergent, do no use
bleach or abrasive cleaners.
• From time to time check that
there are no loose screws on
this unit.
• This product should not be
discarded with household waste.
Take to your local authority
waste disposal centre.
• Maximum safe weight of
user : 100 kgs.

2
Components - Parts
Please check you have all the panels listed below
Components -
Fittings
If you have damaged or missing components,
call the
Customer Helpline: 08456 400800
Please check you have all the panels listed below
Note :The quantities below are the correct amount to complete the assembly. In some cases more
fittings may be supplied than are required.
Bolt x 8
B
Spring washer x 8
C
D
Washer x 8
E
Wood dowel x 2 Screw x 6
A
F
Chair back x 1
Leg x 2
1
3
2
Seat x 1
Side stretcher rail x 2
4
Front stretcher rail x 1
5
L R
L R
Allen key x 1

3
Assembly Instructions
Step 1
a:
Insert wood dowels
into each centre hole in
the back of the seat .
2
D
Do not fully tighten.
a:
b:
A
B
C
2
R
L
Insert bolts
with spring washers
and washers through
the holes at the back of
the seat into the
chair back . Tighten
bolts with allen key .
A
B
b:
1
C
2
F
Screw in screw into the
pre - drilled holes on the
side stretcher rail using
screwdriver.
E
4
2
4
4
1
2
D
x 2
E

4
Step 2
b:
a:
Fit the front stretcher
rail to the front legs.
Screw in screw into the
pre-drilled holes on the
front stretcher rail .
b:
Assembly Instructions
a:
E
X 2
X 4
5
2
2
5
E
5
Attach legs to front
corners of the seat frame.
Use bolts with spring
washers and washers
into each 2 holes in the
front corners. Tighten
bolts with allen key .
A
2
5
B
C
F
A
B
C
E
Screw in screw into the
pre-drilled holes on the
front stretcher rail
using screwdriver.
E

4
Step 3
Note : Stand the chair on
a level floor.
c:
d:
a:
Tighten all bolts.
Sit on the chair to
level the legs.
b:
c:
After sitting test,
re - tighten bolts again,
if adjustment needed.
d:
Highly recommend to
re - tighten all the bolts
again after using the chair
for 7 days.
Note : Please keep
Allen key to re - tighten
all bolts again when
required.
Assembly Instructions
If you need help or have damaged or missing parts, call the Customer Helpline: 0845 6400800
a:
b:
/