51
HEADLIGHTS
To turn on the following lights: Twist
the headlight/turn signal lever knob.
Position 1—Parking, tail, license plate,
side marker and instrument panel lights
Position 2—Headlights and all of the
above
The lights automatically turn off when the
driver’s door is opened with the ignition
key turned off. To turn them on again, turn
the key to the “ON” position or actuate the
headlight switch. If you are going to park
for over one week, make sure the head-
light switch is off.
NOTICE
To prevent the battery from being
discharged, do not leave the lights
on for a long period when the engine
is not running.
Daytime running light system (Canada
only)
The headlights turn on when the parking
brake is released with the engine started,
even with the light switch in the “OFF”
position. They will not go off until the igni-
tion switch is turned off.
To turn on the other exterior lights and in-
strument panel lights, twist the knob to the
position 1.
Under the daytime running light system,
the headlights turn on at reduced intensi-
ty. Twist the knob to the position 2 to turn
to full intensity for driving at night.
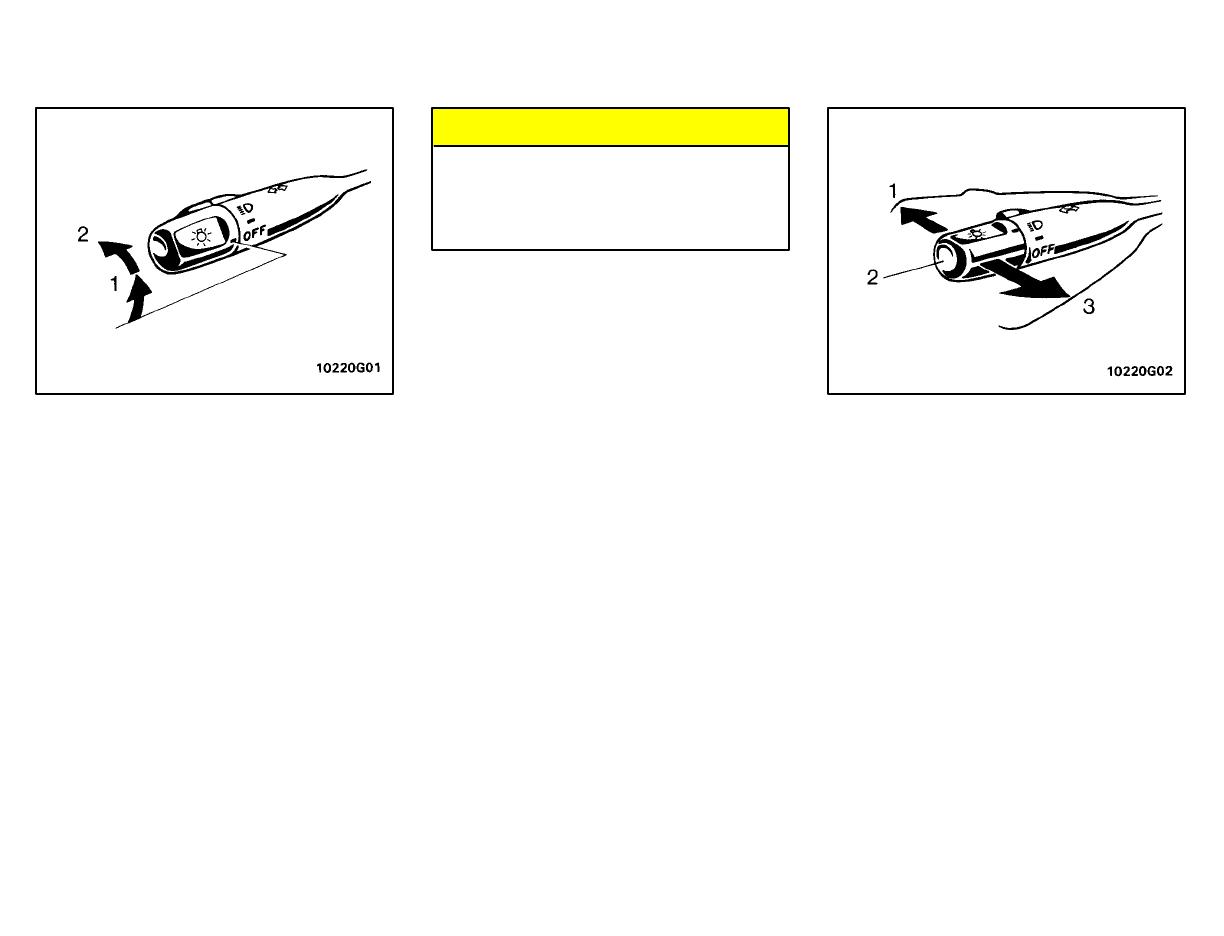
High-Low beams—For high beams,
turn the headlights on and push the lever
away from you (position 1). Pull the lever
toward you (position 2) for low beams.
The headlight high beam indicator light
(blue light) on the instrument panel will tell
you that the high beams are on.
Flashing the high beam headlights
(position 3)—Pull the lever all the way
back. The high beam headlights turn off
when you release the lever.
You can flash the high beam headlights
with knob turned to “OFF”.
Headlights and turn signals
(without automatic light
control system)


