Groen TDC/2-10 Operating instructions

Type
Operating instructions
P IMPORTANT INFORMATION P KEEP FOR OPERATOR P IMPORTANT INFORMATION P
Model TDC/3
Model TD/2Model TDO
OPERATOR MANUAL OM-TD
Part Number 121006 DOMESTIC
MODELS: TDC/3, TDC/2, TDO/1, TDO,
TDA, TDA/1, TD/2
Steam Jacketed Kettles
Stainless Steel
Direct steam heated
Table top mounted
Tilting
THIS MANUAL MUST BE RETAINED FOR FUTURE REFERENCE.
READ, UNDERSTAND AND FOLLOW THE INSTRUCTIONS AND
WARNINGS CONTAINED IN THIS MANUAL.
WARNING
DO NOT STORE OR USE GASOLINE OR OTHER FLAMMABLE VAPORS AND
LIQUIDS IN THE VICINITY OF THIS OR ANY OTHER APPLIANCE.
.
OM-TD
2
IMPORTANT — READ FIRST — IMPORTANT
CAUTION: BE SURE ALL OPERATORS READ, UNDERSTAND AND FOLLOW THE
OPERATING INSTRUCTIONS, CAUTIONS, AND SAFETY INSTRUCTIONS
CONTAINED IN THIS MANUAL.
WARNING: THIS UNIT IS INTENDED FOR USE IN THE COMMERCIAL HEATING,
COOKING AND HOLDING OF WATER AND FOOD PRODUCTS, PER THE
INSTRUCTIONS CONTAINED IN THIS MANUAL. ANY OTHER USE COULD
RESULT IN SERIOUS PERSONAL INJURY OR DAMAGE TO THE
EQUIPMENT AND WILL VOID WARRANTY.
WARNING: KETTLES MUST BE INSTALLED BY PERSONNEL QUALIFIED TO WORK
WITH PLUMBING. IMPROPER INSTALLATION CAN RESULT IN INJURY TO
PERSONNEL AND/OR DAMAGE TO EQUIPMENT.
WARNING: AVOID ANY EXPOSURE TO ESCAPING STEAM. STEAM CAN CAUSE
SEVERE BURNS.
WARNING: TAKE EXTREME CARE TO KEEP HOT CONTENTS FROM SPILLING OR
SPLASHING ON ANYONE. DO NOT STAND DIRECTLY IN FRONT OF
KETTLE BODIES WHEN THEY ARE BEING TILTED.
WARNING: AVOID ALL DIRECT CONTACT WITH HOT EQUIPMENT SURFACES. DIRECT
SKIN CONTACT COULD RESULT IN SEVERE BURNS.
WARNING: AVOID ALL DIRECT CONTACT WITH HOT FOOD OR WATER IN KETTLES.
DIRECT CONTACT COULD RESULT IN SEVERE BURNS.
CAUTION: DO NOT OVER FILL THE KETTLE WHEN COOKING, HOLDING OR
CLEANING. KEEP LIQUIDS A MINIMUM OF 2-3” (5-8 cm) BELOW THE
KETTLE BODY RIM TO ALLOW CLEARANCE FOR STIRRING, BOILING AND
SAFE PRODUCT TRANSFER.
WARNING: TAKE SPECIAL CARE TO AVOID CONTACT WITH HOT KETTLE BODY OR
HOT PRODUCT WHEN ADDING INGREDIENTS, STIRRING OR
TRANSFERRING PRODUCT TO ANOTHER CONTAINER.
WARNING: WHEN TILTING KETTLE FOR PRODUCT TRANSFER:
1) WEAR PROTECTIVE OVEN MITT AND PROTECTIVE APRON.
2) USE CONTAINER DEEP ENOUGH TO CONTAIN AND MINIMIZE
PRODUCT SPLASHING.
3) PLACE CONTAINER ON STABLE, FLAT SURFACE, AS CLOSE TO
KETTLE AS POSSIBLE.
4) STAND TO LEFT OR RIGHT SIDE OF KETTLE (DEPENDING ON TILTING
HANDLE PLACEMENT) WHILE POURING . DO NOT STAND DIRECTLY
IN POUR PATH OF HOT CONTENTS.
5) POUR SLOWLY, MAINTAIN CONTROL OF KETTLE BODY HANDLE AT
ALL TIMES, AND RETURN KETTLE BODY TO UPRIGHT POSITION
AFTER CONTAINER IS FILLED OR TRANSFER IS COMPLETE.
6) DO NOT OVER FILL CONTAINER. AVOID DIRECT SKIN CONTACT WITH
HOT CONTAINER AND ITS CONTENTS.
CAUTION: KEEP FLOORS IN FRONT OF KETTLE WORK AREA CLEAN AND DRY. IF
SPILLS OCCUR, CLEAN IMMEDIATELY, TO AVOID SLIPS OR FALLS.
WARNING: FAILURE TO CHECK SAFETY VALVE OPERATION PERIODICALLY COULD
RESULT IN PERSONAL INJURY AND/OR DAMAGE TO EQUIPMENT.
OM-TD
3
IMPORTANT — READ FIRST — IMPORTANT
WARNING: WHEN TESTING, AVOID ANY EXPOSURE TO THE STEAM BLOWING OUT
OF THE SAFETY VALVE. DIRECT CONTACT COULD RESULT IN SEVERE
BURNS.
WARNING: TO AVOID INJURY, READ AND FOLLOW ALL PRECAUTIONS STATED ON
THE LABEL OF THE WATER TREATMENT COMPOUND.
CAUTION: MOST CLEANERS ARE HARMFUL TO THE SKIN, EYES, MUCOUS
MEMBRANES AND CLOTHING. PRECAUTIONS SHOULD BE TAKEN. WEAR
RUBBER GLOVES, GOGGLES OR FACE SHIELD AND PROTECTIVE
CLOTHING. CAREFULLY READ THE WARNINGS AND FOLLOW THE
DIRECTIONS ON THE LABEL OF THE CLEANER TO BE USED.
CAUTION: USE OF ANY REPLACEMENT PARTS OTHER THAN THOSE SUPPLIED BY
GROEN OR THEIR AUTHORIZED DISTRIBUTORS CAN CAUSE OPERATOR
INJURY AND DAMAGE TO THE EQUIPMENT, AND WILL VOID ALL
WARRANTIES.
IMPORTANT: SERVICE PERFORMED BY OTHER THAN FACTORY AUTHORIZED
PERSONNEL WILL VOID WARRANTIES.
OM-TD
4
Table of Contents
IMPORTANT OPERATOR WARNINGS ..........................................2
REFERENCES .............................................................4
EQUIPMENT DESCRIPTION ..................................................5
INSTALLATION ............................................................7
INITIAL START-UP ..........................................................8
OPERATION ...............................................................8
CLEANING ...............................................................11
MAINTENANCE ...........................................................13
SEQUENCE OF OPERATION ................................................13
TROUBLESHOOTING ......................................................14
PARTS LISTS .............................................................15
MAINTENANCE LOG .......................................................22
WARRANTY ..............................................................23
References
KLENZADE SALES CENTER
ECOLAB. Inc.
370 Wabasha
St. Paul, Minnesota 55102
800/352-5326 or 612/293-2233
NATIONAL SANITATION FOUNDATION
3475 Plymouth Rd.
Ann Arbor, Michigan 48106
ZEP MANUFACTURING CO.
1310-T Seaboard Industrial Blvd.
Atlanta, Georgia 30318
OM-TD
5
Model TDC/3
Model TDO
Model TDO/1
Model TDC/2
Equipment Description
A. All Models
The Groen TDC/3, TDC/2, TDO/1, TDO, TDA/1
and TD/2 are tilting, table-top kettles with direct
steam-heated jackets. The one-piece stainless
steel body on each includes a butterfly shaped
pouring lip. The kettles have a 180 emery grit
interior finish and a bright semi-deluxe exterior
finish.
Every unit requires a remote steam source. The
steam supply is controlled by an inlet valve, and
enters the jacket through one support and rotary
joint. Condensate leaves the jacket through the
other rotary joint and support. Standard units are
ASME shop inspected, stamped, and registered
with the National Board. These kettles operate
efficiently at pressures above five PSI. A safety
valve, strainer, steam trap, and check valve are all
required for installation, and may be ordered from
Groen as optional equipment.
B. Model TDC/3
The TDC/3 kettle has a 2/3 jacket rated for
working pressures up to 55 PSI. The kettle body
incorporates a triple reinforced rim. Two tubular
steel supports support the swivel on which the
kettle tilts. A leg projects from the bottom of the
kettle.
The design of the TDC/3 makes it easy for one
person to tilt the kettle with the tilting handle, even
when the kettle is full.
C. Model TDC/2
The TDC/2 resembles the TDC/3, except that the
kettle rests on a chrome plated base with arms,
and has a maximum operating pressure of 45
PSI.
D. Models TDO and TDO/1
The TDO and TDO/1 Oyster Cookers have a
special purpose kettle body and supports similar
to those of the TDC/2 and TDC/3, with a tilting
handle.
OM-TD
6
TDA/1
TD/2
E. Model TDA/1
The TDA/1 kettle incorporates a triple reinforced
rim and a 2/3 jacket registered for working
pressures up to 50 PSI. Two chrome-plated
arms support the trunnions on which the kettle
tilts. The arm that also serves as the steam inlet
has an integral steam control valve.
F. Model TD/2
The TD/2 kettle has a 2/3 jacket rated to operate
at pressures up to 50 PSI. Two stainless steel
legs support the trunnion. A crank-operated
gear mechanism is used to tilt the kettle and to
hold it in position.
KETTLE CHARACTERISTICS
Model
Capacity Dimensions, inches (mm)
Quarts (liters) Front to back Left to right Rim height
TDC/3-10
10 (9.4) 13-1/4 (337) 12-7/8 (327) 16-1/8 (410)
TDC/3-20
20 (18.9) 15-1/4 (387) 14-7/8 (378) 17-1/8 (435)
TDC/2-10
10 (9.4) 12-3/8 (314) 12-7/8 (327) 16-1/8 (410)
TDC/2-20
20 (18.9) 14-3/8 (365) 14-7/8 (378) 17-1/8 (435)
TDO
1 (0.94) 9-1/4 (235) 9-1/2 (241) 11-5/8 (295)
TDO/1-32
1 (0.94) 10 (254) 13-1/2 (343) 11-5/8 (295)
TDO/1-64
2 (1.9) 10-11/16 (271) 13-1/2 (343) 12-3/8 (314)
TDO/1-72
2-1/4 (2.2) 10-13/16 (275) 13-1/2 (343) 12-7/8 (327)
TDA-10
10 (9.4) 12 (305) 19-7/8 (505) 19-1/4 (489)
TDA-20
20 (18.9) 14-1/2 (368) 21-7/8 (556) 20-3/8 (518)
TDA/1-40
40 (37.8) 19-3/4 (502) 26-3/4 (679) 22-3/8 (568)
TD/2-40
40 (37.8) 20-1/2 (521) 28-1/4 (717) 21-7/8 (556)
Optional Features and Equipment
TDC/3 TDC/2
TDO,
TDO/1
TDA,
TDA/1 TD/2
Higher Maximum Pressure
4 4 4 4
Lift-off cover
4 4 4 4
T5C table mounting
4 4 4 4 4
Basket inserts
4 4 4 4
Kettle brush kit
4 4 4 4
Steam trap assembly
4 4 4 4 4
Motor-driven agitator
4 4 4 4
OM-TD
7
The inlet valve may be located anywhere on the cabinet top or face but not through the
face casting. The illustrated sleeve is designed to simplify valve installation by
allowing the valve to shift off center by 1/4", if necessary. This should be enough to
allow for thread take-up and misalignment.
*Accessories available from Groen as options. Piping is to be supplied by the
installer.
Installation
WARNING
THIS UNIT MUST BE INSTALLED BY PERSONNEL QUALIFIED TO WORK WITH
PLUMBING. IMPROPER INSTALLATION CAN CAUSE INJURY TO PERSONNEL
AND/OR DAMAGE TO EQUIPMENT.
1. Installation under a ventilation hood is
recommended. Consult local codes.
2. Install and anchor the kettle on a level
rigid surface.
3. If the steam supply pressure is greater
than the maximum working pressure
stamped on the nameplate, you must
install a pressure reducing valve in the
steam supply line near the kettle.
4. Connect the steam supply line to the
steam inlet fitting. Include a steam
control valve and an appropriate safety
valve. To obtain the full heating
capability of the kettle, the steam
supply line must be as large as the
steam inlet fitting.
5. The safety valve is preset to relieve
jacket pressure that exceeds its rated
limit. Do not try to adjust the valve
setting, and do not allow the valve
outlet or lever to be blocked.
6. Connect the kettle condensate return
line to the boiler return line, or to a
drain. A suitable steam trap, strainer,
and check valve must be installed.
(See piping diagram, below).
7. Any mechanical change must be
approved by the Groen Food Service
Engineering Department.
STANDARD PIPING FOR TDC/3, TDC/2, TDO/1, TDO and TD/2
OM-TD
8
Initial Start-Up
IMPORTANT
BE SURE ALL OPERATORS READ, UNDERSTAND AND FOLLOW THE OPERATING INSTRUCTIONS,
CAUTIONS, AND SAFETY INSTRUCTIONS CONTAINED IN THIS MANUAL.
Now that the kettle has been installed, you
should test it to ensure that it is operating
correctly.
1. Remove all literature and
packing materials from inside
and outside of the unit.
2. Pour a small amount of water
into the kettle.
3. Open the steam inlet valve.
4. When the water begins to boil,
inspect all of the fittings to
ensure that there are no leaks.
5. Check the safety valve by lifting
its lever far enough to let steam
escape. Then let it snap back
into place to reseat the valve so
that it will not leak.
6. Shut down the unit by closing
the steam inlet valve.
WARNING
AVOID ANY EXPOSURE TO ESCAPING
STEAM, WHICH CAN CAUSE SEVERE
BURNS.
7. Operate the tilting mechanism to
confirm that this feature
functions through the whole
range of normal operation.
If the unit functions as described above, it is
ready for use. If the unit does not function as
intended, contact your local Groen Certified
Service Agency.
Operation
To heat the kettle, open the steam inlet valve.
Adjusting the valve allows you to control the
heating rate. Opening the valve more allows
steam to flow into the jacket faster, and heats
the product faster.
The kettle operates efficiently at pressures from
five PSI to the maximum working pressure for
which the kettle was designed. The maximum
pressure is stamped on the kettle nameplate.
WARNING
AVOID EXPOSURE TO ESCAPING STEAM,
WHICH CAN CAUSE SEVERE BURNS.
Tilting
To transfer product or empty the kettle: the kettle
is designed and manufactured to be tilted in a
controlled manner. Grasp the insulated plastic
ball firmly. Maintain a firm grip on handle when
tilting, while keeping the kettle body in a tilted
position and then SLOWLY returning the kettle
body to an upright position.
A. TDC/3, TDC/2, TDO. TDO/1 and
TDA/1:
Pull the handle forward to tilt the kettle,
backward to return the kettle to upright
position.
B. TDA
The tilting handle on this older model is
spring-loaded to latch the kettle in
position. To tilt the kettle, pull up on
the tilting handle to release the latch,
OM-TD
9
then move the handle forward or
backward as needed.
C. TD/2
Tilt the kettle by turning the handwheel.
The kettle will hold its position when
you stop turning the wheel. If the tilting
mechanism seems to lock, do not use
excessive force to free the kettle. Call
for assistance from your authorized
Groen service agency.
WARNING
AVOID ALL DIRECT CONTACT WITH HOT
FOOD OR WATER IN THE KETTLE. DIRECT
CONTACT COULD RESULT IN SEVERE
BURNS.
TAKE SPECIAL CARE TO AVOID CONTACT
WITH HOT KETTLE BODY OR HOT PRODUCT,
WHEN ADDING INGREDIENTS, STIRRING OR
TRANSFERRING PRODUCT TO ANOTHER
CONTAINER.
CAUTION
DO NOT OVERFILL THE KETTLE WHEN
COOKING, HOLDING OR CLEANING. KEEP
LIQUIDS AT LEAST 2-3” (5-8 cm) BELOW THE
KETTLE BODY RIM TO ALLOW CLEARANCE
FOR STIRRING, BOILING PRODUCT AND
SAFE TRANSFER.
WARNING
WHEN TILTING KETTLE FOR PRODUCT
TRANSFER:
1) WEAR PROTECTIVE OVEN MITT AND
PROTECTIVE APRON.
2) USE CONTAINER DEEP ENOUGH TO
CONTAIN AND MINIMIZE PRODUCT
SPLASHING.
3) PLACE CONTAINER ON STABLE, FLAT
SURFACE, AS CLOSE TO KETTLE AS
POSSIBLE.
4) STAND TO LEFT OR RIGHT SIDE OF
KETTLE (DEPENDING ON TILTING
HANDLE PLACEMENT) WHILE POURING
NOT DIRECTLY IN POUR PATH OF HOT
CONTENTS.
5) POUR SLOWLY, MAINTAIN CONTROL OF
KETTLE BODY HANDLE AT ALL TIMES,
AND RETURN KETTLE BODY TO
UPRIGHT POSITION AFTER CONTAINER
IS FILLED OR TRANSFER IS COMPLETE.
6) DO NOT OVERFILL CONTAINER. AVOID
DIRECT SKIN CONTACT WITH HOT
CONTAINER AND ITS CONTENTS.
CAUTION
KEEP FLOORS IN FRONT OF THE KETTLE
WORK AREA CLEAN AND DRY. IF SPILLS
OCCUR, CLEAN AT ONCE TO AVOID SLIPS
OR FALLS.
Accessories
1. Cover
As with stock pot cooking, an optional lift-off
cover can speed up the heating of water and
food products. A cover helps retain heat in
the cooking vessel and reduces the amount
of heat and humidity released into the
kitchen. Use of a cover can reduce some
product cook times and help maintain the
temperature, color and texture of products
being held or simmered for extended
periods.
Make sure plastic ball handle is secure on
the lift off cover before using. ALWAYS use
the plastic handle to place or remove the
cover from the kettle. Wear protective oven
mitts and a protective apron.
When putting the cover on the kettle, position
it on top of kettle rim, with its flat edge facing
the pouring lip.
OM-TD
10
Avoid contact with steam and hot
condensate when removing a cover.
WARNING
AVOID ALL DIRECT CONTACT WITH HOT
SURFACES. DIRECT SKIN CONTACT
COULD RESULT IN SEVERE BURNS.
AVOID ALL DIRECT CONTACT WITH HOT
FOOD OR WATER IN THE KETTLE.
DIRECT CONTACT COULD RESULT IN
SEVERE BURNS.
When removing cover:
a) Firmly grasp the plastic handle
b) Lift rear edge (farthest from operator) 1-
2” (3-5 cm) to allow any steam and
water vapor to escape the cooking
vessel. Wait 2-3 seconds.
c) Tilt cover to 45-60° angle and allow any
hot condensate or product to roll off
cover back into kettle.
d) Remove the cover, ensuring that any
remaining hot condensate or product
does not drip on operator, floor or work
surfaces.
e) Place cover on safe, flat, sanitary, out-
of-the-way surface, or return to kettle
rim.
CAUTION
DO NOT TILT KETTLE BODY WITH COVER
IN PLACE. COVER MAY SLIDE OFF,
CAUSING INJURY TO OPERATOR.
2. Basket Insert
An optional kettle basket insert (10 Quart
and larger) can assist in cooking water
boiled products, including eggs, potatoes,
vegetables, shell fish, pasta and rice. The
nylon mesh liner must be used when
cooking product smaller than the mesh size
of the basket, which is approximately 1/4” (6
mm). This includes rice and small pasta
shapes.
Allow for the water displacement of basket
and product to be cooked. This may mean
only filling the kettle half full of water. Test
the basket and product displacement with
the kettle OFF, and with cold water in the
kettle.
CAUTION
DO NOT OVERFILL THE KETTLE WHEN
COOKING, HOLDING OR CLEANING. KEEP
LIQUIDS A MINIMUM OF 2-3” (5-8 cm)
BELOW THE KETTLE RIM TO ALLOW
CLEARANCE FOR STIRRING, BOILING AND
SAFE PRODUCT TRANSFER.
c) Load basket on a level, stable work
surface.
c) Lift the loaded basket with both hands.
Get help from another person if the
basket is too heavy for safe handling.
d) Slowly lower product into kettle.
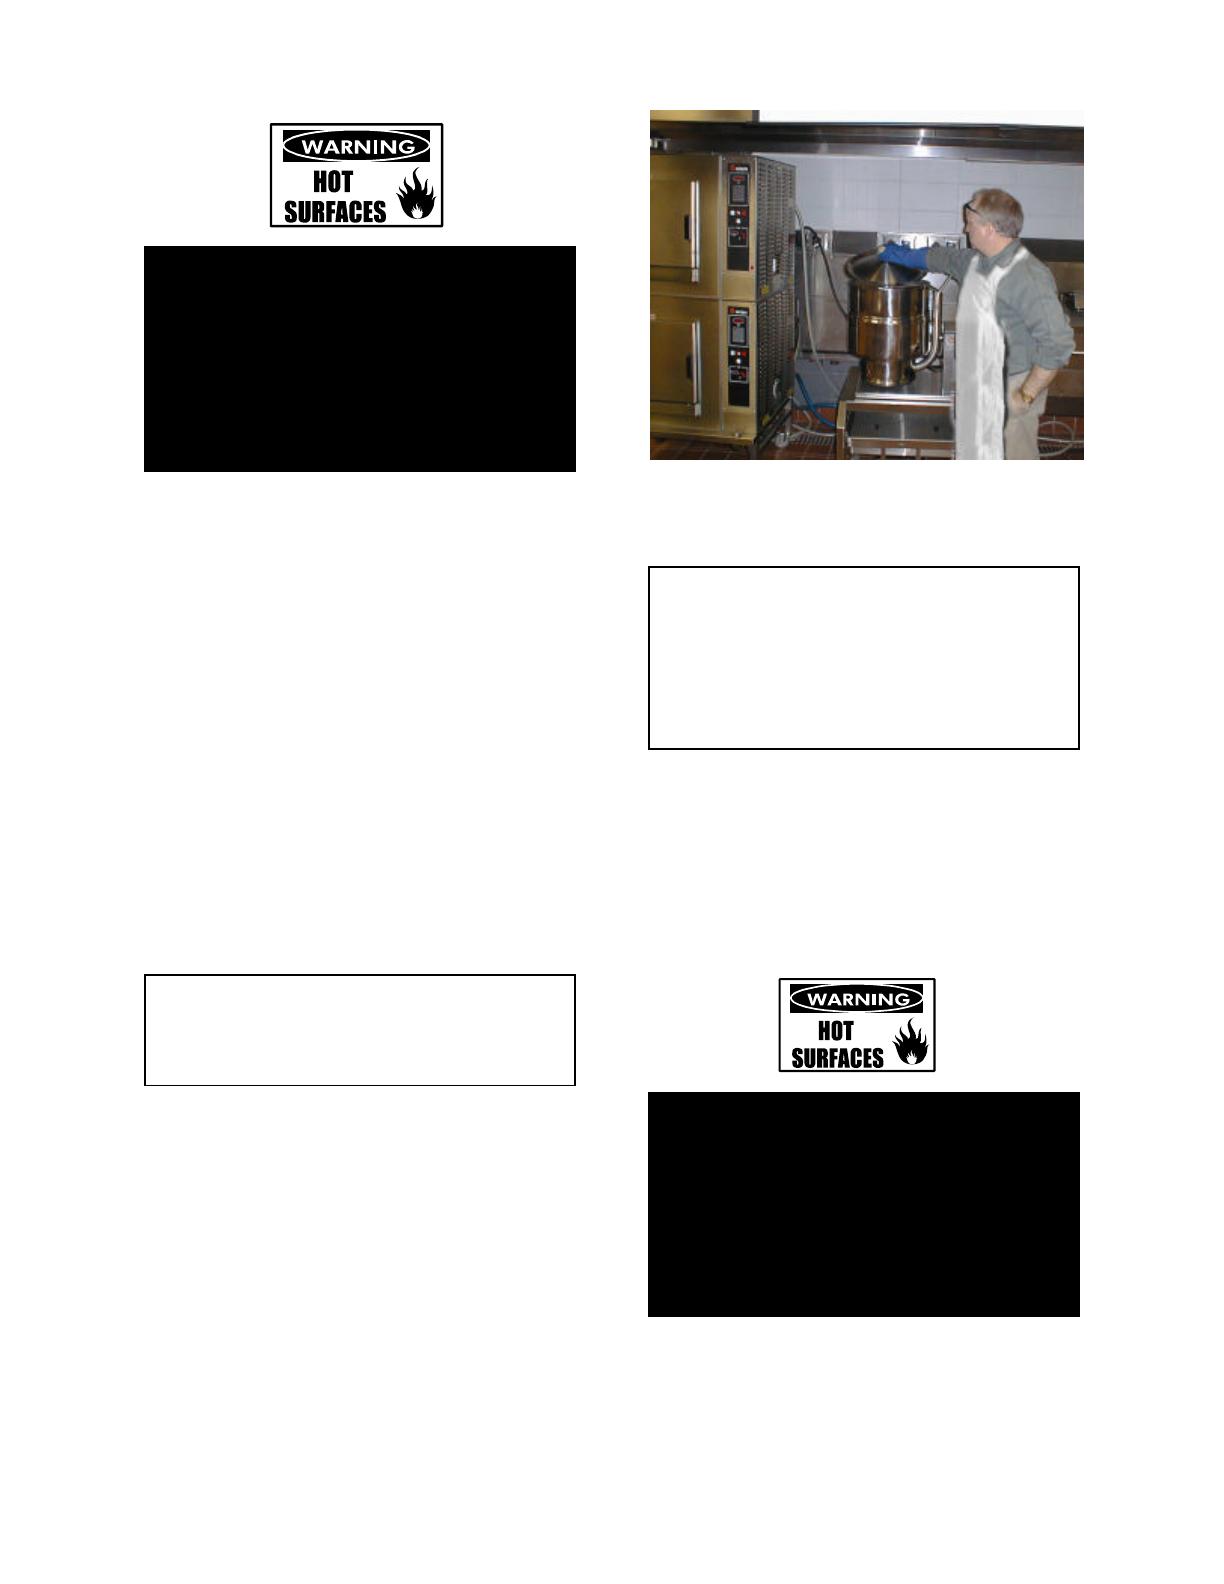
WARNING
AVOID ALL DIRECT CONTACT WITH HOT
SURFACES. DIRECT SKIN CONTACT
COULD RESULT IN SEVERE BURNS.
AVOID ALL DIRECT CONTACT WITH HOT
FOOD OR WATER IN THE KETTLE.
DIRECT CONTACT COULD RESULT IN
SEVERE BURNS.
d) When removing basket with cooked product,
lift the basket straight up, ensuring that the
bottom of the basket clears the rim and
pouring lip of the kettle. Wear protective
oven mitts and a protective apron.
OM-TD
11
Don’t scrape with tools, steel wool or other
abrasives.
Use brushes, sponges or cloth to clean your
kettles
e) Allow hot water to fully drain from
product before moving the basket away
from the kettle. Do not rest the kettle
basket on the kettle rim or pouring lip. If
the basket is too heavy for one
individual to lift and safely move, get
help from another person. Remove
product immediately from the basket into
another container, being sure to avoid
contact with hot product and hot basket
or. . .
f) Place basket with food on stable, flat
surface, setting it inside a solid steamer
or bake pan, to catch any remaining hot
water which might drain from product.
Cleaning
1. Suggested Tools:
a. Cleaner, such as Klenzade HC-10 or
HC-32 from ECOLAB, Inc.
b. Kettle brushes in good condition.
c. Sanitizer such as Klenzade XY-12.
d. Film remover such as Klenzade LC-30.
CAUTION
MOST CLEANERS ARE HARMFUL TO THE
SKIN, EYES, MUCOUS MEMBRANES, AND
CLOTHING. PRECAUTIONS SHOULD BE
TAKEN. WEAR RUBBER GLOVES,
GOGGLES OR FACE SHIELD, AND
PROTECTIVE CLOTHING. READ THE
WARNINGS AND FOLLOW THE
DIRECTIONS ON THE LABEL OF THE
CLEANER CAREFULLY.
2. Procedure
a. Clean food-contact surfaces as soon as
possible after use. If the unit is in
continuous use, thoroughly clean and
sanitize the interior and exterior at least
once every 12 hours.
WARNING
AVOID ANY DIRECT CONTACT WITH HOT
SURFACES. DIRECT SKIN CONTACT
COULD RESULT IN SEVERE BURNS.
b. Scrape and flush out food residues. Be
careful not to scratch the kettle with
metal implements.
c. Prepare a hot solution of the detergent/
cleaning compound as instructed by the
supplier.
d. Clean the unit thoroughly, inside and
outside.
e. Rinse the kettle thoroughly with hot
water, then drain completely.
OM-TD
12
f. As part of the daily cleaning program,
clean soiled external and internal
surfaces.
g. To remove stuck materials, use a brush,
sponge, cloth, plastic or rubber scraper,
or plastic wool with the cleaning solution.
To reduce effort required in washing, let
the detergent solution sit in the kettle
and soak into the residue. Do not use
abrasive materials or metal tools that
might scratch the surface. Scratches
make the surface harder to clean and
provide places for bacteria to grow.
h. Do not use steel wool, which may leave
particles in the surface and cause
eventual corrosion and pitting.
i. The outside of the unit may be polished
with a stainless steel cleaner such as
“Zepper” from Zep Manufacturing Co.
j. When equipment needs to be sanitized,
use a solution equivalent to one that
supplies 200 parts per million available
chlorine. Obtain advice on sanitizing
agents from your supplier of sanitizing
products.
k. Following the supplier’s instructions,
apply the agent after the unit has been
cleaned and drained. Drain and
thoroughly rinse off the sanitizer.
CAUTION
NEVER LEAVE A CHLORINE SANITIZER IN
CONTACT WITH STAINLESS STEEL
SURFACES LONGER THAN 30 MINUTES.
LONGER CONTACT CAN CAUSE STAINING
AND CORROSION.
l. It is recommended that each piece of
equipment be sanitized just before use.
m. If there is difficulty removing mineral
deposits or a film left by hard water or
food residues, clean the kettle
thoroughly and use a deliming agent,
such as Groen Delimer/Descaler (Part
Number 114800) or Lime-Away® from
Ecolab, in accordance with the
manufacturer’s directions. Rinse and
drain the unit thoroughly before further
use.
n. If cleaning problems persist, contact
your cleaning product representative for
assistance. The supplier has a trained
technical staff with laboratory facilities to
serve you.
OM-TD
13
Maintenance
NOTICE: Contact Groen or an authorized Groen representative when repairs are required.
Periodic Maintenance
A Maintenance and Service Log is provided at
the back of this manual. Each time maintenance
is performed on your Groen kettle, enter the date
on which the work was done, what was done,
and who did it. File the log with the warranty.
Periodic inspection will minimize equipment
down time and increase the efficiency of
operation. The following points should be
checked:.
1. Once a day, with pressure in the jacket,
check the operation of the safety valve. Lift
the lever of the safety valve until steam is
released.
WARNING
WHEN TESTING, AVOID ANY EXPOSURE TO
THE STEAM BLOWING OUT OF THE
SAFETY VALVE. DIRECT CONTACT COULD
RESULT IN SEVERE BURNS.
Then release the lever and let the valve
snap shut. If the lever does not activate, or
there is no evidence of discharge, or
the valve leaks, immediately discontinue
use of the kettle and contact a qualified
Groen service representative.
2. At least once every 90 days, inspect fittings
and valves for signs of damage or wear.
Regularly examine trunnion packings and
valve seats for wear, and replace them when
necessary.
CAUTION
USE OF ANY REPLACEMENT PARTS
OTHER THAN THOSE SUPPLIED BY GROEN
OR AN AUTHORIZED SUPPLIER WILL VOID
ALL WARRANTIES AND COULD INJURE
THE OPERATOR OR DAMAGE THE
EQUIPMENT.
NOTE: Service performed by other than factory-
authorized personnel will void all warranties.
3. Lubricate trunnions and gears with a good
grade of high temperature grease. Grease
trunnions at least once every 60 days, and
grease gears when inspection shows that
they are dry.
4. For TD/2 kettles, grease the tilting actuator
every 90 days. While the kettle is fully tilted,
add Calcium Complex No. 2 Grease at the
grease fittings.
NOTE: Use only Calcium Complex Nr. 2
Grease, which is available from Groen
(Part No. 93703).
Sequence of Operation
The following “action-reaction” outline is provided to
help the user understand the function of the
equipment.
When the steam inlet valve is opened, steam flows
into the jacket at a pressure determined by the boiler
system or by the pressure reducing valve that serves
the kettle.
In the jacket, steam transfers heat to the kettle as
it condenses into water. The steam trap allows
condensate (water) to leave the jacket, while it
holds steam in. When the steam is shut off,
condensation produces a vacuum in the jacket, but
the check valve in the condensate return line
keeps water from flowing back into the jacket.
OM-TD
14
Troubleshooting
Your Groen kettle will operate smoothly and efficiently if properly maintained. However, the following is a
list of checks to make in the event of a problem. If the actions suggested do not solve the problem, call
your qualified Groen Service Representative. For the phone number of the nearest agency, call your area
Groen representative or the Groen Parts and Service Department. If an item on the list is followed by X,
the work should be done by a qualified service representative.
WARNING
USE OF ANY REPLACEMENT PARTS OTHER THAN THOSE SUPPLIED BY GROEN OR THEIR
AUTHORIZED DISTRIBUTORS CAN CAUSE INJURY TO THE OPERATOR AND DAMAGE TO
THE EQUIPMENT AND WILL VOID ALL WARRANTIES.
SYMPTOM WHO WHAT TO CHECK
X indicates items which must be performed by an authorized technician.
Kettle will not heat. User a. That the steam inlet valve is open.
b. That the steam supply line is turned on.
c. That the condensate return valve is open.
d. That the boiler is operating properly. Steam should be
supplied at a pressure greater than five PSI.
Auth Service
Rep Only
e. Steam supply line for blockage. X
f. Condensate return line for blockage. X
g. Steam trap operation. X
Safety valve leaks a
small amount of steam.
User a. For contamination that prevents seating the valve. With
pressure in the jacket, lift the valve lever briefly all the way
up, to blow the valve clean then let it snap back down to
seat the valve.
Auth Service
Rep Only
b. Safety valve for defects. Defective valve MUST be
replaced with an identical valve. X
Safety valve leaks a
large amount of steam.
Auth Service
Rep Only
a. Steam supply pressure. X
b. Safety valve for defects. Defective valve MUST be
replaced with an identical valve. X
Pipe fitting leaks User a. Is the fitting tight?
Auth Service
Rep Only
b. If the leak is at a trunnion, and tightening the packing gland
does not stop the leak, replace the packing. X
Kettle is hard to tilt
(TD/2 only)
Auth Service
Rep Only
a. Tilting mechanism for the presence of any contamination
and for proper alignment and lubrication. X
WARNING
TO AVOID INJURY FROM SPLASHING OR SPILLING HOT CONTENTS, EMPTY THE KETTLE
THROUGH THE DRAW-OFF OR BY BAILING BEFORE ANY WORK IS DONE ON THE TILTING
MECHANISM.
OM-TD
15
Parts List
Model TDC/3
Key Description Part No. Key Description Part No.
1 Pedestal Assembly 081572 24 Valve, Globe 3/8" PCP* 010146
2 Pedestal Cap 081574 25 Handwheel, Valve 01148
3 Nut, Hex Jam 1-3/4" OD 081707 26 Valve, Safety (not incl.) 011001
7 Packing Ring Set 002033 27 Strainer, 1/2" Y, Blk. 004181
8 Washer Packing 002019 28 Strainer, 1/2" Y, RCP 010165
9 Spring 002025 29 Strainer, 1/2" Y, PCP 010166
10 Washer 5/8" Neoprene 003242 30 Steam Trap Repair Kit 002886
11 Tip, Crutch 1" ID 002032 31 Steam Trap, 1/2" Blk 010250
12 Handle Assembly 012694 32 Steam Trap, 1/2" RCP 010251
13 Knob, Maroon Ball 012691 33 Steam Trap, 1/2" PCP 010252
14 Ring, Tolerance 012692 34 Valve, Check 1/2" Brass 004187
15 Handle Shaft 018963 35 Valve, Check 1/2" RCP 010124
16 Lockwasher 3/8" 005618 36 Valve, Check 1/2" PCP 010140
17 Nut Cap 3/8-24 003188 37 Nipple, 3/8" x 12-1/2" Lg 005485
18 Basket TDC/3-10 001110 Pedestal Gasket (old style) 001968
19 Basket TDC/3-20 001120 Bullet Foot 042505
20 Cover Assembly TDC/3-10 001107 Stem Extension PCP 012722
21 Cover Assembly TDC/3-20 001108 Kettle Body MS2043
22 Valve, Globe 3/8" Brass* 002051 Control, DC Adjustable 013972
23 Valve, Globe 3/8" RCP* 010145 Control, DC Adjustable 005125
OM-TD
16
Parts List
Model TDC/2
Key Description Part No. Key Description Part No.
1 Base Gasket 001710 19 Basket TDC/2-20 001120
2 Base Pedestal 005901 20 Cover Assembly TDC/2-10 001107
3 Screw Socket HD 1/4-20 x 3/4" 009969 21 Cover Assembly TDC/3-20 001108
4 Lockwasher 1/4" 005692 22 Valve, Globe 3/8" Brass* 002051
5 Gasket Pedestal Cap 1/4" 001968 23 Valve, Globe 3/8" RCP* 010145
6 Cap Pedestal 005902 24 Valve, Globe 3/8" PCP* 010146
7 Packing Ring Set 002033 25 Handwheel, Valve 001148
8 Washer Packing 002019 26 Valve, Safety (not incl.) 011001
9 Spring 002025 27 Strainer, 1/2" Y, Blk. 004181
10 Washer 3/8" Levelling 003242 28 Strainer, 1/2" Y, RCP 010165
11 Tip, Crutch 1" ID 002032 29 Strainer, 1/2" Y, PCP 010166
12 Handle Assembly (pre 1/76)
Handle Assembly (post 1/76)
012695
012694
30 Steam Trap Repair Kit 002886
13 Knob, Maroon Ball 012691 31 Steam Trap, 1/2" Blk 010250
14 Ring, Tolerance 012692 32 Steam Trap, 1/2" RCP 010251
15 Handle Shaft 018963 33 Steam Trap, 1/2" PCP 010252
16 Lockwasher 3/8" 005618 34 Valve, Check 1/2" Brass 004187
17 Nut Cap 3/8-24 003188 35 Valve, Check 1/2" RCP 010124
18 Basket TDC/3-10 001110 36 Valve, Check 1/2" PCP 010140
NOTE: Items 1,5,7,8 and 9 are needed to change packing
OM-TD
17
Parts List
Model TDO
Key Description Part No. Key Description Part No.
1 Base Gasket 001710 23 Valve, Globe 3/8" RCP* 010145
2 Base Pedestal 005901 24 Valve, Globe 3/8" PCP* 010146
3 Screw Socket HD Cap ¼-20x¾" 009969 25 Handwheel, Valve 001148
4 Lockwasher 1/4" 005692 26 Valve, Safety (not incl.) 011001
5 Gasket Pedestal Cap 001968 27 Strainer, 1/2" Y, Blk. 004181
6 Cap Pedestal 005902 28 Strainer, 1/2" Y, RCP 010165
7 Packing Ring Set 002033 29 Strainer, 1/2" Y, PCP 010166
8 Washer Packing 002019 30 Steam Trap Repair Kit 002886
9 Spring 002025 31 Steam Trap, 1/2" Blk 010250
10 Washer 5/8" Plain 007273 32 Steam Trap, 1/2" RCP 010251
11 Bumper, TDO 010888 33 Steam Trap, 1/2" PCP 010252
13 Knob, Maroon Ball 012691 34 Valve, Check 1/2" Brass 004187
14 Ring, Tolerance 012692 35 Valve, Check 1/2" RCP 010124
22 Valve, Globe 3/8" Brass* 002051 36 Valve, Check 1/2" PCP 010140
OM-TD
18
Parts List
Model TDO/1
Key Description Part No. Key Description Part No.
1 Pedestal Assembly 081572 25 Handwheel, Valve 001148
2 Pedestal Cap 081574 26 Valve, Safety (not incl.) 011001
3 Nut, Hex Jam 1-3/4" OD 081707 27 Strainer, 1/2" Y, Blk. 004181
7 Packing Ring Set 002033 28 Strainer, 1/2" Y, RCP 010165
8 Washer Packing 002019 29 Strainer, 1/2" Y, PCP 010166
9 Spring 002025 30 Steam Trap Repair Kit 002886
10 Washer 5/8" Plain 003242 31 Steam Trap, 1/2" Blk 010250
11 Bumper, TDO 010888 32 Steam Trap, 1/2" RCP 010251
13 Knob, Maroon Ball 012691 33 Steam Trap, 1/2" PCP 010252
14 Ring, Tolerance 012692 34 Valve, Check 1/2" Brass 004187
22 Valve, Globe 3/8" Brass* 002051 35 Valve, Check 1/2" RCP 010124
23 Valve, Globe 3/8" RCP 010145 36 Valve, Check 1/2" PCP 010140
24 Valve, Globe 3/8" PCP 010146 37 Nipple d" x 12-1/2" Lg. 005485
OM-TD
19
Parts List
Model TDA
Key Description Part No. Key Description Part No.
1 Knob 001385 15a Valve Assy -1, 4, & 6 Qt pre 1957* 001042
2 Handle & Bushing Assy. 001022 16 Stem Assembly* 001098
3 Spring 001067 16a Stem Assy -1, 4, & 6 Qt pre-1957* 002076
4 Handle Guide Nut 001025 17 Bonnet, see 17a 001142
5 Plunger Guide 001046 17a Bonnet -1, 4, & 6 Qt Pre-1957* 001075
6 Elbow Assembly (Incl item 5) see 6a 001083 18 Packing Ring 001152
6a Elbow Assembly -1, 4, & 6 Qt pre 1957 001043 19 Packing Nut 001144
7 O-Ring 007360 20 Handle (Small 2" dia) 001148
8 Hex Nut (See 8a) 001032 21 Basket TDA 10 001110
8a Hex Nut 1, 4, & 6 Qt pre 1957 001034 21a Basket TDA 20 001120
9 Ferrule 001023 22 Cover TDA 10 001107
10 Pedestal (to 20 Qts incl) 001087 22a Cover TDA 20 001108
10a Pedestal (40 Qt size only) 001088 23 Safety Valve (state pressure)
11 Hex. Mounting Nut 001031 24 1/2" Strainer 004181
12 Pipe (for 1087 Pedestal) 001056 25 1/2" Steam Trap 004182
12a Pipe (for 1088 Pedestal) 001057 26 1/2" Swing Check Valve 004187
13 Packing 001065 27 Handle Screw 002613
14 Packing Gland (see 14a) 001036 28 Valve Stem Assembly (includes 002615
14a Packing Gland -1,4,6 sizes pre-1957 001045 16, 17, 18, 19, 20 & 27)
15 Valve Assembly (Incl 16, 17, 18, 19
and 20 see 15a
001037
*Obsolete - see item 28
OM-TD
20
Parts List
Model TD/2-40
Key Description Part No. Key Description Part No.
1 Mechanical Acuator Assy 013943 16 5/8" OD Tube Assembly 010358
2 Pivot 001275 17 5/8" Flare Nut (part of item 16) 010359
3 Not Used 18 Half Union Coupling 3/4" MPT x 5/8" 010073
4 Not Used 19 3/4" Safety Valve (45 PSI) 011001
5 Not Used 20 1/2" Globe Valve w/Handle 010034
6 Alemite Grease Fitting (st.) 012100 21 1/2" Thermo Steam Trap (black) 010250
7 Packing (4 rings) 001276 22 Steam Trap Repair Kit 002886
8 Packing Washer 001273 23 Valve Stem Sleeve Assembly 010721
9 Trunnion Spring 012403 24 Handle (Part of item 20)
10 LH Trunnion Casting 001265 25 1/2" Strainer (black) 004181
11 RH Trunnion Casting 001266 26 Not Used
12 1/8" R. x 2-3/4" Lg. Brass Pin 001907 27 1/2" Swing Check Valve (Std.) 004187
13 5/16"-18 x 3/4" Hex Cap Screw 006014 28 Calcium Complex No. 2 Grease 093703
14 5/16" Lockwasher 005656 29 Stand Assembly 009913
15 1/2" Jacket Drain Petcock 012070
  • Page 1 1
  • Page 2 2
  • Page 3 3
  • Page 4 4
  • Page 5 5
  • Page 6 6
  • Page 7 7
  • Page 8 8
  • Page 9 9
  • Page 10 10
  • Page 11 11
  • Page 12 12
  • Page 13 13
  • Page 14 14
  • Page 15 15
  • Page 16 16
  • Page 17 17
  • Page 18 18
  • Page 19 19
  • Page 20 20
  • Page 21 21
  • Page 22 22
  • Page 23 23
  • Page 24 24

Groen TDC/2-10 Operating instructions

Type
Operating instructions

Ask a question and I''ll find the answer in the document

Finding information in a document is now easier with AI