VIB 10/11 InstallatIon GuIde
Warning
Failure to avoid the following potentially
hazardous situations could result in an accident or
collision resulting in death or serious injury.
Do not attempt to install or service the VIB
unless you are a professional electronics installer.
Installing or servicing the unit without training and
experience in electronic equipment and automotive
accessories may be dangerous and could expose
you to the risk of electric shock or other hazards.
•
You assume all responsibility and risk for any
damage caused to the vehicle or any violation
of the vehicle’s applicable warranties by your
installation work. Garmin disclaims all liability
for any loss, injury, or damage resulting from the
installation activities.
Do not open the VIB or loosen the case screws.
Doing so will void the warranty.
•
•
InstallInG the InteGrated Mount (optIonal)
The included mount allows you to install the GPS mount in the vehicle in a more
permanent, integrated manner. This mount is optional; if the user prefers to use the
mount that was included with the GPS navigator or a Garmin accessory mount, you
do not need to install this integrated mount.
WARNING: When selecting a location for the integrated mount, ensure that the
GPS navigator and mount do not obstruct the driver’s view of the road or interfere
with vehicle operating controls, such as the steering wheel. Do not place in front
of or above any airbag.
Do not mount where
driver’s eld of vision
is blocked.
Do not mount in front
of an airbag eld of
deployment.
You will need a vehicle-specic automotive accessory mount bracket that has a
standard AMPS 4-hole pattern. Automotive accessory mount brackets are available
from many locations such as RAM (www.ram-mount.com), Panavise
(www.panavise.com) and Pro.Fit (www.pro-t-intl.com)
Step 1: Attach the Mount
Using the four included screws, attach the included
mount to the third-party mount bracket. The ball
socket should face toward the vehicle’s seats.
Step 2: Install the Third-Party Mount Bracket
Follow the mount bracket manufacturer’s instructions to install the mount bracket.
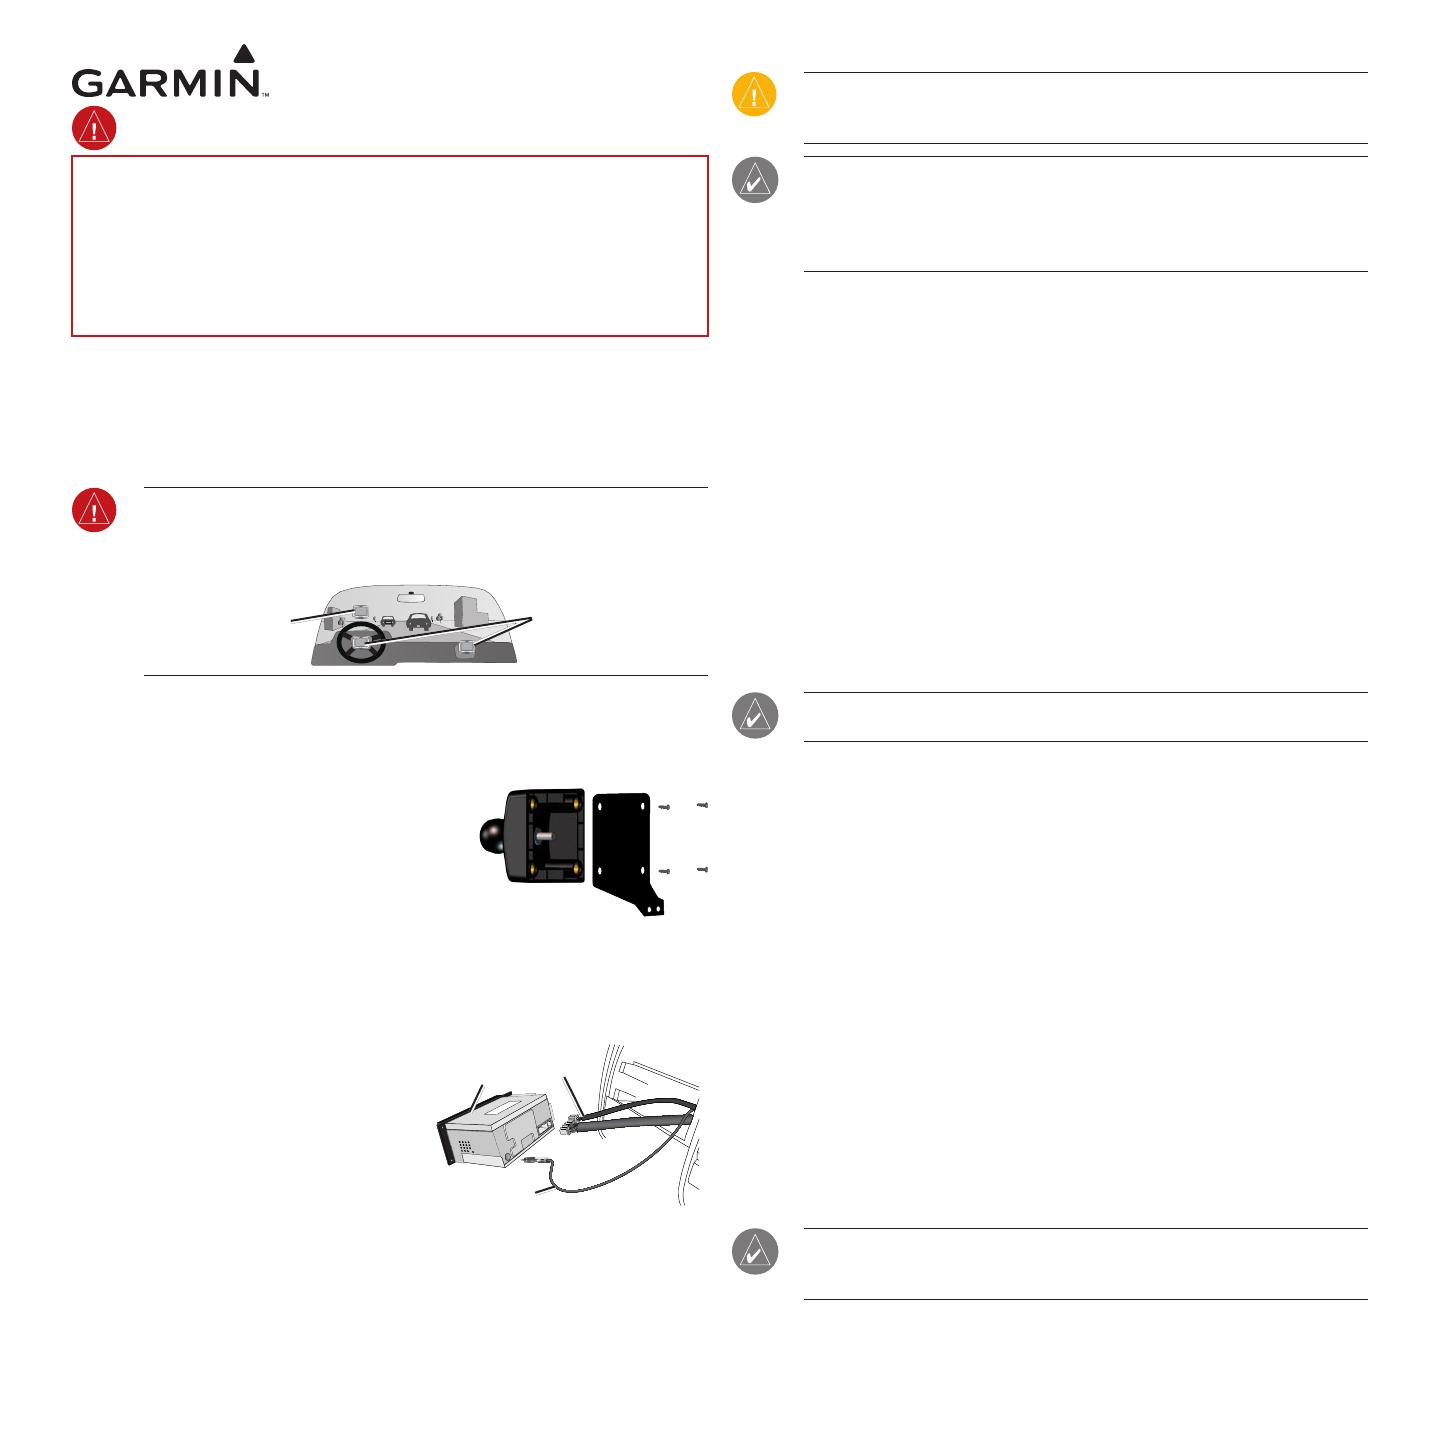
InstallInG the VIB 10/11
Step 1: Prepare the Dashboard
Test the stereo to ensure that it receives FM
signals and that the antenna functions properly
(VIB 11 only).
Remove the trim panel or other parts of the
dashboard. Remove the vehicle’s stereo.
Detach the antenna cable and wiring harness.
Step 2: Connect the Speaker and Power Wires
The VIB wiring harness uses the standard EIA color code. Refer to the wiring
diagram on the back.
Connect the bare ends of the 24-pin connector harness to the vehicle power, stereo,
and speakers. Third-party vehicle-specic wiring harnesses are available to simplify
the installation (www.metraonline.com).
CAUTION: The VIB speaker outputs are differential. Connect the VIB speaker
outputs directly to the vehicle’s speakers or to a high-level audio input on an
amplier. Audible pops may be heard if the VIB is not installed correctly.
NOTE: The tan “Output Level” wire (pin 9) limits the volume of the navigation
prompts when the wire is grounded. You may want to ground the wire if you
are connecting the VIB to a high-level audio amplier input. To achieve the full
volume of the navigation prompts, do not connect this wire and ensure that it does
not come into contact with a ground.
Step 3: Connect Audio and Video Cables (Optional)
To listen to MP3 les from the GPS navigator over the vehicle’s speakers, connect
RCA cables (not included) to the Audio Out connectors on the VIB and the stereo’s
auxiliary input. To view video, connect video cables to the video connector.
Step 4: Connect the FM TMC Cables (VIB 11 Only)
If you are installing a VIB 11, which has an integrated FM TMC Trafc Receiver,
connect the antenna adapter cables. The VIB is connected in-line with the antenna.
Select the proper pair of antenna adapter cables by matching the connectors to the
vehicle’s antenna connector and the stereo’s antenna connector.
1. Connect the vehicle’s antenna to the appropriate adapter cable. Connect the
Fakra plug to the Ant. In connector on the VIB 11. The Fakra plug locks rmly in
place. See the “VIB 11 Antenna Connections” drawings on the back.
2. Connect the Fakra connector of the adapter cable to the Ant. Out connector
of the VIB 11. Connect the appropriate adapter cable to the stereo’s antenna
connector. See the “VIB 11 Antenna Connections” drawings on the back.
NOTE: To test the installation, turn on the vehicle’s stereo. If you can hear sound
from an FM radio station, you have properly connected the VIB 11.
Step 5: Route the GPS Power Cable
Connect the GPS navigator wiring harness to the To PND connector on the VIB.
Route the cable to reach the GPS navigator. Attempt to minimize the cable’s
visibility by routing it through an existing opening in the glove box, trim panel, or
air vent.
Step 6: Mount the VIB
After all the wiring connections are made and the GPS power cable is properly
routed, use screws or wire ties to secure the VIB behind the stereo.
Step 7: Replace Dashboard
When nished, replace the stereo and all parts of the dashboard to their original
locations.
MountInG the Gps naVIGator
Plug the power cable from the VIB into the power connector on the back of the GPS
navigator or GPS navigator’s cradle. Align the ball on the mount with the socket on
the GPS navigator or GPS navigator’s cradle. Snap the GPS navigator or cradle onto
the ball socket. Refer to the GPS navigator’s documentation for more information.
NOTE: To operate the GPS navigator with the VIB, you need to updated the
GPS navigator’s software. See the VIB Reference Guide or GPS navigator’s
documentation for more information.
Stereo
Antenna cable
Wiring
harness
© 2006–2008 Garmin Ltd. or its subsidiaries Part Number 190-00767-00 Rev. E

