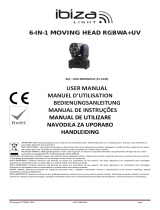
Ibiza Light LED8-MINI User manual

Category
Floodlights
Type
User manual

This manual is also suitable for

©Copyright LOTRONIC 2016 LED8-MINI Page 1
8
8
x
x
3
3
W
W
M
M
I
I
N
N
I
I
S
S
P
P
I
I
D
D
E
E
R
R
L
L
I
I
G
G
H
H
T
T
Ref.: LED8-MINI (15-1430)
USER
MANUAL
MANUEL D’UTILISATION
BEDIENUNGSANLEITUNG
MANUAL DE INSTRUÇÕES
MANUAL DE UTILIZARE
NAVODILA ZA UPORABO
HANDLEIDING
INSTRUKCJA OBSŁUGI
IMPORTANT NOTE: Electric products must not be put into household waste. Please bring them to a recycling centre. Ask your local authorities or
your dealer about the way to proceed.
NOTE IMPORTANTE : Les produits électriques ne doivent pas être mis au rebut avec les ordures ménagères. Veuillez les faire recycler là où il existe
des centres pour cela. Consultez les autorités locales ou votre revendeur sur la façon de les recycler.
WICHTIGER HINWEIS: Elektrogeräte gehören nicht in den Hausmüll. Sie müssen in speziellen Betrieben recycelt werden. Bringen Sie sie zu einer
speziellen Entsorgungsstelle für Elektrokleingeräte (Wertstoffhof)!
BELANGRIJK: De elektrische producten mogen niet naast het huisvuil geplaatst worden. Gelieve deze te laten recycleren daar waar er centra’s hiervoor voorzien
is. Raadpleeg de plaatselijke autoriteiten of uw verkoper ivm de manier van recycleren.
NOTA IMPORTANTE: Produtos eléctricos não deverão ser postos em contentores de lixo caseiros. Por favor, deposite-os em contentores para reciclagem.
Questione as autoridades locais ou onde adquiriu o produto sobre como deverá proceder.
NOTA IMPORTANTE: Produtos eléctricos não deverão ser postos em contentores de lixo caseiros. Por favor, deposite-os em contentores para reciclagem.
Questione as autoridades locais ou onde adquiriu o produto sobre como deverá proceder.
WAŻNA UWAGA: Elektryczne produkty nie mogą być wyrzucane wraz z odpadami domowymi. Prosimy o przyniesienie ich do centrum recyklingu. Zapytaj
sprzedawcę o sposób postępowania.
NOTA IMPORTANTA: Deseurile care provin de la produsele electrice si electronice nu se vor pune la gunoiul menajer. Dezafectarea acestora trebuie sa se faca la
centrele de colectare special amenajate. Contactati autoritatile locale pentru informatii privind procedura de dezafectare a deseurilor electrice si electronice.
©Copyright LOTRONIC 2016 LED8-MINI Page 2
BEFORE YOU BEGIN
Contents of the carton:
1 x Spider light effect
1x Mains lead
1x User Manual
Unpacking Instructions
Immediately upon receiving a fixture, carefully unpack the carton, check the contents to ensure that all parts are
present and have been received in good condition. Notify the freight company immediately and retain packing
material for inspection if any parts appear to be damaged from shipping or the carton itself shows signs of
mishandling. Keep the carton and all packing materials. In the event that a fixture must be returned to the factory, it
is important that the fixture be returned in the original factory box and packing.
Safety Instructions
Please read these instructions carefully, they include important information about the installation, usage and
maintenance of this product.
• Please keep this User Guide for future reference. If you sell the unit to another user, be sure that he also receives
this instruction booklet.
• Always make sure that you are connecting to the proper voltage, and that the line voltage you are connecting to is
not higher than that stated on the decal or rear panel of the fixture.
• This product is intended for indoor use only!
It is essential that the device is earthed. A qualified person must carry out the electric connection.
• To prevent risk of fire or shock, do not expose fixture to rain or moisture. Make sure there are no flammable
materials close to the unit while operating.
• The unit must be installed in a location with adequate ventilation, at least 20in (50cm) from adjacent surfaces. Be
sure that no ventilation slots are blocked.
• Always disconnect from power source before servicing or replacing fuse and be sure to replace with same fuse size
and type.
• Secure fixture to fastening device using a safety chain. Never carry the fixture solely by its head. Use its carrying
handles.
• Maximum ambient temperature (Ta) is 104° F (40°C). Do not operate the fixture at temperatures higher than this.
In the event of a serious operating problem, stop using the unit immediately. Never try to repair the unit by
yourself. Repairs carried out by unskilled people can lead to damage or malfunction. Please contact the nearest
authorized technical assistance center. Always use the same type of spare parts.
Don’t connect the device to a dimmer pack.
• Make sure the power cord is never crimped or damaged.
• Never disconnect the power cord by pulling or tugging on the cord.
• Avoid direct eye exposure to the light source while it is on.
DISCONNECT DEVICE: Where the MAINS plug or an appliance coupler is used as the disconnect device, the
disconnect device shall remain readily operable.
Auto Sensing Voltage: This fixture contains an automatic voltage switch which will auto sense the voltage when it is
plugged into the power source.
GB
©Copyright LOTRONIC 2016 LED8-MINI Page 3
Specifications
Power supply ................................................................................................... 100-240Vac 50/60Hz
Consumption ............................................................................................................................ 39W
Light source .......................................................... 8x 3W LED (2x red, 2x green, 2x blue, 2x white)
Single beam angle ........................................................................................................................
Dimensions ....................................................................................................... 283 x 151 x 110mm
Weight ..................................................................................................................................... 2.5kg
Installation
The unit should be mounted via its screw holes on the bracket. Always ensure that the unit is firmly fixed to avoid
vibration and slipping while operating. Always ensure that the structure to which you are attaching the unit is secure
and able to support a weight of 10 times of the unit’s weight. Also always use a safety cable that can hold 12 times
the weight of the unit when installing the fixture.
The equipment must be fixed by professionals at a place where is out of the reach of people and where nobody can
pass by or under it.
Fuse Replacement
Disconnect the power cord before replacing a fuse and always replace with the same type fuse.
With a flat head screwdriver wedge the fuse holder out of its housing.
Remove the damaged fuse from its holder and replace with exactly the same type of fuse.
Insert the fuse holder back in its place and reconnect power.
Data Cabling
To link fixtures together you must use data cables. If you choose to create your own cable, please use data-grade
cables that can carry a high quality signal and are less prone to electromagnetic interference.
CABLE CONNECTORS
Cabling must have a male XLR connector on one end and a female XLR connector on the other end.
DMX connector configuration
Termination reduces signal errors. To avoid signal transmission problems and interference, it is always advisable to
connect a DMX signal terminator.
CAUTION
Do not allow contact between the common and the fixture’s chassis ground. Grounding the common can cause a
ground loop, and your fixture may perform erratically. Test cables with an ohm meter to check correct polarity and
to make sure the pins are not grounded or shorted to the shield or each other.
CONTROL PANEL
To access the main menu press the MENU button. Press the UP or DOWN
buttons until you reach function you wish to change. When you reach the
function you wish to change, press the ENTER button. When a function is
selected, use the UP or DOWN buttons to change the function settings.
INPUT
COMMON
DMX +
DMX-
Resistance 120 ohm
1/ 4w between pin 2
(DMX-) and pin 3
(DMX+) of the last
fixture.
©Copyright LOTRONIC 2016 LED8-MINI Page 4
Once your changes are made, press the ENTER button, and then press and hold the MENU button for at least three
seconds to confirm and lock the change into the system memory. To exit without making any adjustments, press the
MENU BUTTON. The display will lock after 30 secondes. Press the MENU button for 3 seconds to unlock.
FUNCTION MENU
ADDR
001 - 512, DMX Address setting
CHND
10 ch
14 ch, select the channel mode
SLND
Mast
SL 1
SL 2 ( MASTER, SLAVEC OPTION)
SHND
SHOW 0 SHOW 15, Select the show mode
AUTO
OFF
ON (Auto Mode)
SOUN
On Off (SOUND CONTROL)
SENS
000 100 Sound sensitivity control (0 close, 100 The most sensitive)
LED
On - Off (Background LIGHT ON/OFF)
DISP
Disp
Dsip (Reverse Display)
PINT
Yes - No (PAN Reverse)
TINT
Yes - No (TIL Reverse)
TEST
Test
RSET
Reset
Settings
DMX Address Setting
1. Press the MENU, UP or DOWN button until “ADDR is displayed, press ENTER.
2. The current address will now be displayed and flashing. Press the UP or DOWN buttons to find your desired
address.
3. Press ENTER to confirm.
DMX channel mode
1. Press the MENU button until “CHND” is displayed, press ENTER. Either “10CH”, “14CH” will be displayed
2. Press the UP or DOWN buttons to find your desired DMX channel mode and press ENTER to confirm and exit.
Show modes 0-15 (Factory programs).
Show mode can run with or without sound active mode active.
1. Press the MENU button until “SHND” is displayed, press ENTER.
2. “Sh X” will now be displayed, “X” representing a number between 0-15. Programs 1-15 are factory programs,
while “Sh 0” is random mode. Press the UP or DOWN buttons to find your desired show.
3. When you have found your desired show press ENTER, then press and hold the MENU button for at least 3
seconds to activate. After you have set your desired show, it can be changed at any time using the UP or DOWN
buttons.
AUTO program
1. Press the MENU button until “AUTO is displayed, press ENTER.
2. The Display will show either “ONor “OFF”. Press the UP or DOWN buttons to select ON” or “OFF”.
©Copyright LOTRONIC 2016 LED8-MINI Page 5
Sound Active mode
1. Press the MENU button until “SOUN” is displayed, press ENTER.
2. The display will show either “ONor “OFF”. Press the UP or DOWN buttons to select “ON” to activate sound active
mode, or “OFF” to deactivate sound active mode.
3. Press ENTER, then press and hold the MENU button for at least 3 seconds to activate.
Sound sensitivity
1. Press the MENU button until “SENS” is displayed, press ENTER.
2. A number between 0-100 will be displayed. Press the UP or DOWN buttons to adjust the sound sensitivity. 0 being
the least sensitive and 100 being the most sensitive. When you have found your desired setting press ENTER to
confirm.
Display back light
1. Press the MENU button until “LED” is displayed, press ENTER.
2. The display will show either “ON” or “OFF”. Press the UP or DOWN buttons to select “ON” to keep the LED display
on at all times, or “OFF” to switch to have the LED display switch off after 10 seconds.
3. Press ENTER and then press and hold the MENU button for at least three seconds to confirm.
Display Reverse 180°
1. Press the either the MENU button until “DISP” is displayed, press ENTER.
2. Press the UP button to select “DSIP” to reverse the display, or “DISP” to change the display back.
3. Press ENTER to confirm.
Pan Inversion
1. Press the MENU button until “PINT” is displayed, press ENTER. Either “YES” or “NO” will be displayed.
2. To activate the Tilt inversion press the UP or DOWN buttons until YES is displayed, press ENTER to confirm. To
deactivate Tilt inversion, select NO and press Enter.
Tilt Inversion
1. Press the MENU button until “TILT” is displayed, press ENTER. Either “YES” or “NO” will be displayed.
2. To activate the Tilt inversion press the UP or DOWN buttons until YES is displayed, press ENTER to confirm. To
deactivate Tilt inversion, select NO and press Enter.
Self test program
1. Press the MENU button until “TEST” is displayed, press ENTER.
2. The fixture will now run a self test. Press MENU to exit.
Reset
1. Press the MENU button until “Reset” is displayed. Press the ENTER button and the unit will reset itself.
DMX CHANNELS
10 channel definition table
Channel DMX Value Function
1 0---255 Y1
2 0---255 Y2
©Copyright LOTRONIC 2016 LED8-MINI Page 6
3 0---255 Dimmer 0-100%
4
Strobe
000-007 Close strobe
008-015 Open strobe
016-131 Strobe from slow to fast
132-139 Open strobe
140-181 fast open slow close
182-189 Open strobe
190-231 Slow open fast close
232-239 Open strobe
240-247 Random strobe
248-255 open strobe
5 0---255 Red dimmer
6 0---255 Green dimmer
7 0---255 Blue dimmer
8 0---255 White dimmer
9 0---255 Y1, Y2 speed
10
000-007 Only others channels can be controlled
008-063 Auto run
064-127 Sound active
128-255 Reset
14 channel definition table
Channel DMX Value Function
1 0---255 Y1
2 0---255 Y2
3 0---255 Dimmer from 0-100%
4
Strobe
000-007 Close strobe
008-015 Open strobe
016-131 Strobe from slow to fast
132-139 Open strobe
140-181 fast open slow close
182-189 Open strobe
190-231 Slow open fast close
232-239 Open strobe
©Copyright LOTRONIC 2016 LED8-MINI Page 7
240-247 Random strobe
248-255 open strobe
5 0---255 Y1 Red dimmer
6 0---255 Y1 Green Dimmer
7 0---255 Y1 Blue Dimmer
8 0---255 Y1 White Dimmer
9 0---255 Y2 Red Dimmer
10 0---255 Y2 Green Dimmer
11 0---255 Y2 Blue Dimmer
12 0---255 Y2 White Dimmer
13 0---255 Y1, Y2 speed
14
000-007 Only others channels can be controlled
008-063 Auto run
064-127 Sound active
128-255 Reset
Cleaning
Due to fog residue, smoke, and dust cleaning the internal and external lenses should be carried out periodically to
optimize light output.
1. Use normal glass cleaner and a soft cloth to wipe down the out-side casing.
2. Clean the external optics with glass cleaner and a soft cloth every 20 days.
3. Always be sure to dry all parts completely before plugging the unit back in.
PREPARATIFS
Contenu de l’emballage:
1 effet de lumière Spider
1 cordon secteur
1 Mode d’emploi
Déballage
Dès réception de l’appareil, ouvrez le carton et vérifiez que le contenu est complet et en bon état. Sinon, prévenez
immédiatement le transporteur et conservez l’emballage s’il montre des signes de mauvais traitements. Conservez le
carton et tous les matériaux d’emballage afin de pouvoir transporter l’appareil en toute sécurité.
Consignes de sécurité
Lisez attentivement ce manuel qui contient des informations importantes sur l’installation, l’utilisation et l’entretien
de cet appareil.
F
©Copyright LOTRONIC 2016 LED8-MINI Page 20
Peso ......................................................................................................................................... 2.5kg
Substituição de fusíveis
Desligue o cabo de alimentação antes de substituir um fusível e substitua sempre com o fusível do mesmo
tipo.
Com uma chave de fendas retire o fusível da estrutura.
Retire o fusível danificado e substitua por exactamente o mesmo tipo de fusível.
Insira a tampa de volta e volte a ligar a alimentação.
O fusível está localizado no interior deste compartimento. Remova usando uma chave de fendas.
LIGAÇÃO DE CABOS
A ligação dos cabos deve ter uma ligação macho XLR e na outra ponta uma ligação fêmea XLR.
Configuração de ligação DMX
As terminações reduzem erros no sinal. De modo a evitar problemas e interferências na transmissão de sinal é
sempre aconselhável ligar a um terminal de sinal DMX.
AVISO
Não permitir o contacto entre o comum e a ligação terra do dispositivo eléctrico do chassis. A ligação terra do
comum pode causar um loop de ligação terra e o dispositivo pode funcionar de forma irregular. Teste os cabos com
um medidor de ohm para verificar a polaridade e para garantir que os pinos não estão aterrados ou em curto-
circuito com o escudo ou outro.
Instalação
Ligar o dispositivo para o suporte através dos orifícios. Certifique-se de que a unidade está fixa de forma segura para
impedir a vibração durante a operação. Verifique se o local onde vai instalar a unidade é estável e sólido, sendo capaz
de suportar pelo menos 10 vezes o peso da unidade. Ao instalar usar sempre um cabo de segurança que pode
transportar até 12 vezes o peso do dispositivo. Este aparelho deve ser instalado por profissionais e deve ser instalado
num local está inacessível às pessoas e que ninguém possa passar por baixo.
CONTROL PANEL
To access the main menu press the MENU button. Press the UP or DOWN
buttons until you reach function you wish to change. When you reach the
function you wish to change, press the ENTER button. When a function is
selected, use the UP or DOWN buttons to change the function settings.
Once your changes are made, press the ENTER button, and then press
and hold the MENU button for at least three seconds to confirm and lock
the change into the system memory. If the MENU button is not pressed and held within eight seconds the fixture will
automatically confirm and lock the change into the system memory. To exit without making any changes press the
MENU button.
FUNCTION MENU
ADDR
001 - 512, DMX Address setting
CHND
10 ch
14 ch, select the channel mode
ENTRADA
SAIDA
DMX +
DMX-
Resistência 120 ohm
1/ 4w entre pin 2
(DMX-) e pin 3 (DMX+)
da última posição.
©Copyright LOTRONIC 2016 LED8-MINI Page 21
SLND
Mast
SL 1
SL 2 ( MAST,SL OPTION)
SHND
SH 0 SH 15, Select the show mode
AUTO
OFF
ON (Auto Mode)
SOUN
On Off (SOUND CONTROL)
SENS
000 100 Sound sensitivity control (0 close, 100 The most sensitive)
LED
On - Off (Background LIGHT ON/OFF)
DISP
Disp
Dsip (Reverse Display)
PINT
Yes - No (PAN Reverse)
TINT
Yes - No (TIL Reverse)
TEST
Test
RSET
Reset
Settings
DMX Address Setting
1. Press the MENU button until “ADDR is displayed, press ENTER.
2. The current address will now be displayed and flashing. Press the UP or DOWN buttons to find your desired
address.
3. Press ENTER to confirm.
DMX channel mode
1. Press the MENU button until “CHND” is displayed, press ENTER. Either “10CH”, “14CH” will be displayed
2. Press the UP or DOWN buttons to find your desired DMX channel mode and press ENTER to confirm and exit.
Master/Slave selection
1. Press the MENU button until “SLND” is displayed, press ENTER. Either “MAST”, “SL 1 or “SL 2 will be displayed.
2. Press the UP or DOWN buttons until your desired setting is displayed, and press ENTER to confirm.
Show modes 0-15 (Factory programs).
Show mode can run with or without sound active mode active.
1. Press the MENU button until “SHND is displayed, press ENTER.
2. “Sh X” will now be displayed, “X” representing a number between 0-15. Programs 1-15 are factory programs,
while “Sh 0” is random mode. Press the UP or DOWN buttons to find your desired show.
3. When you have found your desired show press ENTER, then press and hold the MENU button for at least 3
seconds to activate. After you have set your desired show, it can be changed at any time using the UP or DOWN
buttons.
AUTO program
1. Press the MENU button until “AUTO is displayed, press ENTER.
2. The Display will show either “ONor “OFF”. Press the UP or DOWN buttons to select ON” or “OFF”.
Sound Active mode
1. Press the MENU button until “SOUN” is displayed, press ENTER.
2. The display will show either “ONor “OFF”. Press the UP or DOWN buttons to select “ON” to activate sound active
©Copyright LOTRONIC 2016 LED8-MINI Page 22
mode, or “OFF” to deactivate sound active mode.
3. Press ENTER, then press and hold the MENU button for at least 3 seconds to activate.
Sound sensitivity
1. Press the MENU button until “SENS” is displayed, press ENTER.
2. A number between 0-100 will be displayed. Press the UP or DOWN buttons to adjust the sound sensitivity. 0 being
the least sensitive and 100 being the most sensitive. When you have found your desired setting press ENTER to
confirm.
Display back light
1. Press the MENU button until “LED” is displayed, press ENTER.
2. The display will show either “ONor “OFF”. Press the UP or DOWN buttons to select “ON” to keep the LED display
on at all times, or “OFF” to switch to have the LED display switch off after 2 minutes.
3. Press ENTER and then press and hold the MENU button for at least three seconds to confirm.
Display Reverse 180°
1. Press the either the MENU button until “DISP” is displayed, press ENTER.
2. Press the UP button to select “DSIP” to reverse the display, or “DISP” to change the display back.
3. Press ENTER to confirm.
Pan Inversion
1. Press the MENU button until “PINT” is displayed, press ENTER. Either “YES” or “NO” will be displayed.
2. To activate the Tilt inversion press the UP or DOWN buttons until YES is displayed, press ENTER to confirm. To
deactivate Tilt inversion, select NO and press Enter.
Tilt Inversion
1. Press the MENU button until “TILT” is displayed, press ENTER. Either “YES” or “NO” will be displayed.
2. To activate the Tilt inversion press the UP or DOWN buttons until YES is displayed, press ENTER to confirm. To
deactivate Tilt inversion, select NO and press Enter.
Self test program
1. Press the MENU button until “TEST” is displayed, press ENTER.
2. The fixture will now run a self test. Press MENU to exit.
Reset
1. Press the MENU button until “Reset” is displayed. Press the ENTER button and the unit will reset itself.
DMX CHANNELS
10 channel definition table
Channel DMX Value Function
1 0---255 Y1
2 0---255 Y2
3 0---255 Dimmer 0-100%
4
Strobe
000-007 Close strobe
©Copyright LOTRONIC 2016 LED8-MINI Page 23
008-015 Open strobe
016-131 Strobe from slow to fast
132-139 Open strobe
140-181 fast open slow close
182-189 Open strobe
190-231 Slow open fast close
232-239 Open strobe
240-247 Random strobe
248-255 open strobe
5 0---255 Red dimmer
6 0---255 Green dimmer
7 0---255 Blue dimmer
8 0---255 White dimmer
9 0---255 Y1, Y2 speed
10
000-007 Only others channels can be controlled
008-063 Auto run
064-127 Sound active
128-255 Reset
14 channel definition table
Channel DMX Value Function
1 0---255 Y1
2 0---255 Y2
3 0---255 Dimmer from 0-100%
4
Strobe
000-007 Close strobe
008-015 Open strobe
016-131 Strobe from slow to fast
132-139 Open strobe
140-181 fast open slow close
182-189 Open strobe
190-231 Slow open fast close
232-239 Open strobe
240-247 Random strobe
248-255 open strobe
5 0---255 Y1 Red dimmer
©Copyright LOTRONIC 2016 LED8-MINI Page 27
SL 2 ( MAST,SL OPTION)
SHND
SH 0 SH 15, Select the show mode
AUTO
OFF
ON (Auto Mode)
SOUN
On Off (SOUND CONTROL)
SENS
000 100 Sound sensitivity control (0 close, 100 The most
sensitive)
LED
On - Off (Background LIGHT ON/OFF)
DISP
Disp
Dsip (Reverse Display)
PINT
Yes - No (PAN Reverse)
TINT
Yes - No (TIL Reverse)
TEST
Test
RSET
Reset
Settings
DMX Address Setting
1. Press the MENU button until “ADDR is displayed, press ENTER.
2. The current address will now be displayed and flashing. Press the UP or DOWN buttons to find your desired
address.
3. Press ENTER to confirm.
DMX channel mode
1. Press the MENU button until “CHND” is displayed, press ENTER. Either “10CH”, “14CH” will be displayed
2. Press the UP or DOWN buttons to find your desired DMX channel mode and press ENTER to confirm and exit.
Master/Slave selection
1. Press the MENU button until “SLND” is displayed, press ENTER. Either “MAST”, “SL 1 or “SL 2 will be displayed.
2. Press the UP or DOWN buttons until your desired setting is displayed, and press ENTER to confirm.
Show modes 0-15 (Factory programs).
Show mode can run with or without sound active mode active.
1. Press the MENU button until “SHND” is displayed, press ENTER.
2. “Sh X” will now be displayed, “X” representing a number between 0-15. Programs 1-15 are factory programs,
while “Sh 0” is random mode. Press the UP or DOWN buttons to find your desired show.
3. When you have found your desired show press ENTER, then press and hold the MENU button for at least 3
seconds to activate. After you have set your desired show, it can be changed at any time using the UP or DOWN
buttons.
AUTO program
1. Press the MENU button until “AUTO is displayed, press ENTER.
2. The Display will show either “ONor “OFF”. Press the UP or DOWN buttons to select ON” or “OFF”.
Sound Active mode
1. Press the MENU button until “SOUN” is displayed, press ENTER.
2. The display will show either “ONor “OFF”. Press the UP or DOWN buttons to select “ON” to activate sound active
mode, or “OFF” to deactivate sound active mode.
3. Press ENTER, then press and hold the MENU button for at least 3 seconds to activate.
©Copyright LOTRONIC 2016 LED8-MINI Page 28
Sound sensitivity
1. Press the MENU button until “SENS” is displayed, press ENTER.
2. A number between 0-100 will be displayed. Press the UP or DOWN buttons to adjust the sound sensitivity. 0 being
the least sensitive and 100 being the most sensitive. When you have found your desired setting press ENTER to
confirm.
Display back light
1. Press the MENU button until “LED” is displayed, press ENTER.
2. The display will show either “ON” or “OFF”. Press the UP or DOWN buttons to select “ON” to keep the LED display
on at all times, or “OFF” to switch to have the LED display switch off after 2 minutes.
3. Press ENTER and then press and hold the MENU button for at least three seconds to confirm.
Display Reverse 180°
1. Press the either the MENU button until “DISP” is displayed, press ENTER.
2. Press the UP button to select “DSIP” to reverse the display, or “DISP” to change the display back.
3. Press ENTER to confirm.
Pan Inversion
1. Press the MENU button until “PINT” is displayed, press ENTER. Either “YES” or “NO” will be displayed.
2. To activate the Pan inversion press the UP or DOWN buttons until YES is displayed, press ENTER to confirm. To
deactivate Tilt inversion, select NO and press Enter.
Tilt Inversion
1. Press the MENU button until “TILT” is displayed, press ENTER. Either “YES” or “NO” will be displayed.
2. To activate the Tilt inversion press the UP or DOWN buttons until YES is displayed, press ENTER to confirm. To
deactivate Tilt inversion, select NO and press Enter.
Self test program
1. Press the MENU button until “TEST” is displayed, press ENTER.
2. The fixture will now run a self test. Press MENU to exit.
Reset
1. Press the MENU button until “Reset” is displayed. Press the ENTER button and the unit will reset itself.
DMX CHANNELS
10 channel definition table
Channel DMX Value Function
1 0---255 Y1
2 0---255 Y2
3 0---255 Dimmer 0-100%
4
Strobe
000-007 Close strobe
008-015 Open strobe
016-131 Strobe from slow to fast
©Copyright LOTRONIC 2016 LED8-MINI Page 29
132-139 Open strobe
140-181 fast open slow close
182-189 Open strobe
190-231 Slow open fast close
232-239 Open strobe
240-247 Random strobe
248-255 open strobe
5 0---255 Red dimmer
6 0---255 Green dimmer
7 0---255 Blue dimmer
8 0---255 White dimmer
9 0---255 Y1, Y2 speed
10
000-007 Only others channels can be controlled
008-063 Auto run
064-127 Sound active
128-255 Reset
14 channel definition table
Channel DMX Value Function
1 0---255 Y1
2 0---255 Y2
3 0---255 Dimmer from 0-100%
4
Strobe
000-007 Close strobe
008-015 Open strobe
016-131 Strobe from slow to fast
132-139 Open strobe
140-181 fast open slow close
182-189 Open strobe
190-231 Slow open fast close
232-239 Open strobe
240-247 Random strobe
248-255 open strobe
5 0---255 Y1 Red dimmer
6 0---255 Y1 Green Dimmer
7 0---255 Y1 Blue Dimmer
©Copyright LOTRONIC 2016 LED8-MINI Page 30
8 0---255 Y1 White Dimmer
9 0---255 Y2 Red Dimmer
10 0---255 Y2 Green Dimmer
11 0---255 Y2 Blue Dimmer
12 0---255 Y2 White Dimmer
13 0---255 Y1, Y2 speed
14
000-007 Only others channels can be controlled
008-063 Auto run
064-127 Sound active
128-255 Reset
Cleaning
Due to fog residue, smoke, and dust cleaning the internal and external lenses should be carried out periodically to
optimize light output.
1. Use normal glass cleaner and a soft cloth to wipe down the out-side casing.
2. Clean the external optics with glass cleaner and a soft cloth every 20 days.
3. Always be sure to dry all parts completely before plugging the unit back in.
PREDEN ZAČNETE
Vsebina škatle:
1 x Spider svetlobni efekt
1x Omrežni kabel
1x Navodila za uporabo
Navodila za razpakiranje
Takoj po prejemu paketa, pazljivo razpakirajte škatlo, preverite vsebino, da seprepričate, da je vsebina kompletna in
da je naprava v dobrem stanju.V primeru če ugotovite poškodbena škatli, ali pomanjkljivosti glede vsebine
škatle,takoj obvestite dostavitelja. Hranite škatlo za primer da se naprava mora vrniti proizvajalcu, pomembno je da
se vrne v originalni embalaži.
Varnostna navodila
Prosimo, da skrbno preberete ta navodila, ki vsebujejo pomembne informacije o namestitvi, uporabi in vzdrževanju
tega izdelka.
Prosimo, hranite navodila za nadaljnjo uporabo. Če prodajate napravo drugemu uporabniku, se prepričajte, da
prejme tudi navodila za uporabo.
Pred prvo uporabo se prepričajte, da napetost in frekvenca oskrbe z električno energijo ustrezajo porabi energije
enote.
Naprava je samo za notranjo uporabo v suhem prostoru.
Da bi preprečili nevarnost požara ali električnega udara, ne izpostavljajte naprave dežju ali vlagi. Prepričajte se,
da ni nobenih vnetljivih snovi v bližini enote, medtem ko deluje.
SLO
©Copyright LOTRONIC 2016 LED8-MINI Page 35
10
000-007 Only others channels can be controlled
008-063 Auto run
064-127 Sound active
128-255 Reset
14 kanalni DMC način
Kanal DMX Vrednost Funkcija
1 0---255 Y1
2 0---255 Y2
3 0---255 Dimmer from 0-100%
4
Strobe
000-007 Close strobe
008-015 Open strobe
016-131 Strobe from slow to fast
132-139 Open strobe
140-181 fast open slow close
182-189 Open strobe
190-231 Slow open fast close
232-239 Open strobe
240-247 Random strobe
248-255 open strobe
5 0---255 Y1 Red dimmer
6 0---255 Y1 Green Dimmer
7 0---255 Y1 Blue Dimmer
8 0---255 Y1 White Dimmer
9 0---255 Y2 Red Dimmer
10 0---255 Y2 Green Dimmer
11 0---255 Y2 Blue Dimmer
12 0---255 Y2 White Dimmer
13 0---255 Y1, Y2 speed
14
000-007 Only others channels can be controlled
008-063 Auto run
064-127 Sound active
128-255 Reset
  • Page 1 1
  • Page 2 2
  • Page 3 3
  • Page 4 4
  • Page 5 5
  • Page 6 6
  • Page 7 7
  • Page 8 8
  • Page 9 9
  • Page 10 10
  • Page 11 11
  • Page 12 12
  • Page 13 13
  • Page 14 14
  • Page 15 15
  • Page 16 16
  • Page 17 17
  • Page 18 18
  • Page 19 19
  • Page 20 20
  • Page 21 21
  • Page 22 22
  • Page 23 23
  • Page 24 24
  • Page 25 25
  • Page 26 26
  • Page 27 27
  • Page 28 28
  • Page 29 29
  • Page 30 30
  • Page 31 31
  • Page 32 32
  • Page 33 33
  • Page 34 34
  • Page 35 35
  • Page 36 36
  • Page 37 37
  • Page 38 38
  • Page 39 39
  • Page 40 40
  • Page 41 41
  • Page 42 42
  • Page 43 43
  • Page 44 44
  • Page 45 45
  • Page 46 46
  • Page 47 47

Ibiza Light LED8-MINI User manual

Category
Floodlights
Type
User manual
This manual is also suitable for

Ask a question and I''ll find the answer in the document

Finding information in a document is now easier with AI