Page is loading ...

SONY.
Trinitrofi® Color TV
KV-27TS27
KV-32TS20
KV-27TS31
KV-32TS35
KV-32TW75
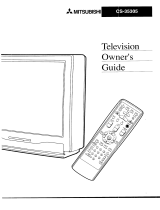
Operating Instructions
BeforeoperatingyourTV, please read this manual
thoroughly and retainit for futurereference.
Owner's Record
The modeland serialnumbersare locatedat the rear of
the TV. Recordthese numbersin the spaces provided
below.Refer to them wheneveryou call uponyourSony
dealer regardingthis product.
Model No. Serial No.
© i991 by Sony Corporation
4-o32-3_-=1(1)
Contents
Preface
This section tells you about special
features, safety information, and
preparatory information for using this
manual.
Chapter 1: Set up
This section shows you the steps
necessary for installing and
presetting your TV.
Chapter 2: Basic Operation
This section gives you basic
information about operating and
adjusting your TV.
Chapter 3: Advanced Operation
This section shows you how to use
Picture-in-Picture, the On-Screen
Menus and other useful features, as
well as the Remote Commander.
Chapter 4: Other Connections
This section shows you how to
connect optional video and audio
equipment.
Appendix
This section gives you specifications
and troubleshooting information.
• For a detailedtable ofcontents,
see page3.
I
i
I
I

n Preface
WARNING
n Precautions
To preventfire or shock hazard, do not
expose the unit to rain or moisture.
CAUTION : TO REDUCE THE RISK OF ELECTRIC SHOCK,
DO NOT REMOVE COVER (OR BACK),
NO USER-SERVICEABLE PARTS INSIDE.
REFER SERVICING TO QUALIFIED SERVICE PERSONNEL
Thissymbolisintendedtoalertthe userto
the presenceof uninsulated"dangerous
voltage"withintheproduct'senclosurethat
maybeofsufficientmagnitudetoconstitute
a riskof electricshockto persons.
Thissymbolisintendedtoalerttheuserto
the presenceof importantoperatingand
maintenance(servicing)instructionsinthe
literatureaccompanyingthe appliance.
I CAUTION: J
TO PREVENT ELECTRIC SHOCK, DO NOT USE THIS
POLARIZED AC PLUG WITH AN EXTENSION CORD,
RECEPTACLE OR OTHER OUTLET UNLESS THE
BLADES CAN BE FULLY INSERTED TO PREVENT
BLADE EXPOSURE.
• Operate the TV only on 120 V AC.
• One blade of the plug is wider than the other for safety
purposes and will fit into the power outlet only one way.
If you are unable to insert the plug fully into the outlet,
contact your dealer.
• Should any liquid or solid object fall into the cabinet,
unplug the TV and have it checked by qualified
personnel before operating it any further.
• Unplug the TV from the wall outlet if you are not going
to use it for several days or more. To disconnect the
cord, pull it out by the plug. Never pull the cord itself.
I Inetalllng I
• To prevent internal heat build-up, do not block the
ventilation openings.
• Do not install the TV in a hot or humid place, or in a
place subject to excessive dust or mechanical vibration.
I Cleaning I
Clean the TV with a soft dry cloth. Never use strong
solvents such as thinner or benzine, which might damage
the finish of the cabinet.
I Repecking I
Keep the original carton and packing msterials to use for
safe transport of your TV in the future.
If you have any questions or problems concerning your
TV, please contact your nearest Sony dealer.
For details concerning safety precautions, see the
supplied leaflet "IMPORTANT SAFEGUARDS."
Note to CATV system Installer
This reminder is provided to call the CATV system
installer's attention to Article 820-22 of the NEC that
provides guidelines for proper grounding and, in particular,
specifies that the cable ground shall be connected to the
grounding system of the building, as close to the point of
cable entry as practical.
Use of this television receiver for other than private viewing
of programs broadcast on UHF or VHF or transmitted by
cable companies for the use of the general public may
require authorization from the broadcasterlcable company
andlor program owner.

I Tableof Contents
Preface
Warning/Precautions ...................... 2
Introducingthe Sony 27TS and 32TS/TW series .. 4
Chapter 1: Set up
Connecting TV antenna/cable ............. 12
Turning the cable mode on or off ........... 14
Identifyingyour TV ....................... 4
Locatingthe controls ...................... 6
Chapter 2: Basic Operation
Watching "IV programs ................... 19
Presetting TV channels ................... 15
Erasing unnecessary channels --
CHANNEL ERASE .................. 16
Presetting only desired channels --
CHANNEL ADD .................... 18
Chapter 3: Advanced Operation
Adjusting picture and sound quality ......... 20
Adjusting the picture ................... 20
Adjustingthe sound .................... 22
Receiving Multichannel
TV Sound programs -- MTS ........ 24
Turning the SPEAKER ON or OFF ..... 25
Using Picture-in-Picture ................... 26
(KV-32TS35 and KV-32TW75 only)
Using the Pre-Programmed
Remote Commander ..................... 30
Setting the CURRENT TIME ............... 32
Using the timer-activated
functions-- GUIDE ...................... 34
Setting the ON/OFF TIMER ............. 34
Setting CHANNEL BLOCK .............. 36
Chapter 4: Other Connections
Setting the TIME DISPLAY .............. 38
Using CHANNEL CAPTION ............... 40
Captioning the channel
display -- CHANNEL CAPTION ........ 40
Viewing the captioned channels
-- CHANNEL GUIDE ................ 42
Enjoying other useful features .............. 43
Appendix
Connecting video equipment ............... 44
Connecting an audio system ............... 46
Specifications ........................... 47
Troubleshooting back cover
Preface 3

I Introducingthe
SonyKV-27TSand
KV.32TSITWSeries
With the following features, you can:
• Receive up to 125 cable channels for a total of 181
possible off-air and cable channels with the multi-band
VHFIUHF/CATV tuner.
• Receive the picture and sound of your VCR through the
VIDEO IN jacks.
• Receive superior VCR playback pictures when you
connect a VCR equipped with an S video output jack to
the S VIDEO IN jack (except for KV-27TS27).
• Watch your portable camera images (8mm, video, etc.)
by connecting to the CAMCORDER/VIDEO IN jacks on
the front panel (except for KV-27TS27 and KV-32TS20).
• Receive stereo programs and Second Audio Program
(SAP) broadcasts with the built-in Multichannel "rv
Sound (MTS) decoder.
• Receive TV or video sound through an audio system, by
connecting to the variable audio output jacks.
• Simulate the sound quality of a concert hall or movie
theater with the SURROUND system.
• Watch another TV channel, video or cable image as a
window picture, using Picture-in-Picture (KV-32TS35
and KV-32TW75 only).
• Call up an on-screen menu for instructions on how to
set the On/Off Timer, Channel Block and Time Display,
using the GUIDE feature.
• Call up an on-screen menu for instructions on how to
set the time, caption the channel display, add or erase
channels from the channel scan memory, and turn the
cable mode on or off, using the SET UP feature.
With the supplied Remote Commander, you can:
• Operate the TV, plus Sony and most other makers'
video equipment or Sony multi disc player with the
Pre-Progremmed feature (except for KV-27TS27 and
KV-32TS20).
• Automatically preset all receivable channels with
AUTO PROGRAM.
• Switch quickly between two channels, using JUMP.
• Set the TV to automatically shut off after approximately
one hour, using the SLEEP timer.
• Set the internal clock to display the CURRENT TIME
on-screen.
And enjoy other features giving you a high quality
picture...
• Colorpure Filter T" produces fine picture detail without
color spill or color noise.
• The New Dynamic picture "= system adjusts picture
contrast automatically to produce more detail in both
bright and dark areas of every scene.
• The Velocity Modulation (VM) circuitry produces clean
and sharp black and white contrasts (except for
KV-27TS27 and KV-27TS31).
:i ! iii!_:i:
Check the model number of your TV set.
This manual covers five models and there are slight
differences among them. Check the table below to
see what is equipped with your TV before you begin
operating it.
Instructions in this manual are based on model
KV-32TS35 (one of the models with maximum number of
features) and Remote Commander RM-Y102. If you have
a different model, please disregard any information that
does not apply to your TV.
Table of models YES: equipped NO: not equipped
KV-27TS27 KV-32TS20 KV-27TS31 KV-32TS351KV-32TW75
Picture-in-Picturefeature NO NO NO YES
Pre-Programmedfeature NO NO YES YES
SURROUND system _ YES YES YES YES"
Frontpanel AIV jacks NO NO YES YES
VARIABLEAUDIO OUT jacks YES YES YES YES
S-VIDEO IN jacks NO YES YES YES
Remote Commander RM791 RM791 RM-Y101 RM-Y102
4 I Preface

Design
Supplied
Remote
Commander
KV-27TS27
KV-32TS20
KV.27TS31
KV-32TS3S
KV.32TW75 (natural wood finish)
RM-Y 102
mm mmm
r'_ C::) O
®®®
®®®
®®®
---_ ,--
• • .,m
m
RM-YI01
m mm *mm
®®®
®®®
®®®
mo_ T--I i i
m
RM-791
_®®
®®®
®®®
m,m
mr--I I i
m_ m
i
.=,.
=
.=,.
==P
€O
==s
=1
.'F
=
€I=
m

| Locatingthe Controls
For details, refer to the pages indicated by the numbered black circles O.
A/V WINDOW displays
(VIDEO, AUDIO, GUIDE,
SET UP)
O-O,O-@,O-O
CURRENT TIME display O
LJ
KV-32TS35
Channelnumber/cable"C"
displays
Main Pictureinputmode
SLEEP, MUTING displays
CHANNEL CAPTION display
O-O
MTS mode(MAIN, SAP or
MONO)
input mode
O-O
6 I Preface

I
KV-27TS27
KV-32TS20
Illill
I, '_' I
KV-27TS31
KV-32TS35
L,o !1
KV-32TW75
g-
co
0
a_
TVJVIDEO - VOLUME + - CHANNEL + POWER
-- IT'T'
II Remotedetector
ITIMERindicatorlamp•
TVNIDEO button*O_
* BUTTONSwiththesamefunctionare
alsolocatedonthe RemoteCommander
(pp.9-10)
STEREOindicatorlamp
CHANNEL-/+buttons*4
VOLUME-/+ buttons*_ Control Door Operation
KV-27TS31
Control Door Operation
KV-32TW75
KV-32TS35
7
[ _V/VIOEO - VOLUME ÷ - C}'_NNEL ÷ POWER ]"
t_oeo._Jmo_mqlee,= ]
oN'
' k k,
CAMCORDERNIDEOIN
VIDEO,AUDIOinputjacks
Remotedetector
1MERindicatorlamp
STEREOindicatorlamp
POWERbutton*_
CHANNEL-/+buttons*0_
VOLUME-/+buttons* _O
TVNIDEO button*_
Preface 7
i!i_!....

Locatingthe Controls
For details, refer to the pages indicated by the numbered black circles O.
VIDEO IN jacks • •
AUDIO OUT
(VARIABLE)jacks •
KV-27TS27
i
m
AUUIIO
R.1(o:)
_Ixn"
i
(('O}] L
(MONO)
_.UDIO
t
(_o;_I .
VIDEOIN
VHF/UHF
i
VHF/UHF antenna terminal
0000
KV-27TS31 KV-32TS35
KV-32TS20 KV-32TW75
S VIDEO IN jacks• •
VIDEO IN jacks • •
AUDIO OUT
(VARIABLE)jacks•
S VIDEO D,
AUI]K]
R K(O?] !((O))
AUOIOotrr
, (WWABM9t_.OI
m
,=llifJ
_vJ
At DIO
t_v_m
v
sVll_-oIN
O
VHF/UHF
I VHF/UHF antenna terminal
0000
. Preface

I--
m
Pushheretoclose.
"" Toopen,pushagain.
KV-32TW75
Partslist
e Bushing (_ 1
• BottomHinge
1
TopHinge _ 1
Screw 4X4 _ 4
Metaltube (_ 4
O
Platepad _ 1
Pushplate _ 1
o
O
_=_
(D
O
O
a
Insertbushing0 intothecabinet
hole.Checkthattheprojectionof
thescrewthroughthehingeallows
forproperinstallationofthehinge
totheglass,theninsertthebottom
hinge• intothebushing.
I Checkprojectionofthisarea
ofscrewO. 7
O
Insertthemetaltubeshelfsupports
• and,aligningthegroveswith
thesupports,insertthesheff.
/
Alignthegrooveswith0.
Attachthetophinge• tooneend
oftheglassdoorandtightenthe
screws.
Attachplatepad• totheother
end,thenpushplate0 overthe
platepad.
Pushingtheglassdoorhingeup
intotheholelocatedonthe
cabinetceiling,slidethedoorinto
thebottomhinge;thentightenthe
screws.
\
Preface J 9

LocatingtheControls
For details, refer to the pages indicated by the numbered black circles e.
MUTING button •
AUTO PGM button •
CH GUIDE button •
:
DISPLAY button00
JUMP button O
SURROUND button O
CODE SET button•
(Pre-Programmed
function)
VCR operating buttons
OO
f
SWAP POSITION PIP
• Jt'O116MOI GLIOE 11//t_EO
C;) CjD _
®
RM-Y102:KV-32TS35
KV-32TW75
(RM-Y101: KV-27TS31)
SLEEP button 9)
POWER bu_on*00
Pi_ure-in-Picturebuttons**
0-0
TVIVIDEO button*
Channelnumberbuttons
CHANNEL GUIDE directorykeys •
ENTER button
VOL (volume) + I- button* 9) O
CH (channel) +1- scan button_'
000
/VTR selector • •
(Video equipment operation)
WINDOW buttons
0-0,0-0,0-0
* Buttons with the same function are
also located on the TV (p. 7).
** Buttonsnotincludedon
RM-YI01.

MUTINGbutton•
AUTO PGM button •
CH GUIDE button•
f
DISPLAY button • •
JUMP button •
SURROUND button •
AU/OI=Gtt O4GtJ0E W/lf¢(-O
®®®
RM-791:KV-2TrS27
KV-32TS20
I-"
SLEEP button •
POWER button* • • ==_
€ID
TVIVIDEO button*
Channel number buttons w
....... CHANNEL GUIDE directorykeys•
ENTER button
(volume)+/- button*• •
_CH (channel) +1- scan button*
0000
WINDOW buttons
0-•,0-0,0-0
* Buttonswiththe same functionare
also locatedon the TV (p. 7).
WARNING
Batteries may explode if mistreated. Do
not recharge, disassemble or dispose of
in fire.
Installing Batteries
1 Remove the battery 2 Inserttwosize AA (R6
compartment cover, batteries in correct polarity.
-._ (Rear oi commander) _ _
Battery life
With normal operation, batteries will last
up to half a year. If the Remote
Commander does not operate properly,
the batteries might be exhausted. Replace
both with new ones.
To avoid damage from possible battery
leakage
Remove the batteries when you w_llnot be
using the Remote Commander for a fairly
long time.
Preface 11

I chapter 1: Set up
Connecting"IVAntennalCable
You can use eittt'er an indoor or outdoor antenna with your TV. We recommend using an outdoor antenna for better
picture quality. You can receive cable TV by connecting a cable supplied by your local cable company.
75-ohm coaxial cable (round)
Check your antenna cable type and prepare the
end of the cable using the F-type connector.
Attachan F-typeconnector(notsupplied).
a
b
C
d
7 mm (1/4inch) 10 mm (% inch) F-lype connector
3 mm (1/Iinch)
300-ohm twin-lead cable (flat)
Check your antenna cable type and prepare the
end of the cable using the 300-ohm twin-lead cable.
Attach the supplied antenna connector.
b
C
Loosenboth
screwson the
connectorwitha
screwdriver.
Attach the cable
and tighten both
screws with a
screwdriver.
Plug the connector into the VHFIUHF terminal atthe rear of the TV.
(Rear of TV)
Plug the connector into the VHF/UHF terminal atthe rear of the TV.
(Rear of TV)
VHFIUHF
VHF/UHF
* Most combination antennas are equipped with a signal splitter.
Remove the splitter and attach the appropriate connector.
2 Chapter 1: Set up

Use the EAC-66 U/V mixer (not supplied).
Prepare the VHF antenna end using the appropriate connector (p. 12).
1
2
3
Connect the cables to the mixer.
Attach the mixer to the VHFIUHF terminal.
(Rear of TV)
VHF/UHF_
VHF
\\ \,, _71//
1
0
:l
:1
m
IQ
:1
:l
:l
w
When the UIV mixer is used
Snow and noise may appear in the pictures of the cable TV channels over 37 ON+ 1).
Chapter l::_Set up I 13

| TurningtheCableModeOnor Off
All of the control_'are on the Remote
Commander.
If you have cable connected to'your "IV (p. 12), follow the steps below to tum
the cable connection on or off. Cable mode is preset to ON when you use
your "IV for the first time; turn cable OFF to preset or watch VHF or UHF
channels (pp. 15 -- 19).
c:::>-"(,%-cz)
RM-Y102
_'rv/VIDEO
,3
AIV WINDOW
+1-
MENU
p
Press MENU to display the
following screen.
MENU
D_JIIEO
AUDIO
GUII]_
S_'UP
US£ [,;_] 8,[ENTER].
Press the +/- button to select SET UP.
(R)
A/U WINDOW
UIDE[)
AUDIO
GLIIDE
_SET UP
USE [:v] 8.[ENTER].
SETUP
Press ENTER.
ENTER
N_t.IRRENTTIME
CI,-I#b;,ELF--°PTI0N
_ ERASE
CHANqELADD
CABLE: OFF
Press +1- button andENTER to select CABLE.
ENTER
SET UP
_TI_SET
_C_TI_
_ERASE
i __D
D,'CP__E: _F
lip
Press the + I- button and ENTER to select ON or OFF alternately.
iI
• You cannot set CABLE ON/OFF while the
TV is in VIDEO mode. Before setting, select
TV mode by pressing TVIVIDEO.
= The menu will be cancelled automatically
after 10 seconds if you do not push any
buttons during that time.
14 Chapter 1: Set up
SETUP
TIIE SET
CAPTION
_ ERASE
_ADI]
_: ON
USE [=_]8.[ENTER].
To return to TV mode.
Press EXIT.
<-)
SL=TLP
TIME SET
O-IANM_ _TION
CH_NEL ERASE
_ADI]
_: OFF
USE [:_] 8,[ENTER].

| PresettingTV Channels
TVIVIDEO POWER
PressPOWER on the TV or the RemoteCommanderto turnthe TV on.
POWER
©
POWER
SWAP PORTION PIP
At/TOI_T_MCHGI.X4_ TV/VIDrco
®®®
®®®
N
iUIU
RESETA/V_t_0OWMENU
C_ _mCZ)
EXIT _ ENTER
II • TV/V'I'R
C_ c_ c_
<N b- I_
C_ C_ cz)
REC
_--e--_
IW-¥'I02
RM-Y102
POWER
TV/VIDEO
AUTO PGM
CH +/-
Turn the cable connection on or off, depending on if you want to presetcable or VHF/UHF channels.
(FOLLOW THE STEPS ON P. 14)
/f "VIDEO" or "S VIDEO" is displayed on the screen, press the TVIWDEO button on
the TV Or the Remote Commander so that a channel number appears.
3
Press AUTO PGM.
AUTO PGM
"AUTO PROGRAM" is displayed on the screen and receivable channels (other than the
channels already preset) will be preset in numerical sequence. The channels previously
preset remain in the TV's memory.
When no more channels can be found, the programming stops and the lowest numbered
channel is displayed.
4
Press CH + I- to check or view preset channels.
Channels that can be received on this TV:
VHF: 2 -- 13
UHF: 14 -- 69
Cable: 1 -- 125
To erase unnecessary channels, or to add channels that could not be
preset automatically because their signal strength was too weak, follow the
steps in "Erasing Unnecessary Channels" (p. 16) and "Presetting Only
Desired Channels" (p. 18).
=B .,4,
=3
_Q
O
=l
=.
s_
O.+.e,,:_,°p 15

PresettingTVChannels
SLEEP
C:_ C:3 C::)
AI,/fOI_ 0,1(_llOE ?lt/'IBO
.Q®®
®®®
®®®
RM-Y102
_TVIVIDEO
CH +1-
3
AIV WINDOW
+I-
MENU
ENTER
Use this feature to erase non-receiving channels from the channel scan
memory.
Note
You cannotuse CHANNEL ERASE whilethe TV is in VIDEO mode. Beforeerasing
channels,selectTV mode by pressingTVIVIDEO.
1
Press MENU to display the following screen.
MENU
_ NINDOd
Jl..UIDEO
AUDIO
GUIDE
SETUP
USE [Z_] 8.[ENTER).
Pressthe +/- buttonto selectSET UP.
PressENTER.
ENTER
A/U WI NDON
UIDEO
AUDIO
GUIDE
H_EI"
USE [=."3 8,[ENTER].
SET UP
H:URRENT TIME SET
CH_ CAPTION
EI_SE
CHANNEL ADD
CABLE: ON
3
Press the +/- button to select CHANNEL ERASE.
(R)
(L)b
Press ENTER.
SETUP
CURRENT TIME SET
CHANNEL CAPTION
I,CI-_ ERASE
ADD
CABLE: ON
i
EI_ 6
ENTER
USE [CH*,-)
TO SELECT THE CH.
THENPRESS [ENTER]
TO ERASE.
,.:,, ,,::,:;,,
16 IChapter 1: Set up

m
4
Press the CH + I- button to select the channel you want to erase.
CH
ERASE 8
JSE [CH÷,-]
TO SELECT THE CH.
PRESS [ENTER)
TO E]_5_ISE.
Press ENTER.
A "--" appears before the channel number, showing that the channel has been erased
from the channel scan memory.
ENTER
USE [CH÷,-]
TO SELECT THE CH.
T1-ENPRESS [ENTER]
TO EF_O_;E.
Thenexttime youpress the CH +I- buttons,channel8 willbe skipped.
Repeat step 4 to erase other channels.
To return to TV mode
Press EXIT.
When you erase a VHF or UHF channel, the
cable TV channel with the same number is
also erased, and vice versa.
Cable "13/channel chart*
Cable TV systems use letters or numbers to
designate channels. To tune in a channel,
refer to the chart below.
Numberon
thisTV
1
5
6
14
15
16
17
18
19
20
21
22
23
24
25
26
27
28
29
3O
31
32
33
34
35
36
37
38"
39
93
94
95
96
97
98
99
160
101
102
123
124
125
Corresponding cable
TV channel
A-8
A-7
A-6
A
EL
C
D
E
F
G
H
I
J
K
L
M
N
O
P
Q
R
S
T
U
V
W
W+I
W+2
W+3
W+57
W+58
A-5
A-4
A-3
A-2
A-1
W+59
W+60
W+61
W +82
W+83
W+84
* This designation of cable TV channels
conforms to the EIAINCTA
recommendation.
Check with your local cable TV company for
more complete information on the available
channels.
"11
=_.
¢1
m
II

PresettingTV Channels
Use this feature to add channels one by one to the channel scan memory.
F
MUTING SLEEP POWER
__C_
®®
®®
RM-Yln_
VIDEO
0 -- 9 buttons
,3
AIV WINDOW
+I-
MENU
You cannot use CHANNEL ADD while the TV is in VIDEO mode. Before adding
channels, select TV mode by pressing TV/VIDEO.
2 (FOLLOW STEPS 1 & 2 ON PAGE 16)
3
Press the +1- button to select CHANNEL ADD.
SETUP
CURRENT TIME SET
CAPTION
O-_ ERASE
_-_ ADD
CABLE: ON
Press ENTER.
ENTER
Aim 2O
USE [0-9] 8;[ENTER]
TO SELECT THE CH.
THENPRESS [EHTER)
TO ADD.
Press the 0 -- 9 buttons to select the channel you want to add. For
example, to add channel 25, press 2, 5 and ENTER.
ADD 25
[0-9] 8,[E],_T'ER)
TO SELECT THE CH.
TI-EN PRESS [EHTER]
TO ADD.
Press ENTER again.
A "'+ "appears before the channel number, showing that the channel has
been added to the channel scan memory.
ENTER
USE [0-914L[ENTER]
TO SELECT THE CH.
THEN PRESS [ENTER]
TO _d_).
Repeat step 4 to add other channels.
To return to "IV mode
Press EXIT.
iI
8 Chapter 1: Set up

I Chapter2: Bask=
openmon
WatchingTV Programs
i i i I lI
VOLUME
+, 4 3 CHANNEL+1-
Q®
®®
_--_c--c::)
POWER
I0 -- 9 buttons
VOL +/-
CH +/-
RM-Y102
1
Press POWER on the TV or the Remote Commander to turn the TV on.
POWER
0
b
POWER
Turn the cable mode on or off, depending on if you want to watch cableor VHF/UHF channels.
(FOLLOW THE STEPS ON Po14)
ff "WDEO'" or "S VIDEO" is displayed on the screen, press the W/VIDEO button on the
711or on the Remote Commander so that a channel number appears.
Select a channel in one of the following two ways:
To scan the preset channels* in numerical sequence
Press CH +/-.
CH
*For moreonpresettingchannels,seepp.15- 18.
To select a channel directly
Pressthe channel numberbutton(s)and then ENTER.
Forexample,to selectchannel 10, press1, 0 arid ENTER.
Press VOL +1- to adjust the volume.
VOL
0b
UOLUI'E
The disp/ay wi//disappear
automatically after 3 seconds. To reduce
To turn off the "rv the volume
Press POWER on the "IV or the Remote Commander again.
To increase
the volume
Chapter 2: Basic Operation 1 9

I AdjustingPictureandSoundQuality
r
r
MUTING SLEEP POWER
SWAP _ PIP
RM-Y102
MENU
ENTER
4
AIV WINDOW
+/-
Press MENU to display the following screen.
VIDEOis alreadyselectedforyou.
2
MENU
_-UlI]£I]
AUDIO
GUIDE
SETUP
USE [_.']8,[BITER].
Press ENTER.
ENTER
UII]EO
I,-PICTLRE
HUE
COLOR II_
BRIGHT
II_
Press the +/- button to select the quality you want to adjust.
For example, to adjust the picture brightness, select BRIGHT.
uIl__o
PICTURE IP
HUE ----'M---.
COLOR IIII----
_.BRIGHT
Press ENTER.
ENTER
BRIGHTNESS
II_
]
1
_)U '_,,=v,=;, =. g='=,_, Operation
/