Paradigm Speaker CE1588 User manual

Category
Subwoofers
Type
User manual

This manual is also suitable for

Owners Manual
The Ocial Sound of YOU
Paradigm, Soundtrack™ 2 System and all associated proprietary and patented designs and technologies are
registered trademarks of Paradigm Electronics Inc. Copyright © Paradigm Electronics Inc. All rights reserved.
All other trademarks are the property of their respective owner(s). Paradigm Electronics reserves the right to
change specifications and/or features without notice as design improvements are incorporated.
Paradigm, Système Soundtrack
MC
2 et les conceptions et technologies connexes exclusives et brevetées sont
des marques de commerce déposées de Paradigm Electronics Inc. Droits d’auteur © Paradigm Electronics Inc.
Tous droits réservés. Toutes les autres marques de commerce sont la propriété de leurs propriétaires respectifs.
Paradigm Electronics se réserve le droit de modifi er les spécifi cations ou les caractéristiques sans préavis, au fur
et à mesure que des améliorations sont incluses.
Paradigm, Sistema Soundtrack™ 2 y sus diseños y tecnologías propietarias y patentadas asociadas son marcas
registradas de Paradigm Electronics Inc. Copyright © Paradigm Electronics Inc. Todos los derechos reservados. Todas
las demás marcas comerciales son de propiedad de sus respectivos titulares. Paradigm Electronics se reserva el
derecho de modifi car las especifi caciones y/o características sin aviso cuando se incorporan mejoras del diseño.
Paradigm Electronics Inc.
205 Annagem Blvd., Mississauga, ON Canada L5T 2V1
For more information visit paradigm.com
HIGH-DEFINITION SOUND
111513
Soundtrack_2_Manual_EN_FR_ES_PRINTER_SPREADS_REV4.indd 2-3 13-11-14 10:41 PM
RECYCLING AND REUSE GUIDELINES FOR EUROPE
In accordance with the European Union WEEE (Waste Electrical and Electronic Equipment) directive eective August 13, 2005, we would like to notify you that this product may contain
regulated materials which, upon disposal, according to the WEEE directive, require special reuse and recycling processing. For this reason Paradigm Electronics Inc. (manufacturers of
Paradigm speakers and Anthem Electronics) has arranged with our distributors in European Union member nations to collect and recycle this product at no cost to you. To nd your
local distributor please contact the dealer from whom you purchased this product or go to our website at paradigm.com.
Please note that the product only falls under the WEEE directive. When disposing of packing and other shipping material we encourage you to recycle through the normal channels.
NOTE:
FCC ID: XCO-SUBWOOFER and FCC ID: XCO-SOUNDBAR2; IC ID: 7756A-SUBWOOFER and IC ID: 7756A-SOUNDBAR2. This device complies with Part 15 of the FCC Rules. Operation is subject to the
following two conditions: (1) This device may not cause harmful interference, and (2) This device must accept any interference received, including information that may cause undesired operation.
Changes or modications not expressly approved by the party responsible for compliance could void the user’s authority to operate the equipment.
This product has been tested and found to comply with the limits for a Class B digital device, pursuant to Part 15 of the FCC Rules. These limits are designed to provide reasonable protection against
harmful interference in a residential installation. This product generates, uses, and can radiate radio frequency energy and, if not installed and used in accordance with the instructions, may cause
harmful interference to radio communications. However, there is no guarantee that interference will not occur in a particular installation. If this product does cause harmful interference to radio or
television reception, which can be determined by turning the equipment o and on, the user is encouraged to try to correct the interference by one or more of the following measures:
– Reorient or relocate the receiving antenna.
– Increase the separation between the equipment and receiver.
– Connect the equipment into an outlet on a circuit dierent from that to which the receiver is connected.
– Consult the dealer or an experienced radio/TV technician for help.
This device complies with Industry Canada licence-exempt RSS standard(s). Operation is subject to the following two conditions:
(1) this device may not cause interference, and
(2) this device must accept any interference, including interference that may cause undesired operation of the device.
WIRELESS TRANSMITTER COMPLIANCE INFORMATION
The term “IC” before the radio certication number only signies that Industry Canada technical specications were met. This equipment complies with FCC and IC radiation exposure limits set forth
for an uncontrolled environment. This equipment should be installed and operated with minimum distance 20cm between the radiator and your body. This transmitter must not be co-located
or operating in conjunction with any other antenna or transmitter. To reduce potential radio interference to other users, the antenna type and its gain should be so chosen that the equivalent
isotropically radiated power (e.i.r.p.) is not more than that permitted for successful communication.
Manufactured under licence from Dolby Laboratories. Dolby and the double-D symbol are registered trademarks of
Dolby Laboratories.
The Bluetooth® word mark and logos are registered trademarks owned by Bluetooth SIG, Inc. and any use of such marks
by Paradigm Electronics Inc. is under license. Other trademarks and trade names are those of their respective owners.
The “aptX® software is copyright CSR plc or its group companies. All rights reserved. The aptX® mark and the aptX logo
are trade marks of CSR plc or one of its group companies and may be registered in one or more jurisdictions.
EN
Soundtrack_2_Manual_EN_FR_ES_PRINTER_SPREADS_REV4.indd 1-12 13-11-14 10:41 PM
TABLE OF CONTENTS
Safety Precautions . . . . . . . . . . . . . . . . . . . . . . . . . . . . . . . 1
Important Safety Instructions . . . . . . . . . . . . . . . . . . . . . . . . 2
Serial Number . . . . . . . . . . . . . . . . . . . . . . . . . . . . . . . . . . 3
About Paradigm. . . . . . . . . . . . . . . . . . . . . . . . . . . . . . . . . 3
About Your Soundtrack™ 2 System . . . . . . . . . . . . . . . . . . . . . 3
Break-In. . . . . . . . . . . . . . . . . . . . . . . . . . . . . . . . . . . . . . 4
Cleaning . . . . . . . . . . . . . . . . . . . . . . . . . . . . . . . . . . . . . 4
Placement . . . . . . . . . . . . . . . . . . . . . . . . . . . . . . . . . . . . 4
Soundbar: On a credenza or shelf . . . . . . . . . . . . . . . . . . . . 4
Soundbar: On a wall . . . . . . . . . . . . . . . . . . . . . . . . . . . . 4
Subwoofer: Positioned Vertically . . . . . . . . . . . . . . . . . . . . 4
Subwoofer: Positioned Horizontally. . . . . . . . . . . . . . . . . . . 4
Step-by-Step Instructions for Wall-Mounting the Soundbar . . . . 5
Control . . . . . . . . . . . . . . . . . . . . . . . . . . . . . . . . . . . . . . 6
Remote Control. . . . . . . . . . . . . . . . . . . . . . . . . . . . . . . 6
Onboard Interface . . . . . . . . . . . . . . . . . . . . . . . . . . . . . 6
IR Learning Codes . . . . . . . . . . . . . . . . . . . . . . . . . . . . . 7
Connection . . . . . . . . . . . . . . . . . . . . . . . . . . . . . . . . . . . . . 7
Setting up the Soundbar
Refer to the Set-Up Guide for detailed instructions on all of the following:
Set up of the Soundbar and Subwoofer
LED functionality
Establishing a Bluetooth Connection
Setting up the Subwoofer . . . . . . . . . . . . . . . . . . . . . . . . . . 7
Wireless Operation . . . . . . . . . . . . . . . . . . . . . . . . . . . . . . . 8
Refer to the Set-Up Guide for detailed instructions on:
Subwoofer Pairing
Wired Operation . . . . . . . . . . . . . . . . . . . . . . . . . . . . . . . . 8
Technical Specications . . . . . . . . . . . . . . . . . . . . . . . . . . . . 9
Limited Warranty . . . . . . . . . . . . . . . . . . . . . . . . . . . . . . . .10
EN
Soundtrack_2_Manual_EN_FR_ES_PRINTER_SPREADS_REV4.indd 11-2 13-11-14 10:41 PM
SAFETY PRECAUTIONS
READ THIS SECTION CAREFULLY BEFORE PROCEEDING!
WARNING!
RISK OF ELECTRIC SHOCK
DO NOT OPEN
The lightning flash with arrowhead symbol
within an equilateral triangle, is intended to
alert the user to the presence of uninsulated
“Dangerous voltage within the products
enclosure that may be of sufficient magnitude
to constitute a risk of electric shock to persons.
The exclamation point within an equilateral
triangle is intended to alert the user to the
presence of important operating and
maintenance (Servicing) instructions in the
literature accompanying the product.
WARNING: TO REDUCE THE RISK OF FIRE OR ELECTRIC SHOCK,
DO NOT EXPOSE THIS APPARATUS TO RAIN OR MOISTURE, AND
OBJECTS FILLED WITH LIQUIDS, SUCH AS VASES, SHOULD NOT
BE PLACED ON THIS APPARATUS.
CAUTION: TO PREVENT ELECTRIC SHOCK, MATCH WIDE BLADE
OF PLUG TO WIDE SLOT, FULLY INSERT.
CAUTION: FOR CONTINUED PROTECTION AGAINST RISK OF FIRE,
REPLACE THE FUSE ONLY WITH THE SAME AMPERAGE AND VOLTAGE
TYPE. REFER REPLACEMENT TO QUALIFIED SERVICE PERSONNEL.
WARNING: UNIT MAY BECOME HOT. ALWAYS PROVIDE ADEQUATE
VENTILATION TO ALLOW FOR COOLING. DO NOT PLACE NEAR A
HEAT SOURCE, OR IN SPACES THAT CAN RESTRICT VENTILATION.
WARNING!
WARNING: TO REDUCE THE RISK OF ELECTRIC SHOCK, DO
NOT REMOVE COVER (OR BACK). NO USER-SERVICEABLE
PARTS INSIDE. REFER SERVICING TO QUALIFIED SERVICE
PERSONNEL.
EN
EN – 1
Subwoofer
Diseño del subwoofer Diseño de driver único, reflexión de graves, lumbreras afinadas de baja turbulencia
dobles, amplificador integrado Gabinete de ABS moldeado con acabado mate
Diseño del amplificador: Alta corriente y salida discreta Amplicador Ultra-Class-D™: Potencia de 120 vatios RMS sostenidos / 240 vatios pico
Características del amplificador Encendido automático / Modo de espera, recorte suave
Driver de graves Cono de compuesto polimérico reforzado de 210 mm (8 pulg.), bobina de voz de
38 mm (1-1/2 pulg.)
Extensión de frecuencias bajas* 33 Hz (DIN)
Frecuencia de corte del subwoofer 150 Hz fija
Alt x ancho x prof
(la base agrega 1.90 cm (3/4 pulg.) a la altura)** 36.0 cm x 46.4 cm x 16.0 cm / 14-3⁄16 pulg. x 18-5/16 pulg. x 6-5/16 pulg.
Peso (desembalado, el soporte agrega 0.32 kg (0.70 lb)) 5.08 kg / 11.2 lb
Accesorios (incluidos) Patas de estabilidad
Acabado Negro
*DIN 45 500. Indica -3 dB en un auditorio típico. **Las patas agregan 2.5 cm / 1 pulg. a la altura en posición horizontal.
GARANTÍA LIMITADA
Paradigm garantiza este producto contra defectos de material y mano de obra en condiciones de uso y operación normales por un período de un (1) año a
partir de la compra en la tienda minorista realizada por el comprador usuario nal original. Para que la garantía sea válida, debe guardar su recibo de ventas y
este Manual del propietario, Para soporte adicional del producto, llame a Paradigm al 905-696-2868 o envíe un correo electrónico a [email protected].
ES
ES – 10
Soundtrack_2_Manual_EN_FR_ES_PRINTER_SPREADS_REV4.indd 1-10 13-11-14 10:41 PM
IMPORTANT SAFETY INSTRUCTIONS
1. Read these instructions.
2. Keep these instructions.
3. Heed all warnings.
4. Follow all instructions.
5. Do not use this apparatus near water.
6. Clean only with dry a cloth.
7. Do not block any ventilation openings. Install in accordance with the
manufacturers instructions.
8. Do not install near any heat sources such as radiators, heat registers,
stoves, or other apparatus (including amplifiers) that produce heat.
9. Do not defeat the safety purpose of the polarized or grounding type
plug. A polarized plug has two blades with one wider than the other.
A grounding type plug has two blades and a third grounding prong.
The wide blade or the third prong are provided for your safety. If the
provided plug does not fit into your outlet, consult an electrician for
replacement of the obsolete outlet.
10. Protect the power cord from being walked on or pinched, particularly
at plugs, convenience receptacles and the point where they exit from
the apparatus.
11. Only use attachments/accessories specified by the manufacturer.
12. Use only with the cart, stand, tripod, bracket, or table
specified by the manufacturer or sold with the apparatus.
When a cart is used, use caution when moving the cart/
apparatus combination, to avoid injury from tip-over.
13. Unplug this apparatus during lightning storms or when unused for
long periods of time.
14. Refer all servicing to qualified service personnel. Servicing is required
when the apparatus has been damaged in any way, such as power-
supply cord or plug is damaged, liquid has been spilled or objects
have fallen into the apparatus, the apparatus has been exposed to rain
or moisture, does not operate normally, or has been dropped.
15. Use the mains plug to disconnect the apparatus from the mains or
”TO COMPLETELY DISCONNECT THIS APPARATUS FROM THE AC
MAINS, DISCONNECT THE POWER SUPPLY CORD PLUG FROM THE
AC RECEPTACLE.
16. “WARNING – TO REDUCE THE RISK OF FIRE OR ELECTRIC SHOCK
– DO NOT EXPOSE THIS APPARATUS TO RAIN OR MOISTURE”
17. “DO NOT EXPOSE THIS EQUIPMENT TO DRIPPING OR SPLASHING AND
ENSURE THAT NO OBJECTS FILLED WITH LIQUIDS, SUCH AS VASES, ARE
PLACED ON THE EQUIPMENT.”
18. THE MAINS PLUG OF THE POWER SUPPLY CORD SHALL REMAIN
READILY OPERABLE.
EN
EN – 2
ESPECIFICACIONES TÉCNICAS
Barra de sonido
Diseño 2 canales (izquierdo y derecho) idénticos aislados. Canal izquierdo: 2 drivers, 2 vías
más radiador pasivo simple. Canal derecho: 2 drivers, 2 vías más radiador pasivo
simple. Gabinete de ABS moldeado con acabado mate
Divisor de frecuencia (Crossover) Electroacústico de 3er orden a 2.4 kHz
Driver de frecuencias altas (por canal) Tweeter con domo de aluminio puro satinado y anodizado de 25 mm (1 pulg.) S-PAL
Driver de frecuencias medias y bajas (por canal) 1 cono de material compuesto de 102-mm (4 pulg.), bobina de voz de 37-mm (1-1/2 pulg.)
Radiador pasivo (por canal) 1 cono de material compuesto de 102 mm (4 pulg.)
Extensión de frecuencias bajas* 90 Hz (DIN)
Respuesta en frecuencia Sobre el eje ±2 dB 140 Hz – 20 kHz
30° fuera del eje ±2 dB 140 Hz – 20 kHz
Respuesta en frecuencia del sistema total 40 Hz – 20 kHz
Sensibilidad – Sala / anecoica 88 dB / 85 dB
Potencia total del amplificador 2 x 25 vatios RMS sostenidos / 2 x 50 vatios de pico dinámico
Entradas Digital óptico; 3.5-mm aux. analógico; entrada RCA a RCA; Bluetooth
Altura x ancho x prof. (incluidas las patas) 13.5 x 92.3 x 7.3 cm (5-5⁄16 x 36-3⁄8 x 2-15⁄16 pulg.)
Peso (desembalado) 7.35 lb / 3.34 kg each
Acabado Negro
Accesorios (incluidos) Ménsulas; Patas de estabilidad
ES
ES
ES – 9
Soundtrack_2_Manual_EN_FR_ES_PRINTER_SPREADS_REV4.indd 9-2 13-11-14 10:41 PM
SERIAL NUMBER
The product’s serial number is located on the rear panel of both soundbar
and subwoofer. In the event that you need to contact Paradigm about
your system, please have the following information recorded:
Serial Number:
Retail Outlet or Website
where Product was Purchased:
Retail Outlet Phone Number:
Purchase Date:
ABOUT PARADIGM
In the early 1980s Paradigm was just an idea in the minds of a couple of
twenty somethings who loved music. Unlike today, there was no 225,000
square-foot factory, no 36,000-cu.-ft. on-site anechoic measurement
chamber, just a desire to make really good sounding speakers and
sell them at a down-to-earth price. Today our speakers are sold on six
continents. We’ve been voted #1 Speaker Brand 22 times* and fans scour
the web to buy used versions of our original speakers. That should tell
you something about Paradigm quality. In our SHIFT
Series, we’ve taken
everything we’ve learned about sound and adapted it for today’s wireless
listening devices. For more info visit us at paradigm.com.
*Rated #1 Best Price/Value. Inside Track Dealer Survey. An annual independent nationwide
survey of consumer electronics specialist retailers and custom installers.
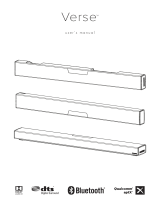
ABOUT YOUR SOUNDTRACK
2 SYSTEM
Your Soundtrack 2 System
is a high-performance design loaded with
Paradigm technology. In other words, it’s got loads of very cool stuff you won’t
find in any other soundbar/subwoofer system. For those who salivate over
technical details, we’ve included a Tech Specs section in the back of this
manual to give you the skinny on why your Soundtrack
2 System
sounds so good!
The difference Soundtrack
2 System will make to your television, music
and movies can’t be put into words, but you’ll hear it and you’ll feel it. It’s
an experience that takes you beyond a high performance system to a
place where youre absolutely lost in the experience. Its the Paradigm
Difference. We guarantee you wont be able to keep that difference a
secret and we hope you don’t. Spread the word. Talk about your Paradigm
Soundtrack
2 System. BRAG about it. Play it and let others listen.
Were all different and our sound should reflect that. Some of us like
music, others love movies, others are gaming enthusiasts and others
enjoy all of it. No matter who you are or where you live, what you
like or what you do, we want to be The Official Sound of YOU
.
Read this manual and follow all instructions. If you still have questions visit
the Q&A page on our website at paradigm.com.
EN
EN – 3
LED STATUS (de estado). Indica el estado de la conexión entre el
subwoofer y la barra de sonido (es decir, No apareados, Buscando
conexión, Apareados). Para obtener información adicional, consulte
la Guía de instalación.
Line-Level Input (Entrada de nivel de línea) (para usar solo en
la conexión del subwoofer con cables). Permite la conexión desde
SUBWOOFER OUTPUT (Salida para subwoofer) de la barra de
sonido o Sub/LFE Out (Salida para Subwoofer/LFE) de un receptor
de A/V, procesador u otra fuente de bajo nivel externa apropiada.
IMPORTANTE: No conecte un cable a la entrada de nivel de línea si
ya instaló una conexión inalámbrica al subwoofer.
Apareamiento. Esta función inicia el apareamiento inalámbrico
entre el subwoofer y el transmisor interno de la barra de sonido.
Nivel del subwoofer. Balancea el nivel de salida del subwoofer con
el de su barra de sonido. Para más información sobre este punto,
consulte la Guía de instalación.
FUNCIONAMIENTO INALÁMBRICO
Alcance del transmisor
En un auditorio típico, el transmisor inalámbrico integrado a su barra de
sonido tiene una alcance máximo de 15 m (50 pies). Las obstrucciones
tales como paredes, muebles de gran tamaño, tabiques divisorios de la
sala, etc., pueden reducir ese alcance. No coloque la barra de sonido y el
subwoofer más separados que el alcance recomendado.
El transmisor inalámbrico de la barra de sonido cuenta con un diseño
de autosensado digital sin comprimir de 2.4 GHz que se ajusta
automáticamente para la mejor conexión digital monitoreando al
mismo tiempo la integridad de la corriente de datos.
Para conocer las instrucciones de apareamiento, consulte la Guía
de instalación.
FUNCIONAMIENTO CON CABLES
Uso de entrada Line-Level Input desde la salida Sub/LFE Out de la
barra de sonido. Utilice un cable de interconexión RCA a RCA (no incluido)
para conectar el subwoofer como se muestra.
1
2
3
4
Panel trasero
del subwooferl
Panel trasero de la
barra de sonido
ES – 8
ES
Soundtrack_2_Manual_EN_FR_ES_PRINTER_SPREADS_REV4.indd 3-8 13-11-14 10:41 PM
BREAK-IN
Although your system will sound great out of the carton’ it will sound
even better when broken in. Allow it to operate for several hours
before you listen critically.
CLEANING
Do not use strong or abrasive cleaners on your system. Gently wipe
the cabinets with a damp soft cloth.
PLACEMENT
Soundbar: On a credenza or shelf (Fig. 1a)
The soundbar must sit on a flat surface directly below your video
display. Supplied stability feet must be attached. See the Setup Guide
included for how to attach the feet.
Soundbar: On a wall
(Fig. 1b)
For more information, refer to the Wall Mounting section.
Subwoofer: Positioned Vertically (Fig. 2a)
If using the subwoofer in the vertical position it must sit in the
supplied cradle.
Subwoofer: Positioned Horizontally (Fig. 2b)
If using the subwoofer in the horizontal position the supplied feet
must be attached to allow adequate clearance for heat dissipation.
Refer to the
Setup Guide included for how to attach feet.
IMPORTANT! WIRED SUBWOOFER CONNECTION ONLY
When positioning the subwoofer horizontally in a wired connection,
use the supplied 90° RCA adapter (Fig. 2b) to allow easier cable
hookup. The adaptor is not necessary in a wireless configuration.
Fig. 2b
Fig. 2a
Fig. 1b
Fig. 1a
EN
EN – 4
Aprendizaje de códigos
El sistema Sistema Soundtrack™ 2 es capaz de aprender ciertos
códigos de los controles remotos que usted ya posee, como el código
de volumen del control remoto de su televisor. Cada código se debe
programar por separado. Para programar, siga los pasos que se indican
a continuación.
1. Mantenga pulsado 3 segundos el botón de la interfaz de la barra
de sonido correspondiente a la función que desea programa
(por ej. volumen, silencio, encendido/apagado).
2. El LED de la Sistema Soundtrack™ 2 comienza a destellar para
indicar que el sistema está en modo de ‘aprendizaje IR’.
3. Apunte el control remoto de la fuente hacia el frente de la barra de
sonido y pulse el botón de la función correspondiente de dicho control.
El LED azul destella rápidamente 4 veces para indicar que el código
IR ha sido “aprendido y luego vuelve a una luz azul permanente.
4. Repita desde el paso 1 para programar cada función.
NOTA: Para aprender un comando Silencio de un control remoto que
usted ya posee, pulse el botón Sync (Sincronismo) de la parte superior
de la barra de sonido 3 segundos y luego continúe con el paso 2
precedente.
NOTA: El control remoto de su decodificador de cable/satelital o el
control remoto de su televisor pueden usar un código que el sistema
Sistema Soundtrack™ 2 no puede aprender. En estos casos, deberá
usar el control remoto que viene con su sistema o un control remoto
universal o de aprendizaje.
CONEXIÓN
Para realizar una rápida instalación de la barra de sonido y el
subwoofer, consulte las instrucciones de la Guía de instalación.
INSTALACIÓN DE LA BARRA DE SONIDO
Consulte la Guía de instalación.
INSTALACIÓN DEL SUBWOOFER
(Mostrado) Panel trasero del
subwoofer. Consulte en la
pág. 8 una descripción de las
funciones numeradas.
1
2
3
4
ES
ES
ES – 7
Soundtrack_2_Manual_EN_FR_ES_PRINTER_SPREADS_REV4.indd 7-4 13-11-14 10:41 PM
PLACEMENT (cont’d)
Step-by-Step Instructions for Wall-Mounting the Soundbar
What’s Included
2 x Wall-Mounting Brackets.
1 x Wall-Mounting Template.
Recommended Tools (not included)
1 x Stud Finder.
1 x Level.
1 x Electric drill and appropriate drill bits.
1 x Phillips Screwdriver.
Recommended Hardware (not included)
4 x Wall anchors to suit mounting surface and weight of soundbar.
4 x Screws to suit mounting surface and weight of soundbar.
IMPORTANT! Weight of soundbar: 7.35 lb / 3.34
NOTE: Mounting instructions are per bracket.
Step 1
Establish desired mounting location.
Step 2
Lightly tape the supplied Installation Template to the wall in the correct
position, using a level for accuracy. Mark locations of the two screws on
the wall. (Fig. 3)
Step 3
Using a stud finder, determine if
there is a wall stud directly behind
the chosen location. (Fig. 4)
Paradigm does not supply screws and anchor bolts
to mount your soundbar to a wall. Although we do
provide limited instructions for wall mounting, you must
contact a Paradigm Dealer for more information. The
subwoofer is NOT designed to be wall mounted.
The instructions that follow assume the mounting
surface is standard wood studs. Should you wish to
mount to another type of surface you must consult
a certified contractor.
Fig. 3
Fig. 4
EN
EN – 5
Paso 4
a) Si encuentra una viga de la pared, perfore un orificio guía en la
viga en cada marca y continúe con el paso 5. O
b) Si no encuentra una viga, instale tarugos en cada marca siguiendo
las instrucciones correspondientes al tipo de tarugo que utiliza.
PRECAUCIÓN: Recomendamos especialmente contactar a un
contratista profesional para este tipo de instalación.
Paso 5
Fije el primer soporte a la pared con los
tornillos. NO apriete completamente los
tornillos (Fig. 5).
Paso 6
Repita todos los pasos para el segundo
soporte. Utilice un nivel para asegurarse
de que los soportes estén completamente
derechos antes de apretar los tornillos.
IMPORTANTE: Conecte los cables de audio ANTES de montar la
barra de sonido en los tarugos. Para la conexión de los cables,
consulte la Guía de instalación.
Step 7
Coloque la barra de sonido en su sitio sobre los soportes y empújela
cuidadosamente hacia la pared haciendo contacto con los soportes.
Oirá un CLIC cuando cada soporte haga contacto con la barra de sonido.
NO suelte la barra de sonido hasta que oiga estos dos clics.
CONTROL
Control remoto
El control remoto provisto viene con 2 pilas AAA (incluidas). Siga el
diagrama de la parte de atrás del control remoto para instalarla correctamente:
+ to + andto -.
Pulsar para
sincronizar
la barra de
sonido y
el subwoofer
Pulsar para
seleccionar
la entrada
Pulsar para
encender y
apagar
el sistema
Pulsar y
soltar para
disminuir
el volumen
Pulsar y
soltar para
aumentar
el volumen
Fig. 5
MODE
IMPORTANTE:
Si pierde el control remoto, comuníquese con Paradigm al
1-905-696-2868 para adquirir uno nuevo. La garantía de
Paradigm no cubre la pérdida del control remoto.
Fuente
Encendido/
apagado
Subir
volumen
Bajar
volumen
Habilitar
Bluetooth
Reproducir/
pausa
Silencio
Modo cine*
Pista siguiente
Pista
anterior
Modo
música*
* Estos modos mejoran su
experiencia de escucha.
Controles del panel superior
ES
ES – 6
Soundtrack_2_Manual_EN_FR_ES_PRINTER_SPREADS_REV4.indd 5-6 13-11-14 10:41 PM
Step 4
a) If a wall stud is found, drill a pilot hole into the stud at each mark,
then move to Step 5. OR
b) If no stud is found, install wall anchors at each mark following the
instructions for the type of wall anchor you are using. CAUTION:
We strongly recommend contacting a professional contractor
for this type of installation.
Step 5
Using the screws, attach the first wall bracket
to the wall. DO NOT completely tighten
screws (Fig. 5).
Step 6
Repeat steps for the second bracket. Use a
level to make sure the brackets are completely
straight before tightening all screws.
Step 7
IMPORTANT: Attach audio cables BEFORE mounting soundbar to
wall brackets. See Set-Up Guide for how to attach cables.
Move soundbar into place directly over brackets and gently push it to the
wall making direct contact with brackets. You will hear a CLICK as each
bracket makes contact with the soundbar. DO NOT release soundbar
from your grasp until you hear those two clicks.
CONTROL
Remote Control
The supplied remote includes 2 x AAA batteries. Follow the diagram on
the back of the Remote for correct insertion: + to + andto -.
Press to synch
soundbar and
subwoofer
Press to
select
Source
Press to turn
system
on and off
MODE
IMPORTANT:
If you lose the remote, contact Paradigm at 1-905-696 2868
to purchase a new one. Loss of remote is not covered under
Paradigm warranty.
Press and
release to
decrease
volume
Press and
release to
increase
volume
Fig. 5
Input
Power
On / Off
Volume Up
Volume Down
Enable
Bluetooth
Play / Pause
Mute
Movie Mode*
Next Track
Previous Track
Music Mode*
* Sonic enhancements
to listening experience
according to mode.
Soundbar Top-Panel Controls
EN
EN – 6
UBICACIÓN (seguido)
Pasos del montaje (las instrucciones son para cada soporte)
Qué está incluido
2 soportes para montaje en la pared
1 plantilla para montaje en la pared
Herramientas recomendadas (no incluidas)
1 detector de vigas
1 nivel
1 perforadora eléctrica y brocas apropiadas
1 destornillador Phillips
Herramientas recomendadas (no incluidos)
4 tornillos aptos para la superficie de montaje y el peso de la
barra de sonido.
4 tarugos (anclajes de pared) aptos para la superficie de montaje
y el peso de la barra de sonido.
IMPORTANTE: Paso barra de sonido: 7.35 lb / 3.34
Pasos del montaje (las instrucciones son para cada soporte)
Paso 1
Establezca el lugar de montaje deseado.
Paso 2
Sujete en la pared con cinta la plantilla de instalación provista, en la
posición correcta, usando un nivel para lograr mayor exactitud. Marque
en la pared las posiciones de los dos tornillos. (Fig. 3)
Paso 3
Utilice un buscador de vigas para
determinar si hay una viga en la
pared directamente detrás del lugar
elegido. (Fig. 4)
Paradigm no provee tornillos ni pernos de anclaje
para montar su barra de sonidos en la pared. Si bien
proporcionamos instrucciones limitadas para el montaje
en la pared, debe contactar a un concesionario de Paradigm
para más información. El subwoofer no está diseñado para
montaje en la pared.
Las instrucciones que siguen a continuación suponen
que la superficie de montaje consiste en vigas de madera
estándar. En caso de que desee montar el equipo en
otro tipo de superficie, debe consultar a un contratista
certificado.
PLANTILLA
Fig. 3
Fig. 4
ES
ES
ES – 5
Soundtrack_2_Manual_EN_FR_ES_PRINTER_SPREADS_REV4.indd 5-6 13-11-14 10:41 PM
IR Learning Codes
Your system is capable of learning certain codes from remote controls
you already own, for example, the volume code from your TVs remote.
Each code must be programmed in separately. To program, follow the
steps below:
1. Press and hold for 3 seconds the button on the soundbars Top
Panel Controls for the desired function to be programmed
(eg. volume, mute, on/off).
2. The soundbars LED will start to flash indicating that the system is
now in ‘IR learning’ mode.
3. Aim alternative remote control at the front of the soundbar and
press its corresponding function button. The blue LED rapidly
flashes 4 times to indicate that the IR code has been ‘learned’, it then
returns to a solid blue.
4. Repeat from Step 1 to program each function.
NOTE ABOUT MUTE: To learn a MUTE command from a remote
control you already own, press the Sync button on top panel of the
soundbar for 3 seconds then move to Step 2 above.
NOTE ABOUT IR CODES: Your existing cable/satellite box remote
control or TV remote control may use a code that the system cannot
learn. In these instances, you will have to use the remote control that
came with your system or use a universal or learning remote control.
CONNECTION
For quick system setup and connection refer to the
instructions in the Set-Up Guide included.
SETTING UP THE SOUNDBAR
Refer to the Set-Up Guide included for detailed instructions on all of
the following.
a) Setup
b) LED functionality
c) Establishing a Bluetooth Connection
SETTING UP THE SUBWOOFER
(Shown) Back panel of Subwoofer.
See page 8 for description of
numbered functions.
1
2
3
4
ENEN
EN – 7
PERÍODO DE ASENTAMIENTO
Si bien su sistema va a producir un sonido excepcional en cuanto lo
saque de la caja, sonará aún mejor cuando se asiente. Hágalo funcionar
varias horas antes de escucharlo como crítico.
LIMPIEZA
No use agentes limpiadores fuertes o abrasivos en su Sistema
Soundtrack™ 2. Limpie suavemente los gabinetes con un paño
blando humedecido.
UBICACIÓN
Barra de sonido: Sobre un aparador o estante (Fig. 1a)
Recomendamos colocar la barra de sonido sobre una superficie plana
directamente debajo de su pantalla de video. Deben fijarse al equipo
las patas de estabilidad provistas. Para saber cómo fijar estas patas,
consulte la Guía de instalación.
Barra de sonido: En la pared
(Fig. 1b)
Para obtener información más detallada, consulte la sección siguiente.
Subwoofer: Vertical (Fig. 2a)
Si utiliza el subwoofer en posición vertical, debe colocarlo en la base
provista.
Subwoofer: Horizontal (Fig. 2b)
Si utiliza el subwoofer en posición horizontal, debe usar las cuatro
patas provistas a fin de asegurar suficiente espacio para la disipación
de calor. Para saber cómo fijar estas patas, consulte la Guía de instalación.
SOLO PARA LA CONEXIÓN DEL SUBWOOFER CON CABLES
Cuando posicione el subwoofer horizontalmente en una conexión
con cables, use el adaptador RCA (Fig. 2b) de 90° provisto para
facilitar la conexión del cable. El adaptador no es necesario en la
conexión inalámbrica.
Fig. 1b
Fig. 1a
Fig. 2b
Fig. 2a
ES
ES – 4
Soundtrack_2_Manual_EN_FR_ES_PRINTER_SPREADS_REV4.indd 7-4 13-11-14 10:41 PM
Status LED. Indicates connection status between the subwoofer
and soundbar (e.g. Not Paired, Searching for Connection, Paired).
For additional information refer to the Set-Up Guide included.
Line-Level Input (for use in a wired subwoofer connection only)
Allows connection from the wired Sub Out of the soundbar
or Sub/LFE Out of an external A/V receiver, processor or other
suitable low-level source. IMPORTANT: Do not connect a cable
to the Line-Level Input if you have already set-up a wireless
subwoofer connection.
Pair. This feature initiates wireless pairing between the subwoofer
and the transmitter inside the soundbar.
Subwoofer Level. Balances the subwoofer’s output level to that of
your soundbar. See the Set-Up Guide for more info in this area.
WIRELESS OPERATION
Transmitter Range
In a typical listening room, the built-in wireless transmitter in your
soundbar has a maximum range of 50’ (15 m). Obstructions such as
walls, large pieces of furniture, room dividers, etc., may reduce that
range. Do not place the soundbar and subwoofer farther apart than
the recommended range.
The soundbar’s wireless transmitter features a 2.4 GHz uncompressed
digital self-sensing design that will automatically adjust for the best
wireless connection while monitoring the integrity of the data stream.
For wireless pairing instructions, refer to the Set-Up Guide included.
WIRED OPERATION
Use the Line-Level Input
From Sub/LFE Out on sound
bar. Using an RCA-to-RCA
interconnect cable connect the
subwoofer as shown.
1
2
3
4
Subwoofer
Back Panel
Soundbar
Back Panel
EN EN
EN – 8
NÚMERO DE SERIE
El número de serie del producto se encuentra en el panel trasero tanto de
la barra de sonido como del subwoofer. En caso de que necesite contactar
a Paradigm acerca de su sistema, anote la siguiente información:
Número de serie:
Tienda minorista o sitio web
donde se adquirió el producto:
Número telefónico de la tienda minorista:
Fecha de compra:
ACERCA DE PARADIGM
A principio de la década de los 80, Paradigm era sólo una idea en las
cabezas de un par de veinteañeros amantes de la música. A diferencia
de hoy, no existía una fábrica de 20.250 metros cuadrados, ni una cámara
de medición anecoica de 970 metros cúbicos. Nada más que el deseo de
hacer altavoces que realmente sonaran bien y venderlos a precios sensato.
Hoy, los altavoces Paradigm se venden en seis continentes. Nos han
votado 22 veces* como la marca de altavoces N° 1 y los fanáticos barren
la web para comprar versiones usadas de nuestros altavoces originales.
Esto debe decirle algo acerca de la calidad de Paradigm. En nuestra serie
SHIFT
, hemos tomado todo lo que aprendimos acerca del sonido y lo
adaptamos para los formatos de escucha más informales de hoy. Para
más información, visíte paradigm.com.
*Calificados como N° 1 en mejor relación precio/valor. Inside Track Dealer Survey. Una encuesta anual independiente
de nivel nacional de minoristas instaladores personalizados especializados en electrónica del consumidor.
ACERCA DEL SISTEMA SOUNDTRACK
2
Su Sistema Soundtrack™ 2 es un diseño de alto rendimiento que incluye
muchas de las excelentes características de la tecnología de Paradigm.
En otras palabras, tiene encima montones de detalles excelentes que no
encontrará en ningún otro sistema de barra de sonido. ¡Para los ansiosos
por los detalles técnicos, hemos incluido una sección de Especificaciones
Técnicas al final de este manual a fin de darles las razones por las que su
Sistema Soundtrack™ 2 suena tan bien!
La diferencia que el Sistema Soundtrack™ 2 producirá en su experiencia
con su televisor, música y películas no puede ponerse en palabras, pero
la escuchará y la sentirá. Es una experiencia que le transporta más allá de
un sistema de alto rendimiento a un mundo fascinante de audio que le
sorprenderá. Es la Diferencia de Paradigm. La garantizamos que no podrá
mantener esa diferencia en secreto —y esperamos que no lo haga. ¡Corra
la voz! Hable de su Sistema Soundtrack™ 2. ¡FANFARRONEE con él!
¡Hágalo sonar y deje que los escuchen los demás!
Somos totalmente diferentes, y nuestro sonido lo refleja. A algunos nos
gusta la música, a otros las películas, otros son entusiastas de los juegos y
a otros les gusta todo eso. No importa quién es usted o dónde vive,
qué le gusta o qué hace, queremos ser Su sonido oficial.
Lea este manual y siga todas las instrucciones. Si aún tiene preguntas, visite
la página Q&A (Preguntas frecuentes) de paradigm.com.
ES – 3
ES
ES
Soundtrack_2_Manual_EN_FR_ES_PRINTER_SPREADS_REV4.indd 3-8 13-11-14 10:41 PM
Subwoofer
Subwoofer Design Single driver, bass-reflex design, dual low-turbulence tuned ports,
built-in amplifier. Molded ABS enclosure with matte finish
Amplifier Design: High-current, Discrete Output Ultra-Class-D™ amplier: 120 watts RMS Sustained / 240 watts Peak Power
Amplifier Features Auto-On / Standby, soft clipping
Bass Driver 210-mm (8 in) reinforced polymer-composite cone,
38-mm (1-1/2 in) voice-coil
Low-Frequency Extension* 33 Hz (DIN)
Subwoofer Cut-Off Frequency 150 Hz fixed
H x W x D (cradle adds 3/4 in / 1.90 cm to height)** 14-3⁄16 in x 18-5/16 in x 6-5/16 in / 36.0 cm x 46.4 cm x 16.0 cm
Weight (unpacked, stand adds 0.70 lb / .32kg) 11.2 lb / 5.08 kg
Accessories 4 x Stability Feet; Cradle
Finish Black
*DIN 45 500. Indicates -3 dB in a typical listening room. **Feet add 1 in / 2.5 cm to height in horizontal position.
LIMITED WARRANTY
Paradigm warrants this product against defects in materials and workmanship under normal use and operation for a period of one (1) year from the date of
retail purchase by the original end-user purchaser. For warranty purposes, you must retain your sales receipt and this Owners Manual for warranty to be
valid.
For additional product support, call Paradigm at 905-696-2868 or email [email protected]om.
EN
EN – 10
ADVERTENCIA: PARA REDUCIR EL RIESGO DE
ELECTROCUCIÓN, NO RETIRE LA CUBIERTA (O PARTE
POSTERIOR). NO HAY PIEZAS REPARABLES POR EL USUARIO
EN SU INTERIOR. SOLICITE EL SERVICIO A PERSONAL DE
SERVICIO CALIFICADO.
RIESGO DE ELECTROCUCIÓN
NO ABRIR
El símbolo del rayo con punta de flecha dentro
de un triángulo equilátero tiene la finalidad
de alertar al usuario acerca de la presencia de
un “voltaje peligroso sin aislamiento dentro
del gabinete del producto, que puede ser de
magnitud suficiente para constituir un riesgo
de electrocución para las personas.
El signo de admiración dentro de un triángulo
equilátero tiene la finalidad de alertar al
usuario acerca de la presencia de instrucciones
de operación y mantenimiento (servicio)
importantes en la literatura que acompaña al
producto.
ADVERTENCIA: PARA REDUCIR EL RIESGO DE INCENDIO O
ELECTROCUCIÓN, NO EXPONGA ESTE EQUIPO A LA LLUVIA O
LA HUMEDAD, Y NO COLOQUE SOBRE ÉL OBJETOS LLENOS DE
LÍQUIDOS, TALES COMO FLOREROS.
PRECAUCIÓN: PARA PREVENIR LA ELECTROCUCIÓN, HAGA
COINCIDIR LA PATILLA ANCHA DEL ENCHUFE CON LA RANURA
ANCHA E INTRODÚZCALA COMPLETAMENTE.
PRECAUCIÓN: PARA LOGRAR UNA PROTECCIÓN CONTINUA CON-
TRA EL RIESGO DE INCENDIO, REEMPLACE EL FUSIBLE ÚNICAMENTE
POR OTRO DEL MISMO TIPO Y DEL MISMO AMPERAJE Y VOLTAJE.
SOLICITE SU REEMPLAZO A PERSONAL DE SERVICIO CALIFICADO.
ADVERTENCIA: LA UNIDAD PUEDE CALENTARSE. SIEMPRE PRO-
CURE UNA VENTILACIÓN ADECUADA PARA PERMITIR QUE SE ENFRÍE.
NO LA COLOQUE CERCA DE UNA FUENTE DE CALOR O EN ESPACIOS
DONDE LA VENTILACIÓN PUEDA ESTAR RESTRINGIDA.
ADVERTENCIA
PRECAUCIONES PARA LA SEGURIDAD
¡LEA ATENTAMENTE ESTA SECCIÓN ANTES DE CONTINUAR!
ESES
ES
ES – 1
Soundtrack_2_Manual_EN_FR_ES_PRINTER_SPREADS_REV4.indd 1-10 13-11-14 10:41 PM
MESURES DE SÉCURITÉ
VEUILLEZ LIRE CETTE SECTION ATTENTIVEMENT AVANT DE CONTINUER!
MISE EN GARDE : POUR RÉDUIRE LE RISQUE DE DÉCHARGE
ÉLECTRIQUE, NE PAS ENLEVER LE COUVERCLE (OU LA PARTIE
ARRIÈRE). AUCUNE PIÈCE RÉPARABLE PAR L’UTILISATEUR À
L’INTÉRIEUR. L’ENTRETIEN DOIT ÊTRE FAIT PAR UN TECHNICIEN
COMPÉTENT.
RISQUE DE DÉCHARGE ÉLECTRIQUE
NE PAS OUVRIR
Le symbole de l’éclair avec une pointe en forme
de flèche, dans un triangle équilatéral, avertit
l’utilisateur de la présence d’une « tension
dangereuse » non isolée près du produit qui
peut être suffisante pour constituer un risque
de décharge électrique.
Le point d’exclamation dans un triangle
équilatéral avertit l’utilisateur de la présence
de directives importantes en matière de
fonctionnement et d’entretien (service) dans
les documents qui accompagnent l’appareil.
MISE EN GARDE : POUR RÉDUIRE LE RISQUE D’INCENDIE OU DE
DÉCHARGE ÉLECTRIQUE, NE PAS EXPOSER CET APPAREIL À LA PLUIE OU
À L’HUMIDITÉ, ET LES OBJETS REMPLIS DE LIQUIDES, COMME LES VASES,
NE DOIVENT PAS ÊTRE PLACÉS SUR CET APPAREIL.
MISE EN GARDE : POUR PRÉVENIR LE RISQUE DE DÉCHARGE
ÉLECTRIQUE, FAIRE CORRESPONDRE LA LAME LARGE À LA FENTE LARGE;
INSÉRER ENTIÈREMENT.
MISE EN GARDE : POUR OBTENIR UNE PROTECTION CONTINUE CONTRE
LES RISQUES D’INCENDIE, REMPLACER LE FUSIBLE UNIQUEMENT PAR
UN FUSIBLE AVEC LE MÊME AMPÉRAGE ET LA MÊME TENSION. LE
REMPLACEMENT DOIT ÊTRE EFFECTUÉ PAR UN TECHNICIEN COMPÉTENT.
MISE EN GARDE : L’APPAREIL PEUT DEVENIR CHAUD. TOUJOURS
ASSURER UNE VENTILATION ADÉQUATE POUR PERMETTRE À L’APPAREIL
DE REFROIDIR. NE PAS PLACER L’APPAREIL PRÈS D’UNE SOURCE DE
CHALEUR OU DANS DES ESPACES QUI N’OFFRENT PAS UNE BONNE
VENTILATION.
MISE EN GARDE!
FR
FR – 1
Caisson de sous-graves
Conception du caisson de sous-graves Haut-parleur unique, conception bass-reflex, deux ports réglés à faible turbulence,
amplificateur intégré. Boîtier ABS moulé avec fini mat
Conception de l’amplificateur : courant élevé, sortie discrète
Amplicateur Ultra-Class-D™ : 120 Watts RMS soutenu / 240 watts puissance de pointe
Caractéristiques de l’amplificateur Allumage/veille auto, écrêtage doux
Haut-parleur de graves Cône en polymère composite de 210 mm (8 in)
renforcé, bobine acoustique de 38 mm (1-1/2 po)
Extension de basse fréquence* 33 Hz (DIN)
Fréquence de coupure du caisson de sous-graves 150 Hz fixe
H x l x P (le socle ajoute 3/4 po / 1,90 cm à la hauteur)** 14-3⁄16 x 18-5/16 x 6-5/16 po / 36,0 x 46,4 x 16,0 cm
Poids (déballé, le support ajoute 0,70 lb / 0,32kg) 11,2 lb / 5,08 kg
Accessoires (compris) Pieds de stabilité; le socle
Fini Noir
*DIN 45 500. Indique -3 dB dans une salle d’écoute typique. **Les pieds ajoutent 1 po / 2,5 cm de hauteur en position horizontale.
GARANTIE LIMITÉE
Paradigm garantit ce produit contre les défauts de matériaux et de fabrication dans des conditions normales d’utilisation pendant une période d’un (1) an
à compter de la date d’achat par l’acheteur original. Aux ns de la garantie, vous devez conserver votre reçu de caisse, ainsi que ce manuel de l’utilisateur
pour que la garantie soit valide. Pour un soutien additionnel concernant le produit, appelez Paradigm au 905-696-2868 ou envoyez un courriel à l’adresse
FR
FR – 10
Soundtrack_2_Manual_EN_FR_ES_PRINTER_SPREADS_REV4.indd 1-10 13-11-14 10:41 PM
  • Page 1 1
  • Page 2 2
  • Page 3 3
  • Page 4 4
  • Page 5 5
  • Page 6 6
  • Page 7 7
  • Page 8 8
  • Page 9 9
  • Page 10 10
  • Page 11 11
  • Page 12 12
  • Page 13 13
  • Page 14 14
  • Page 15 15
  • Page 16 16
  • Page 17 17
  • Page 18 18
  • Page 19 19
  • Page 20 20
  • Page 21 21
  • Page 22 22

Paradigm Speaker CE1588 User manual

Category
Subwoofers
Type
User manual
This manual is also suitable for

Ask a question and I''ll find the answer in the document

Finding information in a document is now easier with AI