Page is loading ...

Earthmate
®
PN-60 GPS
DE LORME
User Manual

The Latest and Most Comprehensive
PN-Series Information is Always Online!
User Manuals, Getting Started Info, Tutorials
The DeLorme Wiki is your link to comprehensive information about your Earthmate
®
PN-Series GPS. The most recent
User Manual is always available for download. www.wiki.delorme.com
Community Forum
An open, interactive community of DeLorme product users. DeLorme experts monitor the boards regularly and participate
to answer questions and share their experiences. forum.delorme.com
DeLorme Products and Available Accessories
Our website has product and accessory information, as well as press coverage, contact, and company information.
www.delorme.com
Technical Support
A large searchable knowledge base of detailed technical information about current and past DeLorme products.
www.delorme.com/support
News and Real-Life Examples
Catch up with news about what we are working on, real-life examples using PN-Series devices, and more at the DeLorme
Weblog. blog.delorme.com
SPOT Satellite Communicator Account & Subscription Information
Visit the SPOT website to sign up and manage your account and learn more about the SPOT Satellite Communicator.
www.findmespot.com

Table of Contents
Introduction ............................................................................................................4
Using the PN-60 ....................................................................................................6
Using the SPOT Communicator ........................................................................... 13
The Home Page ................................................................................................... 16
The Activities Page .............................................................................................. 17
The Satellites Page .............................................................................................. 18
The Map Page ..................................................................................................... 21
The Compass Page ..............................................................................................32
The Trip Info Page ................................................................................................35
The SPOT Communicator Page ........................................................................... 37
The Find Page ......................................................................................................44
The Waypoints Page ............................................................................................48
The Geocaches Page ...........................................................................................53
The Routes Page .................................................................................................61
The Tracks Page ...................................................................................................66

The Prole Page ................................................................................................... 71
The Sun/Moon Page ............................................................................................ 74
The Tides Page .................................................................................................... 76
The Hunt/Fish Page .............................................................................................78
The Settings Page ................................................................................................79
Additional Information ..........................................................................................85
Info Fields Table ...................................................................................................95
Index .................................................................................................................. 101


4
Introduction
This manual is for use with DeLorme Earthmate
®
PN-60/PN-60w GPS and SPOT Satellite Communicator
devices. Note References to "PN-60" include both
devices unless otherwise indicated.
Welcome
The Earthmate PN-60/60w is a complete out-of-the-box
handheld GPS solution for all your outdoor activities.
Navigate worry-free with included topo maps of
the U.S. and Canada.
Add high-resolution aerial imagery for a unique
GPS experience.
Enjoy next-generation GPS features and performance.
If you purchased a PN-60w, the addition of a SPOT
Communicator gives you and your loved ones
peace of mind.
Notify the GEOS International Emergency Rescue
Coordination Center of your GPS location.
Send for assistance in time of need—around the world.
Be completely independent of mobile phone or other
land-based radio coverage.
Getting Started
See the Quick Start Guide for detailed information
on setting up your PN-60 and, if included, your SPOT
Communicator.
How to Use the Manual
When the manual instructs you to do something, use
these actions on the PN-60:
To select an item on the screen, such as a eld, check
box, button, drop-down list, menu item, or search
result—use the arrow keypad to move/scroll to
the item to highlight it and press ENTER.
» To edit alphanumeric elds, use the on-screen
keyboard. See Using the Keyboard on page 10.
» To edit numeric elds, use the up/down arrows on
the arrow keypad to increase/decrease numbers
and change other information. Use the left/right
arrows to move the selection.
To clear a selected check box, highlight it and
press ENTER.
When you make a selection or nish editing
information, press ENTER to complete the action.
Introduction

5
Introduction
To exit a page or screen, press QUIT.
To complete a series of steps—an arrow ( > ) indicates
the sequence. Note that the sequences do not include
ENTER and QUIT button presses described above.
Visit the DeLorme Wiki at wiki.delorme.com for more
information. The latest version of the User Manual is always
available for download.

6
Using the PN-60
For information on setting up your device for the rst
time, see the Quick Start Guide.
Batteries and SD Card
Use two AA batteries (Lithium is recommended;
you can also use NiMH or alkaline) or a DeLorme
rechargeable Lithium-ion (Li-ion) battery.
When the PN-60 is using battery power, the battery
indicator on the Home Page displays the percentange
of battery life remaining.
Remove the batteries when storing the PN-60 for
a month or longer.
A slot for an SD card (not included) is underneath
the batteries inside the battery compartment.
SD/SDHC/MMC cards up to 32GB are supported.
To install batteries and the SD card
1. Unscrew the D-rings on the back of the device
until you can remove the battery cover.
2. Optional. To insert an SD card, gently press down
the SD card latch, insert the card in the slot, and press
down the slot to close the latch. Note Do not lift
the SD card latch as this could cause damage.
3. Insert the batteries according to the polarity symbols
inside the battery compartment.
4. Replace the back cover and screw in the D-rings.
To check the battery type
After you install the batteries, go to Settings > System
> Battery Type and make sure the correct battery type is
selected; this ensures that the battery indicator displays
the correct amount of battery life remaining.
To view the battery indicator
The battery indicator is on the Home Page; for more infor-
mation, see The Home Page section on page 16.
To charge a DeLorme Li-ion battery
in the PN-60
1. Install the battery in the device.
2. To leave the device powered on while charging, power
it on and connect the USB cable to the computer. On
the Home Page, the battery indicator displays a plug.
OR
To put the device in charging mode, power it off,
connect the USB cable to the computer, and then
quickly press Power. The light indicator below the
Using the PN-60

7
Using the PN-60
bottom left corner of the screen ashes red. When
the device is fully charged, the light is green.
To improve battery life
Automatically turn off the backlight after 15 seconds;
go to Settings > Display > Backlight Timer >
15 sec.
Use the power saving option; go to Settings >
System > GPS Setting > Power Saving. For more
information, see To change system settings on
page 79.
Turn off the GPS receiver when inside. Go to Settings
> System > GPS Setting > Off
OR
from the Satellites Page, go to MENU > Turn Off GPS.
Use batteries with higher milliamp-hour (mAh) ratings,
such as Energizer
®
Ultimate Lithium.
Turning the PN-60 On or Off
The Power button is at the bottom right corner of the
button area.
To turn on the PN-60, press and hold Power until you
see the Welcome screen.
To turn off the PN-60, press Power and hold for
1.5 seconds until the “Shutting down the device”
message displays. Then, release the button.
To view or hide Demo Mode
The rst time you turn on the PN-60, it opens in Demo
Mode.
To view the demo, follow the on-screen instructions.
To exit the demo, press QUIT.
To turn off Demo Mode—from the rst screen, press
ENTER to clear the Show at Startup check box.
To restore Demo Mode, go to Settings > System >
GPS Setting > Demo Mode.
The Home Page
The Home Page uses icons to give you a quick and easy
way to locate the page on the device you want to view.
For more information, see The Home Page section
on page 16.
Rotating the Display
The screen rotates when you turn the device upside down
and the keys on the arrow keypad adjust so that they
match the device’s orientation. If you don’t want the
display to rotate, go to Settings > Display > Allow
Screen Rotation and clear the check box.

8
Using the Buttons
Power
Use the Power button to turn the PN-60 on and off, lock
the buttons, or to change the backlight settings.
To turn on the device, press and hold the Power
button until the Welcome screen displays.
To turn off the device, press the Power button until
the “Shutting down the device” message displays.
To open the power options screen, quickly press and
release the Power button. The following options are
available:
» To change the backlight intensity, use the arrow
keypad to adjust the backlight slider.
» To lock the buttons, select Yes when you see the
Lock the buttons? message.
» To unlock the buttons, press Power. Then, select
Yes when you see the Unlock the Buttons?
message.
Tips
» Reduce the backlight intensity and decrease the timer to
signicantly improve battery life.
» The TFT screen is readable in direct sunlight or slanting light
conditions.
» For more information about backlight intensity and the back
light timer, see the Settings > Display section on page 80.
In/Out
Use the IN/OUT button to zoom the map or a track prole
in or out or scroll through a list.
Press IN once to zoom the map or a track prole in
one level and show more detail.
Press and hold IN to zoom the map in all the way.
Press OUT once to zoom the map or a track prole
out one level and show less detail.
Press and hold OUT to zoom the map out all the way.
Press IN or OUT to move forward or backward one
page at a time when viewing lists.
Page
Press the PAGE button to move forward through the
pages in the page order sequence. To add, remove, or
Using the PN-60

9
Using the PN-60
reorder pages, go to Settings > Page Order (for more
information, see Page Order on page 84).
The default page sequence is:
Home
Satellites
Map
Compass
Trip Info
Directions (when navigating)
Menu
Press the MENU button to access functions for the page
or screen you are using.
From any page, press the MENU button twice to go
to the Home Page.
From any main menu, press the MENU button to go
to the Home Page.
The menu lists actions specic to the active page—
select the item and press ENTER.
Find
The Find button is labeled with a magnifying glass.
Use it to search your map for a point of interest, address,
coordinates, and more. You can also search for waypoints
and geocaches in an open waypoint or geocache le. For
more information, see The Find Page section starting on
page 44.
Mark
The Mark button is labeled with a pushpin. Use it to mark
a waypoint at your current GPS location or, when panning,
at the cursor location. Once you mark a waypoint, use its
details page to manage it, view it on the map, or create a
route to it. For more information, see The Waypoints Page
section starting on page 48.
Arrow Keypad
Use the arrow keypad to move around pages and screens.
Press once to move the map cursor left, right, up,
or down in increments.
Press and hold to pan the map in that direction.
Highlight options in menus or lists. Press down to
move to the next entry, press up from the rst entry
to go to the last entry, or press down from the last
entry to go to the rst entry.
Highlight elds and highlight characters on the
keyboard screen.
Press and hold to quickly scroll through a menu or list.
On the Map Page, press any arrow once to turn on
the backlight without changing the map view.

10
Enter
Press the ENTER button to:
Complete the selection of a menu option, entry, eld,
or screen button.
Get detailed information about a point on the map,
if available.
Quit
The function of the QUIT button depends on the status of
the PN-60; some of the things you can do are:
Exit a page or screen.
Cancel actions (for example, panning).
Close the keyboard and cancel changes.
Delete individual points when measuring distance.
Move backwards through the page order sequence.
Taking a Screenshot
To take a screenshot, hold the Power button and
press ENTER.
An SD card must be inserted in the device.
The Screenshots On check box must be selected
in Settings > Display. This creates a “screenshots”
folder on the SD card.
View the SD card contents and open the screenshots
folder. If the SD card is still in the device, go to
Settings > Connect to Computer > Open SD Card.
Using the Keyboard
The on-screen keyboard is available when you need to
enter text, such as when editing a waypoint label, adding
text to a comment eld, or entering search parameters.
Use the arrow keypad to highlight the letter, number,
symbol, or punctuation you want to use, and then press
ENTER after each selection. When you are nished using
the keyboard, highlight OK and press ENTER.
For existing text, enter a letter to replace the highlighted
content. To keep the existing text but move the cursor to
the beginning/end of the text, select to move the
cursor to the beginning or to move the cursor to the
end of the text.
Using the PN-60

11
Using the PN-60
Special Keys
Move the cursor one space to the left without
deleting a letter or number.
Move the cursor one space to the right without
deleting a letter or number.
Change the case of the next letter (the active case
is shown in the keyboard). To use all caps, highlight
and then press ENTER twice. Also changes
numbers to additional symbols.
Move the cursor one space to the left, deleting the
character that was there.
Move the cursor one space to the right, leaving a
blank space.
Clear the content of the text eld being edited.
Accept the changes made to the text eld and
close the keyboard.
Insert a line break and move the cursor to the
next line.
Keyboard Shortcuts
These button presses are keyboard shortcuts.
IN–Delete the last character
OUT–Add a space
Find–Shift (for upper case and to show extra symbols)
Mark–Highlight OK
QUIT–Exit the keyboard
MENU–Move cursor focus from the keyboard to the
text box for faster editing.
Info Fields
The Map, Compass, Trip Info, and Prole Pages include
elds of information that you can customize to suit your
needs. You can even change which info elds display
depending on your activity. For each activity, the info eld
types change for navigating or tracking (regular GPS use).
Tip To change the info elds for an activity navigation/tracking
mode, put the device in that mode before you start making
changes. It is easy to go back to the default settings
at any time.
For more information about what info elds contain, see
the Info Fields Table on page 95.
For more information about Activities, see The Activities
Page on page 17.
To hide or show info elds
On the Map Page, you can hide info elds for a full-screen
view of the map or show them to get information.
Go to MENU > Info Fields and select Hide Info Fields or
Show Info Fields.
To arrange info elds
On the Map Page and Compass Page, you can change

12
how info elds look on the screen.
Go to MENU > Info Fields > Arrange Info Fields and
select an option.
To change the size of the text
On the Trip Info Page, you can change the size of the
text that displays, which also changes the number of info
elds. When the device is set to the small text option,
it displays eight info elds (2 wide, 6 narrow)—when it
is set to the large text option, it displays three wide info
elds.
Press MENU. The available text size option is preceded
by "Switch to"—highlight the option and press ENTER.
To change info elds
On the Map, Compass, Prole, and Trip Info pages,
you can customize which info elds display.
1. From the page, go to MENU > Info Fields > Change
Info Fields.
2. Select the info eld you want to change and press
ENTER. A list of available info elds opens.
3. Select the new info eld and press ENTER.
4. When you nish editing elds, press QUIT. The
changes are saved until you change them again
or restore them to the default settings.
To restore info elds
On the Map, Compass, Prole, and Trip Info Pages, you
can restore the default information elds for your current
activity.
From the page, go to MENU > Info Fields > Restore
Default Info Fields.
Units
You can select the units for different types of measurements
that are used on the PN-60.
To change the units, go to Settings > Units. For more
information, see Units on page 83.
Navigating or Tracking
Tracking is the normal state of the device when it has a
GPS x. You can turn off track recording, but the device
is still in tracking mode. When you follow a route on the
device, you are navigating.
Visit the DeLorme Wiki at wiki.delorme.com for more
information. The latest version of the User Manual is always
available for download.
Using the PN-60

13
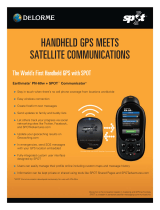
Using the SPOT Communicator
The SPOT Satellite Communicator has two buttons and
ve light indicators that provide access to power, the SOS
message, and device status information. It can operate
alone to send emergency messages when the PN-60w
is not available.
For information about setting up the SPOT Communicator
for rst time use and how to set up your account at
ndmespot.com, see the Quick Start Guide.
What You Need to Know
The SPOT Communicator needs a clear view of
the sky to obtain a GPS signal and provide the most
accurate location information. It is not reliable indoors,
in a cave, or in very dense woods.
Orient the SPOT Communicator so that the SPOT
logo faces toward the sky—this provides optimal
performance as the antenna is located under the logo.
Keep the SPOT Communicator at least 12 inches
away from other GPS devices as it can interfere
with signal reception of other GPS devices.
For detailed information about how the SPOT Communicator
works and its coverage area, go to ndmespot.com.
Buttons
Power
The Power button is on the side of the SPOT
Communicator above the SOS button.
Press and hold the Power button for three seconds
to turn the device on and off.
With the SPOT Communicator turned off, press
and hold the Power button for ve seconds to enter
Pairing Mode. Pairing Mode cannot start unless
the device is turned off.
SOS
The SOS button is on the side of the SPOT Satellite
Communicator below the Power button. It has a
protective cover to prevent accidental activation.
To activate or cancel SOS messaging mode from
the SPOT Communicator, press and hold the SOS button
for three seconds. A message dialog appears
on the PN-60w. An SOS message triggered by the
SPOT Communicator can be canceled by the
Using the SPOT Communicator

14
Using the SPOT Communicator
SPOT Communicator or by the paired PN-60w.
Note The SOS button should be used only for life-
threatening or other critical situations.
Light Indicators
The SPOT Communicator uses lights to tell you
what it’s doing. Every time you turn the SPOT
Communicator on, it performs an automatic self-test.
Important! If the SPOT Communicator’s self test fails,
the Power, GPS, and Message Sending lights
simultaneously blink red.
Power
The Power light blinks and changes color to indicate
various states:
Green–The SPOT Communicator is on and it passed
the self test.
Red–The batteries have less than 100
transmissions remaining.
Wireless Connection
The Wireless Connection light blinks blue when a
wireless connection is established between the PN-60w
and the SPOT Communicator. The blue light goes off if
the SPOT Communicator has not heard from the PN-60w
in 30 seconds. The Wireless Connection light blinks
rapidly when the PN-60w and SPOT Communicator
are being paired.
GPS
Green–The SPOT Communicator is operating in
independent mode (not connected to the PN-60w),
and is in view of three or more GPS satellites.
Red–The SPOT Communicator is in independent
mode and is unable to see three or more GPS
satellites.
Green/Red–When operating in dependent mode
(connected to the PN-60w), the GPS light blinks
green or red (depending on the GPS acquisition) for
15 seconds when the SPOT Communicator transitions
from GPS acquisition to message transmission.
Note The GPS light blinks green or red (depending
on the GPS acquisition) simultaneously with the
Message Sending light for 15 seconds when the
SPOT Communicator starts sending a SPOT message.
Message Sending
Green–Any SPOT message is being sent.
Red–A casual message was not sent. The casual
message type includes Check-in/OK, Reference Point,
Track Progress, and Geocache messages. For more
information, see page 38.

15
SOS
Green–The SPOT Communicator is in SOS mode.
Red–Cancelling SOS mode.
Batteries and Connector
Batteries
The SPOT Communicator is powered by two Lithium
batteries (Energizer
®
Ultimate Lithium 8x). See page 92 for
more information.
Connector
The SPOT Communicator has a mini-USB connector
located in the battery compartment. The mini-USB
connector is used to transfer rmware upgrades to
the SPOT Communicator.
Device Pairing
To control the SPOT Communicator with the PN-60w, you
must rst pair the devices. From the Home Page, open
the SPOT Communicator Page and follow the on-screen
instructions. You can also go to Settings > Wireless >
Pair SPOT Communicator to pair the devices.
For more information about device pairing and initial
setup, see the The SPOT Communicator Page section
starting on page 37 and the Quick Start Guide.
Visit the DeLorme Wiki at wiki.delorme.com for more
information. The latest version of the User Manual is always
available for download.
Using the SPOT Communicator

16
The Home Page uses icons to give you a quick and easy
way to locate the page on the device you want to view.
Use the arrow keypad to select an icon and then press
ENTER to open that page. The Home Page also displays
the GPS status and accuracy, the battery indicator, time,
and date.
To quickly get to the Home Page, from any page
on the PN-60, press MENU twice.
To switch pages, press the right or left arrow until
the page view changes.
Home Page Icons
Tracks
Waypoints
Geocaches
Compass
Map
Trip Info
Settings
Satellites
SPOT (PN-60w only)
Tides
Hunt/Fish
Sun/Moon
Routes
Prole
Activities
Visit the DeLorme Wiki at wiki.delorme.com for more
information. The latest version of the User Manual is always
available for download.
The Home Page
The Home Page

17
Use the Activities Page to optimize the info elds and
settings on your PN-60 for eight pre-dened activities
and two custom activities. For each activity, the device
will automatically change the page order, Home Page
icon layout, info elds, and other settings to give you
information that is specic to what you are doing.
If you change an option while you are using an activity,
your changes are saved—allowing you to ne tune each
one of your activities. To change info elds for navigating
or tracking (normal GPS use), just make sure you are in
the mode you want to change.
To change the activity
Select the activity you want to use and press ENTER.
The background of the current activity is highlighted green.
To restore the default activity settings
It's easy to switch back to the default options for an
activity at any time. With the activity you want to reset
highlighted on the Activities Page, go to MENU >
Restore Default Settings.
For more information about the default options for each
activity, visit the DeLorme Wiki (wiki.delorme.com).
To create a custom activity
Highlight one of the Custom activities and then go to
MENU > Rename Button. Use the on-screen keyboard
to edit the button name.
Visit the DeLorme Wiki at wiki.delorme.com for more
information. The latest version of the User Manual is always
available for download.
The Activities Page
The Activities Page

18
The Satellites Page displays GPS and satellite information,
time, and elevation.
Constellation and Signal Graph
Both the satellite constellation and the satellite signal
graph display visible satellites and their identifying numbers.
The satellite constellation depicts each satellite’s position
and the signal graph bars indicate the strength of each
satellite signal.
The icons in the satellite constellation and the bars in the
signal graph are color-coded based on the quality of the
data they are transmitting:
Gray–Satellites have not been located but they are
shown in the constellation because they appear in the
PN-60’s almanac data.
Red–The receiver is tracking the satellite, but it is not
using it to navigate.
Yellow–The receiver is tracking the satellite, predicted
ephemeris data is available when a 3-D x has not
been obtained, and the satellite is being used for
navigation.
Green–The receiver is tracking the satellite,
ephemeris data is available, and the satellite is being
used for navigation.
Blue–The receiver is tracking the satellite, ephemeris
data is available, the satellite is being used for
navigation, and WAAS corrections are available.
GPS and WAAS Status
The Global Positioning System (GPS) is a system of
satellites that orbit the earth to provide position and
navigation information. The Wide Area Augmentation
System (WAAS) is system of satellites and ground
The Satellites Page
The Satellites Page
/