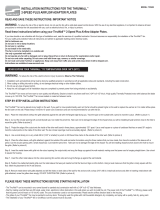
INSTALLATION INSTRUCTIONS FOR THE AIR PRESSURE INDICATOR
READ AND SAVE THESE INSTRUCTIONS (FOR GENERAL VENTILATION PURPOSE ONLY)
MODEL: PI004
SUNCOURT INC.
P.O. BOX 40
DURANT, IOWA 52747-0040
1.800.999.FANS (3267)
www.suncourt.com
WNT400-1015-C01-HD
Printed in China
Mounting your Air Pressure Indicator:
Install the Air Pressure Indicator on any clean and dry vertical section of the suction side of the vent pipe in an indoor location where the Air Pressure Indicator
can be easily read.
1. Using the adhesive tape on the back, mount to the vent pipe, keeping the Air Pressure Indicator vertical so that the fluid does not run out.
2. Remove the sealing caps from the tube and allow the liquid to settle. You may need to tap the Air Pressure Indicator lightly with your finger to settle the liquid.
3. Slide the tube up-down until the liquid level is at the Zero level in both columns. Use screw provided to hold tube in place. Screw goes into the hole above the
numbered section. (See photo #1) This is how the indicator will look if the fan is not operating.
4. Using a 3/16” drill bit, drill a hole in the vent pipe 1” to 2” below the top of the Air Pressure Indicator.
5. Connect one end of the tubing to the top of either opening of the Air Pressure Indicator and insert the other end into the 3/16” hole. Use a little silicon sealant
to make sure the hose connections are airtight.
6. Complete the information on the installation label and apply to the vent pipe near the installation.
7. See photo #2 to see how the liquid should appear when the fan is running. The liquid will be higher on the side the 3/16” tubing was inserted into. The
markings are not calibrated. You may get a different reading than what is pictured.
Please Note: Do not ingest the liquid. Contact with your eyes or skin may cause irritation. Liquid will stain if spilled.
Warranty
Subject to the following limitations, Suncourt Inc. (manufacturer) warrants that the Air Pressure Indicator will, for 5 (five) years from date of original purchase, remain free
from appearance of defects in workmanship or materials. This warranty is subject to the following limitations: (a) manufacturer’s liability is limited to the replacement or
repair of the unit, as decided by the manufacturer; (b) a defective unit must be returned, prepaid, with proof of purchase, to Suncourt; and (c) this warranty does not
apply to defects resulting from the alteration, abuse, accidental damage, unauthorized repair, or misuse of the unit. This warranty is given in lieu of all other warranties,
guarantees, and conditions on manufacturer’s part, and the manufacturer shall have no tortious or other liability in respect to this Air Pressure Indicator. There is no
implied warranty of merchantability and fitness for a particular purpose. Suncourt shall not be liable for any direct, indirect, special, incidental or consequential damages
arising from, or relating to, the Air Pressure Indicator or the performance of it. Suncourt’s maximum liability shall not exceed the amount of the purchase price of the Air
Pressure Indicator. The sole remedy under this warranty shall be the repair or replacement of the product.
Ship unit to Suncourt Inc. only after obtaining a Return
Goods Authorization (RGA) number. Returns without this RGA number will not be accepted.
Actual product appearance may differ from illustrations. Suncourt reserves the right to modify any or all of its products’ features, designs, components and specifications
without notice.
Photo #1 Fan not running Photo #2 Fan runningInstallation
PVC Pipe
Air Pressure
Indicator:
Installed as
shown
Radon
To exhaust fan
mounted in attic
Exhaust Option 2:
Interior Stack
Exhaust
Option 1:
Exterior
Stack


