Page is loading ...

USER MANUAL
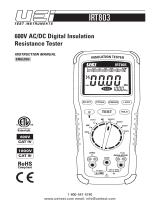
Insulation Tester + DMM
Model MG320

2 MG320-en-GB_v1.1 1/17
TableofContents
1. INTRODUCTION 3
2. SAFETY 3
3. METERDESCRIPTION 5
4. CONTROLBUTTONS 6
5. SYMBOLSANDANNUNCIATORS 6
6. OPERATINGINSTRUCTIONS 7
6.1DisplayBacklight 7
6.2DataHold 7
6.3LowBatteryIndication 7
6.4DCVOLTAGEMEASUREMENTS 7
6.5ACVOLTAGEMEASUREMENTS 8
6.6LOWRESISTANCE/CONTINUITYMEASUREMENTS 9
6.7INSULATIONRESISTANCEMEASUREMENTS 10
6.7.1DisableInsulationTestLockMode 10
6.7.2InsulationResistanceTestTimeSetup 11
6.7.3DielectricAbsorptionRatio[DAR]InsulationTesting 11
6.7.4PolarizationIndex[PI]InsulationTesting 11
6.7.5ComparatorUtility 12
7. DATARECORDING 12
8. MAINTENANCE 13
8.1BATTERYINSTALLATION 13
8.2REPLACINGTHEFUSE 13
9. SPECIFICATIONS 14

3 MG320-en-GB_v1.1 1/17
1. Introduction
Congratulations on your purchase of the MG320 True RMS Insulation Resistance CAT IV 600V DMM.
The MG320 features a rugged design for heavy duty use. The MG320 measures Insulation
Resistance, AC/DC Voltage, and Resistance.
Insulation Resistance tests are automatic ranging with 5 test voltages from 50V to 1000V. The
MG320 can store and recall up to 99 measurements.
The MG320 is suitable for measuring the insulation resistance on elecrical equipment such as
transformers, motors, cables, switches, and appliances.
Proper use and care of this meter will provide years of reliable service.
Features
True RMS AC/DC Voltage Measurments to 600V
Insulation Resistance Measurements up to 20G
Low Resistance/Continuity Measurements to 20k
Auto Ranging measurements
Polarization Index (PI) and Dielectric Aborption Ratio (DAR) tests
Five (5) Insulation Resistance test voltages (50, 100, 250, 500, and 1000V)
Insulation Resistance tests in10% voltage steps (from 50% to 120% of range)
Front panel LED test voltage alert lamp
Eight (8) Insulation Resistance measurement ranges (automatic ranging)
Pass/Fail Comparator function
Auto-discharge at end of test
High voltage display symbols
Hand’s free test lock feature
Manually store and recall up to 99 readings
Overload indication
Optional remote test probe for controlling the TEST button remotely
Test leads, alligator clips, batteries, user manual, and case included
2. Safety
Warning and Caution safety label
Double Insulation
DC Direct Current
AC Alternating Current
Low Battery
Fuse symbol
High Voltage Alert
Audible beeper
Earth ground
Complies with EC standard

4 MG320-en-GB_v1.1 1/17
PER IEC1010 OVERVOLTAGE INSTALLATION CATEGORY
OVERVOLTAGE CATEGORY I
Equipment of OVERVOLTAGE CATEGORY I is equipment for connection to circuits in which measures are taken
to limit the transient over-voltages to an appropriate low level.
Note – Examples include protected electronic circuits.
OVERVOLTAGE CATEGORY II
Equipment of OVERVOLTAGE CATEGORY II is energy-consuming equipment to be supplied from the fixed
installation.
Note – Examples include household, office, and laboratory appliances.
OVERVOLTAGE CATEGORY III
Equipment of OVERVOLTAGE CATEGORY III is equipment in fixed installations.
Note – Examples include switches in the fixed installation and some equipment for industrial use with permanent
connection to the fixed installation.
OVERVOLTAGE CATEGORY IV
Equipment of OVERVOLTAGE CATEGORY IV is for use at the origin of the installation.
Note – Examples include electricity meters and primary over-current protection equipment
SAFETY INSTRUCTIONS
This meter has been designed for safe use, but must be operated with caution. The rules listed below
must be carefully followed for safe operation.
1. NEVER apply voltage to the meter that exceeds the specified maximum:
Input Protection Limits
Function Maximum Input
V DC or V AC 600VDC/AC rms
Resistance/Continuity 500mA/600V fuse protected input
Insulation Resistance 250VDC/AC rms
Surge Protection: 8kV peak per IEC 61010
2. USE EXTREME CAUTION when working with high voltages.
3. DO NOT measure voltage if the voltage on the "COM" input jack exceeds 600V above earth
ground.
4. NEVER connect the meter leads across a voltage source while the function switch is in the
resistance mode. Doing so can damage the meter.
5. ALWAYS discharge filter capacitors in power supplies and disconnect the power when making
resistance tests.
6. ALWAYS turn off the power and disconnect the test leads before opening the covers to replace
the fuse or batteries.
7. NEVER operate the meter unless the battery/fuse cover is in place and fastened securely.
8. If the equipment is used in a manner not specified by the manufacturer, the protection provided by
the equipment may be impaired.

5 MG320-en-GB_v1.1 1/17
1
2
3
4
5
6
7
8
SAFETY STANDARDS
This instrument is designed and produced strictly in accordance with the safety requirements for GB4793 electronic
measuring instruments and IEC61010-1 safety standards. This instrument meets the double insulation over-voltage
standard CAT IV 600V and pollution degree II. Failure to use the instrument as described in this user manual can
weaken or negate the protections provided.
Check the instrument, test leads, and test pen before use. Check for any abnormal conditions such as
exposed test lead wire, damaged meter housing, no display or random display errors.
Do not use this instrument with an open battery compartment.
Damaged test leads must be replaced with those of the same type or specifications.
Do not touch bare wires or conductors, unused input terminals, or the circuit being measured when the
instrument is in operation.
Use caution when measuring voltages greater than 42V DC or 30V AC. Keep fingers behind the finger guard
on the test leads to avoid electrical shocks when measuring.
Do not apply signals greater than those specified between any two terminals or any terminal and ground.
Set the function switch to the correct position before beginning a test. Never move the function switch during a
test. Please stop testing and remove connections to the circuit under test before moving the function switch to
a new position.
Do not store or use the instrument in an explosive or flammable environment or an environment characterized
by high temperature, high humidity, or strong electromagnetic fields.
There are no user-serviceable parts in this instrument. Please refer all service and repairs to Extech
Instruments.
Replace the batteries as soon as the low battery icon appears in order to ensure the highest measurement
accuracy.
3. MeterDescription
1. 5999 count backlit LCD display with bargraph
2. Control buttons; detailed in next section
3. Rotary function switch
4. Low Resistance/Continuity (+) positive input jack
5. Low Resistance/Continuity (-) COM input jack
6. Insulation and Voltage (-) COM input jack
7. Insulation and Voltage (+) positive input jack
8. Test Voltage alert LED indicator
Note: Tilt stand and battery compartment on back

6 MG320-en-GB_v1.1 1/17
1
2
3
45
6
7
8
9
4. Controlbuttons
1. Data Hold on/off (short press) for AC/DC Voltage and Resistance modes only. Also for display
Backlight on/off (long press)
2. Short press to Recall stored readings. Another short press to exit this mode.
3. Save reading (short press) and Clear all stored readings (long press)
4. Comparator (short press) and Zero (long press)
5. PI and DAR test mode selection (short
presses)
6. Insulation Test Lock button (long press to
activate/deactivate lock mode)
7. Up arrow for adjusting test voltage output and
scrolling through recalled readings
8. Down arrow for adjusting test voltage output
and scrolling through recalled readings
9. Press to start Insulation or Low Resistance
tests. Insulation tests output high voltages and measure insulation resistance. Low Resistance
tests can be made up to 20kΩ.
5. SymbolsandAnnunciators
1. Test Voltage alert
2. Insulation Test Lock icon
3. Audible beeper symbol
4. PI/DAR test modes
5. True RMS voltage measurement
6. ZERO function icon
7. Battery status
8. Test voltage value
9. Measurement type and units
10. PI/DAR timer information
11. Bargraph measurement representation
12. Comparator area: Test pass [PASS], test fail [NG], units [K, M, G], and reference value.
13. Main measurement display digits
14. Display Hold Icon (freeze/unfreeze display)
15. Save/Recall readings (01-99)
1234 567
8
9
10
11
12
13
14
15

7 MG320-en-GB_v1.1 1/17
6. OperatingInstructions
WARNING: Risk of electrocution. High-voltage circuits, both AC and DC, are very dangerous and should be
measured with great care.
1. ALWAYS turn the function switch to the OFF position when the meter is not in use.
2. If “>” appears in the display during a measurement, the value exceeds the maximum range of
the meter.
6.1 Display Backlight
Press and hold the button to switch the backlight on or off. Excessive use of the backlight will
cause the batteries to drain quicker.
6.2 Data Hold
The Data Hold function freezes the reading in the display. To freeze or unfreeze the reading, press
H (Data Hold) key. The H icon is shown when data hold is active. This mode is available for Voltage
and Resistance modes only.
6.3 Low Battery Indication
When the icon appears in the display, the battery must be replaced. See the Maintenance
section for details on battery and fuse replacement.
6.4 DC VOLTAGE MEASUREMENTS
CAUTION:
When the measured voltage is > 42VDC or 600VAC the meter flashes the warning icon on the upper left.
Do not measure DC voltages if a motor on the circuit is being switched ON or OFF. Large voltage surges may
occur that can damage the meter.
1. Set the function switch to the position.
2. Insert the black test lead banana plug into the negative COM jack (6).
Insert the red test lead banana plug into the positive V jack (7).
3. Touch the black test probe tip to the negative side of the circuit.
Touch the red test probe tip to the positive side of the circuit.
4. Read the voltage in the main display and in the lower bargraph.
5. Press the
button to store the reading.
6. Short press the H (Hold) button to freeze (H icon displayed) or
unfreeze (no H icon displayed) the displayed reading.
7. Note that the Auto Power OFF function activates after 3 minutes of
inactivity. The meter will audibly beep just prior to shutting off.
V
DC
100 200 300 400 500 600 700
0

8 MG320-en-GB_v1.1 1/17
6.5 AC VOLTAGE MEASUREMENTS
WARNING: Risk of Electrocution. The probe tips may not be long enough to contact the live parts inside
some 240V outlets for appliances because the contacts are recessed deep in the outlets. As a result, the reading
may show 0 volts when the outlet actually has voltage on it. Make sure the probe tips are touching the metal
contacts inside the outlet before assuming that no voltage is present.
CAUTION
Do not measure AC voltages if a motor on the circuit is being switched ON or OFF. Large voltage surges may
occur that can damage the meter.
Do not measure voltages higher than 600V
When the measured voltage is > 60VDC or 600VAC the meter flashes the warning icon on the upper left.
Do not measure AC voltages if a motor on the circuit is being switched ON or OFF. Large voltage surges may
occur that can damage the meter.
1. Set the function switch to the position.
2. Insert the black test lead banana plug into the negative COM jack
(6).
Insert red test lead banana plug into the positive V jack (7).
3. Touch the black test probe tip to the neutral side of the circuit.
Touch the red test probe tip to the “hot” side of the circuit.
4. Read the voltage in the main display and in the lower bargraph.
5. Short press the H (Hold) button to freeze (H icon displayed) or
unfreeze (no H icon displayed) the displayed reading.
6. Press
to store the reading
7. Note that the Auto Power OFF function activates after 3 minutes
of inactivity. The meter will audibly beep just prior to shutting off.
8. Note that the Auto Power OFF function activates after 3 minutes
of inactivity. The meter will audibly beep just prior to shutting off.
V
AC
100 200 300 400 500 600 700
0

9 MG320-en-GB_v1.1 1/17
6.6 LOW RESISTANCE/CONTINUITY MEASUREMENTS
WARNING: To avoid electric shock, disconnect power to the unit under test and discharge all capacitors
before taking any resistance measurements. Remove the batteries and unplug the line cords.
WARNING: To avoid electric shock, never measure resistance on circuits or wires that have a voltage.
1. Set the function switch to the Ω position.
2. Insert the black test lead banana plug into the negative COM
jack (5).
Insert the red test lead banana plug into the positive
CONTINUITY jack (4).
3. Press the TEST button on the meter (or on the optional
remote test leads) to put the meter in test mode. The display
will show TEST and the front panel alert LED will light.
4. Reset the display to zero before testing: Short the test probes
and note the value. Short the test probes again and press and
hold ZERO until ZERO is displayed (0.00Ω reading when
successful). Press and hold ZERO again to exit.
5. Before testing, it is best to disconnect one side of the part
under test so that other circuits do not interfere with the
resistance reading.
6. Touch the test probe tips across the circuit or part under test.
7. Read the resistance in the main display.
8. If the circuit is open, the display will indicate “>”. If 2V or more
are sensed on the device under test, the meter will stop the
test.
9. Short press the H (Hold) button to freeze (H icon displayed) or unfreeze (no H icon displayed)
the displayed reading.
10. Press
to store the reading
11. Note that the Auto Power OFF function activates after 3 minutes of inactivity. The meter will
audibly beep just prior to shutting off.
TEST
>

10 MG320-en-GB_v1.1 1/17
6.7 INSULATION RESISTANCE MEASUREMENTS
Note: Disconnect the unit under test from all power sources and isolate it from any stray
resistance.
1. Connect the red test lead to the meter’s INSULATION (+) jack (7) and the black test lead to the
EARTH (-) jack (6). Connect the probe end of the test leads to the circuit under test.
2. Set the rotary function switch to one of the Insulation Resistance test positions (50V, 100V,
250V, 500V, or 1000V); the selected test voltage is indicated on the top right of the display.
3. Press the TEST button on the meter (or on the optional remote test lead) to start testing (TEST
will display).
4. The primary display and the analog bargraph will show
the insulation resistance in Ω.
5. The test voltage (VDC) value will be indicated in the top
right display, the
symbol will flash and the front panel
red LED will light.
6. The meter defaults to test lock mode (lock icon
displayed) so the test will run without having to hold the
TEST button.
7. Press the TEST button to stop the test.
8. At the end of each test the high voltage switches off
(alert symbol
and LED light switch off), the measured
resistance value is held in the primary display, and the
meter internally discharges the balance of the test
voltage.
9. Short press the H (Hold) button to freeze (H icon) or
unfreeze (no H icon) the displayed reading.
10. Press
to store the reading
Note: If the circuit under test is live and has a voltage potential (AC/DC) over 25V, the meter will not
test (the display will show “EXT” and the
symbol will flash). If the circuit under test is not live or if
its voltage is less than 25V, the meter will begin applying voltage to the circuit under test.
Note: Do not turn the function switch to another test position during a test. Please wait until a test is
completed and test leads are removed from the device under test before moving the function switch.
6.7.1 Disable Insulation Test Lock Mode
To disable test lock mode, press and hold the button until the lock icon switches off and
then press and hold the TEST button for the duration of the test (TEST will be displayed).
Release the button to stop the test.

11 MG320-en-GB_v1.1 1/17
6.7.2 Insulation Resistance Test Time Setup
1. Press the button to select the desired test time. Select from 15s, 30s, 1m, 15s/1m,
1m/30s, 10m, 15s/10m, and 30s/10m. Connect the meter to the device under test as shown
in the Insulation Resistance test section above.
2. Press TEST to start the test. The test will end automatically after the time period has elapsed.
NOTE: Combination test times (15s/1m, for example) provide an audible beep at the first test time
value and then continue testing until the test automatically stops at the second test time value.
6.7.3 Dielectric Absorption Ratio [DAR] Insulation Testing
Read and understand all operations and safety information in the Insulation Resistance
measurement section above and in the Safety section before continuing.
1. Connect the meter to the device under test as shown in the Insulation test section above.
2. Select the desired output test voltage using the rotary function switch.
3. Use the PI/DAR button to step to the first DAR test mode (60 seconds : 15 seconds ratio test)
or to the second DAR test mode (60 seconds : 30 seconds ratio test).
4. The display will show the DAR icon when the DAR mode is successfully accessed.
5. The test times will show on the lower right.
6. Press the TEST button to start the test. When Time1 is reached the meter beeps and then
beeps again when Time2 is reached at which time the test automatically stops.
7. During the test the main display digits show the test elapsed timer, the voltage alert flashes
on the upper left, and the ‘test voltage alert’ LED will light.
8. If the insulation breaks down during the test, the meter emits an audible tone and buzzer.
9. Press the TEST button to stop the test and activate the discharging circuit.
6.7.4 Polarization Index [PI] Insulation Testing
Read and understand all operations and safety information contained in the Insulation Resistance
measurement section above and the Safety section before continuing.
1. Connect the meter to the device under test as shown in the test section above.
2. Select the desired output test voltage using the rotary function switch.
3. Use the PI/DAR button to access the PI test mode.
4. The display will show the PI icon when the PI mode is successfully accessed.
5. The timers (Time1: 60 seconds and Time2: 10 minutes) will show on the lower right.
6. Press the TEST button to start the test.
7. After 60 seconds (Time1) the meter beeps. The meter beeps again at the 10 minute mark
(Time2) after which the test automatically stops.
8. During the test the main display digits show the test elapsed timer, the voltage alert flashes
on the upper left, and the ‘test voltage alert’ LED illuminates.
9. If the insulation breaks down during the test, the meter emits audible tone and buzzer.
10. Press the TEST button to stop the test and activate the discharging circuit.

12 MG320-en-GB_v1.1 1/17
6.7.5 Comparator Utility
Read and understand all operations and safety information contained in the Insulation Resistance
and Continuity measurement sections and the Safety section before continuing.
In Comparator mode the meter compares measurement to a preset reference values and
displays PASS (measured value greater than reference value) or NG (measured value lower than
reference value).
1. Connect the meter to the device under test as shown in the test section above.
2. Press the COMP button momentarily and the COMP icon will appear on the lower left, next to
the comparison resistance value. Use the COMP button to step to the desired reference value.
3. Press the TEST button to start the test. If the measurement is greater than the reference,
then the test passes and PASS will be displayed; if the measured value is lower than the
reference then the test fails and NG is displayed.
4. The Resistance comparator preset options are: 100k, 200k, 300k, 400k, 500k, 1M, 2M, 3M,
4M, 5M, 10M, 20M, 30M, 40M, and 50M.
5. The Continuity comparator preset options are: 1, 2, 5, 10, and 20Ω.
7. DataRecording
The MG320 can store, recall, and clear up to 99 readings (01-99).
1. Press the
button to save a displayed reading.
2. The displayed counter increments to the next available memory location.
3. To recall a reading, press the
button (RECALL will be displayed). Use the arrow
buttons to scroll through the stored readings. The stored reading counter keeps track of the
memory location (01-99). Press
again to return to the normal mode.
4. Press and hold the
button for 2 seconds to erase all memory data.

13 MG320-en-GB_v1.1 1/17
8. Maintenance
WARNING: To avoid electric shock, disconnect the test leads from any source of voltage before removing the
back cover, the battery, or fuse covers.
WARNING: To avoid electric shock, do not operate your meter until the battery and fuse covers are in place and
fastened securely.
This Instrument is designed to provide years of dependable service, if the following care instructions
are performed:
1. KEEP THE METER DRY. If it gets wet, wipe it off.
2. USE AND STORE THE METER IN NORMAL TEMPERATURES. Temperature extremes can
shorten the life of the electronic parts and distort or melt plastic parts.
3. HANDLE THE METER GENTLY AND CAREFULLY. Dropping it can damage the electronic parts
or the case.
4. KEEP THE METER CLEAN. Occasionally wipe the case with a damp cloth. DO NOT use
chemicals, cleaning solvents, or detergents.
5. USE ONLY FRESH BATTERIES OF THE RECOMMENDED SIZE AND TYPE. Remove old or
weak batteries so they do not leak and damage the unit.
6. IF THE METER IS TO BE STORED FOR A LONG PERIOD OF TIME, the batteries should be
removed to prevent damage to the unit.
8.1 BATTERY INSTALLATION
WARNING: To avoid electric shock, disconnect the test leads from any source of voltage before removing the
battery cover.
1. Turn power off and disconnect the test leads from the meter.
2. Open the rear battery cover by removing three screws using a Phillips
screwdriver.
3. Insert the six (6) 1.5V AA batteries into battery holder, observing the
correct polarity.
4. Put the battery cover back in place. Secure with the screws.
You, as the end user, are legally bound (EU Battery ordinance) to return all used batteries, disposal
in the household garbage is prohibited! You can hand over your used batteries / accumulators at
collection points in your community or wherever batteries / accumulators are sold!
Disposal: Follow the valid legal stipulations in respect of the disposal of the device at the end of its
lifecycle
WARNING: To avoid electric shock, do not operate meter until the battery cover is in place and fastened securely.
8.2 REPLACING THE FUSE
WARNING: To avoid electric shock, disconnect the test leads from any source of voltage before removing the
meter cover.
1. Disconnect the test leads from the meter.
2. To replace the 500mA/600V fuse, remove the battery cover (three Phillips screws); the fuse will
be visible to the right of the batteries (recessed).
3. Gently remove the old fuse and install the new fuse into the holder.
4. Always use a fuse of the proper size and value (500mA/600V fast blow).
5. Replace and secure the rear battery cover.
WARNING: To avoid electric shock, do not operate meter until the fuse cover is in place and fastened securely.

14 MG320-en-GB_v1.1 1/17
9. Specifications
Function Range Resolution Accuracy
DC Voltage 600V 0.1V (2.0% reading + 3 digits)
AC Voltage 600V 0.1V (2.0% reading + 3 digits)
Specified from 5% of range to 100% of range
Input impedance: 10M
Min. Measured Voltage: 0.1V
Frequency 50~400Hz
Input protection: 600V DC and AC rms
Low Resistance
& Continuity
20.00k 0.01 (1.5% reading + 3 digits)
Open-circuit voltage is 5.0V approx.
Short-circuit current > 200mA
500mA/600V fuse protected input terminals
Insulation Resistance Measurements
50V test voltage 0.01M~19.99M
20.0M~50.0M
0.01M
0.1M
0.01M~50.0M: (3% + 5 digits)
100V test voltage 0.01M~19.99M
20.0M~100.0M
1M
0.01G
0.01M~100.0M: (3% + 5 digits)
250V test voltage 0.01M~19.99M
20.0M~200.0M
0.01M
0.1M
0.01M~200.0M: (1.5% + 5 digits)
500V test voltage 0.01M~19.99M
20.0M~199.9M
200M~500M
0.01M
0.1M
1Mv
0.01M~500M: (1.5% + 5 digits)
1000V test
voltage
0.01M~19.99M
20.0M~199.9M
200M~2000M
2.0G~20.0G
0.01M
1M
1M
0.1G
0.01M~200.0M: (1.5% + 5 digits)
200M~2000M: (1.5% + 5 digits)
2.0G~10.0G: (10% + 3 digits)
10.0G~20.0G: (20% + 10 digits)
Short-circuit current < 2mA
Insulation Resistance Alerts
50V: 0.01M~50.0M (alert buzzer sounds when resistance is <1M)
100V: 0.01M~100.0M (alert buzzer sounds when resistance is <1M)
250V: 0.01M~200.0M (alert buzzer sounds when resistance is <4M)
500V: 0.01M~500M (alert buzzer sounds when resistance is <4M)
1000V: 0.01M~10.0G (alert buzzer sounds when resistance is <4M)

15 MG320-en-GB_v1.1 1/17
Insulation Resistance Test Voltage Outputs
Output Voltage Test Steps (50~120%) Load Overload
Test
current
Short-circuit
current
50V (0%~+10%) 10% steps (25~60V) 50kΩ 250VAC/DC 1mA ≤2mA
100V (0%~+10%) 10% steps (50~120V) 100kΩ 250VAC/DC 1mA ≤2mA
250V (0%~+10%) 10% steps (125~300V) 250kΩ 250VAC/DC 1mA ≤2mA
500V (0%~+10%) 10% steps (250~600V) 500kΩ 250VAC/DC 1mA ≤2mA
1000V (0%~+10%) 10% steps (500~1200V) 1MΩ 250VAC/DC 1mA ≤2mA
Note: Accuracy is stated at 23
o
C (75
o
F) and 45~75% RH.
Note: Calibration interval: 1-year maximum
Note: Temperature coefficient: 0.1 x stated accuracy/C
Note: Accuracy specifications consist of two elements: (% reading) this is the accuracy of the measurement circuit;
(+digits) this is the accuracy of the analog to digital converter.
General Specifications
Display 5999 count, backlit, LCD with bargraph
Ranging Automatic
Storage capacity 99 records (01-99)
Input Impedance >10MΩ
AC Response True rms
ACV Bandwidth 50Hz to 400Hz
Over range indication “>” is displayed
Auto Power Off After 3 minutes of inactivity
Polarity Automatic (no indication for positive); Minus (-) sign for negative
Measurement Rate 2 times per second, nominal
Low Battery Indication “
” is displayed if battery drops below operating voltage
Battery Six (6) 1.5V ‘AA’ batteries
Consumption 500mA (at a 1000V test voltage); 10mA in nominal conditions
Fuse 500mA/600V fast blow
Enclosure Double molded, IP 40
Operating Temperature 0ºC~40ºC (32ºF~104ºF)
Storage Temperature -20
o
C~60
o
C (-4
o
F~140
o
F)
Operating Humidity <85%
Storage Humidity <90%
Operating Altitude 2000m (7000ft.) maximum
Weight 0.7kg (1.5 lbs.) with batteries
Size 225[L] x 103[W] x 59[D] mm (8.8[L] x 4.1[W] x 2.3[D] in.)
Safety This instrument is designed in strict compliance with safety standard
IEC61010, overvoltage standard (CAT IV 600V) and pollution degree II.
Copyright © 2017 FLIR Systems, Inc.
All rights reserved including the right of reproduction in whole or in part in any form
www.extech.com
/