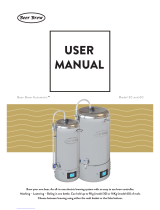
VEVOR YML03110F User manual

Type
User manual

VEVOR YML03110F is a 30L compressor wine cooler that is designed to provide efficient cooling and storage for your wine collection. With its powerful compressor, it can quickly cool down and maintain a consistent temperature, ensuring your wine stays fresh and flavorful. The unit also features a digital control panel with LED display, allowing you to easily set and monitor the desired temperature. Its compact design and stylish appearance make it an ideal choice for home bars, wine cellars, or any other space where you want to store and enjoy your wine.

VEVOR YML03110F is a 30L compressor wine cooler that is designed to provide efficient cooling and storage for your wine collection. With its powerful compressor, it can quickly cool down and maintain a consistent temperature, ensuring your wine stays fresh and flavorful. The unit also features a digital control panel with LED display, allowing you to easily set and monitor the desired temperature. Its compact design and stylish appearance make it an ideal choice for home bars, wine cellars, or any other space where you want to store and enjoy your wine.

Technical Support and E-Warranty Certificate www.vevor.com/support
OPERATINGMANUAL OF
ALCOHOL DISTILLER
MODEL: YML03110F YML03111F YML03113F YML03121 YML03123F
YML05110F YML05111F YML05113F YML05121F YML05123F
YML08110F YML08111F YML08113F YML08121F YML08123F
YML13111F YML13113F YML13121F YML13123F
We continue to be committed to provide you tools with competitive price.
"Save Half", "Half Price" or any other similar expressions used by us only represents an
estimate of savings you might benefit from buying certain tools with us compared to the major
top brands and doses not necessarily mean to cover all categories of tools offered by us. You
are kindly reminded to verify carefully when you are placing an order with us if you are
actually saving half in comparison with the top major brands.
- 1 -
Model Number:YML03110F YML03111F YML03113F YML03121 YML03123F
YML05110F YML05111F YML05113F YML05121F YML05123F YML08110F YML08111F
YML08113F YML08121F YML08123F YML13111F YML13113F YML13121F
YML13123F
Have product questions? Need technical support? Please feel free to
contact us:
CustomerService@vevor.com
NEED HELP? CONTACT US!
This is the original instruction, please read all manual instructions
carefully before operating. VEVOR reserves a clear interpretation of our
user manual. The appearance of the product shall be subject to the
product you received. Please forgive us that we won't inform you again if
there are any technology or software updates on our product.
Compressor Wine Cooler
30L/50L
- 2 -
Technical parameters corresponding to the model:
- 3 -
Packing List
1 X Boiler
In Accessory Bag
1 X Thermometer
1 X Condenser
1 X Bended Copper Pipe Kit
(including brass fitting, nut and seal)
1 X Fermentation Valve 1 X Silicone Plug
1 X Extension Cooper Tube
1 X Extension Silicone Tube
2 X Water Tubes
1 X Instruction
1 X Bag of 2 seals and 1 M10 nut
for thermometer assembly
(1 of the seals is a spare part)
4 X Spare Seals for Corrugated Pipes
(only for 3 pots product)
1 X Submarine Pump (only for 3 pots product)
1 X Thumper Keg with Seal (only for 3 pots product)
2 X Corrugated Pipes (only for 3 pots product)
Installation
All seal must be put on the front of lid toavoid leakage !
- 4 -
- 5 -
- 6 -
Safety Instructions of the Submersible Pump
(Ignore this if you ordered SKU without Submersible Pump)
The manipulation and utilization of our pump are very simple and convenient. The user just
need stop our a suitable height level of water and link the pump with the outlet water pipe
and then connect the pump with power supply in accordance with the mark on the
label(different country different standard). Thus, the pump can run well.
To reduce risk of electric shock
• Always unplug the pump from the electric outlet before cleaning and handling.
• Use with clean water only. Do not place it in any liquid. Never let the pump run dry.
• OPTION-The pump is supplied with ground in conductor and a grounding type attachment
plug, and must be connected only to a proper ground outlet to reduce the risk of electric
shock (Europe standard only).
• Do not use the pump in water above 90or 30.
• Prevent the water from running into the electrical outlet down the cord.
• Do not lift, carry, or pull the pump by the power cord.
• Do not replace the pump cord. Stop using the pump if it sustains damage (Option for pump
with safe low voltage).
• Always use the transformer provided to run the water pump or consult with your electrician
before other transformer is connected.
• Do not connect the transformer provided to other appliance.
• Always unplug the power transformer from the electrical outlet before any cleaning and
handling.
• Indoor use only. Place the transformer away from fire, moisture & direct sunlight. (Option
for pump with light).
• Do not immerse hot glass tube cover into water or pour water directly on glass tube
surface when it is lighted.
• Glass tube cover is make of glass. It is fragile. Should handle with care during light
installation & light bulb maintenance. Wear gloves to protect your hands from hurting if the
glass is broken.
• The supply cord cannot be replaced. If the cord is damaged, the appliance should be
scrapped.
To keep water clean
- 7 -
• Periodically change water to prevent water from becoming sticky and forming
microorganisms.
Trouble Shooting
If the pump fails to run, the following should be checked:
• Check the circuit breaker, or try a different outlet to make sure that the pump is getting
electrical power. NOTE-Always disconnect the pump from electrical outlet before checking.
• Check the pump discharge and tubing for kinks and obstructions.
• Algae buildup can be flushed out with a garden hose.
• Remove the pump filtering cover & pump chamber to access the impeller area. Turn the
rotor to ensure it is not broken or jammed.
With little flow rate, the pump will spew or "burp":
• Check the water level to make sure the pump is completely submerged.
If abnormal noise is heard during operation (with water):
• First disconnect the power supply and then remove pump filtering cover & pump chamber.
• Use hand to grip the impeller, gently pull the impeller/rotor assembly out of the pump
housing.
• Rinse the impeller/rotor assembly and the cavity with clean water. If breakage or surface
damage is found on the assembly, contact your distributor for part replacement.
Warning Ill
The water pump must be fully soaked or it will be damaged!
Minimum Water Leverl (Niveaude I’eau minimum)
- 8 -
This product is subject to the provision of European Directive 2012/19/EC.
The symbol showing a wheelie bin crossed through indicates that the
product requires separate refuse collection in the European Union.
This applies to the product and all accessories marked with this
symbol. Products marked as such may not be discarded with
normal domestic waste, but must be taken to a collection point
for recycling electrical and electronic devices.
Steps to Start
- 9 -
Notice! The wine barrel cannot be completely filled with water, and more than 4cm of
space must be reserved to facilitate the formation of steam. (Under normal
circumstances, the liquor yield will be higher than 90%)
- 10 -
- 11 -
Fermentation guide
You can use your any pot or keg fermentation.
1. Weight 500g (1.1 lb) rice
2. Add about 4g (0.14 oz) yeast
If you need do more by yourself, please see this table:
Fermentation table
category
grain
yeast
water
Rice
500g(1.1 lb)
4g(0.14 oz)
1000g(2.2 lb)
Corn(wheat)
500g(1.1 lb)
3.5g(0.11 oz)
1000g(2.2 lb)
Sweet potato
500g(1.1 lb)
3g(0.1 oz)
750g(1.65 lb)
3. Add the clean cold water (use boiling water) about 1000g (2.2 lb)
Mixing the yeast with rice stir well every day stir 3 times.
keep the fermentation temp about 28-35 degree, if your house cold, you can use clothes
keep it warm.
See the mash fermentation like the picture 6, it is fermentation well.
You can smell very nice and see the rice sink to the bottom. Fermentation time need about
12-15 days, if you can keep the fermentation pot 30-35 degree need about 10 days
fermentation finish.
How to Fermentation :
using grain and wine yeast.
liquid state fermentation proportion: Proportion table
category
grain
yeast
water
Rice
500g(1.1 lb)
4g(0.14 oz)
1000g(2.2 lb)
Corn(wheat)
500g(1.1 lb)
3.5g(0.11 oz)
1000g(2.2 lb)
Sweet potato
500g(1.1 lb)
3g(0.1 oz)
750g(1.65 lb)
For example, if you want do about 500g rice wine you need to use4g yeast and l000g rice to
- 12 -
make a mash.
How to do it.
Find a ceramics or stainless steel or glass material pot big enough to hold the amount you
wish to make.
To make the rice wine.
Put rice and yeast and water in the pot leave for 6 days do not seal. First put the rice in the
pot then the yeast, add the water thoroughly mix them together.
If you are making corn or wheat mash it needs to be milled. Let's do it
Mix the rice with the hot water, wait for the temperature to cool to about 32 degrees at the
same time mixing them, and then we put in the yeast mix it through the mash. Fermentation
should last7-15 days. Keep in a warm place at about 28-36 degrees check the temperature
of the mash with thermometer provided.
I suggest to everyone use this system you will get the best wine, with excellent flavor body
and aroma.
To boil your rice use a rice cooker if you have one or cook in a suitable pot. Do not let stick
us a low heat use warm from the tap will speed things up.
Cook tboroughly (cooked but not mushy). Then, we take the rice out into another container (do
not use plastic containers). Wait for the rice temperature to drop to 20 to 30 degrees (you can
use a fan to bring down temperature).
- 13 -
Weigh 8g of yeast for the l000g rice with electronic scales, mix in the yeast and start the
fermentation.
In our country, we all use pottery and utensils to keep everything hygienic use gloves.
- 14 -
It is very important not to use left over rice, it can get Contaminated and cause food poisoning.
- 15 -
Cover it with a foil.
Do not seal, because the fermentation needs oxygen. We can cover it with a carton board.
After about 36 hours, you should now smell and see the fermentation. If it looks mushy and
smells of wine, add 1200ml to 1500ml of cold water that has been boiled to sterilize it,mix the
water by stirring (use a sterile wooden spoon dip it in hot water before use).
- 16 -
Cover it and leave to ferment for about 6 days (in winter, it needs about 7-10 days). A little
more yeast can be added if it is very cold, or you can put it in a warm place.
When you can see the water is clear, or when reading the same degree as room temperature
using the thermometer, then we can start distillation.
How to make moonshine
Let's begin
Grocery list: what you'll need for a 10 gallon recipe
This recipe is completely scalable. If you want to make 5 or 20 gallons, simply half or
double the recipe.
1 Can(12oz) Tomato Paste(not sauce)
- 17 -
1 Lemon(large, or three small ones)
2.5lbs Potatoes(any kind will work, just grab a cheap 5# bag and use half)20lbs White
Sugar
2 Tablespoons of baker's yeast(Fleischmann's or Red Star, buy the 4oz bottle instead of
the packets to save money. Also, choose highly active if you have a choice).
10gal Fermenter, this is what will hold your mash for 1-2 weeks while it ferments. There are
several options available here. One: Brute trashcans are made of food-grade plastic and
make great fermenters. Two: Local donut shops typically give away or sell their old filling
buckets, these are also food grade and extremely cheap, try to get them in 5 gallon sizes.
Three: Buy new 5 gallon plastic paint buckets from a local hardware store for $5-$6.
*Note:* when making a 10 gallon mash, mixing is much easier in a container that can hold
all 10 gallons, however, lifting and moving it becomes a monumental task. Two 5 gallon
buckets are much easier to move alone, but a bit harder to mix.
Making the mash:
Boil approximately 2.5lbs of potatoes, then mash completely.
Making them runny is preferred because they will mix easier.
Fill the fermenter half way with hot water, any water you can drink is fine for this recipe,
including tap.
Mix 20lbs sugar into hot water. Stir until completely dissolved. Mix mashed potatoes in. Stir
until completely dissolved. Mix 12oz tomato paste in. Stir until completely dissolved. Juice
one large lemon, add juice to fermenter mix.
Top up to 9 gallons with water. Alternate between hot and cold to reach a target
temperature of 27°C (80°F) (70-90°F is fine, but do not go over 95°F or you may kill your
yeast).
When reaching the target temperature, add 1oz (2 tablespoons) of yeast. Stir until
completely dissolved.
Place lid loosely on fermenter. You should allow carbon dioxide gas to escape easily, but
keep bugs from getting in. Set out of direct sunlight and maintain temperature between
21-27°C (70-80°F).
Mash should begin to fizz or bubble within the first 24-48 hours. Check daily until either all
activity in the mash stops or the mash has been fermenting for two full weeks.
Distill promptly(within 3 days).
- 18 -
Distilling
First use:
When using a new still for the first time, you must dean your stilling a more thorough
manner than through normal use. The procedure starts with washing all parts of the still
very thoroughly with hot-soapy water. The second step is called a vinegar run.
Simply mix equal parts vinegar and water to roughly one-fifth the capacity of the still (i.e. a
1 gallon mix for a 5 gallon still). Setup the still and condenser(without water), pour in the
mixture, and heat until water/vinegar liquid and steam come out of the condenser. Turn off
the heat, allow it to cool down, and dispose of the contents.
Next is the final cleaning step called the sacrificial run. You will follow the steps below as if
you were making a drinking run, but throw away your first batch of moonshine. This will
clear the still of anything that could possibly taint the taste of future runs. For un-scientific
reasons, this is also considered a rite of passage for a new distiller and is the all-important
christening of the still.
Precautions
Never leave a running still unattended.
Never drink while distilling.
Never block the outlet of the still. Doing so may result in
Over pressure and explosion.
Never use an open-flame heat source while distilling indoors.
Distilling outdoors is always preferred.
Setup
Set the base of the still on your heat-source.
Pour in mash, but take care to keep the sediments that have settled in the bottom of the
container from going into the still since they can cause off-flavors. Additionally, leave
approximately 4" of space at the top of the still to prevent boil over into the top section or
worse, the swan neck and condenser.
Place and seal the onion top. The sealing can be done using a thick water/flour mix and
pushing it in and around the seam where the top and bottom meet. Another option is
wrapping the bottom of the onion head with plumber's Teflon tape before setting it in the
bottom part of the still.
Attach condenser
Keep the condenser cool. This is done by filling the condenser body with water and
  • Page 1 1
  • Page 2 2
  • Page 3 3
  • Page 4 4
  • Page 5 5
  • Page 6 6
  • Page 7 7
  • Page 8 8
  • Page 9 9
  • Page 10 10
  • Page 11 11
  • Page 12 12
  • Page 13 13
  • Page 14 14
  • Page 15 15
  • Page 16 16
  • Page 17 17
  • Page 18 18
  • Page 19 19
  • Page 20 20
  • Page 21 21
  • Page 22 22
  • Page 23 23
  • Page 24 24
  • Page 25 25
  • Page 26 26
  • Page 27 27
  • Page 28 28
  • Page 29 29
  • Page 30 30
  • Page 31 31
  • Page 32 32

VEVOR YML03110F User manual

Type
User manual

VEVOR YML03110F is a 30L compressor wine cooler that is designed to provide efficient cooling and storage for your wine collection. With its powerful compressor, it can quickly cool down and maintain a consistent temperature, ensuring your wine stays fresh and flavorful. The unit also features a digital control panel with LED display, allowing you to easily set and monitor the desired temperature. Its compact design and stylish appearance make it an ideal choice for home bars, wine cellars, or any other space where you want to store and enjoy your wine.

Ask a question and I''ll find the answer in the document

Finding information in a document is now easier with AI