Owlet Cam 2 Installation guide

Category
Baby video monitors
Type
Installation guide

Owlet Cam 2: a smart baby monitor that provides a secure video and audio connection to your baby's room. With its encrypted Wi-Fi connection, the Cam 2 offers peace of mind, allowing you to keep an eye on your little one from anywhere. The magnetic base and adjustable tilt angle make it easy to position the camera for the best view, and the included wall mount provides a bird's-eye view of the crib or nursery. The Cam 2 also includes a temperature and humidity sensor to help you monitor your baby's environment, and the two-way audio feature lets you communicate with your baby remotely.

Owlet Cam 2: a smart baby monitor that provides a secure video and audio connection to your baby's room. With its encrypted Wi-Fi connection, the Cam 2 offers peace of mind, allowing you to keep an eye on your little one from anywhere. The magnetic base and adjustable tilt angle make it easy to position the camera for the best view, and the included wall mount provides a bird's-eye view of the crib or nursery. The Cam 2 also includes a temperature and humidity sensor to help you monitor your baby's environment, and the two-way audio feature lets you communicate with your baby remotely.

1
Owlet Cam 2 Installation Guide
2
Let’s Get Started
Download the Owlet App.
Plug in and follow app instructions
to pair the Cam 2 with your Owlet
Account.
If you’ve already downloaded the
Owlet App, click the Account tab to
add a new device.
EN
Guide to Owlet Cam 2 Status Lights
(blinking red/blue) Cam 2 is ready to pair with App
(red) User is actively streaming via App, using background audio, or the Cam is rebooting.
(blinking blue) Cam 2 is trying to connect to Wi-Fi
(blue) Cam 2 is connected to internet. App is not streaming
Remember: the Cam 2 allows for video
and audio via secure, encrypted
Wi-Fi. Only connect the Cam 2 to a
private network that requires
a secure password.
3
Choose Your View
Place the Cam 2 and all cables 36 inches
(92 cm) away from the edge of the crib.
Cables within 36 inches (92 cm) of the
edge of the crib should be covered.
You can set up the Cam 2 in two ways:
1 Place it on a flat surface using the
magnetic base and adjust for
desired tilt angle.
2 Mount it on a wall above the crib
using the base as a wall mount for
a bird’s-eye view of the crib or for
an expanded view of your nursery.
The next steps will guide you through
mounting the Cam 2 on the wall
(above the crib).
You can also view our Installation Video
at support.owletcare.com
4
What’s in the Box
Owlet Cam 2
Mounting
plate
Magnetic base
Measuring tape
(not included)
Cables with Owlet wraps*
and room temperature and humidity sensor
21x cable guards
18x long guards
1x end piece
2x L-brackets
Power adapter
Small Phillips screwdriver
(not included)
1x screw
Wall Mounting Kit Tools Needed to Mount the Cam 2
5
1. Measure and mark
Consider which outlet to use. The
outlet should be at least 36 inches
(92 cm) away from the crib to ensure
no exposed cables will be within
baby’s reach. The next steps will
instruct you on how to cover
all cables.
Measure 36 inches (92 cm) (92 cm)
from the top of your baby’s mattress
and make a mark on the wall — this
is where the Cam 2 will be mounted.
Center this mark above baby’s crib for
the optimal viewing angle.
36 inches
(92 cm)
36 inches (92 cm)
(six cable guards)
It’s also important to consider the
location of the temperature and
humidity sensor. The temperature
sensor can be found near the end
of the smart cable on the side that
connects to the power adapter.
6
3. Unwind the cable 4. Thread the cable
Remove the cable wraps and
unwind the cable.
Thread the cable down the channel
of the mounting plate, aligning the
orange sticker on the cable to the top
of the mounting plate.
2. Align and fasten
Align the center hole of the mounting
plate with the mark you’ve made on
the wall. Using the provided screw,
fasten the mounting plate to the wall
with the arrows pointing upward.
sticker
7
5. Mount the base
Position the large holes of the
magnetic base over the protruding
tabs on the mounting plate, then slide
downward until it clicks.
sticker
Attach the Cam 2 to the magnetic
base. Plug the cable into the Cam 2.
6. Attach the Cam 2
The orange sticker should be
placed just above the mounting
plate so that you have enough
cable slack to position the Cam 2
to your desired angle.
8
The cable guards use high-strength
adhesive. Take your time during
installation to ensure proper placement.
1 Peel off adhesive cover from the
back of a long guard
2 Thread cable down the center
of a long guard
3 Snap long guard onto the
bottom of the mounting plate
4 Press firmly onto wall
5 Repeat steps 1–4 with remaining
long guards until you reach the
height of the wall outlet
7. Mount cable guards
long guard
9
Use the right or left L-bracket to guide
the cable in the direction of the wall
outlet.
Install long guards until any cable
within 36 inches (92 cm) of the edge
of the crib is covered. Continue adding
long guards as needed to reach the
outlet. Finally, install the end piece
when you are within 6-10 inches of
the outlet (this allows enough room to
wrap excess cable with velcro).
8. Mount L-bracket
L-brackets
end piece
10
For contact information specific to
your region, please visit
https://support.owletcare.com
Need Help?
Gather the excess cable into a loop.
Secure the top section of the loop
by feeding the cable wrap through
the first hole. The Owlet logo faces
outward. Secure the bottom section
of the loop to the top section by
feeding the cable wrap through the
second hole (The loop should now
look like a bow). Secure remaining
cable wrap.
Once the excess cable has been
wrapped securely, connect the power
cable to the power adapter and plug
it in.
You’re all set! You can now use the
App to reference how to adjust the
Cam 2 angle until you achieve the
desired view.
9. Wrap excess cable with velcro
11
designed to provide reasonable protection against harmful
interference in a residential installation. This equipment
generates, uses and can radiate radio frequency energy and,
if not installed and used in accordance with the manufac-
turer’s instructions, may cause interference harmful to radio
communications.
WEE COMPLIANCE STATEMENT
Owlet is committed to meeting the requirements of directive
2012/19/EU on waste electrical and electronic equipment
(WEEE). Please visit our website at owletcare.com to nd
out more about the proper disposal of Owlet products in
the EU and UK.
DECLARATION OF CONFORMITY STATEMENT
Hereby, Owlet Baby Care declares that the Owlet Cam 2 is
in compliance with Directive 2014/53/EU. The full text of the
EU declaration of conformity is available at the following
internet address:
https://owletbabycare.co.uk/pages/ce-compliance
FREQUENCY RANGE AND MAXIMUM OUTPUT
2412-2472MHz (0.0249 output Watts)
U.S. Pat. Nos. D864147 and D864148. Other patents pending
IC : 21386-OC2A
This device complies with Industry Canada license-exempt
RSS standard(s). Operation is subject to the following two
conditions: (1) this device may not cause interferences,
and (2) this device must accept any interferences, including
interferences that may cause undesired operation of the
device.
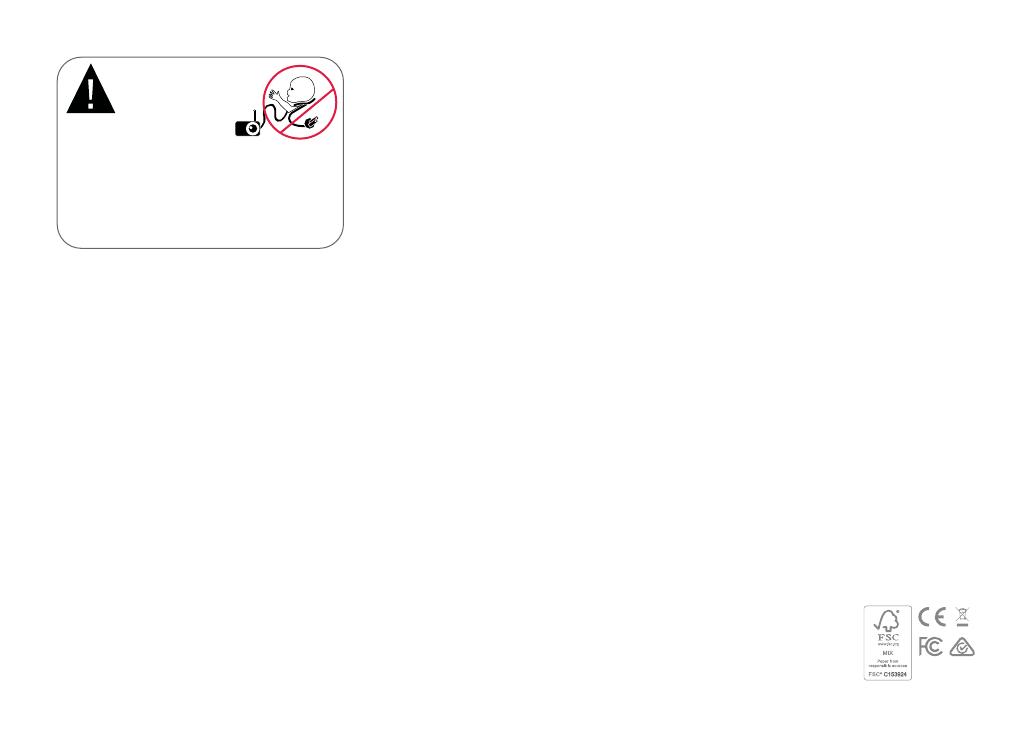
Children have STRANGLED in cords. Always use
protective covering when used within 3 feet of crib.
Check before each use to ensure the cord is not
exposed to your child. Immediately discontinue use if
the protective covering is damaged or broken. Do not
remove tag from cord or protective covering.
WARNING:
Strangulation Hazard!
IMPORTANT SAFETY INSTRUCTIONS
• WARNING: The Owlet Cam 2 is not a medical device. It is
not intended for use as a medical device or to replace a
medical device. It does not and is not intended to diagnose,
cure, treat, alleviate or prevent disease or health condition
or investigate, replace or modify anatomy or any physiolog-
ical process.
• For indoor use only. To reduce the risk of re or electrical
shock, DO NOT expose this product to water or moisture. DO
NOT use monitor near water (such as bathtub, sink, etc.) or
submerge in water.
• The use of this monitor should not replace proper adult/
parental supervision. You should check your child’s activity
at regular intervals, as this monitor will not alert parents to
the silent activities of a child.
• NEVER attempt to disassemble the product. This is danger-
ous and will void the warranty.
• The user should not attempt to service/repair monitor.
• Use only the adapter supplied with this product. Incorrect
adapter polarity or voltage can seriously damage the
product.
• To prevent entanglement and overheating, DO NOT use
extension cords.
• The adapter may become slightly warm to the touch
during operation. This is normal.
• ALWAYS unplug the AC adapter from the wall during
extended periods of non-use.
• Check to make sure wall outlet plates are not unusually
hot to the touch. If they are, immediately unplug cords from
these outlets. Check that all outlet connections are in good
condition so that adapter is not loose or that no wiring is
exposed. Have a qualied, licensed electrician check that no
wiring is exposed.
• DO NOT place adapter/wall plug under a window where
a child might use it to step on and/or reach something that
might be dangerous.
• Adult assembly is required. Keep small parts away from
children when assembling. Exercise care when unpack-
ing the product.
• This product is not a toy. DO NOT allow children to play
with it.
• Monitor uses encrypted transmission over FCC-managed
frequencies. Always remember to password-protect your
WiFi router.
ADDITIONAL SAFETY INSTRUCTIONS
• VENTILATION: DO NOT block ventilation openings. DO NOT
place on a bed, sofa, rug or similar surface. DO NOT place in a
bookcase or cabinet that may restrict air ow.
• HEAT: The monitor should be situated away from heat
sources, such as radiators, heat registers, stoves or other
appliances that produce heat. Also, keep these components
out of direct sunlight.
• POWER CORD PROTECTION: The power supply cord should
be routed so that it is not likely to be walked on or pinched
by items placed upon or against it. Pay particular attention
to the cord at the plug and at the point it exits from the
monitor.
LIMITED WARRANTY
Owlet proudly stands behind its products. Our warrantie-
s are found at: https://owletcare.com/pages/warranty.
FCC COMPLIANCE STATEMENT
Changes or modications to this unit not expressly
approved by the party responsible for compliance could
void the user’s authority to operate this equipment. Please
ONLY use the supplied power adapter. Failure to so do may
void our limited warranty. This equipment has been tested
and found to comply with the limits for a Class B digital
device, pursuant to Part 15 of the FCC rules. These limits are
12
FCC Warning
This device complies with part 15 of the FCC Rules. Operation is subject to the following two conditions:
(1) This device may not cause harmful interference, and (2) this device must accept any interference
received, including interference that may cause undesired operation.
Any Changes or modifications not expressly approved by the party responsible for compliance could
void the user's authority to operate the equipment.
Note: This equipment has been tested and found to comply with the limits for a Class B digital device,
pursuant to part 15 of the FCC Rules. These limits are designed to provide reasonable protection
against harmful interference in a residential installation. This equipment generates uses and can radiate
radio frequency energy and, if not installed and used in accordance with the instructions, may cause
harmful interference to radio communications. However, there is no guarantee that interference will not
occur in a particular installation. If this equipment does cause harmful interference to radio or television
reception, which can be determined by turning the equipment off and on, the user is encouraged to try to
correct the interference by one or more of the following measures:
-Reorient or relocate the receiving antenna.
-Increase the separation between the equipment and receiver.
-Connect the equipment into an outlet on a circuit different from that to which the receiver is
connected.
-Consult the dealer or an experienced radio/TV technician for help.
This equipment complies with FCC radiation exposure limits set forth for an uncontrolled environment.
This equipment should be installed and operated with minimum distance 20cm between the radiator &
your body.
IC Warning
This device complies with Industry Canada’s licence-exempt RSSs. Operation
is subject to the following two conditions:
(1) This device may not cause interference; and
(2) This device must accept any interference, including interference that may
cause undesired operation of the device.
This equipment complies with ISED radiation exposure limits set forth for an
uncontrolled environment. This equipment should be installed and operated
with minimum distance 20cm between the radiator & your body.
Cet appareil est conforme aux CNR exemptes de licence d'Industrie Canada .
Son fonctionnement est soumis aux deux conditions suivantes :
( 1 ) Ce dispositif ne peut causer d'interférences ; et
( 2 ) Ce dispositif doit accepter toute interférence , y compris les interférences
qui peuvent causer un mauvais fonctionnement de l'appareil.
Ce matériel est complé par une exposition de rayonnements ISED pour un
environnement naturel. Ce matériel doit être installé et se faire avec une
distance minimale de 20cm entre les radiateurs et les autresYour body shop.
  • Page 1 1
  • Page 2 2
  • Page 3 3
  • Page 4 4
  • Page 5 5
  • Page 6 6
  • Page 7 7
  • Page 8 8
  • Page 9 9
  • Page 10 10
  • Page 11 11
  • Page 12 12
  • Page 13 13
  • Page 14 14

Owlet Cam 2 Installation guide

Category
Baby video monitors
Type
Installation guide

Owlet Cam 2: a smart baby monitor that provides a secure video and audio connection to your baby's room. With its encrypted Wi-Fi connection, the Cam 2 offers peace of mind, allowing you to keep an eye on your little one from anywhere. The magnetic base and adjustable tilt angle make it easy to position the camera for the best view, and the included wall mount provides a bird's-eye view of the crib or nursery. The Cam 2 also includes a temperature and humidity sensor to help you monitor your baby's environment, and the two-way audio feature lets you communicate with your baby remotely.

Ask a question and I''ll find the answer in the document

Finding information in a document is now easier with AI