Page is loading ...

1
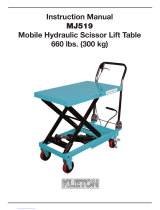
AIR/HYDRAULIC LIFT TABLE CART — 770-LB .
OWNER’S MANUAL
WARNING:
Read carefully and understand all MACHINE ADJUSTMENT AND OPERATION
INSTRUCTIONS before operating. Failure to follow the safety rules and other basic safety
precautions may result in serious personal injury.
Item# 44501

2
Thank you very much for choosing a Roughneck product! For future reference, please complete the
owner’s record below:
Model: _______________ Purchase Date: _______________
Save the receipt, warranty and these instructions. It is important that you read the entire manual to
become familiar with this product before you begin using it.
This machine is designed for certain applications only. The distributor cannot be responsible for issues
arising from modification. We strongly recommend this machine not be modified and/or used for any
application other than that for which it was designed. If you have any questions relative to a particular
application, DO NOT use the machine until you have first contacted the distributor to determine if it can
or should be performed on the product.
For technical questions please call 1-800-222-5381.
INTENDED USE
Quickly and easily lift and lower up to 770lbs. on this Roughneck Air/Hydraulic Lift Table Cart with the
one-touch ease of compressed air (compressor not included) or with the foot pedal control. Ideal for lifting,
positioning and transporting heavy materials around the shop, factory, warehouse or office.
TECHNICAL SPECIFICATIONS
Item
Description
Load Capacity (lbs.)
770
Raised Height (in.)
51 1/8
Lowered Height (in.)
13 1/2
Platform Size L x W (in.)
35 5/8 x 20 1/8
Overall Dimensions L x W x H (in.)
39 1/3 x 20 1/2 x 36
Air Pressure
9 CFM @ 90 PSI
GENERAL SAFETY RULES
WARNING: Read and understand all instructions. Failure to follow all instructions listed below
may result in serious injury.
CAUTION: Do not allow persons to operate or assemble this Lift Table until they have read
this manual and have developed a thorough understanding of how the Lift Table works.
WARNING: The warnings, cautions, and instructions discussed in this instruction manual
cannot cover all possible conditions or situations that could occur. It must be understood by the
operator that common sense and caution are factors which cannot be built into this product, but must be
supplied by the operator.
SAVE THESE INSTRUCTIONS

3
IMPORTANT SAFETY CONSIDERATIONS
USE AND CARE
1. Do not exceed the 770 lb max weight capacity and be aware of dynamic loading!
2. When the table is hoisted the weight of goods on the table should not exceed the capacity. While
loading the table, goods should be loaded gently. Sudden load movements may briefly create an
excess load, causing product failure.
3. When loading and unloading goods on the hoisted table, don’t place goods unparallel with the table top.
Doing so may cause serious offset and make the cart turn over.
4. Use only on flat, level, and hard surface capable of supporting the Lift Table and any item(s) placed on
the table.
5. Be aware of the “pinch points”. Keep hands or feet clear of lifting mechanism during operation. The
Scissor Arm Assembly can cause serious injury when opening or closing. Do not allow anyone near the
Scissor Arm Assembly during operation.
6. Undistributed loading is not suggested. Loaded goods should be at least 80% on the table top surface.
7. Loose or unstable goods should not to be loaded onto the table.
8. Don’t put goods on working table for more than 2 hours at a time.
9. Do not adjust the Safety Valve.
10. Use as intended only. Do not use Lift Table to lift or transport people.
11. Do not make any alterations to this product.
12. This product is not a toy. Keep it out of reach of children.
13. Lower load slowly.
14. Do not use for aircraft purposes.
15. Lock casters when unattended. The cart can’t be moved when goods are being lifted.
16. Follow all hydraulic air release instructions specified in this manual.
17. WARNING: Wear ANSI-approved safety goggles and heavy duty work gloves during assembly
and use.
ASSEMBLY
The handle, foot pedal and discharge iron board of the lift table is dismantled during manufacturing. They
can be reassembled by user. The assembly methods are as follows:
1. Handle installation: according to the developed drawing, fix the handle to mounting hole of the cart body
by using the big washer, spring washer, and hex cap nut. Then screw down the bolt with wrench.
2. Foot pedal mounting: pull out the pin; line up the hole in the foot pedal and the holes drilled in the press
wheel seat; insert the shaft into the hole and tighten with the pin.
3. Discharge iron board mounting: loose the screw, place the discharge board in place, secure with the
screw.
Note: The Discharge Iron Board controls the operation of the Air/Hydraulic Pump unit. To lower
Table, step the Discharge Iron Board.
When the Discharge Iron Board is released, the Table movement will stop and will remain
stationary.

4
OPERATION
1. Before placing anything on the cart, lock the back two casters. Pressing the lever down into the locked
position with your foot can lock the Locking Swivel Casters. Test the cart operation using the Foot Pedal
and Discharge Iron Board. Make sure the Table raises and lowers properly before adding weight to the
Table.
2. Observing safe lifting procedure, move the goods onto the table. If necessary, secure the item onto the
cart using tie-downs or chocks to keep it stable while moving.
3. Release the Locking Swivel Casters by moving the levers to the unlock position. Move the cart to the
desired location.
4. Before raising the table top, lock the Locking Swivel Casters.
5. To raise the Table, ensure that the Discharge iron board is in the released position. Press repeatedly on
the Foot Pedal to raise the table.
Note: There are two speed settings when lifting the table by foot.
a. The weight≤440 lb, remain the stop block. (see chart, left)
b. The weight>440 lb, push forward the stop block then raise the table. (see chart, right)
6. Besides the foot pedal pump lift structure, this table also have a pneumatic lift structure. Please
Pin
Screw
Stop Block

5
connect the air pipe before the pneumatic. After engaging the pneumatic switch, the air cylinder will fill
with air, causing the piston to draw the lift pump, causing it to work and lift the table.
7. After the desired height is reached, engage the Safety Bars on sides of the Lift Frame by swinging them
back towards the handle. Lower the table slightly and make sure the bars lock in place. This helps
prevent uncontrolled table drop.
8. To lower the Lift Table, pump the table up until the Safety Bars can be disengaged.
9. Swing the Safety Bars up away from the Handle and towards their original position.
10. Step the Discharge iron board to lower the Tables.
11. To prevent accidents, when finished using the cart, move the cart to a safe location, lock the Locking
Swivel Casters, lower the Table as far as it will go. Clean, store the cart indoors out of children's reach.
WARNING: When maintaining and repairing the cart there should be no goods placed on the table
and the safety bar should be in place to support the Scissor Arm Assembly in order to prevent table from
falling.
CLEANING, MAINTENANCE AND LUBRICATION
1. BEFORE EACH USE, inspect the general condition of the tool. Check for loose hardware,
misalignment or binding of parts, cracked or broken parts, damaged electrical wiring, and any other
condition that may affect its safe operation.
2. Store your cart in a location where it is protected from moisture, dirt and potential corrosion. Protect it
from being damaged from other items being moved in and out of its storage area.
3. Occasionally check the condition of the wheels.
4. Occasionally apply light grease to the hinge points of the Scissor Arm Assembly and other pivot points
of the assembly. Wipe off excess grease, as this will attract dirt.
5. AFTER USE, wipe external surfaces of the tool with clean cloth.
REMOVING AIR FROM THE PUMP
Change the hydraulic oil every twelve months. Use ISO #32 hydraulic oil.
Changing the hydraulic oil can put air into the system. Follow these steps to change the hydraulic oil:
a) Slightly raise the lift table and engage the Safety Bars.
b) Loose the oil pipe plug; open the oil mouth; drain the used oil from the oil box.
c) Install the oil pipe plug; then fill with hydraulic oil from the oil mouth (500 ml max.); screw the oil
mouth.
d) Loose the hex cap bolt(oil seal), press the foot pedal with hand up and down a few times to bleed
the air from the hydraulic system, after there is no air bubbles present, use your foot to press the
foot pedal, then tighten the hex cap bolt by hand.

6
TROUBLESHOOTING
Trouble
Cause
Action
Table does not rise
No oil
Replenish oil
Bring up the empty site.
Set open the M5 hex cap nut, and
step the foot pedal to fix the
screw.
Check valve does not
replacement.
Clean steel ball in the check valve
and re-assembly.
Single valve does not
replacement
1. When the table can not lift up by
pneumatic, please clean the steel
ball and re-assembly.
2. When the table can not lift up by
foot pedal, please clean the steel
ball and re-assembly.
Table does not lowering
down
The top rod of discharge single
valve can not stand out.
Check the length of top rod, and
re-assembly.
The hole of lowering valve be
air-logged.
Take down the lowering valve to
clean carefully and then
re-assembly or replace.
Oil leaks from pump cylinder
Oil seal in the pump cylinder
was worn out.
Replace the oil sealUHS25 and
DH25.
Hydraulic cylinder can not
bearing
Oil seal in the cylinder was worn
out
Replace oil seal UHS10.
The high pressure oil pipe and
the joint worn out
Replace the high pressure oil
pipe.
Oil Mouth
Oil Pipe Plug
Hex Cap Bolt

7
DIAGRAM & PARTS LIST

8
Part
Description
Qty
Part
Description
Qty
Part
Description
Qty
1
Table
1
54
Switch Wrench
1
(41
Steel Ball
1
2
Scissor arm(upper)
1
55
Set Nut
1
(42
C-ring
1
3
C-ring
8
56
Screw
1
(43
O-ring
2
4
Bushing
4
57
Plug Tie-in
1
(44
O-ring
1
5
Shaft
2
58
O-ring
1
(45
Plug
1
6
Shaft
2
59
Enter Air Mouth
1
(46
Top Rod
1
7
Scissor arm(bottom)
1
60
Tie-in
1
(47
Plug
1
8
Flat Washer
4
61
Support Rod
2
(48
Lowering Valve
1
9
Spring Washer
4
62
Hex Cap Bolt
2
(49
Spring Column Pin
1
10
Bolt
4
63
Set Nut
2
(50
Big Pump Piston
1
11
Shaft
2
(51
Dust Cover
1
12
Roller Guide
4
(52
O-ring
1
13
Frame Seat
1
(1
Valve
1
(53
Oil Seal
1
14
Hex Cap Bolt
2
(1-1
Discharge Iron Board
1
(54
Big Spring
1
15
Wheel Cover
4
(2
Hex Cap Bolt
3
(55
Hex Cap Bolt
1
16
Bearing
8
(3
Spring Washer
3
(56
O-ring
1
17
Wheel
4
(4
Top Nut
1
(57
Plug
1
18
Set Nut
4
(5
Washer
1
(58
Plug
1
19
Hex Cap Bolt
8
(6
Rubber Cover
1
(59
Plg
1
20
Flat Washer
8
(7
Piston Cover
1
(60
Flat Washer
1
21
Swivel Wheel
Holder
2
(8
Small Piston
1
(61
Block
1
22
Spring Washer
8
(9
Oil Seal
1
(62
Steel Ball
1
23
Hex Cap Nut
8
(10
Big Piston
2
(63
Spring
1
24
Hex Cap Bolt
8
(11
O-ring
2
(64
Joint Block
1
25
Shaft Cover
2
(12
Rubber Cover
1
(65
Shaft
2
26
Separate Cover
4
(13
Air Cylinder
1
(66
Bushing
1
27
Brake Pedal
2
(14
Hex Cap Nut
1
(67
Bushing
1
28
Brake Slice
2
(15
Spring Seat
1
(68
Shaft
1
29
Bushing
4
(16
Small Piston Rod
1
(69
Press Wheel Seat
1
30
Handle
1
(17
Big Spring
1
(70
Press Wheel
1
31
Big Spring Slice
2
(18
Plug Cover
1
(71
Pin
1
32
Spring Washer
2
(19
Seat
1
(72
Shaft
1
33
Hex Cap Bolt
2
(20
Hex Cap Nut
1
(73
Shaft
1
34
Hex Cap Bolt
2
(21
Bushing
1
(74
Foot Pedal Rod
1
35
Flat Washer
2
(22
Oil Seal
1
(75
Cylinder
1
36
Spring Washer
2
(23
Pump Cylinder
1
(76
O-ring
1
37
Hex Cap Nut
2
(24
Compose Washer
1
(77
Oil Pipe Tie-in
1
38
O-ring
2
(25
Plug
1
(78
High Press Oil Pipe
1
39
Oil Mouth Plug
1
(26
Taper Spring
1
(79
C-ring
4
40
Oil Tank
1
(27
Steel Ball
2
(80
Shaft
1
41
Hex Cap Bolt
2
(28
Hex Cap Plug
2
(81
Nut
1

9
42
Spring Washer
2
(29
O-ring
1
(82
Washer
1
43
Hex Cap Nut
2
(30
Fix Shaft
1
(83
Oil Seal
1
44
Oil Pipe
1
(31
Spring Seat
1
(84
Piston
1
45
Air Pipe
1
(32
Spring
1
(85
Lift Piston
1
46
Enter Air
1
(33
Steel Ball
1
(86
Shaft
1
47
O-ring
1
(34
Plug
1
(87
O-ring
1
48
O-ring
1
(35
Taper Spring
1
(88
Top Nut
1
49
Valve Core
1
(36
Steel Ball
2
(89
Plug
1
50
Spring
1
(37
Oil Pipe Tie-in
2
(90
O-ring
1
51
Oil Seal
1
(38
O-ring
1
(91
Oil Seal
1
52
Plug
1
(39
Plug
1
(92
O-ring
1
53
Bolck Ring
1
(40
Spring
1
(93
Dust Cover
1
For replacement parts and technical questions, please call 1-800-222-5381.
WARRANTY
One-year limited warranty
Distributed by
Northern Tool + Equipment Co., Inc.
Burnsville, Minnesota 55306
NorthernTool.com
Made in China
/