Page is loading ...

Instruction
Manual
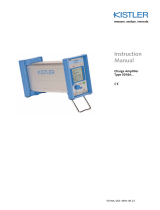
Charge Amplifier
Type 5080A...
ä
5080A_002-503e-06.23


Foreword
5080A_002-503e-06.23 Page 1
Foreword
Information in this document is subject to Charge Amplifier
Type 5080A...
Thank you for choosing a Kistler quality product
characterized by technical innovation, precision and long
life.
Information in this document is subject to change without
notice. Kistler reserves the right to change or improve its
products and make changes in the content without
obligation to notify any person or organization of such
changes or improvements.
© 2010 … 2023 Kistler Group. Kistler Group products are
protected by various intellectual property rights. For more
details visit www.kistler.com. The Kistler Group includes
Kistler Holding AG and all its subsidiaries in Europe, Asia,
the Americas and Australia.
Kistler Group
Eulachstraße 22
8408 Winterthur
Switzerland
Tel. +41 52 224 11 11
www.kistler.com

Charge Amplifier, Type 5080A...
Page 2 5080A_002-503e-06.23
Content
2.1For your Safety ..................................................................................................................... 6
2.2Unpack ................................................................................................................................. 7
2.3Transportation and Storage .................................................................................................. 7
2.4Electromagnetic Compatibility (EMC) ................................................................................... 8
2.5Tips for Using this Manual .................................................................................................... 9
2.6Instrument Versions ........................................................................................................... 10
2.7Accessories Included ........................................................................................................... 11
2.8Optional Accessories .......................................................................................................... 11
2.9Manual Nomenclature ........................................................................................................ 13
2.10Units of Measure ................................................................................................................ 14
2.11Piezoelectric Measurement Concept ................................................................................... 15
2.12Drift Compensation of Piezoelectric Amplifier Type 5080A…
for Cylinder Pressure Signals ............................................................................................... 19
2.13Disposal Instruments for Electrical and Electronic Equipment .............................................. 20
3.1Block Diagram .................................................................................................................... 22
3.26-Component Force-Moment Measurement ...................................................................... 23
3.3Amplifier Unit ..................................................................................................................... 24
3.4Control Unit ....................................................................................................................... 25
3.5Power Supply Unit ............................................................................................................. 26
3.6The Measuring Chain ......................................................................................................... 27
3.7Multi-Component Force Measurements with Dynamometers ............................................ 28
3.7.13-Component-Force Measurement with 3-Channel Charge Amplifier
and a Stationary Dynamometer .......................................................................................... 28
3.7.24-Component-Force-Moment Measurement with 4-Channel Charge Amplifier
and a Stationary Dynamometer .......................................................................................... 28
3.7.36-Component-Force-Moment Measurement with 8-Channel Charge Amplifier
and a Stationary Dynamometer .......................................................................................... 29
3.7.45- /(6-) Component-Force-Moment Measurement with 8-Channel Charge Amplifier
and a Measuring Hub ......................................................................................................... 30
4.1User Interface ..................................................................................................................... 31
4.2Inserts and Connections ..................................................................................................... 32
4.3Inserting Amplifier Modules and Interfaces ........................................................................ 35
4.4Connecting the Instrument ................................................................................................. 36
4.4.1Connecting Cable Adaptor Type 5435A… with Charge Amplifier Modules ....................... 36
4.4.2EMC and Ground Loops ..................................................................................................... 37
4.5Instrument Operation ......................................................................................................... 39
4.5.1Display and Main Menu ..................................................................................................... 39
4.5.2 Menu Operation ............................................................................................................... 40
4.5.3Select Language ................................................................................................................. 40
4.5.4Set Numerical Values .......................................................................................................... 40
4.6Step by Step Measuring Guidance ...................................................................................... 41
4.6.13-Component-Force Measurement .................................................................................... 41
4.6.1.1Signals on Analog Output ..................................................................................... 46
4.6.26-Component-Force Moment Measurements .................................................................... 47
4.6.2.1Sensor Distances .................................................................................................... 47
4.6.2.2Correction Factors ................................................................................................. 48

Content
5080A_002-503e-06.23 Page 3
4.6.2.3sApplication: 'General Force' vs 'Wheel Force' ....................................................... 48
4.6.2.4Signals on Analog Output in 'General Force' Application ...................................... 49
4.6.2.5Signals on Analog Output in 'Wheel Force' Application ........................................ 49
4.7Remote Control and Triggering ........................................................................................... 50
4.8Software ............................................................................................................................. 51
5.1Contrast Setting .................................................................................................................. 52
5.2Lock/Unlock Settings .......................................................................................................... 52
5.3Channel Selection ............................................................................................................... 52
5.4Summation ......................................................................................................................... 53
5.4.1Scaling ................................................................................................................................ 53
5.4.2Sensor Distances ................................................................................................................. 55
5.4.3Correction Factors ............................................................................................................... 55
5.4.4'General Force' vs. 'Wheel Force' ........................................................................................ 56
5.5Actuate Output ................................................................................................................... 56
5.6Menu .................................................................................................................................. 56
5.7Measuring Range ................................................................................................................ 56
5.7.1Stepwise Range Setting ....................................................................................................... 57
5.7.2Variable Range Setting ........................................................................................................ 57
5.8Mechanical Unit .................................................................................................................. 57
5.9Sensor Sensitivity Value....................................................................................................... 58
5.10Sensor Sensitivity Unit ......................................................................................................... 59
5.11Display of Measuring Value ................................................................................................ 60
5.12High-Pass Filter ................................................................................................................... 60
5.13Low-Pass Filter .................................................................................................................... 60
5.14Voltage Output Scaling ....................................................................................................... 61
5.15Display of Active Drift Compensation ................................................................................. 61
5.16Trigger Display .................................................................................................................... 62
5.17Parameter Set Display ......................................................................................................... 62
6.1Demo Mode ....................................................................................................................... 63
6.2Select Language .................................................................................................................. 63
6.3Display of Instrument Information ...................................................................................... 64
6.4Communication RS-232C / USB Interface ........................................................................... 64
6.5Function Key Definition ...................................................................................................... 64
6.6Control Measuring Cycle .................................................................................................... 65
6.6.1Use of MiniDIN Interface as a Remote Control ................................................................... 67
6.6.2Use of RS-232C Interface on Interface Type 5245 to Trigger .............................................. 67
6.6.3Use of RS-232C Interface on Interface Type 5245 as a Remote Control ............................. 68
6.7Zero Error Adjustment ......................................................................................................... 68
6.8Storing, Recalling and Clearing Parameter Sets ................................................................... 69
6.8.1Channel Copying ................................................................................................................ 69
6.8.2Storing a Parameter Set....................................................................................................... 70
6.8.3Recalling a Parameter Set .................................................................................................... 71
6.8.4Clearing a Parameter Set ..................................................................................................... 72
6.9Factory Defaults .................................................................................................................. 73
6.10 Signal display ..................................................................................................................... 73
6.11Piezotron ............................................................................................................................ 74
6.12Messages ............................................................................................................................ 74
6.13Commands for RS-232C Interface ...................................................................................... 75
6.14Extended Instruction Record of the RS-232C Interface ....................................................... 78
6.15Event Messages .................................................................................................................. 82
6.15.1Message Format ................................................................................................................. 82
6.15.2Event Messenger from Measure Card ................................................................................. 83

Charge Amplifier, Type 5080A...
Page 4 5080A_002-503e-06.23
6.15.3Event Messenger from CPU ............................................................................................... 83
6.16LED Signaling ..................................................................................................................... 83
7.1Charge Input ...................................................................................................................... 84
7.2Low Impedance (Piezotron)/Voltage Input on Dual Mode Module Type 5067A2 .............. 84
7.3Voltage Output on Charge Amplifier/Dual Mode Module Type 5067................................ 85
7.4Frequency Response on Charge Amplifier/Dual-Mode Module (Type 5067A0/5067A2) .. 86
7.4.1Time Constant (Short / Medium) ....................................................................................... 86
7.4.2Time Constant (Long) ........................................................................................................ 86
7.4.3Drift Compensation (DrCo) ................................................................................................ 86
7.4.4Low-pass Filter ................................................................................................................... 87
7.5Voltage Output on Summing Calculator Interface (Type 5245) .......................................... 90
7.5.1Specifications Without Piezotron Option ............................................................................ 90
7.5.2Specifications With Piezotron Option ................................................................................. 91
7.6Charge Input on Fischer Connector (on Type 5435A…) ..................................................... 92
7.7Refresh Rate LCD ............................................................................................................... 93
7.8Remote Control (Type 5067) .............................................................................................. 93
7.9Remote Control (Type 5245) .............................................................................................. 93
7.10Data Communication ......................................................................................................... 94
7.11Power Supply Connection .................................................................................................. 95
7.12Environmental Data ............................................................................................................ 96
8.1Precautions......................................................................................................................... 99
8.2Causes of Drift ................................................................................................................... 99
8.3Testing and Calibration .................................................................................................... 101
8.3.1Instrument Test ................................................................................................................ 101
8.3.2Calibration........................................................................................................................ 101
8.3.3Kistler Calibration Service ................................................................................................. 102
8.4Loading New Firmware .................................................................................................... 102
8.5Changing Fuses ................................................................................................................ 103
8.6Remote Control Connection ............................................................................................. 104
8.7RS-232C Cable ................................................................................................................. 105
8.8Charge Amplifier Transfer Function .................................................................................. 106
8.8.1High-Pass Filter ................................................................................................................ 106
9.1DynoWare Type 2825A ................................................................................................... 108
9.1.13-Component Force Measurement F
x
, F
y
, F
z
with 4-Channel Charge Amplifier
Type 5080Axx3x001 and DynoWare Type 2825A-02 ..................................................... 108
9.1.26-Component Force-Torque Measurement F
x
, F
y
, F
z
, M
x
, M
y
, M
z
with
8-Channel Charge Amplifier Type 5080Axx80004 and DynoWare Type 2825A-02 ......... 110
Total pages 115

Introduction
5080A_002-503e-06.23 Page 5
Introduction
By choosing this quality Kistler product you have opted for
an instrument distinguished by technical innovation
precision and long life.
To the extent permitted by law Kistler does not accept any
liability if this instruction manual is not followed or
products other than those listed under Accessories are
used.
Amplifier Type 5080A... is an universal Charge Amplifier
with a liquid-crystal display. The technology employed
allows simple operation and offers many useful functions in
piezoelectric measurement. Its impressive features are
excellent technical specifications and simplicity of
operation.
The most important performance features at a glance:
Multi-channel charge amplifier
Measuring range ±2 ... ±2 200 000 pC
Multiple extended low pass filters
Communication interfaces USB and RS-232C
Piezotron input (option)
6-component analog summing calculation
Suitable for data acquisition software DynoWare Type
2825A (option)
Menu-driven user interface
Please study this instruction manual carefully so that you
can use the versatile features of your new Charge Amplifier
to their best advantage.
Kistler offers a wide range of products for use in measuring
technology:
Quartz crystal sensors for force, torque, strain, pressure,
acceleration, shock, vibration and acoustic-emission
Piezoresistive pressure sensors and transmitters
Signal conditioners, indicators and calibrators
Electronic control and monitoring systems as well as
application-specific software for measuring technology
Kistler also develops and produces measuring solutions for
the application fields engines, vehicles, manufacturing,
plastics, biomechanics and traffic.
Our product and application brochures will provide you
with an overview of our product range.
If there are particular questions which you still want to
raise after studying this manual, worldwide Kistler
customer service is available to you. The Kistler sales
centres are competent and may advise you on problems in
particular applications.

Charge Amplifier, Type 5080A...
Page 6 5080A_002-503e-06.23
Important Guidelines
It is essential for you to study the following information,
compliance with which is for your personal safety when
working with the Charge Amplifier and will ensure its long-
term, fault-free operation.
2.1 For your Safety
This system is built and tested in accordance with the
safety requirements for electronic measuring equipment
(EN Publication 61010-1); leaving the factory in perfect
condition and securely tested. In order to maintain this
condition and to ensure hazard-free operation, the user
must comply with the information and warning notes
contained in this manual and/or imprinted on the instru-
ment.
Compliance with local safety regulations which apply to
the use of power line operated electrical and electronic
equipment is recommended.
If there is evidence that safe operation is no longer
possible, the instrument must be shut off and made safe
against accidental start-up. Safe operation is no longer
possible,
if the instrument shows visible signs of damage,
if the instrument is no longer functioning,
after lengthy storage under unsuitable conditions,
after rough transport conditions.
If safe operation is no longer guaranteed as a result of the
reasons listed above, the instrument must be returned
immediately to the Kistler distributor for repair.
When opening covers or removing parts, except where this
is possible by hand, live parts may be exposed if the device
remains connected.
The instrument must be disconnected from all power
supplies before undertaking any alignment, maintenance,
repairs or exchange of parts.
Wherever possible, no alignment, maintenance or repair
work should be carried out on exposed live equipment. If,
however, work of this kind cannot be avoided, it must be
carried out only by a qualified technician, who is aware of
the dangers involved.

Important Guidelines
5080A_002-503e-06.23 Page 7
Any interru
p
tion to the grounding conductor inside
or outside the instrument or disconnection of the
ground wire connection can make the instrument
dangerous. Intentional interruption is not permitted!
The power plug must be plugged only into a socket
outlet with a grounding contact. The protective
effect must not be cancelled by the use of an
extension cable which has no a ground wire
connection
Defective fuses must be replaced only with the
corresponding types with the specified current rating
(refer to sections 8.5 and 7.11). The use of
"repaired" fuses or the short-circuiting of the fuse
holder is not permitted
The grounding screw in the instrument connects the
power plug ground with the case. It must not be
removed
2.2 Unpack
Please check all instrument packaging for any damage
sustained during transport. Report any such damage to the
transporters and to your Kistler distributor.
Before you get started, please check that your Charge
Amplifier package includes the items listed in section 2.7. If
any parts are missing, contact your Kistler distributor
immediately.
2.3 Transportation and Storage
If the instrument is to be transported or stored for a
lengthy period, the following safety precautions must be
taken:
The temperature must remain within the range of
–10 C and 50 C
All interface connectors (BNC and Fischer) must be
covered with a dust cover which does not cause short-
circuits
Ensure that no dirt can enter the instrument
The environment should be as dry as possible and free
of vibrations
Store the instrument so that no pressure is placed on
either the front or back panel
The instrument should be stored in its original
packaging during any period when it is not in use

Charge Amplifier, Type 5080A...
Page 8 5080A_002-503e-06.23
2.4 Electromagnetic Compatibility (EMC)
The Charge Amplifier is CE-compliant. It complies with
safety requirements according to EN 61010-1 as well as
requirements for electromagnetic compatibility according to
EN 61326-1 (class A and class B).
The EMC specification tests were fulfilled with and without
signal ground connection to the instrument case
(protective ground). This connection is provided as
standard. The M2,5x5 grounding screw at the front side of
the instrument is used for this purpose. The user can
remove this connection at any time by removing the screw
to interrupt ground loops. The common mode voltage
must not exceed 25 V.
A flat connecting tab (6,3 mm) connected to the
protective ground is fitted at bottom right at the
back of the case. In the event of interference
problems from ground loops, a low impedance and
low inductance equipotential bonding conductor
can be connected at this point.
Generally speaking, in the event of interference
problems caused by ground loops, tests are always
needed to find the best solution (see section 4.4).
Flat tab connector

Important Guidelines
5080A_002-503e-06.23 Page 9
2.5 Tips for Using this Manual
We recommend you to read the entire instruction manual
carefully. However, if you are in a hurry and already have
experience with Kistler instruments, you can confine your-
self to reading the specific information needed.
We have attempted to give these instructions a simple
layout to make it easier for you to gain direct access to the
information you need. Please keep this instruction manual
in a safe place where you can retrieve them at any time.
If you lose the instruction manual, please contact your
Kistler distributor and ask them for a replacement.
Equipment modifications (conversions, upgrades etc.)
usually also result in amendments to the instruction
manual. In this case, contact your Kistler distributor for
updating facilities for your documentation.

Charge Amplifier, Type 5080A...
Page 10 5080A_002-503e-06.23
2.6 Instrument Versions
The complete type designation of the multichannel
amplifier consists of the basic designation Type 5080A...
and seven additional digits.
The following key shows the instrument versions available:

Important Guidelines
5080A_002-503e-06.23 Page 11
2.7 Accessories Included
Charge Amplifier Type 5080A... with
Rack with Power supply
LCD-Unit
Interface Type 5245
Country-specific power cord
USB connecting cable Type A to B; length 1,8 m
Art. no. 5.590.303
Instruction manual and CD-ROM with USB driver
Calibration sheet
Charge Amplifier Module Type 5067A0 with:
Plug for 'Remote Control' (Art. no. 5.510.305)
Piezotron Module Type 5067A2 with:
Plug for 'Remote Control' (Art. no. 5.510.305)
2.8 Optional Accessories
Optional Accessories Type
RS-232C interface cable 1200A27
USB connecting cable Type A to B; 1200A127AL2
length 2,0 m, lockable
USB connecting cable Type A to B; 1200A127AL5
length 2,0 m, lockable
Connecting cable for signal outputs 1700A111A2
from card Type 5245 to
DAQ system Type 5697A…
Inductive proximity switch 2233B
generates an external trigger signal to
start measurement with
DynoWare Type 2825A…
Distributing box 5407A
Input: Fischer 9-pole neg.
Output: 3 x BNC neg.
Distributing box 5405A
Input: Fischer 9-pole neg.
Output: 8 x BNC neg.
Connecting cable BNC pos./BNC pos. 1601B

Charge Amplifier, Type 5080A...
Page 12 5080A_002-503e-06.23
Fig. 1: RS-232C interface cable Type 1200A27
Fig. 2: Connecting cable Type 1700A111A2
Fig. 3: Inductive proximity switch Type 2233B

Important Guidelines
5080A_002-503e-06.23 Page 13
2.9 Manual Nomenclature
Below is a key to the indications and abbreviations used in
this handbook along with explanatory notes on the
meaning of special typefaces.
Abbreviation Definition
FS Full Scale = full scale value
M.U. Mechanical Unit = Mechanical unit according to sensor
type used
Pressure bar, psi, kPa
Force N, lbf
Strain
Acceleration m/s2, ft/s2
E.U. Electrical Unit = Electrical unit according to measurement
input
Charge pC
Voltage mV
p
C picoCoulomb = Unit of electrical charge
1 pC = 10–12 C
1 C = 1 As
mV milliVol
t
= Unit of voltage
b
p
s Bits
p
er second
s
p
s Sam
p
les
p
er second
RMS Index of a root mean s
q
uare value
Text indications Button or key designations are shown in s
q
uare
parentheses, e.g. [F], [Meas] or [Esc].
All labels on the instrument are shown in single quotation
marks, e.g. ‘Error‘, ‘Measure‘ or ‘Sensor‘.
All internal parameters are printed in italics.
Messages on the LC-display are printed in
this typeface.
Special cautionary or warning notes to be observed
when using this instrument along with section titles and
headings are printed in bold.

Charge Amplifier, Type 5080A...
Page 14 5080A_002-503e-06.23
2.10 Units of Measure
Units of measure are used to assign a value to physical
quantities. A system of units is a set of rules which dictates
how the unit of measure of every quantity used in natural
science and technology is determined in a consistent
manner. The system of units used worldwide today is the
International System of Units, in French Système
International d'Unités (SI). It was officially adopted at the
11th General Conference on Weights and Measures
(CGPM) in 1960. The SI has subsequently released a series
of standard systems of units, mainly applied in the various
fields of natural science, which has made the, at times,
complicated conversions between the different systems
superfluous.
The International System of Units differentiates between
two classes of units: Base Units and Derived Units.
The Base Units are
Unit Quantit
y
S
y
mbol
Mete
r
Kilogram
Second
Ampere
Kelvin
Mole
Candela
Length
Mass
Time
Electric current
Temperature
Amount of substance
Luminous intensity
m
kg
s
A
K
mol
cd
The derived units are obtained from these base units and
the same algebraic relationships (quantity equations) as
hold for the respective quantities in nature. An important
factor of the SI system of units is coherence, by which is
meant that derived units are defined by the multiplication
and/or division of the base units, without the need for any
numerical factors.

Important Guidelines
5080A_002-503e-06.23 Page 15
For the measurement of mechanical and electrical quanti-
ties the Charge Amplifier supports the following units:
Quantit
y
Set Unit SI Unit
Force 1 N
1 kN
1 MN
1 grf
1 kgf
1 lbf
1 N
103 N
106 N
9,80710–3 N
9,807 N
4,448 N
Pressure
1 ba
r
1 mbar
1 hPa
1 kPa
1 MPa
1 psi
105 N/m2
100 N/m2
100 N/m2
103 N/m2
106 N/m2
6,895 N/m2
Acceleration 1 g
1 m/s2
1 ft/s2
9,807 m/s2
1 m/s2
0,3048 m/s2
Strain 1 10–6 m/m
Tor
q
ue 1 N·m
1 kN·m
1 N·cm
1 lbf-in
1 lbf-ft
1 N·m
103 N·m
0,01 N·m
0,1130 N·m
1,356 N·m
el. Charge 1
p
C 10–12 As
el. Voltage 1 mV 10–3 V
2.11 Piezoelectric Measurement Concept
High Impedance Sensors
Piezoelectric sensors convert mechanical quantities such as
pressure, force, moment and acceleration directly into an
electric charge. The charge produced is proportional to the
force acting on the quartz crystal contained in the sensor.
The sensitivity of the sensor is stated in pC/M.U
Low Impedance Sensors (Piezotron Electronic)
In addition, an integrated amplifier circuit is included with
these sensors. This converts the high impedance charge
signal of the piezoelectric sensor element into a low
impedance voltage. These sensors are designated as Piezo-
tron, PiezoBeam or ICP1-compatible sensors. The sensitivity
of these sensors is stated in mV/M.U. The electronic circuit
is designed so that power supply and signal transmission
use the same two-pole cable. A standard coaxial cable can
be used to connect sensor and instrument. These sensors
are particularly suitable for long cables or in dirty areas
with high humidity.
1 Integrated Circuit Piezoelectric
F
F
F
F
Q
Q CT R
T

Charge Amplifier, Type 5080A...
Page 16 5080A_002-503e-06.23
The use of these sensors is restricted to dynamic processes,
since CT is constantly discharged through RT. Time constant
and lower cut-off frequency fu are calculated using the
adjacent equations. The naturally wide measuring range
and the operating temperature of piezoelectric sensors is
restricted by the characteristics of the sensor integrated
electronic. The optional voltage input is required for the
connection of low impedance sensors.
Tips for the Piezoelectric Measurement Technique
When working with piezoelectric measuring instruments,
please note that they differ from other familiar electrical
measuring instruments. Different criteria apply than is the
case, for example, with customary current or voltage
measurement. When unpacking the sensors and the special
cables, make sure that their connectors remain clean and
dry to maintain a high insulation resistance. In particular,
Teflon insulators of all plug connections in the input circuit
must be kept absolutely clean and must not be touched
with the fingers. Any necessary cleaning must be carried
out with extremely pure cleaning materials, for example
the cleaning spray Type 1003 from Kistler or white spirit
together with a clean, lint-free paper tissue.
Special Highly Insulating Cables
Only low-noise special cables according to Kistler datasheet
1687B_000-545 (Cables for multi-component force
sensors, dynamometers and force plates) and 1631C_000-
346 must be used to connect high impedance sensors.
Standard commercially available coaxial cables produce
triboelectricity due to movement and would therefore
falsify the measuring results.
Connecting Piezoelectric Sensors in Parallel
When several sensors are connected in parallel, the charge
amplifier measures the sum of all charges. For example, the
four force measuring elements of a force plate can be
connected in parallel for measurement of the entire force.
Polarity
As defined by Kistler, an increase in pressure at the sensor
elements produces a negative charge. The Charge
Amplifier inverts the sensor signal and in this case
generates a positive read-out and output voltage.
Measuring Range
We recommend to set the largest measuring range at the
beginning of a measurement or also in the event of lengthy
stoppages. Normal overloads caused by high charge signals
will not damage the charge amplifier.
TT CR
2
1
fu

Important Guidelines
5080A_002-503e-06.23 Page 17
In case the charge exceeds at least 10-times the selected
as full scale value an unacceptably high voltage can be
generated. The magnitude of the voltage will depend on
the charge fed in, the total internal capacitance (sensor
and cable capacitance) and the range capacitor.
Measuring Modes
'DrCo (Engines)'
Drift compensation is only applicable for engine application
and is recommended to avoid any drift of the measuring
signal.
'Short' and 'Medium'
When making dynamic measurements of periodic or quasi-
periodic processes, it is best to select the 'Medium' or
'Short' measuring modes in order to prevent any drift.
'DC (Long)'
A switch must be made to 'DC (Long)' for quasi-static
measurements and calibration. In the 'DC (Long)' measur-
ing mode, depending on the instrument setting, both a
periodic and transient processes of up to several minutes
duration can be measured. For general force application
such as cutting force 'DC (Long)' is usually chosen.
Measuring mode: DrCo (Engines)

Charge Amplifier, Type 5080A...
Page 18 5080A_002-503e-06.23
0 100 200 300
0
1
1.5
0.5
0.5
x(t)
t
280 290 300
0
1
1.5
0.5
0.5
x(t)
t
01020
0
1
1.5
0.5
0.5
x(t)
t
Measuring mode: AC (Short,
Medium)
01020
0
1
1.5
0.5
0.5
x(t)
t
0 100 200 300
t
0
1
1.5
0.5
0.5
x(t)
280 290 300
0
1
1.5
0.5
0.5
x(t)
t
Measuring mode: DC (Long)
/