Kmart 42999690 User manual

Category
Pressure cookers
Type
User manual

This manual is also suitable for

双胶纸 70g
USER MANUAL
IMPORTANT NOTE: Please read the manual carefully before operating your
product. Retain it for future reference.
Electric Pressure Cooker
MY-CS6002WP1
USER MANUAL
IMPORTANT NOTE: Please read the manual carefully before operating your
product. Retain it for future reference.
Electric Pressure Cooker
MY-CS6002WP1
CONTENT
Specifications
Product Structure
Controls and State of the Cooker
Before the First Use
Cooking Preparation
Cooking with Your Cooker
Care and Maintenance
Troubleshooting
................................................................................................5
..........................................................................................5
...................................................................7
.......................................................................................8
....................................................................................10
............................................................................11
.................................................................................16
...........................................................................................17
12 Month Warranty
......................................................................................18
IMPORTANT SAFEGUARDS ......................................................................1
1
When using electrical appliances, basic safety precautions
should always be followed including the following, please
read all instructions.
1. This product is for household use only. Do not use outdoors.
2. Do not use pressure cooker for other than intended use.
3. Do not place the unit on or near a hot gas or electric burner,
or in a heated oven
4. Do not use it in a place which is near splash water or fire.
Do not use it in a place exposed directly to sunshine or
oil splash. Put it in a place out of the reach of children.
5.
6. Close supervision is necessary when the pressure cooker is
used by or near children. The adult should supervise the
children in order to make sure the children cannot play with
the appliance.
7.This appliance is not intended for use by persons (including
children) with reduced physical, sensory or mental
capabilities, or lack of experience and knowledge, unless
they are accompanied by a person responsible for their
safety.
8. To protect against electrical shock, do not immerse cord,
plugs, or appliance in water or other liquid.
9. Be sure that handles are assembled and fastened properly
before each use. DO NOT use if the handle is damaged.
10.
11.
Caution
IMPORTANT SAFEGUARDS
Do not place the unit on an unstable location. DO NOT use it
on a newspaper, foam or other object that may easily block
the vent hole at the bottom.
Do not operate the appliance with a damaged cord or plug
or after the appliance malfunctions or has been damaged in
any manner. For electrical safety, any repairs to the product
should be carried out by a qualified electrical person only or
the product must be disposed.
Do not attempt to replace any parts inside the pressure
cooker, as this may cause electric shock, fire or injury.
2
Caution
IMPORTANT SAFEGUARDS
12. The use of accessory attachment not recommended by the
appliance manufacturer may cause injuries.
13. Do not let cord hang over edge of table or counter, or touch
hot surfaces.
14. Caution: to reduce the risk of electric shock, cook only in the
provided removable container (cooking pot).
15
16.
17
18
19. Do not fill the unit over MAX level (2/3 full). When cooking
foods that expand during cooking such as rice or dried
vegetables, do not fill the unit over l/2 full. Over filling may
cause a risk of clogging the vent pipe and developing
excess pressure. Please see "Cooking Preparation".
20. This appliance cooks under pressure. Improper use may
result in scalding injury. Make certain unit is properly
closed before operating. Please see "Cooking Preparation".
21. Never deep fry or pressure fry in the unit with oil. It is
dangerous and may cause a fire or serious damage.
. Before use each time, be sure to check the anti-block
shield, float valve and exhaust valve for obstruction,
wipe the surface of the inner pot and the heating plate to
confirm they are free of any foreign object, make sure
the exhaust valve is in sealing location.
Always check the pressure release devices for clogging
before use. Do not cover the pressure valves.
. Please soak dry foods before cooking them in the product.
. Be aware that certain food, such as applesauce,
cranberries, pearl barley, oatmeal or other cereals, split
peas, noodles, macaroni, rhubarb, or spaghetti can foam,
froth, and sputter, and clog the pressure release device.
These foods should only be cooked in a pressure cooker
with caution with the inner pot never more than l/2 full
and using natural release.
3
Caution
IMPORTANT SAFEGUARDS
22. Do not move this product or force to remove the lid when
the unit is in operation.
23. Extreme caution must be used when moving the unit
Do not touch hot surfaces. Use handles or knobs. Do not
place your hands or face over the exhaust valve or float
valve to avoid scalding when the unit is in operation.
ontaining hot food or other hot liquids.
24.
25.
26. When opening the lid after cooking, do not touch the inner
pot and cover inside with hands directly to avoid scald.
27. Do not open the pressure cooker until the unit has
cooled and all internal pressure has been released. If the
handles are difficult to push apart, this indicates that the
cooker is still pressurized-do not force it open. Any
pressure in the cooker can be hazardous. Please see
"Cooking Preparation".
28. To disconnect, turn any control to "off " then remove plug
from wall outlet.
29.
After cooking, use extreme caution when removing the
lid. Serious burns can result from steam inside the unit.
Always unplug from the mains power outlet when not in use,
before removing parts and cleaning. Allow to cool before
putting on or taking off parts, and before cleaning.
4
PLEASE SAVE THESE INSTRUCTIONS
Caution
IMPORTANT SAFEGUARDS
Warning: Be careful to avoid spillage on the connector.
Misuse may cause potential injury. The heating element
surface is subject to residual heat after use.The appliance
is not intended to be operated by means of an external
timer or a separate remote-control system.Appliances
should be positioned in a stable situation with the handles
positioned to avoid spillage of the hot liquids.
No. Description
2
4
No. Description
1
1
2
3
4
5
6
3
5 6
5
Float valve
Lid handle
Lid position mark
Lid open/close mark Lid
Specifications
Parts Structure
Inner Pot
Model
220-240V~
50-60Hz
Power
Supply
Accessories
Working
Pressure
60kPa
Keep Warm
Temperature
60~80
Rated
Power
1100W
Volume
5.8L
Ladle
Measuring cup Water box Power Cord
Components
User Manual
MY-CS6002WP1
Rice Spoon
Steam exhaust valve
6
No. Description
2
4
No. Description
1
3
5 6
Lid
Spoon shelf
Control panel
Anti-block shield
Exterior pot
8
10
7
9
Base & Heating unit
Sealing ring
Cooker housing
Cooker handle
Inner pot
Parts Structure
1
2
3
4
5
6
7
8
9
10
7
Standby state: the LED display shows " ".
Preset state: the LED display shows "preset" time and the time counts down,
and the activated function indicator lights up.
Program operating state: the LED display shows " " and the activated
function indicator lights up.
Keep-warm state: the LED display shows " " and the time counts up, and
the "Keep Warm" function indicator lights up.
Your electric pressure cooker has 4 states which are shown on the LED display
and function indicators.
The control panel of your electric pressure cooker consists of an LED display,
3 mode indicators, 2 operation keys and 14 function keys. Each function key has
a function indicator light. Operation keys do not have indicator lights.
Controls and States of the Cooker
Control Panel
States of the cooker
LED display
Mode indicators
Operation keys
Function indicators
Function keys
Curry
Porridge Broth/Dal Beans Steam
Meat Stew Soup Poultry
Vegetables
8
Controls and States of the Cooker
Before the First Use
Operation Keys
Function Keys
Remove and lnstall the Anti-Block Shield
The 2 operation keys include "Taste" and "Delay Timer" keys. The "Taste" key is
used to adjust cooking duration except "Sauté" . The "Delay Timer" key is used to
preset cooking.
The anti-block shield can be removed by pushing it on the side to lift it up. To
install the anti-block shield, position it in place and press it down.
Before the first use, please take out all accessories from the package and read this
manual carefully. Please pay particular attention to operational instructions and
cautions to avoid any injury or property damage. Please wash the inside of the lid
and the inner pot with warm soapy water, rinse and dry thoroughly. Wipe the outer
housing with a clean damp cloth. Never immerse the cooker housing in water or
any other liquid. The inner pot, sealing ring and exhaust valve and all accessories
are dishwasher safe. But never clean the lid and housing in a dishwasher.
The most important key is "Keep warm/Cancel". When the cooker is being
programmed or any program is in effect, press this key will cancel the program and
take the cooker to standby state. When the cooker is in standby state, pressing this
key activates the keep-warm program.
The other function keys include "Preset (+/-)", "Rice", "Curry", "Porridge", "Broth/
Dal", "Beans", "Steam", "Vegetables", "Meat", "Stew", "Soup", "Poultry" and
"Sauté" keys.
9
The sealing ring can be removed by pulling upwards from the sealing ring rack in
sections. To install the sealing ring,
pressing it down into the rack section
by section. The sealing ring can be
installed on either side facing up.
Remove and lnstall the Sealing Ring
Safe Lid Opening
Please note the following:
Prior to each use, inspect to make sure the sealing ring is well seated in the
sealing ring rack and the anti-block shield is mounted properly on the steam
release pipe.
After use, remove any foreign objects from the sealing ring and anti-block shield.
Never pull the sealing ring by force, as the pulling may cause deformation and
affect its function in sealing the pressure.
Keep the sealing ring clean to avoid odor. Washing the sealing ring in warm
soapy water or dishwater can remove odor. However, it is normal for the sealing
ring to absorb the smell of certain acidic foods. That is why it is always a good
idea to have more than one sealing ring on hand.
Safe Lid Release:
1. Make sure the pressure cooking program has completed or press "Keep
warm/Cancel" key to terminate the program.
2. Wait until the pressure cooking program has completed or press the “Keep
Warm/Cancel” key to terminate the program.
3. Unplug the cooker and remove the power cord.
4. Allow the cooker to cool down until the float valve drops down. This may take 10
to 14 minutes.
5. Once the float valve has dropped down, open the exhaust valve by turning the
valve handle to the left towards the steam symbol.
6. Hold the lid handle and turn the lid to the right until the unlock symbol align
with the lid position mark
7. Lift the lid off the pot. Attention: Do not open the lid until pressure inside
the pot is completely released. See Important Safeguards.
A sealing ring with cracks, cuts or other damages should not be used.
A new sealing ring replacement should be used.
10
Caution: Do not open the lid until pressure inside the pot is completely
released. As a safety feature, until the float valve drops down, the lid is locked
and cannot be opened.
Holding the lid handle with your hand, rotate approximately30
degrees clockwise until the " " mark on the lid is aligned with
the " " mark on the cooker housing rim.
Check the float valve and exhaust valve for obstructions. Make
sure that the sealing ring is well seated inside its holding rack,
the anti-block shield is installed properly and the float valve can
move up and down easily.
1. Open the lid
he total amount of food and water should NEVER exceed the
maximum level marking of the inner pot. It is recommended
that you do not fill the unit over 2/3 full. When cooking foods
that expand during cooking such as rice, beans or dried
vegetables, do not fill the unit over 1/2 full. Over filling may risk
clogging the vent pipes and developing excess pressure. This
could also cause spillage and may damage to the unit.
3. Take out inner pot, and put in food and liquid
2. Check whether all parts on the lid are assembled properly
Cooking Preparation
Usable
capacity
Quick Release:
1.Wait until the exhaust valve has stopped emitting steam. To speed up the cooling
down process, you can place a wet towel on the lid.
2.Slowly open the exhaust valve by turning the valve handle to the left towards the
steam symbol. Wait until the float valve has dropped down.
Attention: Keep hands and face away from any escaping steam. It is very hot
and can cause scalding. See Important Safeguards.
Note: A Quick Release is not suitable for food in large liquid volume or with high
starch content (e.g. porridge, congee, soup, etc.) because food may be expelled
with steam. In this case, use the Safe Lid Release method instead.
11
4. Place the inner pot inside the cooker housing
Before that, be sure to remove foreign objects and wipe dry the outside of the
inner pot and the heating element inside of the cooker.
After putting the inner pot inside the housing, rotate the inner pot slightly to
ensure good contact between the inner pot and the heating element.
Hold the lid handle and put the lid on the cooker, with the" "
mark on the lid and " " mark on the housing rim are aligned.
Rotate the lid counterclockwise approximately 30 degrees
until the " " mark on the lid is a aligned with the " " mark
on the housing rim.
5. Close the lid completely
6. Attach the power cord to the appliance then plug into socket outlet. An
audible sound and "--" show on display, indicating the cooker is in standby
mode now.
7. For any functions except "Keep-Warm" on "Saute", close the exhaust valve
by turning the valve handle to the right, pointing away from the steam
symbol.
Please note that it is normal and necessary for the steam exhaust valve to
be loose.
Note: When the cooker is plugged in while you open or close the lid, an
audible sound will indicate correct locking and unlocking
Exhaust valve
open/steam position.
Exhaust valve
closed position.
This following procedure is"Rice", Curry",
"Porridge", "Broth/Dal", "Beans", "Steam",
"Vegetables", "Meat", "Stew", "Soup" and
"Poultry" functions.
1. Follow steps in the "Cooking Preparation" section
of this manual.
2. Contact power cord. The LED display shows " "
indicating that it is in standby state.
3. Select a cooking function, e.g. "Rice". Once a
function key is pressed, its indicator lights up.
Cooking with Your Cooker
Pressure Cooking
Within 10 seconds after pressing a function key, you can still adjust cooking
duration.
Curry
Porridge Broth/Dal Beans Steam
Meat Stew Soup Poultry
Vegetables
12
5. Cooking starts automatically in 10 seconds after
the last key press. The LED display shows " "
indicating that the pre-heating state is in progress.
As the pressure increase inside the cooker, it is
perfectly normal for traces of steam to escape
from the float valve until the float valve pops up.
At any time, you can cancel the cooking program
in progress and return to standby mode by pressing
the "Keep warm/Cancel" key.
4. Select cooking time.
You may use the "Taste" key to adjust cooking
duration. Press the "Taste" key repeatedly to
change between "Low", "Medium" and
"High" modes which will light up on the display. Curry
Porridge Broth/Dal Beans Steam
Meat Stew Soup Poultry
Vegetables
Curry
Porridge Broth/Dal Beans Steam
Meat Stew Soup Poultry
Vegetables
13
Your cooker has a preset function to delay the start of cooking for between 30
minutes and 15 hours. The preset function does not apply to the "Keep Warm",
and "Sauté" functions. The following shows how to program for preset cooking.
NOTE:
If you no need to change the default cooking
duration, skip the fourth step.
It is not recommended to leave cooked rice in
"Keep Warm" state for too long as it may affect the
texture or the taste of the food.
6. When the cooking program finishes, the cooker
beeps and automatically goes into the "Keep Warm"
cycle, called Auto "Keep Warm" Cycle. The LED
display shows " ". If the Auto "Keep Warm" cycle
finishes, the cooker goes into standby state.
7. To serve the food, press "Keep warm/Cancel" key
to stop the keep-warm cycle and open the lid
according to the "Safe Lid Opening" section of this
manual.
When opening the lid, the inner pot may appear to
be stuck on the lid by vacuum. This is caused by
contraction of air due to cooling.
Preset Cooking
Curry
Porridge Broth/Dal Beans Steam
Meat Stew Soup Poultry
Vegetables
Curry
Porridge Broth/Dal Beans Steam
Meat Stew Soup Poultry
Vegetables
4. Products to make an appointment time for an appointment start time, decrease
the appointment time to 0, begin to enter functions work, rather than go into
heat preservation.
PLEASE NOTE:
We highly discourage using the preset function for perishable foods, such as
meat and fish, which may go bad when left at room temperature for hours.
Cooked rice may yield overly soft texture due to long soaking time. It may also
cause a layer of burned rice at the bottom of the cooker if it is left in Keep-Warm
mode for too long.
Care should be taken when using Preset function for porridge, oatmeal or other
foamy and sticky foods. Because of the possibility of these foods gumming up
the float valve, if your cooker is overfilled, causing it to never seal and leading to
overflowing food content, it is highly recommended that your cooker not be filled
more than 1/2 full and ideally not be left unattended during the preheat cycle.
14
2. Within 10 seconds after program selection, press
"Delay Timer" and "preset(+/-)" keys to set the
preset time.
The time is the delayed time before the program
starts. Please allow sufficient cooking time and
cooling down time before serving.
3. 10 seconds after last key press, the "Preset"
function starts, the time on LED display counts
down, and the "Preset" indicator lights up.
To cancel the Preset operation, press the "Keep
warm/Cancel" key at any time.
Cooking with Your Cooker
Preset Cooking
1. Follow steps in the previous "Pressure Cooking" section to set a cooking
program.
Curry
Porridge Broth/Dal Beans Steam
Meat Stew Soup Poultry
Vegetables
15
To avoid pressure building up, the lid cannot be closed. Or else this can be
hazardous.
The "Sauté" program can be cancelled by pressing the "Keep warm/Cancel"
key at any time.
5. When cooking finishes, the cooker beeps and automatically goes into standby
state. If you need more time, simply press the "Sauté" key again.
1. Follow steps in the "Cooking Preparation" section
of this manual. Keep the lid open to avoid pressure
from building up inside the cooker.
2. Contact power cord. The LED display shows " "
indicating that it is in standby state.
3. Press "Sauté" key. For safety reasons, the
maximum operation time of one "Sauté" cycle is
20 minutes.
4. Heating starts automatically in 10 seconds. Time
shows on the LED display and starts to count
down, indicating that the heating state is progress.
Cooking with Your Cooker
Sauté
Curry
Porridge Broth/Dal Beans Steam
Meat Stew Soup Poultry
Vegetables
Cleaning
Cooking with Your Cooker
Care and Maintenance
16
WARNING:
Pressing the "Keep warm/Cancel" key in standby state activates the "Keep
Warm" function. When "Keep Warm" function starts, the keep warm indicator is
bright, and "OH" is shown on the screen. The time counts up by Hours for up to
12 hours. The "Keep Warm" function can be used with or without the lid closed.
Caution:
please make sure the appliance has cooled down and is unplugged before
cleaning.
Regular care or maintenance is essential in ensuring that this product is safe for
use If any of the following circumstances take place, please stop using the appli-
ance immediately.
If there is dust or dirt on the plug or socket, please remove dust or dirt with a dry
brush.
Power cord and plug suffer from expansion, deformation, discoloration, damag-
es, etc.
A portion of the power cord or the plug gets hotter than usual. Electric pressure
cooker heats abnormally, emitting a burnt smell.
When power on, there are unusual sounds or vibrations.
1. Clean the product after each use. Wipe the black inner housing rim and slot dry
with cloth to prevent rusting on the exterior pot rim.
2 Remove the lid and take out the inner pot, wash them with detergent, rinse with
clear water and then wipe dry with a soft cloth. The inner pot is also dishwasher
safe.
3. Use water to clean the lid, including the sealing ring (which can be removed),
exhaust valve, anti-block shield, and wipe them clean with dry soft cloth. Do not
take apart the steam release pipe assembly.
4. Clean the cooker body with clean damp cloth. Do not immerse the cooker into
water. Do not use a wet cloth to clean the pot while the power cord is plugged
into the power outlet.
Faulty temperature sensor
(short circuited)
Faulty temperature sensor
(cannot be detected)
Cooker's electrical fuse was blown
Bad power connection or no power
Pressure control fails
Steam release handle not in
sealing position
Float valve obstructed by the lid
locking pin
Float valve silicone ring worn-out
Food debris on the float valve
silicone seal
Lid not closed properly
Food debris attached to the sealing
ring
Sealing ring damaged
No sealing ring
Float valve in the popped-up
position
Sealing ring not installed properly
Replace the float valve silicone seal
Add water according to the recipe
Close the lid completely
Turn the release handle to the
sealing position
Inspect the power cord to ensure a
good connection, check the power
outlet is active.
Contact Kmart. Product is faulty.
After cooking, cycle completes, leave
the cover on for 5 more minutes.
Adjust dry-rice and water ratio
according to recipe
Adjust dry-rice and water
ratio according to recipe
Position the sealing ring well
Press the float valve lightly
downwards
Use the steam release handle to
reduce the internal pressure. Open
the lid after the pressure is
completely released.
Press the float valve lightly with a
pen or chopstick.
Install the sealing ring
Replace the sealing ring
Clean the sealing ring
Open then close the lid again
Clean the float valve silicone seal
Too litter water
Faulty pressure sensor
Contact an electrician to check the
mains power outlet socket in your home.
Mains voltage is too low
Contact Kmart. Product is faulty.
Contact Kmart. Product is faulty
Contact Kmart. Product is faulty.
E8 code
EL code
E2 code
E1 code
Cover opened prematurely
Steam comes out from
exhaust valve non-stop
Rice half cooked or too
hard
Rice too soft
Too much water
Display remains blank
after connecting the
power cord
All LEDs flash
with a code
appearing on
screen
Float valve unable to rise
Steam leaks from float
valve for over 2 minutes
Steam leaks from the
side of the lid
Difficult to open the lid
Pressure exists inside the cooker
Float valve stuck at the popped-up
position
Difficult to close the lid
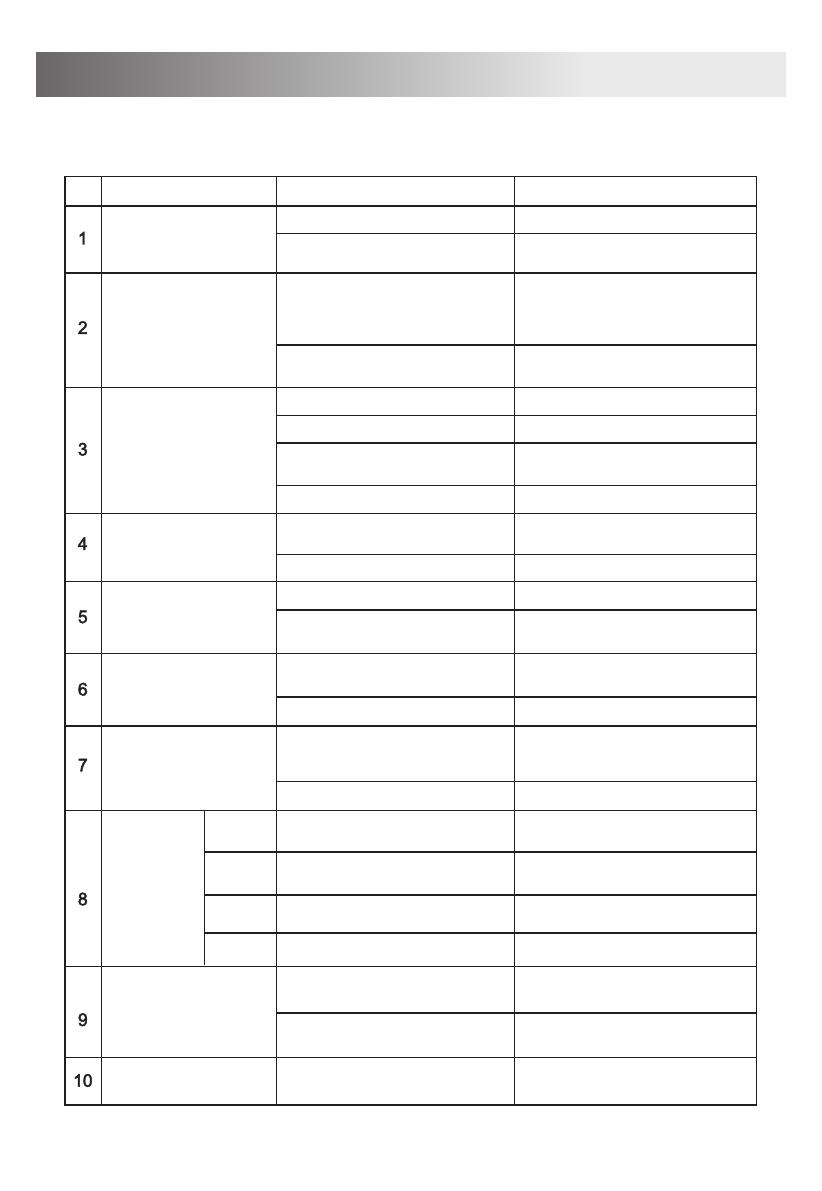
Possible Reason
The cases in the following tables do not always indicate a faulty cooker. Please
examine the cooker carefully before contacting Kmart.
Problem Solution
Too little food or water in inner pot
17
Troubleshooting
  • Page 1 1
  • Page 2 2
  • Page 3 3
  • Page 4 4
  • Page 5 5
  • Page 6 6
  • Page 7 7
  • Page 8 8
  • Page 9 9
  • Page 10 10
  • Page 11 11
  • Page 12 12
  • Page 13 13
  • Page 14 14
  • Page 15 15
  • Page 16 16
  • Page 17 17
  • Page 18 18
  • Page 19 19
  • Page 20 20
  • Page 21 21

Kmart 42999690 User manual

Category
Pressure cookers
Type
User manual
This manual is also suitable for

Ask a question and I''ll find the answer in the document

Finding information in a document is now easier with AI