Page is loading ...

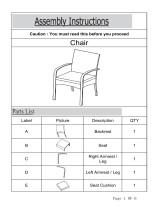
Label Picture Description QTY
A Backrest 1
B Seat 1
Caution : You must read this before you proceed
Chair
Page 1 OF 6

C Right Armrest / Leg 1
D Left Armrest /Leg 1
E Seat Cushion 1
Label Picture Description QTY
F Bolt(M6*35MM) 11
G Washer 11
H Allen Key 1
Before
Beginning
Assembly:
Page 2 OF 6

Overview
This Chair has multiple parts and may require up to some 30 minutes to assemble. To
give you an overview of the Chair parts, the above picture is to help you put the various
parts into perspective. Please read through the instructions herebelow to familiarise
yourself with the parts and steps before assembly.
Step 1
Open the carton and place all the parts onto a clean and soft surface.
Unpack all packages of hardware.
Place the Backrest (A) with its inside facing skywards.
Attach Seat(B) to Backrest(A) using Hardware(H, G) with Allen Key(H).
Do not fully tighten the bolts.
ATTENTION: Occasionally some of the PE Wicker shifts and covers the mounting
positions preventing easy assembly.
The PE wicker should never be cut, but moved away from the mounting positions.
Backrest(A)
Seat(B)
Right Armrest / Leg(C)
Left Armrest / Leg(D)
Seat Cushion(E)
Page 3 OF 6

Step 2
Place the Right Armrest/Leg(C), as picture above so as to be attached to the Backrest (A)
and Seat(B) using Hardware(F, G) with Allen Key(H).
Do not fully tighten the bolts.
Step 3
Place the Left Armrest/Leg (D) as pictured above and affix to Backrest (A) and Seat(B)
using Hardware(F, G) with Allen Key(H) as shown in Picture 4 and Picture 5.
Do not fully tighten the bolts.
Page 4 OF 6

Step 4
Stand CHAIR rightside up.
Check stability and then tighten the bolts.
Note: DO NOT fully tighten a BOLT in one go and then move on to the next. Rather,
In a sequential manner, gradually tighten each Bolt until all bolts are evenly
secured. This methodology will ensure maximum evenness once all Bolts are fully
tightened.
Step 5
Put the Seat Cushion(E) on the Seat.
Your Chair is ready for use.
The Chair can only be used on a flat and level surface.
Page 5 OF 6

What is Proposition 65?
Proposition 65 is a California law that requires warning labels on products that may
contain one of more than 800-plus chemicals or ingredients that the California Office of
Environmental Health Hazard Assessment (OEHHA) has deemed to cause cancer or
other reproductive toxicity. Chemicals and elements on this list include wood dust, brass,
and other everyday substances, which can be found in very common household items,
such as: lamps, tableware, jewelry, crystal glasses, electric cords, beauty products,
automobiles, and furniture.
Why Did I Find a Proposition 65 Warning on My Home Goods Product?
We include Proposition 65 warnings on all of our products because there is always a
chance that one of the 800-plus common chemicals and ingredients listed under this law
could potentially be on our furniture or packing materials. We risk large fines under this
law, if we don't include this warning.
Should I worry?
We realize you may be worried finding this warning on our products, but we want to
reassure you that the hazardous exposure limits for any of these chemicals have never
been found on furniture products that we’ve shipped to our customers. Additionally, this
warning label is very common and can be found on almost every piece of furniture sold in
the state of California.
Just How Common Are Proposition 65 Warnings?
Proposition 65 warnings have become so common in California that it is hard to take a trip
to a local bank, grocery store, or restaurant without finding at least one warning. In fact,
even the Disney Land Resort has a Proposition 65 warning:
Page 6 OF 6

Label Picture Description QTY
Parts List
Assembly Instructions
Caution: You must read this before you proceed
Table
Caution: This Table is NOT a TOY
Keep your child/ children at bay during the assembly process.
Whenever moving/lifting the Table and to prevent damage to the Table, two
adults are needed to execute these actions.

A Table Top 1
B Leg 4
C Leg Support 4
Label Picture Description QTY
①
Bolt
(M6x50mm)
9
②
Screw
(M6x35mm)
9
③
Washer
9
④
Allen Key
1
Hardware
Before Beginning Assembly:
Assembly Preparation
Noble House Home Furnishings LLC

Assembly Steps
Noble House Home Furnishings LLC

This Table has multiple parts and may require up to 30 minutes to assemble. To give you
an overview of the Table parts, the above picture is to help you put the various parts into
perspective. Please read through the instructions below to familiarise yourself with the
parts and steps before assembly.
Step 1
Unpack and place all parts on a clean, non-marring surface.
Overview
Leg (B)
FRONT FACING
Leg Support (C)
Table Top (A)
Noble House Home Furnishings LLC

Place Leg Supports(C) between Table Top(A) and Leg(B), as shown above.
3.1) Attach Leg Supports(C) to Table Top(A) using Screws(②) with Allen Key(④).
3.2) Attach Leg Supports(C) to Legs(B) using Screws(②) with Allen Key(④).
Do not fully tighten Screws.
Step 2
Attach Leg(B) to the Table Top(A) using Bolts(①), and Washers(③) with Allen Key(④).
Do not fully tighten the Bolts.
Repeat the same process with the remaining three Legs(B).
Step 3
A
B
4
C
4
2
A
B
3.2
3.1
4
2
3
1
Noble House Home Furnishings LLC

Your Table is ready for use.
This Table can only be used on a flat, level surface.
Step 4
Step 5
Stand the Table up, with assistance from your adult partner.
Exert pressure floorwards, onto the Table with both your hands.
This pressure will help the Legs and Table Top reach full alignment status.
Check for wobbles on a LEVEL surface.
If no wobbles are found proceed to tighten the Bolts and Screws in a sequential manner,
until evenly secured.
When tightening the Bolts and Screws tighten sequentially.
Do not tighten any Bolt or Screw fully and then move on towards the next one.
If there are still wobbles, loosen the Bolts and Screws and excute the same above
process.
If the Table is not Stable it could lead to damage to the product.
Noble House Home Furnishings LLC

Noble House Home Furnishings LLC

Noble House Home Furnishings LLC

Noble House Home Furnishings LLC

Noble House Home Furnishings LLC

Noble House Home Furnishings LLC
/


