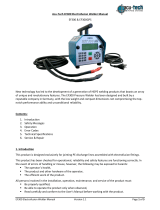
SF PLENUM+ 4X2 RD45Y

Orion Fittings SF PLENUM+ 4X2 RD45Y Installation guide

  • Hello! I am an AI chatbot trained to assist you with the Orion Fittings SF PLENUM+ 4X2 RD45Y Installation guide. I’ve already reviewed the document and can help you find the information you need or explain it in simple terms. Just ask your questions, and providing more details will help me assist you more effectively!
ORION
Acid Waste Piping Systems ORION FITTINGS, INC. 63
Joint Assembly
Many of the questions you may have about
assembling Orion No-Hub/Plain End, socket
fusion and electrofusion systems are answered
in this section. However if, after reading this
section you still have questions, please call our
technical department at (913) 342-1653, 8:00 am
– 4:30 pm, Monday-Friday, Central Time.
Cold Weather Assembly
As with all types of plastic piping systems,
installation in cold weather can be difficult and
therefore is not recommended at temperatures
below 40 degreesF unless proper precautions
are taken.
In cold weather installations, the area being
installed must be shielded from the wind and
other outside elements and the joints must be
covered with heating blankets, prior to being
installed.
If joints are installed in cold weather, they may
be difficult to seal. In addition, if above ground
systems are installed in cold temperatures and
the area is later heated; the system will expand,
possibly causing undue stress on the entire sys-
tem. In view of this, special care must be taken
when designing and installing any plastic piping
system in cold weather. The above information
applies to SocketFusion, Electrofusion and No-
Hub/Plain End systems.
Assembly
Assembly
70 ORION FITTINGS, INC. Acid Waste Piping Systems
Acid Waste Assembly Socket Fusion
A socket fusion tool kit, including heat tool and various sizes of heads
is available from Orion.
Note:
Make all field cuts of pipe square and true using a pipe cutter
designed for plastic pipe.
Make certain heads are installed properly on heat tool. Heads
are marked “M” and “F”, indicating male and female.
• Bevel the leading edge of each pipe section with a 1/8” 45 degree
chamfer. This will minimize the amount of bead on the inside of the
fitting when fused
STEP 2
Measure depth of fitting. Subtract
1
/
16
".
STEP 3
Transfer measurement to pipe. Mark pipe with measurement
obtained in Step 2.
3
1
4
STEP 1
Check the heads for proper temperature (482 - 520°F or 250°- 270°C ). If
necessary, adjust the thermostat dial so that the 488°F Tempil stick burns,
but the 525°F does not. NOTE: The newest Orion fusion tools may
have a temperature dial in degrees celcius which has a maximum
temperature of 300°C. If this is the case, see temperature conversion
chart below. Heat tools are factory set, however settings can vary due to
factors such as weather, current variances, cord lengths, generators, etc.
These variables should be checked on site. To increase tool
temperature, turn dial “in” (clockwise). To decrease, turn screw “out”
(counterclockwise).
Step 6
Hold joint under pressure for 15 seconds to allow surfaces to
fuse. Do not stress joint until fully cooled.
Clean any melted material from heater bushings using a cotton
rag. Do not use abrasive materials to clean the heater bushings.
Confirm the heater bushings are the correct temperature before
fusing next joint.
The following chart shows the approximate time that the pipe
and fitting should be held on the heater bushings. These times
are a guideline ony. It may be necessary to increase or
decrease times to obtain the correct melt
conditions.
2
6
1-1/2” 2” 3” 4” 6”
PP 12-15 sec 15-20 sec 20-25 sec 25-30 sec 30-35 sec
PVDF 12-15 sec 15-20 sec 20-25 sec 25-30 sec 30-35 sec
STEP 4
Insert fitting on the male side of the heat tool. Then insert
pipe on the female side. Do not insert past the mark on
the pipe.
Fusion Times in seconds
STEP 5
Keep pipe and fitting absolutely straight on heat tool.
Use the chart below to determine how long to leave the pipe and
fittings on the heater bushings.It should be noted that pipe and
fittings will normally have a slight interference with the fusion
tools. However, if the pipe and/or fittings do not fit tightly on the
heater bushing, the heating time should be started when the
components have swelled to just contact the surface of the
bushing.
NOTE: DO NOT TEST
NOTE: DO NOT TEST
ANY
ANY
ORION PIPING SYSTEM WITH COMPRESSED
AIR OR GASSES.
AIR OR GASSES.
TEST HYDROST
TEST HYDROST
A
A
TICALL
TICALL
Y
Y
ONL
ONL
Y
Y
Temperature Conversion Factors
°F = Degrees in Farenheight
°C = Degrees in Celcius(Centigrade)
°F = (°C x 1.8) + 32
°C= (°F - 32) x .555
°F °C
122 50
212 100
300 150
392 200
482 250
520 270
572 300
Acid Waste Piping Systems ORION FITTINGS, INC. 71
Slip Fit and Backwelding (Hot Gas Welding)
Welding Procedure
When a backwelding kit is purchased from Orion, a
complete booklet on Hot Gas welding is included. An
overview of those welding procedures is summarized
below. (The following guidelines summarize the proce-
dures used for backwelding with Orion’s speed tip
Line up the area or the two parts that are to be weld-
ed together. Make sure that the surfaces are clean,
oil and water free. Gently preheat the area where the
weld is to be started by holding the Orion welding
Gun near the surface and fanning the area. Now
feed the welding rod into the preheat chamber of the
speed tip. This will start to soften the welding rod.
Preheat both the softened welding rod and the area
to be welded for about 5-6 seconds. Gently push the
welding rod through the preheat chamber out of the
front of the nozzle laying if down with pressure on the
area to be welded. DON’T STOP THE MOTION
just gently work the rod through the preheat chamber
and in a slow, fluid motion along the weld until the
desired seam is completed. The welding gun should
always be held at approximately a 45 degree angle
from all surfaces. Typically a triple weld is required and
therefore 3 complete passes should be performed.
Hot Gas Welding (Backwelding)
Hot-gas welding (Backwelding) is a method used
primarily as a means of joining certain outer compo-
nents such as closure joints where one of the other
methods described above are not suitable or possi-
ble. 12” Polypropylene as well as any outer PVDF
couplings require the slip fit and backweld method.
Performing field pipe repairs may also require back-
welding.This method involves the use of a welding
rod filler material matching that of the material being
joined. The filler material, and immediate
surfaces to be joined are heated by means of a hot
gas, usually air or nitrogen, and then the filler
material is pressed into place along the surfaces to
be joined. With hot gas welding, multiple
passed are usually required. Orion’s speed (hot
gas) welding technique, used in slip-fit systems,
is shown above. When Backwelding is required, the
contractor should be thoroughly trained prior to making
field joints.
Hot Gas Welding (Backwelding) Acid Waste Assembly
/