Page is loading ...

Installation and mounting manual for EK-DCP mounting plate KIT
This product is intended for installation only by expert users. Please consult with a qualified technician for installation. Improper installation may result in damage to your equipment. EK Water Blocks assumes no liability
whatsoever, expressed or implied, for the use of these products, nor their installation. The following instructions are subject to change without notice. Please visit our web site at www.ekwaterblocks.com
for updates.
Before installation of this product please read important notice, disclosure and warranty conditions printed on the back of the box or our website.
The barb hose fittings require only a small amount of force to screw them in; otherwise the high flow fittings might break. These fittings do not need to be tightened with much force because the
liquid seal is made using o-rings.
Users must by all means also consider instructions that are being made for proper use of pump provided by pump manufacturer.
STEP 1: GENERAL INFORMATION
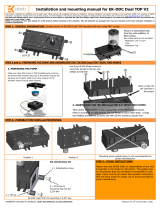
STEP 2: ATTACHING MOUNTING PLATE TO EK-RESERVOIR COMBO DCP 2.2
EKWB recommends pump mounting plate in order to guarantee stabile and
aesthetic positioning of your pump in PC case or any other surface by your
choice. Plate has various holes for screw positioning. Please note that plate
is (so far) only compatible with EK-DCP 2.2 or EK-DCP 4.0 pumps. For any
other compatibility please contact EKWB support.
Install only one mounting screw and screw it only for few turns with allen key.
How to install reservoir on pump please refer to instruction included with EK-
Reservoir combo DCP 2.2.
STEP 2: ATTACHING MOUNTING PLATE TO EK-RESERVOIR COMBO DCP 2.2
Cont.1: Install the Pump mounting plate so it sticks
on to the one mounting screw.
Cont.2: Align the mounting plate with opposite
screw hole and screw in second mounting screw.
Cont.3: Tighten all 4 screws equally using gentle
force.
Cont.4: Install mounting bracket that comes with
your pump.
Cont.5: Use M3×6mm screws and M3 nut to attach
the mounting bracket.
Cont.6: Use pliers and screwdriver to screw the M3
screws.
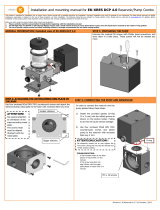
STEP 3: ATTACHING MOUNTING PLATE TO EK-
RESERVOIR COMBO DCP 4.0
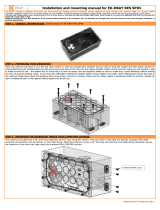
STEP 4: ATTACHING MOUNTING PLATE TO PC
CASE
STEP 6 (optional): PUTTING ON EKWB SPONGE
Same mounting procedure goes for EK-reservoir
combo DCP 4.0. Only difference is in using
mounting holes on bracket and adjustment of
bracket.
Please attach mounting plate to even surface in
order to secure positioning. Below is a sample
picture of mounting screws in use. (
EKWB strongly
recommends using antivibration sponge that comes padded
between PC case and mounting plate. Due to vibrations caused
by operating pump a mild noise can occur, which can be
efficiently diminished by using EKWB sponge (next step shows
you how to install it).)
EKWB sponges are highly adhesive on one side, so
be careful when placing them as they might get
thorn apart when detaching them. Below is a way
that EKWB finds most suitable. You can do it your
way.
Alldisclosures,noticesandwarrantyconditionsarebeingwrittenonthebackofthebox. Releasedon4
th
ofMarch,2010
For EK-DCP 4.0 please use
holes that are on far end
of bracket.
Please adjust
bracket position
acc. to step 2
(cont. 4).
Align mounting holes and
pierce through lower sponge
with screws.
PC case comes between
lower sponge and
washer. Please make
sure you use nut to
secure position.
These 2 sides
are adhesive!
PC case comes
between mounting
plate and washer.
You might have to
predrill holes in your
PC case in order to
provide mounting
holes (depends on
type of PC case you
have in possesion).

STEP 7(optional): MOUNTING EK-DCP PUMP AS A STANDALONE OPTION
Cont.1: Users can also mount pump onto mounting plate. In this case please use enclosed standoffs on both model of pump (EK-DCP 2.2 and EK-DCP 4.0).
Standoffs prevent overtightening mounting screws and bending/damaging plate.
Cont.2: Place pump as shown on picture below and use enclosed screws to attach and secure position of pump.
Cont.3: Lastly, position bracket and fasten it according to pump installation manual (with screws that come with your water pump). Use fittings or barbs to
prepare your pump for connection with other water cooling components.
STEP 8: OTHER INSTRUCTIONS
Please note that EKWB holds no responsibility of any kind if assembly is not made by instructions. This applies also for all
products that are not listed as compatible on web page. Users must by all means also consider instructions that are being made
for proper use of pump and other water cooling components provided by manufacturer(s).
HINT: Never let your pump dry running. If that happens for prolonged period of time you risk destroying bearing and rendering
pump useless.
REQUIRED MOUNTING SCREWS:
Standoffs
OuterholesareforEK‐DCP4.0
Alldisclosures,noticesandwarrantyconditionsarebeingwrittenonthebackofthebox. Releasedon4
th
ofMarch,2010
UsePhilipsscrewdriverto
tightenM3x16DIN7985
screws.
InnerholesareforEK‐DCP2.2
4 x M4x12 DIN7985
4 x M4 PVC washer 4 x M4 nut
2 x M3x6 DIN7985
2 x M3 PVC washer 2 x M3 nut
2 x M3x16 DIN7985
/


