Page is loading ...

© Adam Equipment Company 2020
Luna
LAB, LPB, LTB, LBB Series
Operating Manual
For internal (‘i’) and external (‘e’) calibration models

© Adam Equipment Company 2020

© Adam Equipment Company 2020
1.0 KNOW YOUR BALANCE .......................................................................................................... 3
2.0 PRODUCT OVERVIEW ............................................................................................................ 4
3.0 PRODUCT SPECIFICATIONS ................................................................................................. 5
4.0 UNPACKING THE BALANCE ................................................................................................. 10
5.0 LOCATING THE BALANCE .................................................................................................... 10
6.0 SETTING UP THE BALANCE ................................................................................................. 11
6.1 ASSEMBLING THE BALANCE ........................................................................... 11
6.1.1 Levelling the balance .................................................................................. 11
6.1.2 Warm-Up Time ............................................................................................ 11
6.1.3 Weighing ..................................................................................................... 11
6.2 CALIBRATION ..................................................................................................... 12
6.2.1 External Calibration ..................................................................................... 12
6.2.2 Motorised Internal Calibration ..................................................................... 12
6.2.3 Calibration Errors ........................................................................................ 12
7.0 DISPLAY ................................................................................................................................. 13
7.1 SYMBOLS AND TEXT ........................................................................................ 13
8.0 KEYPAD .............................................................................................................. 14
8.1 NUMERIC ENTRY METHOD .............................................................................. 15
9 INPUT/OUTPUT ...................................................................................................................... 15
10.0OPERATIONS ......................................................................................................................... 16
10.1 INITIALISATION .................................................................................................. 16
10.2 PASSCODES ...................................................................................................... 16
10.3 WEIGHING .......................................................................................................... 17
10.4 FUNCTIONS........................................................................................................ 18
10.4.1 Parts Counting ............................................................................................ 19
10.4.2 Percentage Weighing .................................................................................. 19
10.4.3 Check weighing........................................................................................... 20
10.4.4 Animal (Dynamic) Weighing ........................................................................ 21
10.4.5 Net / Total ................................................................................................... 23
10.4.6 Density Determination ................................................................................. 23
11.0RS-232 INTERFACE ............................................................................................................... 25
11.1 HARDWARE........................................................................................................ 25
11.2 OUTPUT FORMATS ........................................................................................... 25
11.2.1 Single-line output format ............................................................................. 25
11.2.2 Custom output format ................................................................................. 26
11.3 INPUT COMMANDS USING REMOTE KEYS .................................................... 27
11.3.1 Invalid input command: ............................................................................... 27
12.0ERROR CHECKING ............................................................................................................... 28
13.0SUPERVISOR MENUS ........................................................................................................... 29
13.1 ENABLE WEIGHING UNITS ............................................................................... 29
13.2 ENABLE WEIGHING MODES ............................................................................. 29
13.3 ENABLE SERIAL INTERFACE PARAMETERS .................................................. 29
13.4 FORMAT OF CUSTOM FORMS #1 and #2 ........................................................ 30
13.5 SETUP PARAMETERS ................................................................................... 31
13.6 CALIBRATION SETUP ........................................................................................ 32
13.7 PASSCODES ...................................................................................................... 32
14.0ACCESSORIES & SPARE PARTS ......................................................................................... 33
15.0SAFETY AND MAINTENANCE .............................................................................................. 34
16.0TROUBLE-SHOOTING ........................................................................................................... 35
16.1 TROUBLE-SHOOTING GUIDE. .......................................................................... 36

© Adam Equipment Company 2020
17.0SERVICE INFORMATION ...................................................................................................... 38
18.0BALANCE MENU STRUCTURE ............................................................................................. 39
19.0LANGUAGE TABLE ................................................................................................................ 42
20.0WARRANTY INFORMATION ................................................................................................. 43

© Adam Equipment Company 2020
1.0 KNOW YOUR BALANCE
Thank you for selecting the Luna Balance from Adam Equipment.
This Instruction Manual will familiarise you with the installation, use, general maintenance
etc. of the balance, and will guide you through the various applications. It also covers
accessories, trouble-shooting, after sales service information, and other important
information.
These balances are highly accurate precision instruments and contain sensitive
mechanisms and components. They should be transported and handled with care. When in
operation, be careful to place loads gently on the weighing surface and do not overload or
exceed recommended maximum capacity of the instrument or damage may occur.
H
Please read this Manual thoroughly before starting operation. If you need any clarifications,
feel free to contact your supplier or Adam Equipment.

© Adam Equipment Company 2020
2.0 PRODUCT OVERVIEW
The Luna balances are ideal for laboratory and general purpose weighing. They can also
be used for some advanced weighing functions.
FEATURES:
External menu-driven calibration allowing user-selectable range of calibration
weights.
Internal calibration (option) for outstanding accuracy without the need for manual
calibration.
Mains powered.
Wipe clean ABS plastic housing with 304 grade stainless steel pan.
Large easy to read dual line LCD display with backlight.
Standard applications include weighing, percentage weighing, parts counting,
dynamic (animal) weighing and solid and liquid density determination.
Bi-directional RS-232 interface and USB interface as standard.
Can be configured to print a GLP Compliant report after each calibration to include
the time, date, balance number and a verification of the calibration.
Force-restoration mechanism for supreme accuracy, or alloy load cell technology
for stable yet accurate weighing.
Automatic temperature compensation.
Multiple weighing units.
Easy to use, wipe-clean sealed membrane keypad.
Below balance weighing facility (accessory hook required).
Display in a choice of 4 languages – English, German, French & Spanish.
Password protection.
Security locking point.

© Adam Equipment Company 2020
3.0 PRODUCT SPECIFICATIONS
Luna Models
(Suffix e for external calibration models, Suffix i for internal calibration models)
Model # LAB 84 e/i LAB 124 e/i LAB 214 e/i LAB 254 e/i
Maximum Capacity 80 g 120 g 210 g 250 g
Readability (d) 0.0001 g 0.0001 g 0.0001 g 0.0001 g
Number of intervals
n=
800000 1200000 2100000 2500000
Min. weight (USP) 0.4 g 0.4 g 0.4 g 0.4 g
Repeatability
(
Std. Dev
)
0.0002 g 0.0002 g 0.0002 g 0.0002 g
Linearity + 0.0003 g 0.0003 g 0.0003 g 0.0003 g
Units of Measure
grams, milligrams, carats, grains, Newtons, ounces, troy ounces, Drams,
Taels-HK, Taels-T, Taels-S, Mommes, Tolas, Ticals, penn
y
wei
g
ht, custom
Stabilization Time Typically 3 seconds
Operating Temp 15ºC to 35ºC recommended, 40 – 60 % RH (non-condensing)
Power Supply
External mains power adapter - supplied as standard
(
Input Volta
g
e 100
–
240 VAC, 50/60 Hz
)
Input Voltage 18 VDC - 830 mA
Weighing
mechanism
Force Restoration
Calibration Suffix i = internal calibration mechanism, e = external calibration only
External Calibration
Mass
Recommended OIML class: E2, ASTM / ANSI class: 1
50 g 100 g 100 g 100 g
Display LCD with black backlight, 7 characters, 24 mm high, and symbols
Draft Shield
(
w x d x h
)
Sliding door Draft Shield (198 x 212 x 240 mm)
Pan Size Round, 90mm diameter
Overall Dimensions
(
w x d x h
)
228 x 377 x 333 mm
9x 14.8x 13.1in
Net
Weight
e models 5.9 k
g
/ 13 lb 0 oz
i models 6.2 k
g
/ 13 lb 10 oz

© Adam Equipment Company 2020
Model # LPB 223 e / i LPB 423 e / i
Maximum Capacity 220 g 420 g
Readability (d) 0.001 g
Number of intervals
n=
220000 420000
Min. weight (USP) 4 g 4 g
Repeatability
(
Std. Dev
)
0.002 g
Linearity + 0.003 g
Units of Measure
Kilograms, grams, milligrams, carats, grains, Newtons, pounds, ounces, troy
ounces, Drams, Taels-HK, Taels-T, Taels-S, Mommes, Tolas, Ticals,
penn
y
wei
g
ht, custom
Stabilization Time Typically 3 seconds
Operating Temp 15ºC to 35ºC recommended, 40 – 60 % RH (non-condensing)
Power Supply
External mains power adapter - supplied as standard
(Input Voltage 100–240 VAC, 50/60 Hz)
[Removed text related to batter
y
].
Input Voltage 18 VDC - 830 mA
Weighing
mechanism
Precision Load Cell
Calibration Suffix i = internal calibration mechanism, e = external calibration only,
External Calibration
Mass
Recommended OIML class: E2, ASTM / ANSI class: 2
50, 100, 200 g 100, 200, 400 g
Display LCD with black backlight, 7 characters, 24 mm high, and symbols
Draft Shield
(
w x d x h
)
Sliding door Draft Shield (198 x 212 x 120 mm)
Pan Size Round, 120 mm diameter
Overall Dimensions
(
w x d x h
)
228 x 377 x 213 mm
9 x 14.8 x 8.4 in
Net
Weight
e models 4.3 kg / 9 lb 8 oz 4.3 kg / 9 lb 8 oz
i models 4.7 kg / 10 lb 5.7 oz 4.9 kg / 10 lb 12.8 oz

© Adam Equipment Company 2020
Model # LPB 623 e / i LPB 823 e / i
Maximum Capacity 620 g 820 g
Readability (d) 0.001 g
Number of intervals
n=
620000 820000
Min. weight (USP) 4 g 4 g
Repeatability
(
Std. Dev
)
0.002 g
Linearity + 0.003 g
Units of Measure
Kilograms, grams, milligrams, pounds, carats, grains, Newtons, pounds,
ounces, troy ounces, Drams, Taels-HK, Taels-T, Taels-S, Mommes,
Tolas, Ticals, penn
y
wei
g
ht, custom
Stabilization Time Typically 3 seconds
Operating Temp 15ºC to 35ºC recommended, 40 – 60 % RH (non-condensing)
Power Supply
External mains power adapter - supplied as standard
(
Input Volta
g
e 100
–
240 VAC, 50/60 Hz
)
Input Voltage 18 VDC - 830 mA
Weighing
mechanism
Force Restoration
Calibration Suffix i = internal calibration mechanism, e = external calibration only
External Calibration
Mass
Recommended OIML class: E2, ASTM / ANSI class: 2
500 g
Display LCD with black backlight, 7 characters, 24 mm high, and symbols
Draft Shield
(
w x d x h
)
Sliding door Draft Shield (198 x 212 x 120 mm)
Pan Size Round, 120 mm diameter
Overall Dimensions
(
w x d x h
)
228 x 377 x 213 mm
9 x 14.8 x 8.4 in
Net
Weight
e models 5.9 k
g
/ 13 lb 0 oz 5.9 k
g
/ 13 lb 0 oz
i models 6.4 k
g
/ 14 lb 1.6 oz 6.6 k
g
/ 14 lb 8.8 oz

© Adam Equipment Company 2020
Model # LTB 2602 e / i LTB 3602 e / i LTB 4602 e / i LTB 6002 e / i
Maximum Capacity 2600 g 3600 g 4600 g 6000 g
Readability (d) 0.01 g 0.01 g 0.01 g 0.01 g
Number of intervals
n=
260000 360000 460000 600000
Min. weight (USP) 40 g 40 g 40 g 40 g
Repeatability
(
Std. Dev
)
0.02 g
Linearity + 0.03 g
Units of Measure
Kilograms, grams, milligrams, carats, grains, Newtons, pounds, ounces, troy
ounces, Drams, Taels-HK, Taels-T, Taels-S, Mommes, Tolas, Ticals,
penn
y
wei
g
ht, custom
Stabilization Time Typically 3 seconds
Operating Temp 15ºC to 35ºC recommended, 40 – 60 % RH (non-condensing)
Power Supply
External mains power adapter - supplied as standard
(
Input Volta
g
e 100
–
240 VAC, 50/60 Hz
)
Input Voltage 18 VDC - 830 mA
Weighing mechanism Precision Load Cell
Calibration Suffix i = internal calibration mechanism, e = external calibration only
External Calibration
Mass
Recommended OIML class: F1, ASTM / ANSI class: 3
0.5, 1, 2 kg 1, 2, 3 kg 1, 2, 4 kg 1, 2, 5 kg
Display LCD with black backlight, 7 characters, 24 mm high, and symbols
Draft Shield
(
w x d x h
)
None
Pan Size Square, 185x185 mm
Overall Dimensions
(
w x d x h
)
228 x 337 x 108 mm
9 x 14.8 x 4.3 in
Net
Weight
e models 3.6 k
g
/
7 lb 14.8 oz
i models
4.6 kg / 10 lb 2.2
oz
4.8 kg / 10 lb 9.3
oz
5.0 kg / 11 lb 0 oz 5.0 kg / 11 lb 0 oz

© Adam Equipment Company 2020
Model # LBB 6001e LBB 8001e LBB 12001e LBB 15001e
Maximum Capacity 6000g 8000g 12000g 15000g
Readability (d) 0.1g 0.1g 0.1g 0.1g
Number of intervals
n=
60000 80000 120000 150000
Min. weight (USP) 400 g 400 g 400 g 400 g
Repeatability
(
Std. Dev
)
0.2g
Linearity + 0.3g
Units of Measure
Kilograms, grams, milligrams, carats, grains, Newtons, pounds, ounces, troy
ounces, Drams, Taels-HK, Taels-T, Taels-S, Mommes, Tolas, Ticals,
penn
y
wei
g
ht, custom
Stabilization Time Typically 3 seconds
Operating Temp 15ºC to 35ºC recommended, 40 – 60 % RH (non-condensing)
Power Supply
External mains power adapter - supplied as standard
(Input Voltage 100–240 VAC, 50/60 Hz)
[Removed text related to batter
y
]
Input Voltage 18 VDC - 830 mA
Weighing
mechanism
Precision Load Cell
Calibration External calibration only
External Calibration
Mass
Recommended OIML class: F2, ASTM / ANSI class: 4
1, 2, 5 kg 2, 5, 8 kg 2 ,5 ,10 kg 5,10, 15 kg
Display LCD with blue backlight, 7 characters, 24 mm high, and symbols
Draft Shield
(
w x d x h
)
None
Pan Size Square, 185x185 mm
Overall Dimensions
(
w x d x h
)
228 x 337 x 108 mm
9 x 14.8 x 4.3 in
Net Weight 3.7 kg / 8 lb 2.4 oz

© Adam Equipment Company 2020
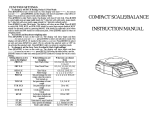
4.0 UNPACKING THE BALANCE
Remove the balance from the packing by carefully lifting it out of the box. Inside the box you
will find everything needed to start using the balance-
AC mains power adapter & cord
Stainless Steel Top Pan
Alloy sub-pan
User documentation
Carefull
y
follow the quick setup
g
uide included to assemble the balance.
5.0 LOCATING THE BALANCE
The balance should not be placed in a location that will
reduce the accuracy.
Avoid extremes of temperature. Do not place in direct
sunlight or near air conditioning vents.
Avoid unsuitable tables. The table or floor must be rigid
and not vibrate.
Avoid unstable power sources. Do not use near large
users of electricity such as welding equipment or large
motors.
Do not place near vibrating machinery.
Avoid high humidity that might cause condensation. Avoid
direct contact with water. Do not spray or immerse the
balances in water.
Avoid air movement such as from fans or opening doors.
Do not place near open windows or air-conditioning
vents.
Keep the balance clean. Do not stack material on the
balances when they are not in use.
Avoid sources of static electricity. This can affect
measurement accuracy and may damage sensitive
electronics.

© Adam Equipment Company 2020
6.0 SETTING UP THE BALANCE
6.1 ASSEMBLING THE BALANCE
Carefully follow the below guide to assemble the balance. Ensure that you locate the
balance on a solid level surface, free from vibration.
6.1.1 Levelling the balance
After placing the balance in a suitable location, level it by
using the spirit level on the front of the balance. To level
the balance turn the two adjustable feet at the front of the
balance until the bubble in the spirit level is centred.
6.1.2 Warm-Up Time
Before you start weighing, you should allow the balance to achieve a stable internal
temperature. For accurate weighing to the manufacturer’s specification it is important to
power on the balance and allow to warm up for at least 6 hours for LBB + LTB models, and
12 hours for LAB + LPB models.
6.1.3 Weighing
Insert the power supply cable DC connector to the
connector on the rear of the balance. Plug the power
supply module into the mains and press the power switch
on the keypad to turn on the balance. The display will
indicate the balance serial number followed by the
software revision number, followed by the maximum
capacity of the balance. Next the balance will run a self-
test by displaying all segments followed by a busy symbol
and a line of 7 dashes indicating the balance is in busy
mode. Once ready, the display will show a zero weight
reading, accompanied by the 0 symbol.
Once a suitable warm-up period is complete and you are
ready to start weighing, place an item to be weighed on
the balance. A stable symbol is shown when the
balance is in stable condition. It will turn off if the balance
is not stable.
Exact zero is shown when the “0“ symbol is visible
on the top left of the displa
y
area. [displa
y
photo chan
g
ed]

© Adam Equipment Company 2020
6.2 CALIBRATION
Units with an ‘i’ suffix can be calibrated using either internal calibration mechanism or by
using an external mass. Units with an ‘e’ suffix can only be calibrated with an external mass.
Internal calibration option must be enabled in the setup menu options or else external
calibration mode will be used when the [Cal] key is pressed
6.2.1 External Calibration
Pressing the [Cal]
Display shows:
Press the [Setup
Display shows
For analytical and LPB623 and LPB823 models, the display shows an
appropriate weight for your model, load the weight.
For precision models, then display shows press [Unit] or [Cal] to
select calibration weight value, and then press the [Setup], display shows
load the weight
Display shows
Display shows remove the weight and clear the top pan.
Display shows:
then returns to zero. The calibration is complete
6.2.2 Motorised Internal Calibration
If your balance is fitted with internal calibration (i models), then press [Cal] and the balance
will automatically run through the above processes and finish calibration.
6.2.3 Calibration Errors
Occasionally during calibration an error will be detected. These errors can be caused by:
Unstable readings
Improper calibration weights being used
Large shifts of zero from the factory settings
When an error is found a displayed message will be shown and the calibration must be done
again. If the balance has error messages more than once it is possible the mechanics have
been damaged

© Adam Equipment Company 2020
7.0 DISPLAY
The LCD has several areas-
A large 7 digit area to display the weight with symbols for common weighing units on its right
and symbols for zero, tare (Net) and stability on the left.
Text symbols above the display show the current operation or function being used.
7.1 SYMBOLS AND TEXT
The LCD has unique symbols to indicate the following:
0
Zero
Busy
Stable
g, mg, kg, ct, dwt, GN, ozt, oz,
N, Custom,
g
/cc, Pcs, %,
Symbols shown for units and modes
[removed battery symbol from the table above]
Indicators:
“CAL” When calibration is occurrin
g
or about to occu
r
“ti” For a time driven calibration
“ºC” When a temperature is shown or a temperature
driven calibration is to occu
r
“Net” When a net wei
g
ht is shown

© Adam Equipment Company 2020
8.0 KEYPAD
The keypad has the following keys to operate the balance.
[]
[]

© Adam Equipment Company 2020
8.1 NUMERIC ENTRY METHOD
To set a value when required, use the keys as given below:-
[Up] and [Down] symbol keys start entry process, causing the active digit to flash.
Press [Up] and [Down] to increase or decrease the flashing digit.
Once each digit is set to the required value, use the [Left] symbol keys to advance or move
back through the digits and then press [Up] and [Down] to increase or decrease the flashing
digit as required.
Once the value displayed on screen is as required, press the [Setup] key to accept or enter
the displayed value.
Press the [0/T] key to exit the menu at any time.
9 INPUT/OUTPUT
The rear panel has some or all of the following connectors depending on model:
RS-232 serial - 9 pin d-subminiature plug.
USB type A socket.
Power input socket. (Required power input is a low-voltage external supply,
18VDC @ 830mA for all models). Accepts concentric barrel plug 11.4mm
length X 5.5mm outside diameter X 2.1mm centre diameter.

© Adam Equipment Company 2020
10.0 OPERATIONS
10.1 INITIALISATION
If Operator and Supervisor passcodes have been set, the display will show
shortly followed by In this case you must enter the passcode to continue, using the
numeric entry method (see section 10.2). If passcode is incorrectly entered then the
message will flash, shortly followed by Once a passcode is correctly
entered, or if passcodes have not been set, the balance will continue as below
The display will show zero reading along with
the zero symbol “0” and the weighing unit
last used. If automatic time calibration is
enabled the balance will calibrate 15 minutes
after power up, or again after the pre-set time
interval.
10.2 PASSCODES
This equipment has passcode security functions which can restrict certain operations to
particular users. Supervisor and Operator modes are available. If no passcode is set then
the default access is Supervisor level. Setting a Supervisor passcode gives the option to
lock down key parameters so that they are not available to be changed by operator-level
staff.
If a passcode has been set to limit access to the weighing functions of the balance then
when reset or turned on, or when the [Setup] key is pressed in Operator mode, the display
will show followed by Use the numeric entry method (see section 8.1) to
enter either the operator or supervisor code depending on the access level required. The
display show the digits entered as they are set. The active digit will have the “-“ symbol
flashing. Make sure to enter the correct passcode to continue. See Section 13.7 for details.

© Adam Equipment Company 2020
10.3 WEIGHING
Press [0/T] to zero the balance if required. The “
0
“ symbol will be displayed.
Carefully place a mass on the pan and the weight will be displayed with the symbol on
the left hand side of the display to indicate that a stable reading has been obtained.
If a container is to be used, place it on the balance and press [0/T] to tare the weight.
When the balance symbol is on, the “Net” symbol will be displayed to indicate that the
balance is tared.
When the display shows zero, place the item to be weighed. Only the net weight will be
displayed.
When a tared weight has been stored, pressing [0/T] again will remove it.
At any time the [Unit] key may be pressed to select another unit. Use the [Up] or [Down]
keys to scroll through the units and select the desired unit by pressing [Setup], the display
will change to show the weight in the selected weighing unit. The available weighing units
can be enabled or disabled during setup of the balance (see section 13.1). Only weighing
units that have been enabled will be cycled through when [Unit] is pressed.
Weighing Units:
You can select alternative weighing units to display the weight by pressing the [Unit] key.
Depending on model, the available weighing units may include:
Unit Symbol Models
Conversion
Factor
1g =
Conversion
Factor
1 unit = grams
1 GRAMS g All 1 1.0
2 MILLIGRAMS mg not 0.01g & 0.1g
units
1000 0.001
3 KILOGRAMS kg 0.01g & 0.1g units 0.001 1000
4 CARATS ct All 5 0.2000
5 PENNYWEIGHT dwt Some models 0.643014865 1.555174
6 GRAINS GN Some models 15.43236 0.0647989
7 TROY OUNCES ozt Some models 0.032150747 31.103476
8 OUNCES oz Some models 0.035273962 28.349523
9 POUNDS lb Some models 0.00220462 453.59237
10 CUSTOM Custom Some models As specified As specified
It is possible to set the balance to display only grams. Grams will always be one of the units
enabled, by default.

© Adam Equipment Company 2020
If “Custom” unit is available and selected, the balance will prompt for entering a multiplier by
displaying “CF 1.2345”, where “1.2345” is the last stored value. Any value ranging from
0.100 to 10.000 may be entered, by which the weight in grams will be multiplied before being
displayed. If a multiplier of greater than 1.000 is entered, the number of decimal places
displayed will be reduced by one. This multiplier value will be saved for the next use until it
is changed by the user.
The balance displays the alternate weighing units with as much precision as possible. For
example, the LPB 423 balances (420g x 0.001g) could weigh up to:
Unit Maximum d =
g 420 0.001
mg 420000 1
kg 0.420000 0.000001
ct. 2100 0.005
dwt 270.066 0.001
GN 6481.59 0.02
ozt 13.50330 0.00005
oz 14.81505 0.00005
Lb 0.92594 0.00001
N 4.1188 0.0001
10.4 FUNCTIONS
When weighing, the user can access the applications that have been enabled (see section
13.2).
The following applications are available depending on model:
Parts counting
Percent weighing
Check weighing
Animal (Dynamic) weighing (some models)
Net/ Total
Density determination (Liquid & Solid) (some models)
The selectable functions can be enabled in supervisor mode and are selected by pressing
the [Mode] key to enter selection mode. The display will go blank and a small
will appear at the top of the display, such as “
Dynamic
”, “
Density Solid
”, “
Parts
” etc. Use the [Up]
and [Down] symbol keys to cycle through functions, and press [Setup] to confirm your
selection, or press one of the [0/T] keys at any time to return to normal weighing mode.
/