Page is loading ...

1
BabysitzKidPlus-Kid18-ENG-7-17
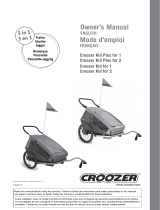
Owner’s Manual
ENGLISH
www.croozer.com
124 102 718
BabysitzKidPlus-Kid18-ENG-7-17
for
Croozer Kid Plus
Croozer Kid
from 2014
Baby Seat

2
BabysitzKidPlus-Kid18-ENG-7-17
IMPRINT
Publisher: Croozer GmbH
Oskar-Jäger-Str. 125
D-50825 Cologne
Germany
Copyright © 2017 Croozer GmbH. All rights reserved.
No part of this manual may be reproduced or transmitted in any form for any
purpose other than the purchaser’s personal use.
Additional manuals and instructions on the use of this product and its acces-
sories can be ordered from Croozer GmbH or downloaded from the website
www.croozer.com. Every effort has been made to ensure the accuracy of this
manual. However, if you do nd an error, we would appreciate hearing about
it so that we can correct it.
Planning, text, graphic design and editing:
W. Piontek, www.technik-transparent.de
Photos: W. Piontek and Croozer GmbH

1
BabysitzKidPlus-Kid18-ENG-7-17
Description . . . . . . . . . . . . . . . . .2
What’s what?. . . . . . . . . . . . . . . . . . . . . . 2
Who can use the Baby Seat? . . . . . . . . . . . . . 2
How should the Baby Seat be used? . . . . . . . . . 2
In what cases is the use of the Baby Seat
strictly prohibited? . . . . . . . . . . . . . . . . . . . 2
Safety Guidelines . . . . . . . . . . . . . .3
Symbols and warnings . . . . . . . . . . . . . . . . . 3
Orientation and wording . . . . . . . . . . . . . . . . 3
Read and observe this manual. . . . . . . . . . . . . 3
Legal requirements for transporting infants . . . . . . 3
Correct installation . . . . . . . . . . . . . . . . . . . 3
Buckle up! . . . . . . . . . . . . . . . . . . . . . . . 3
Adult supervision . . . . . . . . . . . . . . . . . . . . 3
Riding speed . . . . . . . . . . . . . . . . . . . . . . 3
Suitable accessories . . . . . . . . . . . . . . . . . . 3
Folding the Croozer . . . . . . . . . . . . . . . . . . 3
Installing the Baby Seat to the Croozer . .4
Unpacking the Baby Seat . . . . . . . . . . . . . . . 4
Installing the Baby Seat . . . . . . . . . . . . . . . . 4
Transporting Your Infant Safely . . . . . .8
Fastening and unfastening the safety harness. . . . . 8
Adjusting the safety harness . . . . . . . . . . . . . . 9
Tips: Transporting Your Infant . . . . . .10
Cleaning, Storage and Disposal . . . . . 10
Technical Data . . . . . . . . . . . . . . 10
Warranty Conditions . . . . . . . . . . . 10
Warranty Claims . . . . . . . . . . . . . 10
Additional Accessories for
Transporting Infants . . . . . . . . . . . 11
Table of Contents

2
BabysitzKidPlus-Kid18-ENG-7-17
Description
Description
What’s what?
Lower Baby Seat
attachment
In what cases is the use of the Baby Seat
strictly prohibited?
The Baby Seat may not be used in other Croozer models
or in child trailers from other manufacturers because these
other trailers lack the required attachment sites.
Never transport animals or cargo together with children.
The Baby Seat may not be used with Croozer models
manufactuered prior to 2014. The use of the Baby Seat
in the following situations is strictly prohibited: riding on
unsurfaced roads or paths, commercial use, overloading
or exceeding the maximum weight and height of the infant,
the use of an improperly installed or damaged/defective
Baby Seat or use in a child trailer that has been involved in
an accident. Furthermore, certain children may not be per-
mitted to use the Baby Seat for medical reasons. Croozer
GmbH will not be liable for any damages resulting from
non-compliance with these requirements.
Who can use the Baby Seat?
The Baby Seat is intended for use with infants between ap-
prox. four weeks and 10 months of age who are unable to sit
upright unassisted.
The Baby Seat cannot be used for infants with a height of
more than 75 cm (29½ inches) or a weight of more than
10 kg (22 lb).
How should the Baby Seat be used?
This Baby Seat is intended for private use for carrying
infants and can only be used with the child trailers Croozer
Kid Plus for 1, Croozer Kid for 1, Croozer Kid Plus for 2
and Croozer Kid for 2, model years 2014 and newer. The
instructions and safety guidelines provided in this manual
must be followed at all times. The Baby Seat must be
properly installed to professional standards.
The one-seater trailer can only be used with one Baby
Seat. The two-seater trailer can be used with two Baby
Seats. It is also possible to use the two-seater trailer
with one Baby Seat and a second child who is able to sit
upright unassisted. The Baby Seat can only be used with
the Croozer Kid Plus and Croozer Kid on smooth, well-
surfaced roads and paths.
Crotch strap
Shoulder straps
Safety harnesses
Centre buckle
Baby Seat
Lap belts
Rear Baby Seat
attachment
Upper
Baby Seat
attachment
Edge zipper
For the attachment of the Baby Seat Winter Kit
(accessory)
two straps with hooks,
two cross straps with buckles

3
BabysitzKidPlus-Kid18-ENG-7-17
Safety Guidelines
Buckle up!
Infants riding in the Baby Seat in the Croozer must be
strapped into the safety harnesses at all times. Follow the
instructions provided in this manual for fastening the safety
harnesses correctly. Infants who are not properly secured
in a safety harness could sustain life-threatening injuries in
the case of accidents or sudden braking.
Adult supervision
Never leave your child in the Baby Seat unattended, not
even briefly! In your absence, hazardous, unforeseen situ-
ations could arise, including accidents with serious injury
or death. It is the adult’s responsibility to ensure that the
ventilation and temperature conditions in the trailer are
safe and comfortable for the child at all times. Check on
your infant frequently to make sure he or she is safe and
comfortable in the Baby Seat.
Riding speed
For the transport of your infant in the Croozer, we recom-
mend a riding speed of no more than 15 km/h (9 mph).
Suitable accessories
Use only accessories that have been recommended and
approved by Croozer GmbH. These are the only acces-
sories that can be used safely with the Baby Seat and the
Croozer. When in doubt, consult a Croozer dealer. Croozer
GmbH cannot be held responsible for any damage result-
ing from the use of non-approved accessories.
Folding the Croozer
For transport, the Croozer can be folded to a compact
size with the Baby Seat installed. After unfolding, check all
attachment sites of the Baby Seat and all locking mecha-
nisms of the Croozer. An improperly installed Baby Seat
could become loose or fall off while riding, resulting in
accidents with serious injury or death. Never, under any
circumstances, should the Croozer be folded with an infant
in the Baby Seat. The infant could suffer serious injuries.
Safety Guidelines
Symbols and warnings
DANGER indicates a hazardous situation which, if not
avoided, will result in death or serious injury.
WARNING indicates a hazardous situation which, if not
avoided, could result in death or serious injury.
CAUTION indicates a hazardous situation which, if not
avoided, could result in minor or moderate injury.
NOTICE indicates a situation which, if not avoided, could
result in damage to the Baby Seat or the environment.
Tip: In this manual, “Tip” indicates helpful advice about
the use or maintenance of the Baby Seat.
Orientation and wording
The terms right and left in this manual always refer to the
viewer’s perspective (when facing the trailer’s passenger
seats from the front). The descriptions apply to both the
Croozer Kid Plus and Croozer Kid. Some of the photos
and graphics used in this manual only show the Croozer
Kid Plus for 2. However, the respective descriptions also
apply to the Croozer Kid Plus for 1, Croozer Kid for 1 and
Croozer Kid for 2.
Read and observe this manual
This manual contains information that is extremely impor-
tant for the safe transport of your infant. Therefore, it is es-
sential that you read the entire manual carefully and follow
the instructions closely. If you should experience difcul-
ties understanding any of the information or instructions,
please contact a specialist dealer. Keep this manual handy
at all times for future reference. If you loan or sell your
Baby Seat, pass on this manual to the new user. It is also
vitally important that you read and observe the instructions
provided in the manual of the child trailer.
Legal requirements for transporting
infants
Be sure to observe all laws that apply to the transport of
children in child trailers. Some countries prohibit the trans-
port of children in child trailers or prescribe certain age
limits. In case of doubt, be sure to familiarise yourself with
the legal requirements of the country in which you plan to
use the Baby Seat with the Croozer.
Correct installation
The Baby Seat must be properly installed to professional
standards. Follow the instructions on correct attachment
in the section “Installing the Baby Seat to the Croozer” on
page 4. If you should experience difculties with the instal-
lation, please contact a specialist dealer. An improperly
installed Baby Seat could become loose or fall off while
riding, resulting in accidents with serious injury or death.

4
BabysitzKidPlus-Kid18-ENG-7-17
Installing the Baby Seat to the Croozer
Installing the Baby Seat to the
Croozer
Unpacking the Baby Seat
1. The plastic packaging contains the Baby Seat with a
head pad and this manual.
2. Remove all plastic packaging from the Baby Seat.
Recycle all packaging materials if possible.
Plastic bags and packaging materials can be dangerous!
To avoid danger of suffocation, keep plastic bags and
packaging away from babies and children. Babies and
children could pull plastic bags or packaging over their
heads and suffocate.
Installing the Baby Seat
The Baby Seat must be properly installed to professional
standards. An improperly installed Baby Seat could cause
accidents with serious injury or death. If you should
experience difficulties understanding or performing the
installation, please contact a specialist dealer.
Before using the Baby Seat to transport an infant between
one and ten months of age in the Croozer, the Baby Seat
must be properly installed. The Baby Seat was designed
for use with any Croozer Kid Plus for 1, Croozer Kid for 1,
Croozer Kid Plus for 2 or Croozer Kid for 2 manufactured
in or after 2014.
The Baby Seat has six attachment points.
Rear attachment
• Step
two straps with hooks that are attached to the seat of
the Croozer
• Step
two cross straps with buckles that are attached to the
harness system of the Croozer.
Upper attachment
• Step
two straps with hooks that are attached to the upper
part of the Croozer seatback.
Lower attachment
• Step
two straps with hooks that are attached to the front
part of the Croozer frame.
The Baby Seat must be correctly attached at all attach-
ment points. An improperly attached Baby Seat could
cause accidents with serious injury or death.
Tip: The step numbers indicating the order of attachment
are also printed on the straps of the Baby Seat.
1.
2.
3.
4.
3.
2.
1.
4.

5
BabysitzKidPlus-Kid18-ENG-7-17
Installing the Baby Seat to the Croozer
Step
In the centre of the rear surface of the Baby Seat, there
are two straps with hooks (1 and 2) that connect to the
loops (3 and 4) on the seat of the Croozer.
1. Place the Baby Seat on the seat of the Croozer and
fold the upper part of the Baby Seat forward so that it
is easier to reach the attachment straps on the back of
the Baby Seat.
2. Guide the left hook (1) of the Baby Seat through the
left loop (3) that is attached to the seat of the Croozer.
The hook must be inserted from the inside to the out-
side (i.e. from right to left) as shown in the photo.
3. Connect the right hook (2) of the Baby Seat in the
same manner (this time, hooking it through the loop
(4) from left to right).
Check both hooks to make sure they are correctly and
securely attached. Improper attachment could result in
serious injury or death to the occupant in the event of an
accident.
Step
In the centre of the rear surface of the Baby Seat, there
are also two cross straps with buckles (5 and 6) that must
be attached to the slide straps (7 and 8) of the Croozer
seat. These are the straps to which the shoulder straps of
the Croozer seat are attached.
1. Slide the triglide adjusters (9 and 10) of the shoulder
straps on the Croozer seat all the way down so that
the slide straps (7 and 8) are more accessible.
2. Slide the two cross straps with buckles (5 and 6) under
the slide straps (7 and 8) of the Croozer seat and in-
sert the male end of the buckle (6) into the female end
(5). You should hear a click and be able to see that the
clip is securely fastened in the buckle.
3. Pull on the ends of the two attachment straps (11 and
12) to tighten them until the back of the Baby Seat is
pulled tightly against the Croozer seat.
Check to make sure that the buckle is securely fastened
and the straps are tightened. Improper attachment could
result in serious injury or death to the occupant in the
event of an accident.
1.
2.
1
2
1
3
3
4
5
8
7
6
9
10
7
Click!
11
12
8

6
BabysitzKidPlus-Kid18-ENG-7-17
Installing the Baby Seat to the Croozer
Step
Attachment rings (13) for the installation of the Baby Seat
are located at the rear of the Croozer on the upper frame
tube to which the seat is attached. The one-seaters have
two attachment rings. The two-seaters have four attach-
ment rings because two Baby Seats can be attached.
(For clarity, both trailers in the photo on the right is shown
without the fabric body.)
1. Pull the two upper attachment straps with the Baby
Seat hooks (14) up and over the seatback.
2. Insert the rst Baby Seat hook (14) as shown through
the attachment ring (15) behind the seatback of the
Croozer; then press the hook upwards until you see
and hear it snap into place on the ring.
3. Attach the second Baby Seat hook in the same
manner.
4. Check both Baby Seat hooks to make sure they are
securely fastened.
Check both Baby Seat hooks to make sure they are
correctly fastened. Improper attachment could result in
serious injury or death to the occupant in the event of an
accident.
Step
At the lower (front) edge of the Baby Seat, there are two
attachment straps with hooks (16 and 17) that are attached
to the front frame tube of the Croozer.
1. Pull the two front attachment straps with the Baby Seat
hooks (16 and 17) toward the front of the Croozer.
2. Attach the right Baby Seat hook (16) to the front frame
tube (18).
3. Attach the left Baby Seat hook in the same
manner.
Pulling the Baby Seat taut
The Baby Seat must be pulled taut for the comfort and
safety of the infant.
1. Pull on the ends of the two front attachment straps (19
and 20) to tighten them until the Baby Seat is sufcient-
ly taut.
2. Check that all Baby Seat hooks are correctly inserted
and snapped into place by putting gentle pressure on
the Baby Seat inside the Croozer or by trying to lift the
Baby Seat slightly.
The Baby Seat must be pulled taut. When pressure is ap-
plied or when pulled upwards, it should only yield slightly.
If the Baby Seat is too loose, the infant could be tossed
around in extreme situations, which could lead to serious
injury or death.
3. Adjust the length of all safety-harness straps to the size
of the infant. See page 9.
3.
4.
15
14
16
17
19
13
One-seater
Two-seater
13
Click!
18
20

7
BabysitzKidPlus-Kid18-ENG-7-17
Installing the Baby Seat to the Croozer
Attaching the head pad
The head pad has two straps with snaps (18 and 19) that
are used for attaching the head pad to the harness system
of the Baby Seat.
1. Insert the left strap of the head pad (18) through the left
slide strap (20) and snap the end onto the head pad to
secure it.
2. Attach the right strap (19) in the same manner.
3. Then ip the head pad upwards.
18
19
20

8
BabysitzKidPlus-Kid18-ENG-7-17
Transporting Your Infant Safely
Transporting Your Infant Safely
For the transport of your infant in the Croozer, we recom-
mend a riding speed of no more than 15 km/h (9 mph). At
higher speeds, the infant could suffer injuries.
Fastening and unfastening the safety har-
ness
The 5-point safety harness consists of two shoulder straps
(1), two lap belts (2) and a crotch strap (3), which are all
individually connected to the centre buckle (4). Padded
shoulder straps and lap belts provide additional comfort.
When riding in the Baby Seat, your infant must be
strapped securely into the safety harness at all times!
Otherwise, your infant could could sustain life-threatening
injuries in dangerous situations.
Opening the harness
1. Press the button (4) on the centre buckle in order to
release the clips attached to the shoulder straps and
lap belts.
2. Allow the crotch strap (3) to hang down, and drape
both shoulder straps (1) and lap belts (2) over either
side of the seat so that the child can be placed com-
fortably into the Baby Seat.
Fastening the safety harness
1. Make sure that the harnesses are unbuckled; then
place the infant in the seat.
2. Place the crotch strap (3) between the child’s legs,
with the centre buckle (4) resting on the infant’s upper
body.
3. Pull the shoulder straps (1) over the shoulders and
the lap belts (2) around the hips of the infant. Insert all
clips into the centre buckle. For each strap, you should
hear a click and be able to see that the clip is securely
fastened in the buckle.
When riding in the Baby Seat, your infant must be
strapped securely into the safety harness at all times!
Otherwise, your infant could could sustain life-threatening
injuries in dangerous situations.
Failure to adjust the straps of the safety harness prop-
erly or to fasten the buckles correctly could result in the
serious injury or death of the infant in the event of an
accident.
2
3
4
1
1
2
Click!
3
22
1
1
4

9
BabysitzKidPlus-Kid18-ENG-7-17
Transporting Your Infant Safely
Unfastening the safety harness
1. Press the button (4) of the centre buckle. The clips
attached to the shoulder straps and lap belts will be
released.
Adjusting the safety harness
1. Make sure that the harnesses are unbuckled; then
place the infant in the seat.
2. Slide the triglide adjusters (5) (cannot be seen in the
photo because they are beneath the head pad) up or
down to adjust the height of the shoulder straps.
Tip: The head pad can be slid up and down together
with the shoulder straps.
3. Buckle the infant into the seat if the straps are long
enough.
4. All straps can be shortened or lengthened in the same
manner. The two bottom photos on the right show the
adjustment of the shoulder straps as an example.
Shortening: Shorten any strap by pulling on the
end (6).
Lengthening: Lengthen any strap by lifting the
respective adjustment buckle (7) and
pulling on the strap (8).
5. Adjust the tension of all straps so that the infant is held
securely but comfortably in the harness (i.e. ensure
that the straps are snug but not so tight that they
cause discomfort).
Tip: In general, if your flat hand fits between the straps
and the infant, then the harness has been properly
adjusted.
The distance between the infant’s body and the shoul-
der straps and lap belts must be as small as possible to
ensure that the infant is held securely in the seat. If the
distance is too great, the safety harness may not be able
to hold the infant securely, which in the event of an acci-
dent could result in serious injury or death. If the distance
is too small, the straps can press too tightly against the
infant’s body, causing discomfort.
Failure to adjust the straps of the safety harness properly
or to fasten the buckles correctly could result in accidents
with serious injury or death.
4
5
5
6
7
7
8

10
BabysitzKidPlus-Kid18-ENG-7-17
Tips: Transporting Your Infant
Tips: Transporting Your Infant
Be cautious, patient and attentive when transporting your
infant in the Croozer. The rst few trips should be short
and easy, to give your infant time to get used to riding in
the Baby Seat.
For the transport of your infant in the Croozer Bicycle
Trailer, we recommend a riding speed of no more than 15
km/h (9 mph).
Dress passengers appropriately, and check on them fre-
quently to make sure they are comfortable in the Croozer,
with adequate ventilation. Under the Rain Cover, the
passenger compartment can become warm more quickly
than otherwise, especially in direct sunlight. However, in
colder weather, infants sitting inactively in the trailer will
feel colder and need more insulation than the person who
is pedalling the towing bicycle or pushing the Croozer as
a Jogger or Stroller. Therefore, in colder temperatures, be
sure to dress your child in warm clothing or use a blanket.
You can also use the Baby Seat Winter Kit that is available
as an accessory.
Keep your passengers’ needs and well-being in mind: al-
ways take along small toys so that your infant does not get
bored. And when planning longer trips, keep in mind that
your infant will require frequent breaks. Avoid bumpy roads
and paths, and if you are pulling the Croozer as a Bicycle
Trailer ride slowly and cautiously.
After the infant is able to sit upright unassisted and has
outgrown the Baby Seat, you can use the Baby Supporter,
which is available as an accessory from specialist dealers.
Cleaning, Storage and
Disposal
The Baby Seat is easy to clean and maintain. No special
care or maintenance is required. A cloth or sponge can be
used with a soap solution or a mild household detergent
to remove light soiling. For cases of heavy soiling, remove
the Baby Seat and wash it by hand in lukewarm water.
Never wash the Baby Seat in a washing machine, and
never use solvents or mineral spirits on the Baby Seat.
Store the Baby Seat in a dry and well-ventilated area in
order to prevent mildew and mould growth. If you will not
be using your Baby Seat for an extended period of time,
then store it dry and enclosed in packaging.
The Baby Seat is extremely durable. However, it will even-
tually reach the end of its service life. If the Baby Seat has
been involved in an accident, its further use is prohibited.
Be sure to dispose of the Baby Seat properly.
Technical Data
Dimensions W x H x D 22 x 72 x 16 cm (8¾ x 28¼ x
6¼ inch)
Age Range 1 to 10 months
Maximum Height of Infant 75 cm (29½ inch)
Maximum Weight of Infant 10 kg (22 lb)
For Use With Models from 2014 or later
Croozer Kid Plus for 1
Croozer Kid Plus for 2
Croozer Kid for 1
Croozer Kid for 2
Warranty Conditions
The statutory warranty in the country or state of purchase
has unlimited application to the above-mentioned products.
This warranty only applies to defects inherent to the mate-
rial supplied and does not cover damage due to improper
use, use of force or normal wear and tear. The period of
statutory warranty depends on the law of the country in
question.
Warranty Claims
If the Baby Seat shows any sign of defects, contact a spe-
cialist dealer. The dealer will forward your claim to us. For
such cases, be sure to keep your original sales receipt.

11
BabysitzKidPlus-Kid18-ENG-7-17
Additional Accessories for Transporting Infants
Additional Accessories for Trans-
porting Infants
Winter Kit for Baby Seat
Footmuff with teddy-eece lining, zipper for attachment
to Baby Seat, incl. Baby Seat insert with teddy-eece lining
Baby Supporter
For small children aged approx. 10 to 24 months, height
adjustable, 2-piece
Sun Cover
A practical sunshade for your child in the same colour as
your Croozer
Rain Cover
For one-seater or two-seater

12
BabysitzKidPlus-Kid18-ENG-7-17
Tips: Transporting Your Infant

13
BabysitzKidPlus-Kid18-ENG-7-17
Tips: Transporting Your Infant

14
BabysitzKidPlus-Kid18-ENG-7-17
Tips: Transporting Your Infant
CONTACT
Croozer GmbH
Oskar-Jäger-Straße 125
D-50825 Cologne
Germany
info@croozer.com
www.croozer.com
www.croozer.com
/